• Scam Alert. Members are reminded to NOT send money to buy anything. Don't buy things remote and have it shipped - go get it yourself, pay in person, and take your equipment with you. Scammers have burned people on this forum. Urgency, secrecy, excuses, selling for friend, newish members, FUD, are RED FLAGS. A video conference call is not adequate assurance. Face to face interactions are required. Please report suspicions to the forum admins. Stay Safe - anyone can get scammed.

Jswain's active projects

Susquatch

Ultra Member
Administrator
Moderator
Premium Member
You could get fancy and mill the underside of the cutting board so that it locked into the mill table slots.

Interesting idea. My cardboard hasn't moved. If I was gunna do that I'd take a shortcut and just add a few tabs - one would do since I would contour the end to fit my vise like @Jswain did.
 

Susquatch

Ultra Member
Administrator
Moderator
Premium Member
It may burn in a bit with hot chips, maybe not, but it should do a good job protecting the table.

Burning or melted chips is always a possibility. It's even happened to me with cardboard. As long as I can pull the odd one out with pliers, I can live it. If it became a melted chip magnet it's life would be over.
 

Jswain

Joe
After probably a year I finally decided to clean the printer bed on my ender & put on some new tape to hold the glass bed.

Made some mounts for the South bend lathe cover outta clear PETG.
 

Attachments

  • 1000006281-01.jpeg
    1000006281-01.jpeg
    261.5 KB · Views: 10
  • 1000006284-01.jpeg
    1000006284-01.jpeg
    487.2 KB · Views: 9
  • 1000006286-01.jpeg
    1000006286-01.jpeg
    255.3 KB · Views: 9
  • 1000006287-01.jpeg
    1000006287-01.jpeg
    349.7 KB · Views: 7

Jswain

Joe
Nothing crazy here but I have seen a few members talking about tool centre height gauges for their lathes. Got me thinking closing the jaws and eyeballing it wasn't enough :confused:

Never knew how the hell I could measure it accurately to make one and a Joe pie video happened to pop up on YouTube, stupid simple.

Chuck up an end mill (I used 12mm) and on your tool side use one half the size(6mm for me)

Few trips back to the mill later taking a bit at a time and now I can centre up the tools properly, especially when I have something in the chuck

DTI may have been more accurate? But I trust the accusize more then my 19$$ DTI :cool:

Added a link to the video:
 

Attachments

  • 1000006350-01.jpeg
    1000006350-01.jpeg
    267.7 KB · Views: 6
  • 1000006351-01.jpeg
    1000006351-01.jpeg
    197.1 KB · Views: 6
  • 1000006352-01.jpeg
    1000006352-01.jpeg
    338.6 KB · Views: 6
  • 1000006353-01.jpeg
    1000006353-01.jpeg
    182.5 KB · Views: 6
Last edited:

Jswain

Joe
As you can see me eyeballing it wasn't very good... Excited to see how much difference it makes
 

Attachments

  • 1000006358-01.jpeg
    1000006358-01.jpeg
    187.5 KB · Views: 7

Susquatch

Ultra Member
Administrator
Moderator
Premium Member
Nothing crazy here but I have seen a few members talking about tool centre height gauges for their lathes. Got me thinking closing the jaws and eyeballing it wasn't enough

Perfect! Looks just like mine. I even put a flat on mine like yours after the guys on here convinced me that it was worth doing.

I often tell others that this should be your very first lathe project.
 

Susquatch

Ultra Member
Administrator
Moderator
Premium Member
DTI may have been more accurate? But I trust the accusize more then my 19$$ DTI

I appreciate your point. But there are a million reasons why you really should get a dial test indicator.

You did a nice job. But it's worth making a few points for the benefit of others who see your post.

End mill shanks are sometimes undersized vs their specified cutting diameter. You need to measure them to make sure one is exactly half of the other.

Since you did use a test indicator, and since you positioned it vertically, you could have just used 1/2 of the diameter to find the half way point. That way only one end mill is needed.

Again, nice job. It will bring a smile to your face every time you use it! That's what mine does for me!
 

Jswain

Joe
Perfect! Looks just like mine. I even put a flat on mine like yours after the guys on here convinced me that it was worth doing.

I often tell others that this should be your very first lathe project.
Honestly I never thought, seen or heard of it til here in the last few weeks reading posts.

And with how easy it is, I now agree.

All of my tools were out(mostly high) except for my parting tool which I was very happy about because I've never had issues with it(knock on wood) so wasn't looking forward to changing it.

It's going to sit on the desk now and every tool change will get a quick check. I tested down the length of the bed and everywhere was within .001" so it sure will be handy.
 

Jswain

Joe
I appreciate your point. But there are a million reasons why you really should get a dial test indicator.

You did a nice job. But it's worth making a few points for the benefit of others who see your post.

End mill shanks are sometimes undersized vs their specified cutting diameter. You need to measure them to make sure one is exactly half of the other.

Since you did use a test indicator, and since you positioned it vertically, you could have just used 1/2 of the diameter to find the half way point. That way only one end mill is needed.

Again, nice job. It will bring a smile to your face every time you use it! That's what mine does for me!
I do have a dial test indicator, but it's extremely cheap and I don't know how I feel about it compared to the accusize.

There are a lot of measuring tools that I need/need to upgrade, and eventually I will

I did mic the endmills 6mm = .236" and 12mm = .4724"

I thought the 2 endmill method was clever because then I don't have to grab the indicator at all. If I left the 6mm endmill out I would need to lift the indicator .250" to get a reading on the 12mm endmill in the chuck and I've had limited success with having to move the indicator that much & get consistent reading. Maybe better tools / more experience will change that.
 
Last edited:

Susquatch

Ultra Member
Administrator
Moderator
Premium Member
I thought the 2 endmill method was clever because then I don't have to grab the indicator at all.

Oh, those comments were just aimed at others reading your post. Yours was just fine. Over the years I've run into all kinds of guys who never knew about a lathe height standard and just as many who figured other methods were better. I've used all the other methods and that is the best one hands down. All that's needed is a big old bolt or a chunk of bar stock. Doesn't even matter what material.

Start saving your loonies and toonies and get one of these for yourself next Christmas.


They are not cheap. And better deals do show up from time to time - even on Amazon. But the long barrel that the indicator needle is on together with the interchangeable tips make this one the best I have found. If you only want tenths, and don't care about the barrel, the interapid is also first rate.
 

Jswain

Joe
I'm pretty focused on the machining tools now as I have basically most of what I need for everything else so over the next couple years I should get tooled up well enough.

Until a good deal comes up on Kijiji and something gets upgraded/new project :p
 

Jswain

Joe
Sure, right or wrong this is how I did it:

I didn't have a dial test indicator at the time so I turned a piece of stock to .750" about 3 inches long. Near the end I drilled a hole sized for the adjustable arm off my mag base, & drilled and tapped a hole into the end for a set screw to hold the arm tight.

Mount that with a .0005" dial indicator in a 3/4" collet & the indicator vertical. I did this with the vise off. It gets the indicator ~5 inches ish off centre of the spindle. Come down with the spindle for just enough preload on the indicator for a good reading but not enough to have to mess with it dropping into the tslots.

Then I just turned the spindle, by hand, from the top to not influence the indicator and grabbed side to side readings off the same slot of the table and also corner to corner. I didn't notice much if any nod front to back so I loosened the 3 swivel bolts for the head just enough that I could get it to move with a deadblow on the side of the housing.

Get it almost perfect, repeat measurements, tighten a bit, rinse and repeat as it took a few tries and I probably need to do it again as I've moved the machine a couple times & when using my face mill it's definitely cutting a thou or two more on the right side of the cutter vs the left.

I will probably try it off 123 blocks this time with the vise on & see how that goes if everything clears.

I'll take a photo when I get back outside of the setup, it's nothing fancy but it's what I made when I bought my craftex mill
 

Susquatch

Ultra Member
Administrator
Moderator
Premium Member
my face mill it's definitely cutting a thou or two more on the right side of the cutter vs the left.

Lots of machinists prefer a little bias because the finish is better. I'm not so fussy about finish so mine is set level.
 

Jswain

Joe
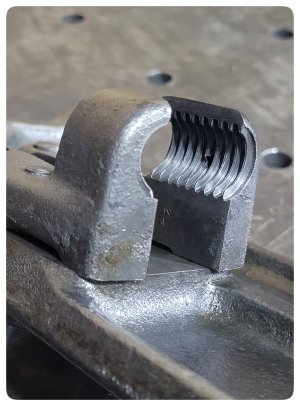
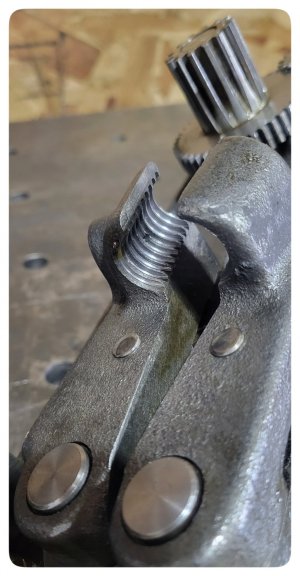
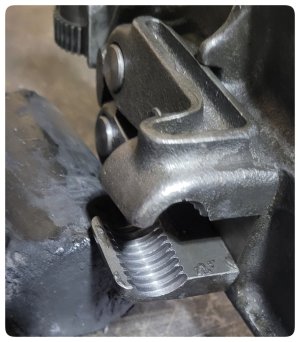
I've spent the last few days playing with the South bend, I wanted to check spindle play etc. on it as I had the spindle removed when I first bought it and installed new wicks. Spindle looked as new and the wicks must be doing there job because the play up/down front/back is all very good so I made no adjustments.

Also took the apron off to clean it. Half nuts are definitely worn(according to my, inexperienced opinion lol) but I think still fine to use? I have no issues with them & they engage fine, never disengage on their own. Thoughts?

All in all, pretty happy for a machine that's nearing 90years old. With the tool height adjustment and all the tune ups it is night and day difference with how well it is cutting, less pressure and much easier to hit tolerances.
 

Attachments

  • 1000006372-01.jpeg
    1000006372-01.jpeg
    752.6 KB · Views: 4
  • 1000006373-01.jpeg
    1000006373-01.jpeg
    296.1 KB · Views: 4
  • 1000006374-01.jpeg
    1000006374-01.jpeg
    468.7 KB · Views: 4
Last edited:

Jswain

Joe
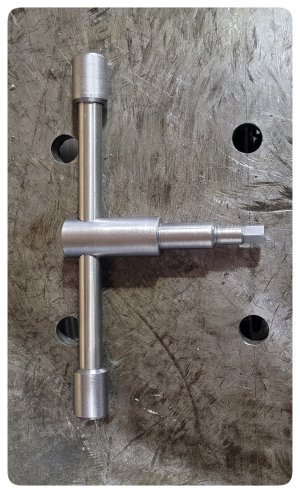
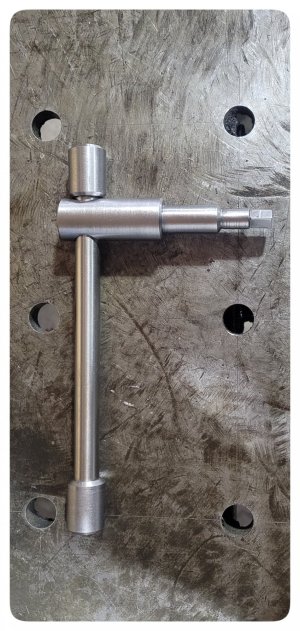
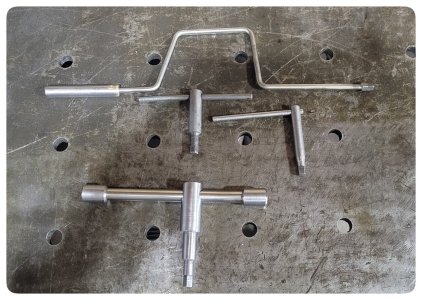
Also I decided that I needed a new chuck key. The small ones are too small and the speed key is nice but can't torque it with it so would rather just use one.

Nothing fancy about it but I'm happy how it turned out. Did a .002" press fit on the ends. I used 1/2" stainless fairly thick tube for the handle will see how that holds up. Gives it a lighter feel but feels nice in the hands.

Have also been forcing myself to use the 4 jaw on the lathe, so getting better at dialing it in.
 

Attachments

  • 1000006382-01.jpeg
    1000006382-01.jpeg
    535.2 KB · Views: 8
  • 1000006381-01.jpeg
    1000006381-01.jpeg
    449.6 KB · Views: 8
  • 1000006380-01.jpeg
    1000006380-01.jpeg
    628.8 KB · Views: 8

Susquatch

Ultra Member
Administrator
Moderator
Premium Member
Also I decided that I needed a new chuck key.

Try one of these made by our own member @a smile. You will love it. He hasn't been around much lately. Prolly up to his butt in gators.


All in all, pretty happy for a machine that's nearing 90years old. With the tool height adjustment and all the tune ups it is night and day difference with how well it is cutting, less pressure and much easier to hit tolerances.

Nice feeling isn't it! Well done!
 

Jswain

Joe
Try one of these made by our own member @a smile. You will love it. He hasn't been around much lately. Prolly up to his butt in gators.


Nice feeling isn't it! Well done!
I have seen his chuck keys on here and they look amazing!
 

Proxule

Ultra Member
Nice chuck key Joe.
Thanks for dharing your tramming procesure and results.

How ever. This spinning and measurements off the table is for the head tram and nod. Did you do a column tram as well?

Thanks !
 
Top