Bridgeport Project

Susquatch

Ultra Member
Administrator
Moderator
Premium Member
View attachment 16001There’s a bunch of different companies that make similar bearing pullers but that’s the basic concept. I’ve posted pics of mine on here before but you get the idea
It sounded similar to what you were describing making

I didn't see your post till after I pressed send.

I actually already have a bearing puller like those. They are designed to remove pressed on bearings and require access to the back of the bearing. Unless I am mistaken, we don't have access in this case. If we do, then @architect and I are both fussing over nothing.

Machinery repair advocates drilling holes through the housing to insert punches through. However, I couldn't find a demo and I am very leery of the whole idea of doing that.

Could you provide a link to the earlier post you mentioned?
 

Susquatch

Ultra Member
Administrator
Moderator
Premium Member
I’ve posted pics of mine on here before but you get the idea

Could you provide a link to the earlier post you mentioned?
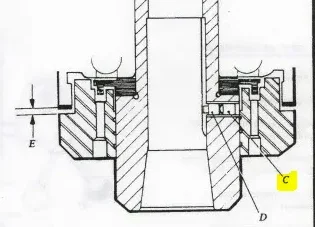
Never mind. I believe I found the post you referred to.

You guys should all try farming. You would not believe what I have to do sometimes to get things apart......

Last year I had to pull the wing hinge pin on a set of 24ft disks. The idiot I bought it from never greased it. It froze in the sleeve and the frame welds broke. The pin is 3" in diameter and about 18" long. The frame is 1" plate.

I started by trying to use a regular three jaw puller. NFW. So I borrowed a giant puller. Still no way. So I drilled and tapped the back side and put a big home made slide hammer on it while pushing on the other side with the puller. Still NFW. Next was acetylene torch to heat the sleeve. Flame wasn't big enough so upgraded my torch tip to burn a whole tank of acetylene in 1 minute (not really, but it was a BIG tip). Still NFW.

I succeeded on my last attempt by drilling all the way through the pin and installing water fittings so I could run cold water through the pin while my bride heated the sleeve with a big raspberry torch, with about 10 tons on the puller ( its rating ), and an 8 pound slide hammer on the back side to shake things up. When that SOB let go, the guys in Calgary thought Ontario had disappeared off the map.

My wife needed two weeks vacation after that........
 
Last edited:

RobinHood

Ultra Member
Premium Member
The problem seems to be the “bearing in a blind hole”: Get a bar that is a snug, sliding fit in the bearing ID. Pack the bore full with putty or thick grease (even wet newspaper works - not as well though). Start the bar in the bearing ID. Cover the bearing with a rag. Hammer the bar into the grease filled bore. As the putty/grease gets bushed under the bearing, it will lift it out of the blind hole by hydraulic force. You may have to add more putty/grease as the bearing starts to come out and the volume of space increases behind it. Should work to get it out. I prefer grease over putty as it is easier to clean the bearing afterwards - in case you are going to re-use it.

Search “removing bearing from a blind bore” for more info / videos.
 

Susquatch

Ultra Member
Administrator
Moderator
Premium Member
How does one drill a hole through a 18" long pin?

Actually drilling the holes was the easy part! The pin already had 1/8" grease journals about 6" long in it from both ends with a zirc fitting in each. I have a range of 12" long bits so I just started small at 1/4" from each side and prayed that the holes would meet in the middle. They did - prolly cuz the oem holes were well done. Once through with 1/4", then drilled again with a 3/8, and then a half. Then drilled in sideways at the weldment for a water fitting. The slide hammer and puller plugged the end holes. Cold water went in and mostly steam came out!
 

Susquatch

Ultra Member
Administrator
Moderator
Premium Member
The problem seems to be the “bearing in a blind hole”: Get a bar that is a snug, sliding fit in the bearing ID. Pack the bore full with putty or thick grease (even wet newspaper works - not as well though). Start the bar in the bearing ID. Cover the bearing with a rag. Hammer the bar into the grease filled bore. As the putty/grease gets bushed under the bearing, it will lift it out of the blind hole by hydraulic force. You may have to add more putty/grease as the bearing starts to come out and the volume of space increases behind it. Should work to get it out. I prefer grease over putty as it is easier to clean the bearing afterwards - in case you are going to re-use it.

Search “removing bearing from a blind bore” for more info / videos.

This is a VERY COOL IDEA! I LIKE IT!

I would think the original shaft would work too.

I've used a similar trick to remove things stuck in a bore. But never thought about doing it in this case. I guess my only concern would be leaks through the bearing.....
 

Susquatch

Ultra Member
Administrator
Moderator
Premium Member
I thought there was only one screw holding the nose cover? o_O

I "believe" (from reading lots about the R8 alignment pin) that there is "usually" only one screw for the cap. And "usually" two for the R8 alignment pin. That's certainly how both my mills are.

However, I seen plenty of posts articles and videos that all say that the number of set screws on the Bridgeport mill and its Clones from one end to the other cannot be taken for granted. I believe the rule is to always check.

But I'll bet your issue is a screw that got tightened onto threads instead of the recessed hole and that buggered up the threads.
 

John Conroy

member
Premium Member
This style of blind hole bearing puller might work for this application. Very common to have blind hole bearings in automotive transmissions and transfer cases.


Susquatch

Ultra Member
Administrator
Moderator
Premium Member
This style of blind hole bearing puller might work for this application. Very common to have blind hole bearings in automotive transmissions and transfer cases.

That's almost exactly what I imagined making myself on my lathe. The only real difference is that I was going to use a slide hammer instead of the pusher rams.

But right now, I'm planning to try the Hydraulic grease trick first!
 

architect

Super User
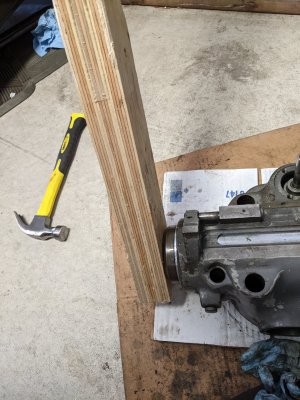
My generous friend mocked up serious plywood tool for me based on @PeterT design. It's working but still only bit by bit and even standing and putting my own weight on the housing can't get it to turn. Given, I'm a small dude, but still. This thing is really, really stuck. Need the bigger friend to come over and stand on housing...

I'm wondering if the inner set screw wasn't actually put in properly and catching on the nose cover? I wonder how they even managed to get the cover on at all...

1625948586025.png

PXL_20210710_200912073.jpg
 

architect

Super User
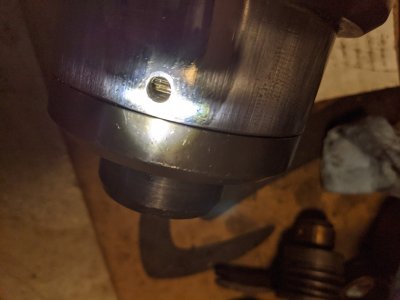
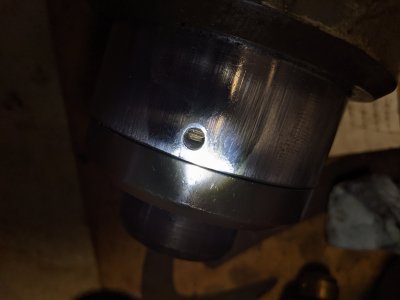
Peaked into the nose cap set screw hole and threads don't look so bad but hard to say. Sprayed some WD40 just for the heck of it.
PXL_20210710_204228057.jpg
 
Last edited:

Susquatch

Ultra Member
Administrator
Moderator
Premium Member
My generous friend mocked up serious plywood tool for me based on @PeterT design. It's working but still only bit by bit and even standing and putting my own weight on the housing can't get it to turn. Given, I'm a small dude, but still. This thing is really, really stuck. Need the bigger friend to come over and stand on housing...

I'm wondering if the inner set screw wasn't actually put in properly and catching on the nose cover? I wonder how they even managed to get the cover on at all...

View attachment 16021

View attachment 16022

Just get @Brent H to bring Bertha over. She will spin it off with her bare hands.

Ya, it's possible that the 2nd R8 set screw has backed off enough to contact the threading. If so, I think you just have to grunt it off and risk buggering up more threads. No other way I can see. You can always buy a new nose piece.

But I'm still sticking to the theory that the primary set screw for the nose itself has buggered up the threads cuz it was not installed into the thread recess. This is actually worse cuz it's the quill threads that will be buggered.

Very nice looking tool. If you have a small gap, try some penetrating oil.

If all else fails, try lightly heating the nose cap. No need for Acetylene, a regular Propane torch will prolly do it. You just want to expand the nose cap a bit.

Also you could try back N forth like working a tap.
 

Susquatch

Ultra Member
Administrator
Moderator
Premium Member
Peaked into the nose cap set screw hole and threads don't look so bad but hard to say. Sprayed some WD40 just for the heck of it.
View attachment 16023

If my theory is correct, the threads will only be messed up where the lock screw was.

Frankly, I don't find wd40 to be a very good penetrating oil. Even a light oil works better. Everyone loves the stuff. I'm not a huge fan.

WD originally meant Water Displacing. It does work decent for that purpose. But it doesn't last as a corrosion inhibitor or as a long term lubricant. As a penetrant it down right sucks. Even the company acknowledges that and they do sell a pretty decent penetrating oil.
 

YYCHM

(Craig)
Premium Member
Are you sure you're turning it the right direction? Have you tried the opposite direction?

No insult intended...

Remount the housing on the machine, then you won't need your friend to stand on it.
 
Last edited:

Susquatch

Ultra Member
Administrator
Moderator
Premium Member
Also, can you bolt the assembly back onto the head temporarily? That might give you the leverage you need.

Too bad I don't live closer. I'm no BERTHA, and I am old, but I'm a VERY BIG fellow. Partly why my friends call me Susquatch.
 

Tom O

Ultra Member
Are you sure you're turning it the right direction? Have you tried the opposite direction?

No insult intended...

Remount the housing on the machine, then you won't need your bigger friend to stand on it.
Looking at the thread through the hole it looks to me like a normal righty tightly thread. :p
 

architect

Super User
I believe I have the right direction and looks like right handed thread :) I can see it opening up with a little gap now! Doesn't take a lot of strength just awkward at this point. I need to really hold down the housing while another arm reaches at the end of the 4ft plywood and lever it it.

Yes, mounting it back on the housing makes sense. But I'm also short and don't have much room so putting it up higher causes other clearance issues!

PXL_20210710_204217252.MP.jpg
 

Susquatch

Ultra Member
Administrator
Moderator
Premium Member
If all else fails, I'd also try drilling a hole into the side of the cap. Not all the way through but enough to be able to use a pin spanner wrench that you can whack at with a small hammer. A home made version using your lathe could even wrap all the way around the cap, have two holes and two pins installed after the cap wrench is on. That would give you way better control than an end wrench could ever have no matter what its made of.

Hmmmmm..... I like that idea so much that I might modify my own nose cap that way and make a wrench like that for myself! Heck, if I drill the tool for the pin while it's mounted to the cap, I can drill right into the cap at the same time and not worry about pin alignment. Two Bolts for handles on the tool would give you plenty of leverage and something to tap on too.
 
Top