• Scam Alert. Members are reminded to NOT send money to buy anything. Don't buy things remote and have it shipped - go get it yourself, pay in person, and take your equipment with you. Scammers have burned people on this forum. Urgency, secrecy, excuses, selling for friend, newish members, FUD, are RED FLAGS. A video conference call is not adequate assurance. Face to face interactions are required. Please report suspicions to the forum admins. Stay Safe - anyone can get scammed.

Bridgeport Project

They sell a King 5gal washer for $80 so I'll probably grab that. Any recommendation on water based solvent and where to source a pail?

I don't use water based cleaners. I'm no fan of the fashion trends. Generally speaking, I use diesel oil to get the crud off and simultaneously soft oil parts. I keep regular Canadian Tire Parts Cleaner in my parts cleaner unit.

https://www.canadiantire.ca/en/pdp/turbo-power-parts-cleaner-18-9-l-0381312p.html

Edit - Also, call your local NAPA Automotive Parts store. They usually stock and sell good stuff for auto mechanics.

Lastly, I'd use deoderized Kerosene or low volatility Naptha Solvent, or even a light mineral oil long before I'd go near water based anything. I much prefer to use something that actually works.
 
Last edited:
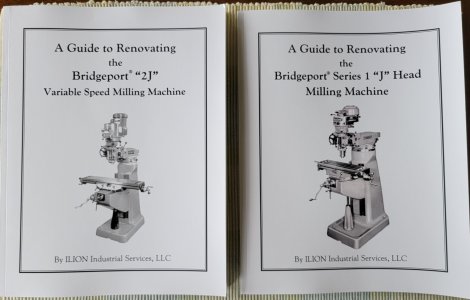
@Susquatch...... Get a copy of that book on refurbishing a Bridgeport- lots of great info

Guess what arrived today.......?

20210625_170720.jpg


Lots of reading to do.

Some great info in there in addition to repairing the machine. Even a short history of the Bridgeport mill!

TECO L510 VFD is scheduled to arrive on MONDAY.

Be still my heart......
 
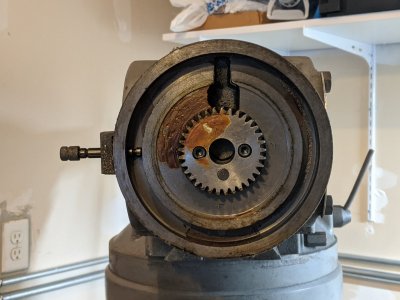
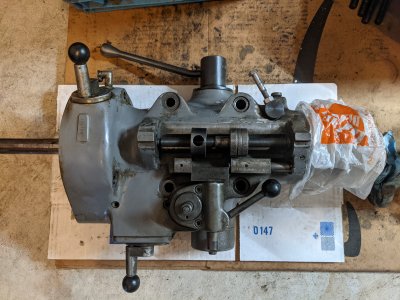
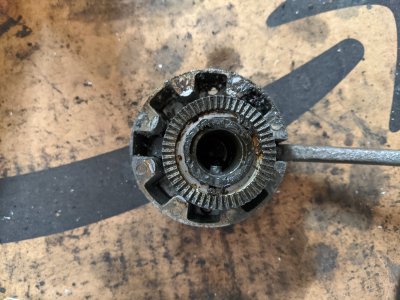
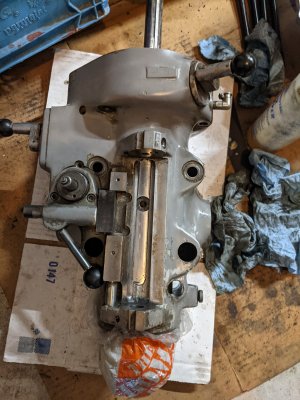
Small update and still waiting for gear puller to come from PA but it's delayed big time for some reason. Decided to pull off the quill assembly and boy I did not expect it to be so heavy. I will dissemble to give it a once over and also look into play in the quill lever that Brent pointed out during the move. Gave it a quick wipe down but will get everything cleaner once I get more time and less heat!

PXL_20210628_234005575.jpg

PXL_20210628_233916518.jpg
 
Small update and still waiting for gear puller to come from PA but it's delayed big time for some reason. Decided to pull off the quill assembly and boy I did not expect it to be so heavy. I will dissemble to give it a once over and also look into play in the quill lever that Brent pointed out during the move. Gave it a quick wipe down but will get everything cleaner once I get more time and less heat!

View attachment 15818
View attachment 15819

I recognize the parts in the top photo. I believe I am looking at the front of the ram after the head has been removed. The head spins on that surface. The photo shows how the limiter pin works. (the pin is missing on one of my mills).

But it's not obvious to me what the gear in the middle is for?
 
I recognize the parts in the top photo. I believe I am looking at the front of the ram after the head has been removed. The head spins on that surface. The photo shows how the limiter pin works. (the pin is missing on one of my mills).

But it's not obvious to me what the gear in the middle is for?

OK, I watched the disassembly video and looked at the parts breakdown. That relatively tiny gear is the "rack" gear for the left right tilt. I guess I was expecting something much bigger for that - something almost the same diameter as the ram itself. Anyway, it makes sense now.
 
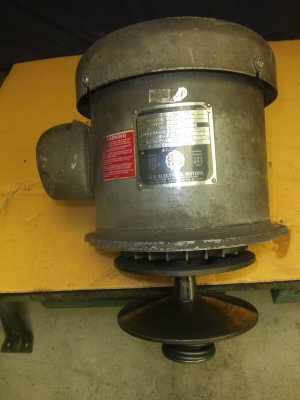
I manage to out bid for this 220v motor today. The shaft was "repaired" but I should be able to swap my own in anyway. I searched Ebay US for this and they don't ship to Canada. So I'm asking if the seller can hang onto it and ship closer to when the border opens. I've used this sketchy package holding place at Buffalo once that worked out so will drive over once we're in the clear. It's not the cheapest but seems hard to find and the least amount of work. My girlfriend and I will make a fun road trip out of heading to Buffalo.

s-l1600.jpg

s-l1600b.jpg
s-l1600c.jpg
 
Sexy all around!!! You scored a 220/440 3 phase motor for what ? A new rebuild is like $1400 USD and @architect pulls an assembly in for less than 1/4 the cost - WOOT!!!! Sweet!!! Way to go!!!

(I was following on eBay - bloody intense - right up to seconds) Amazing!!!
 
Way t
Sexy all around!!! You scored a 220/440 3 phase motor for what ? A new rebuild is like $1400 USD and @architect pulls an assembly in for less than 1/4 the cost - WOOT!!!! Sweet!!! Way to go!!!

(I was following on eBay - bloody intense - right up to seconds) Amazing!!!

Way to go @architect!

I like eBay auctions. I actually bought a backhoe on one 15 years ago.

I always found that "sniping" works fairly well for me. I don't make any bids at all till the very last 5 seconds and then I bid the full amount of whatever I am willing to pay. Other bidders cannot react fast enough to my surprise bid and it gives them no time to think about it. More often than not, this avoids the bidding war and often nets me quite a huge savings over what I would have had to pay in a full-on bidding war.

But sometimes it doesn't work. I recently bid on a used US General Indicator Holder. The only one I've ever seen on ebay. I sniped at $55 US figuring it was a slam dunk only to find that it sold for $81 which means at least two other snipers were out there playing the same game. Lord knows what the winner actually sniped at......
 
I've used this sketchy package holding place at Buffalo once that worked out so will drive over once we're in the clear.

Pre-pandemic, I used this place in Lewistown, NY, a few times for USA-purchases:

https://www.needausaddress.com/index.php

They are about 5 minutes from the Queenston-Lewistown bridge. Pickup fees are not bad and service is very good. Do NOT use them to store a purchase--the fees would add up quickly.

When I have had to pay HST, the Canadian border office at Queenston has been uncrowded and only a minor hassle. If you have flexibility, do check on the border traffic before going. A couple of time, it took a fair amount of time to get into the USA due to the volume of traffic at the US border station. Remember that you have to pay a $5 toll on Queenston bridge coming back to Canada.

Craig
 
I manage to out bid for this 220v motor today. The shaft was "repaired" but I should be able to swap my own in anyway. I searched Ebay US for this and they don't ship to Canada. So I'm asking if the seller can hang onto it and ship closer to when the border opens. I've used this sketchy package holding place at Buffalo once that worked out so will drive over once we're in the clear. It's not the cheapest but seems hard to find and the least amount of work. My girlfriend and I will make a fun road trip out of heading to Buffalo.

View attachment 15833
View attachment 15834View attachment 15835
If you need this sooner than later the right truck driver could be talked into picking this up and bringing it across the border

Duty free, too ;)
 
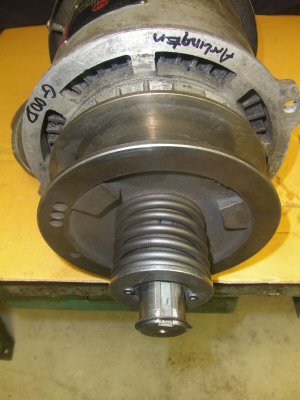
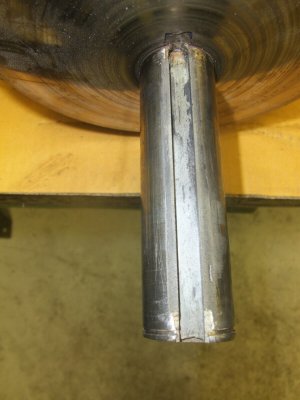
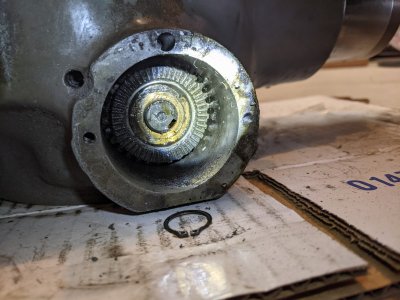
Got a look inside the clutch and as Brent had suspected the cir clip was loose or not seated properly so the shaft pulled right out.

PXL_20210705_203105365.jpg


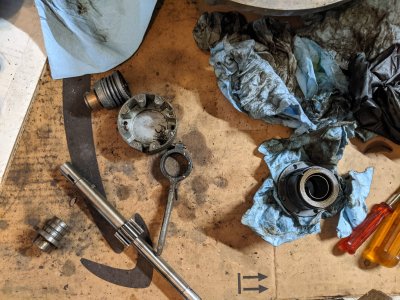
Rest of the parts look fine just need some time in a parts washer (which I just got!)

PXL_20210705_205003104.jpg

PXL_20210705_203052615.jpg


Slowly taken apart the quill housing still to give everything a nice clean. Otherwise everything seem okay and just replacing minor parts.

PXL_20210705_221104715.jpg


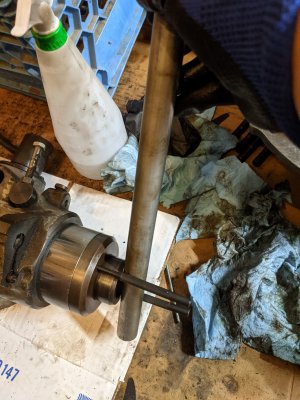
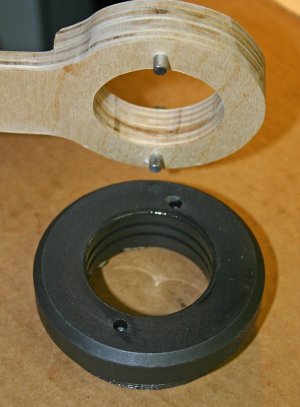
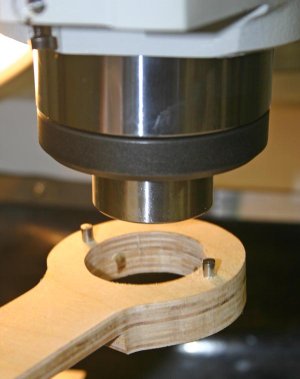
The quill nose is REALLY stuck. I tried using two 3/16 pin punches and a pipe to try to get it off but it's really on there and I don't want to ruin anything, so I will order a cheapo pin spanner. I don't plan on doing any work on the R8 spindle (thanks to Brent for warning me!) but just want to take the assemble off to lessen the weight. This way I can lift the quill housing back up to the rest of the machine more easily. The spindle will then go in last.

PXL_20210703_030455792.jpg


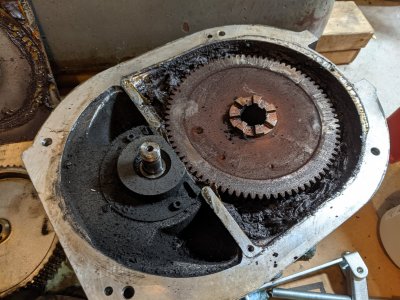
Back gear housing has more dirt than grease. I'm procrastinating this part as it's just gonna be a dirty job and i wanna get parts out of the way first.

PXL_20210705_025626254.jpg


The cheapo gear puller that finally came in has really large claw ends that can't reach under things. I'm going to Princess Auto end week to pick up another cheap puller that will hopefully let me get the bearings off the vari disc assemblies.
 
Last edited:
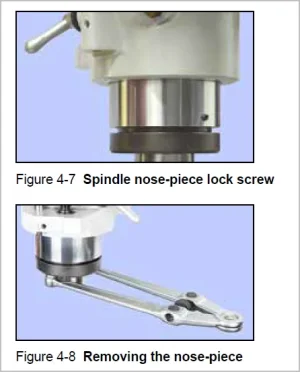
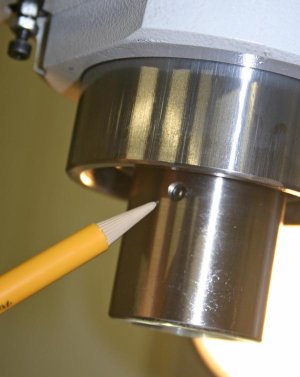
Be careful with the nose cap. If the real Bridgeport is anything like the Taiwan clone Bridgeport, its a left hand thread & you might be tightening it.
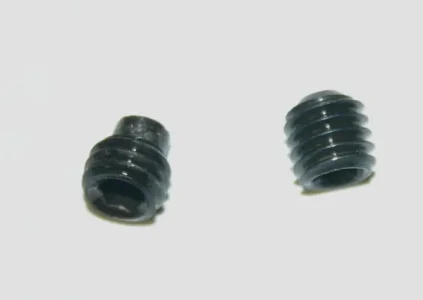
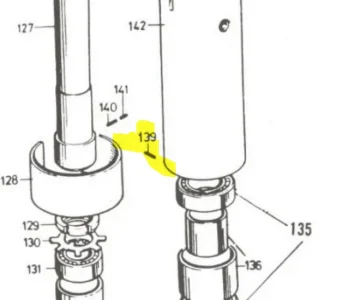
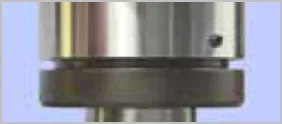
Also does yours have a set screw slightly up the quill barrel? That has to come out first. It engages against the threads.
(pics from PM 935 mill manual).

1625532036481.webp
 
Be careful with the nose cap. If the real Bridgeport is anything like the Taiwan clone Bridgeport, its a left hand thread & you might be tightening it.
Also does yours have a set screw slightly up the quill barrel? That has to come out first. It engages against the threads.
(pics from PM 935 mill manual).

View attachment 15938

Thanks for the tips. The original Brighports should be right hand thread so that's what I've been trying. I have removed the set screw as well. I'm also not yanking at it with all my force, again, because I'm afraid of damage. The entire quill housing is lifting off from the ground from my current force already. I could use a rubber mallet with my current setup. I'd really rather not buy a pin spanner just for this as I don't have other uses for it otherwise, and also just seem really hard to source.
 
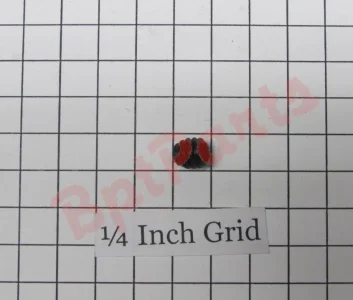
Make sure you actually got the set screw and not just one of them. Bridgeport has a habit of locking set screws with a hollow set screw. You may think you have the set screw but there could be another.
 
The quill nose is REALLY stuck. I tried using two 3/16 pin punches and a pipe to try to get it off but it's really on there and I don't want to ruin anything, so I will order a cheapo pin spanner. The cheapo gear puller that finally came in has really large claw ends that can't reach under things. I'm going to Princess Auto end week to pick up another cheap puller that will hopefully let me get the bearings off the vari disc assemblies.

Haha! We seem to be following similar paths......

I just received a spanner from Amazon that I bought for the same purpose. Total junk. It's going back. I'm planning to make my own spanner for this job with some grade 5 Bolts chucked in the lathe to make nose pins and threaded into a home made flat plate handle. Once I get the cap off, I'll be drilling new holes in it a little bigger and a little further from the spindle so I can get some decent metal in there to hold the pins. Then I will grind a small groove in the quill for access. Why all the trouble? Cuz I wanna be able to easily change the R8 alignment pin. AND I DO NOT LIKE the way that cap comes off right now!!!

Beware of cheap pullers. Jaws break, threads strip, arms bend. In my mind, a really good puller is a great investment. After many disappointments, I finally broke down and bought a really good one. It is a combo 180 (two arms) and 120 (three arms) that has not failed me (yet). I've used it to pull/push huge 2" pins on farm equipment and on my backhoe. Just sayin, buy a good one and only cry once.
 
Don't laugh at Mr. Woody, it worked haha. I had read where guys were having to grind the pin ends of those expanding spanner type wrenches to engage properly but this might be a function of the wrench model and/or 935 mill. Yes 2 set screws used for the collet guide, dog point & retention. The reason I was in there to begin with. You don't want it protruding too far in or it can jam up in the R8 slot.
 

Attachments

  • IMG_7654_edited-1.webp
    IMG_7654_edited-1.webp
    5.8 KB · Views: 10
  • IMG_7658_edited-1.jpg
    IMG_7658_edited-1.jpg
    55.5 KB · Views: 9
  • IMG_7666_edited-1.webp
    IMG_7666_edited-1.webp
    4.8 KB · Views: 10
  • IMG_7676_edited-1.jpg
    IMG_7676_edited-1.jpg
    39.3 KB · Views: 10
  • IMG_7661_edited-1.jpg
    IMG_7661_edited-1.jpg
    43.1 KB · Views: 9
Don't laugh at Mr. Woody, it worked haha. I had read where guys were having to grind the pin ends of those expanding spanner type wrenches to engage properly but this might be a function of the wrench model and/or 935 mill. Yes 2 set screws used for the collet guide, dog point & retention. The reason I was in there to begin with. You don't want it protruding too far in or it can jam up in the R8 slot.

LOL! Well good to see that worked!

Hmm the parts diagram showed just one set screw?

1625549986904.webp

1625550130937.webp


I've been yanking on it after removing just this one screw, and maybe have even notice the nose cap move.... hope I didn't jam anything.

EDIT: Okay I realize you're talking about the inside collet with the two set screws. I'm not even there yet :(
 
Ya sorry and I shouldn't assume a 935 is a Bridgeport, it was just more of generic cautionary FYI in case you didn't have the exact parts manual.
On my 935 there is this setscrew that engages the nose cap threads. That just rubs me the wrong way on many levels but I put mine in lightly with a drop of blue Loktite. I assume its to prevent nose cap spin off.
Then with the cap removed you see the 2 bonus point set screws for collet slot.

1625550384677.webp
 
FYI Keith Fenner is back on Buffy rebuild as of late, might be some tidbits in there even if the BP model is different. The 2017 spindle vid definitely shows ~ 6:00 lefty loosey on the nut. Huh, learned something new. I just assumed Taiwan cloned USA machines directly unless there was a cheaper way to do it. Maybe there is a specific reason for one direction or another, but one would think would be the same opinion.

 
Back
Top