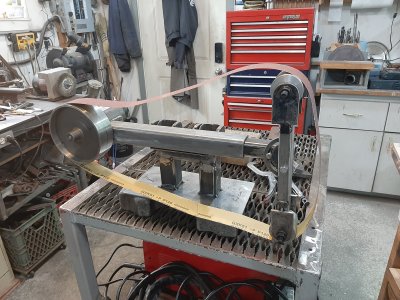
The plans for mine called for 1/4 inch wall 2x2 tubing and 1 1/2 inch tubing. I used 3/16 wall for the 1 1/2 as it's all I could find. Seems pretty solid. The base plate is 1/4 and the motor plate and D-plate are 3/8. The 4 pivot plates are 1/2 inch which is serious overkill.
The square tubing gets tapped in a few places so the 1/4 inch thickness holds a thread securely. Platen support plate is supposed to be 1/4 inch with a high carbon steel platen on top. I guess lots of guys are using heat resistant glass for the platen now to avoid wear. I won't be making knives, I don't think, so not sure what I'll use. One Tuber just used regular glass tile and it seemed to hold up for him even making knives but that was a 6 by 48 sander I think.
Yeah, the shop is a blessing and a curse. 30 by 60 with 12 foot walls. It was just bare metal until a few years ago when I treated myself by insulating and finishing the interior, having it wired and heated and putting in a four post lift. It's a nice play to play but I seem to be genetically incapable of keeping it tidy or organized.
My wife and I laugh about it. Her hobby is honeybees and unless you are going to eat 1500 lbs of honey yourself you have to sell it, so she does. She is an all in kinda girl so to sell honey she got CFIA certified and we built a 30 by 30 extraction facility. Because she produces certified safe honey she does well. Makes money even.
My shop is the kinda place that money goes in and is never heard from again

.
What are you using for motor control?
I use the old control board with a cheap pulse generator from Amazon. Works like a charm.
")
")