Plan on picking up a QCTP in the near future.
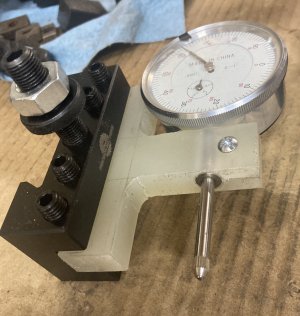
What's on there now? You gunna be another member making a post to retrofit an AXA or BXA Tool Post? Need some tips?
Plan on picking up a QCTP in the near future.
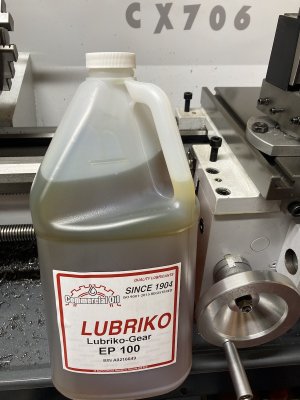
What did you get for gear oil? Are there actually yellow-metal gears in the headstock?Made a big mess of my 706 today🙄, decided to totally drain the gearbox oil, that means taking off the front panel as the drain plug is 3/4"above the bottom. A lot of paper towels later to soak up the oil that i didn't catch and i got to examine the gear box internals. Lots of black gunk in the bottom. I may put in a lower drain hole for the future. The apron drain is on the bottom so no issue there except getting small dish to catch the oil. Plan on picking up a QCTP in the near future.


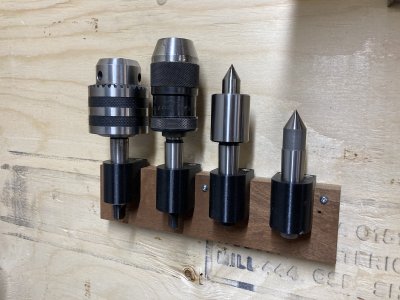
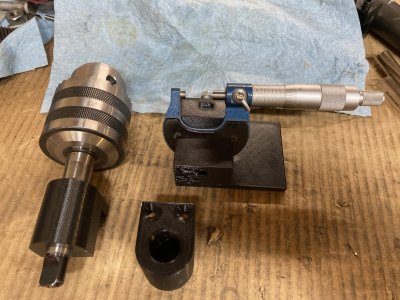
As a matter of fact, the tools do stick. If I just pull up, it is not easy to dislodge them. Weirdly, I find that if I press up on the portion sticking out the bottom, the tool comes out pretty easily.Very cool! Does tooling ever fit so tight in these holders they get stuck? Is it possible to get stl files for this design or for that matter an MT3 version? What is the infil %?
That's a good question actually, I have never thought about that. Oil shouldn't be a problem along as long as it doesn't have any detergents in it I would think.@gmihovics would there be any problem with wiping a bit of oil in the holders? Oil won't dissolve this material, right?
I'll post the stl file today and then post the link here in the thread. I'll take a stab at an MT3 design really quickly too.Is it possible to get stl files for this design or for that matter an MT3 version?
I just used 15%, I did increase the perimeters to 4 though. it's also just printed in PLA.What is the infil %?
Weirdly, I find that if I press up on the portion sticking out the bottom, the tool comes out pretty easily.
Just remember to ipe off oil residues from Mt taper before using.As a matter of fact, the tools do stick. If I just pull up, it is not easy to dislodge them. Weirdly, I find that if I press up on the portion sticking out the bottom, the tool comes out pretty easily.
@gmihovics would there be any problem with wiping a bit of oil in the holders? Oil won't dissolve this material, right?
Craig
As a matter of fact, the tools do stick. If I just pull up, it is not easy to dislodge them. Weirdly, I find that if I press up on the portion sticking out the bottom, the tool comes out pretty easily.
....
Craig
I haven't looked at them closely but there are a bunch of MT3 designs on Thingiverse for free:Very cool! Does tooling ever fit so tight in these holders they get stuck? Is it possible to get stl files for this design or for that matter an MT3 version? What is the infil %?

Did you and another person lift it into place on the bench?Some of you may remember that I started searching seriously for a new lathe in the 10-11" swing range a couple of months ago:

10-11 inch lathes -- Precision Matthews, Modern Tool
Hi: I'm edging toward upgrading from my tiny, beat-up Atlas 618 lathe and I thought I'd ask for input about new lathes. Whatever I choose has to go down the basement stairs, including a 90 degree corner, and into the available space which is ideally 51 inches or maximally about 60 inches...canadianhobbymetalworkers.com
I'm happy to report that my new Craftex CX706 10 X 22 lathe arrived safely this week. At Busybee in Mississauga, they forklifted it into the van I'd rented. My son and I slide it down some 2X6's into the garage. They say the gross weight is 160 kg (352 pounds) but it sure felt like more. In the garaage, I opened up the crate and pulled out the parts that could be carried separately--2 chucks, face plate, tailstock, tools, etc.
I planned to use a 2-wheel cart to move the machine to the basement. In hindsight, renting a proper appliance dolly would have made it slightly easier. I decided to leave the machine bolted to the base of the crate for the move since it was otherwise going to be very difficult to strap it to the cart. In any event, my son, my daughter and I got it down the stairs (including a right-angle turn) and into the basement. Only my son got his fingers pinched when we lifted it off the crate base and onto the bench*. 😉
Not that I also took the backsplash and gear train covers off for the move. The gear train cover is just held in place by a couple of small studs--no where near strong enough to be a lifting point. I was concerned the backsplash was going to make it more difficult to maneuver down the stairs and again it is not strong enough to be a lifting point.
I've spent a fair bit of time cleaning and lubing my new toys. Disassembled both chucks; the 4-jaw had a large metal chip fouling one of the screws. In the picture below, you can see some of the grit and dirty oil that was on the machine. I disassembled, cleaned and lubed both the compound and the cross slide. After adjusting the gibs, I think the operation is pretty smooth.
I wanted to take the gears off the banjo to clean and lube but I've put that off for now. There was a Blondihacks video where she noted that the gears on her Precision Matthews lathe were and extremely tight to the studs to begin with. I believe she used a reamer to ensure the hole in each gear was a good fit. That would require a 14mm reamer (ideally spiral) which I don't have. May need to buy one.
I'm also debating about changing the oil in the headstock and apron. Now or wait until I've used it for a few months?
The next step is to retrieve the QCTP I ordered. I had it delivered to a service just across the border in New York. This will be my first crossing since the pandemic started. Fingers crossed that it goes OK. BTW, I'm 90% certain that I'll have to modify the compound slightly to fit the QCTP. The tool post that comes with it sits on a boss that sticks up too high. Should be no big deal to mill it down.
I also want to try taking some measurements. I've ordered a test bar from India and the tracking says it will be here in 3 days.
Or course, I've played with the controls a bit. All the basic functions seem to work OK. The two knobs on the front (left-right travel and A-B-C feed speeds) don't give good feedback that they're engaged. Also, the lever is quite stiff going from longitudinal to crossfeed modes. I know you don't want to do by accident but it seems pretty sticky.
Craig
* No fingers were permanently harmed in the moving of the lathe.
