• Scam Alert. Members are reminded to NOT send money to buy anything. Don't buy things remote and have it shipped - go get it yourself, pay in person, and take your equipment with you. Scammers have burned people on this forum. Urgency, secrecy, excuses, selling for friend, newish members, FUD, are RED FLAGS. A video conference call is not adequate assurance. Face to face interactions are required. Please report suspicions to the forum admins. Stay Safe - anyone can get scammed.

Bridgeport Project

Brent had a wench tied up to the back of trailer to slowly release the mill down the ramp.

I spit out my drink on that one! Had to read it twice! Still laughing!

So are you saying you rolled it off the trailer? Wow...... I would have been terrified of doing that! Of course, my wench isn't that strong......

What was it rolling on?

Bet you are all damn glad your destination wasn't a basement! You would have needed 30 wenches to stop that one from going down too fast!

I'm glad you got it done! Looks like you had time to take the head off too. Did Brent take that home with him?

Ya, still laughing at the typo....... You can't make stuff like that up!
 
I'll need to spin it around 275 degrees but saving that for another day as I'm exhausted and need to make up for skipping work today!

If I were you, I'd just tie a wench to the back wall and spin it 85 degrees the OTHER way. Only 1/3 the work. That way you could do it today........ (insert evil grin here).

Yup, still laughing......
 
Last edited:
That wench was a full 1.5 tons and man could she hold her weight! LOL.

Our mission began at 0830 with the trailer and truck hopefully carrying enough to do the job. I did not have the trailer from my neighbour I was hoping to use - I had his more “garden style” than his big 5 ton dump trailer. This added to some issues - but we overcame them!!!!

The guys selling were a funny lot and I think blown away when we rotated the head 180, slipped the table into position and then secured things. The fork driver came over and we did some adjustments and he lifted it in from under the ram. I had wood protection and ratchet strapped his forks from opening. We set the mill on some made up 4x4 and my son screwed things down to the trailer while we tarped and lashed the mill down. It is about 10 to 15 minute drive to Esmond’s and we took about 25 minutes. Some fancy backing up to the garage and we were set for phase 2……

Phase 2 ….. the drop off …. Or - let’s get this big guy rolling!!

Well, some of the change up with the smaller trailer and the way the mill sat in the trailer meant it had to turn 90 degrees so we could get the pallet jack underneath. I had brought some 6” lag screws to bolt the mill to the 4x4’s but Esmond’s mill has the bottom coolant tray option so it is 2” deeper. Esmond shot off to Canadian Tire and picked up some 8” x 1/2” lag screws and we were back in business. With the mill bolted to the 4x4’s I used a 1/2 ton wench (Bretha’s smaller sister) :p (1/2 ton come along) to rotate the mill. My boy pushing also helped.

once the pallet jack was fitted we hooked up Bertha (1-1/2 ton chain fall) to the back of the trailer and it connected via straps to the top turret of the mill and also the base. The mill could descend the trailer ramp but not tip or go nuts as it’s fall was being controlled by the chain fall pay out.

One shite thing with the trailer ramp was the space down the middle - to fill that I cut a 3/4” sheet of plywood to bridge any gap (4”) and allot the mill to roll smoother. With my son running the chain falls and Esmond on the pallet jack we rolled the mill down the ramp and into his garage, fairly easy peasy - there was a tense moment when I put down my Pom Poms and we needed to “adjust” the direction of mill flow, but all in all it went fine. We used the pallet jack to get the mill back into the garage as far as we could.

Opinion on the mill:
For $1200 it is a steal of a deal. The quill bearings seem fine and I sensed no play. The head, I suspect has a worn upper and lower speed control bearing. - this may have a bit of other caused damage to the belts and maybe the drive - all can be replaced pretty easy.
There are a few odds and ends that need some TLC and adjustments - I think a nut is off the quill feed Handle at the clutch end. The mill has some wear on the y-axis ways and x axis ways but nothing “oh my gosh”. The table rides pretty smooth in all directions and the head and ram are all free to move. The mill has Mitutoyo scales for a DRO - not sure if working and the power feed on the x-axis is sexy.

I didn’t get a chance to pull off the head as we were a bit late arriving and the mission ran a bit long. My wife’s Birthday today so had to make a bit of an exit.

All awesome Brent, very well done!

Hope you didn't get your "pom-poms" dirty.

If everyone had neighbours like you, the world would be a much better place.

Kudos to you.
 
What can I say, Brent is a charmer of wenches :p

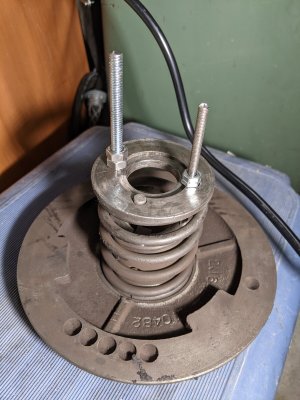
I was struggling to compress the vari disc and eventually discovered one of the holes is a 1/4-20. It takes a bigger nut that blocks the snap ring so I couldn't compress pass it but managed to get it out. Also not sure why my spring collar has a pin in it. OEM part doesn't have this.

PXL_20210616_235640094.jpg


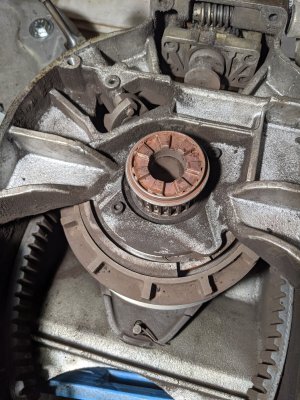
There's lots of play in this upper housing and I may have found the source of the rattle. I'm not sure that brake shoe is suppose to sit misaligned, and in 3 pieces:

PXL_20210617_043434999.jpg
 
I was struggling to compress the vari disc and eventually discovered one of the holes is a 1/4-20.

That is weird. Is it possible they should both be 1/4" and someone stripped the other one and retapped it bigger? Unless I am mistaken, that is a pretty shiny looking fastener in the other photo. Perhaps it has been on the operating table before......
 
That is weird. Is it possible they should both be 1/4" and someone stripped the other one and retapped it bigger? Unless I am mistaken, that is a pretty shiny looking fastener in the other photo. Perhaps it has been on the operating table before......
That's what Brent thinks is the case. They are both suppose to be 10-32. Hoping to not find any more surprises!
 
Last edited:
@Susquatch : original screw size is 10-32 to remove the vari disc - probably someone threaded in a 10 - 24 and stripped one side. Next size practical to fix it is 1/4” as #12 machine screws are almost the same size and are very rare compared to 1/4-20.

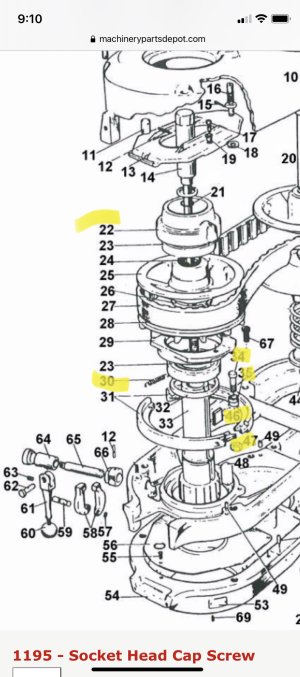
@architect : how do the bearings feel - part 23?
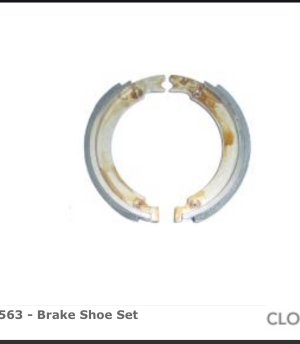
Check to make sure all the little parts are there in the brake assembly:

C6A64DA0-80D3-4B44-9E65-1780EB8E9BA1.jpeg

The top of the spline looks good for the drive - how does the mating surface look?
 
Next size practical to fix it is 1/4” as #12 machine screws are almost the same size and are very rare compared to 1/4-20.

Yes, #12 machine screws are extremely rare. I have a set of taps and dies for #12 that were almost impossible to source. I had a need for longer screws in an application some 40 years ago and I recall one big fastener company telling me they didn't even really exist. Yet I had some that had become too short. So I had to make my own. That was before I had a lathe. I still have those dies and taps and every once in a long while I still use them.

I'd be tempted to see if I could go back to finer thread somehow though. I have no idea how hard it is to compress that spring, but finer is definitely better. Tpi is everything when compressing a spring. I'd oil or grease them too!
 
Last edited:
That's what Brent thinks is the case. They are both suppose to be 10-32. Hoping to not find any more surprises!

If you replace the top section, perhaps you can go back to original. Otherwise I would at least modify the system to use the bigger screws. It seems downright silly to have one smaller than the other.
 
If you replace the top section, perhaps you can go back to original. Otherwise I would at least modify the system to use the bigger screws. It seems downright silly to have one smaller than the other.
The original is the smaller 10-32 but someone drilled a bigger 1/4-20! I'll leave it and just tape a 1/4 to the side of my mill [emoji28]
 
Last edited:
To compress the Vari-drive spring on the motor end one is supposed to use two of the long cover SHCS. It is critical that you use two and keep them nice and parallel so that they each share the load of the spring. If you torque one down excessively, it cants the washer and jams. That’s how you strip the threads. Once they engage, give half a turn on each SHCS until they both bottom out - then the spring is fully compressed. Installation is the reverse. It’s a slow process doing it that way, but you won’t wreck anything. This is not a job for a cordless or an air ratchet.
 
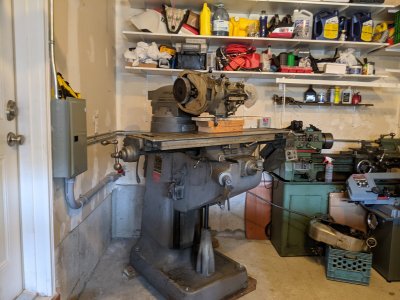
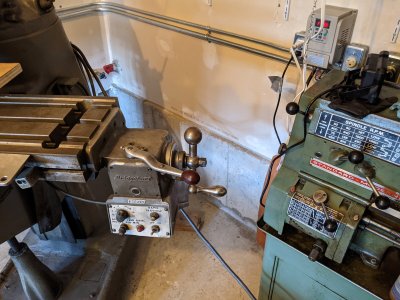
My large friend came by with some rods and what is basically an iron spear to pivot the mill around. I'm not sure if I should leave it at this position or keep rotating until the table it parallel to the side wall/door. I don't have much room now and I'm now thinking to have the mill parallel to gain more space. The table will have more range and only block the convenience door.

PXL_20210617_194325399.MP.jpg

PXL_20210617_194332140.jpg
 
Something to keep in mind is leave yourself enough room to get the table off if need be in the future.
 
My large friend came by with some rods and what is basically an iron spear to pivot the mill around.

Iron Spear eh! LMHO!

20210617_182903.jpg


I think you are referring to what I call a Pinch Bar. There are probably other names for it too.

In addition to removing the table, you also need to be able to get around behind it sometimes.

More importantly, you don't want @Brent H s wench to run into it leaving the house when finished doing your chores......
 
Back
Top