• Scam Alert. Members are reminded to NOT send money to buy anything. Don't buy things remote and have it shipped - go get it yourself, pay in person, and take your equipment with you. Scammers have burned people on this forum. Urgency, secrecy, excuses, selling for friend, newish members, FUD, are RED FLAGS. A video conference call is not adequate assurance. Face to face interactions are required. Please report suspicions to the forum admins. Stay Safe - anyone can get scammed.

Bridgeport 2J

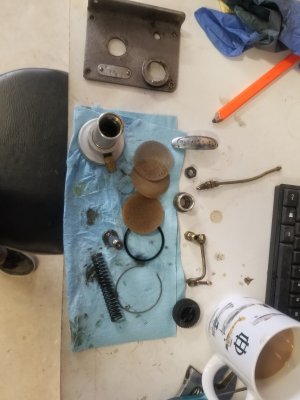
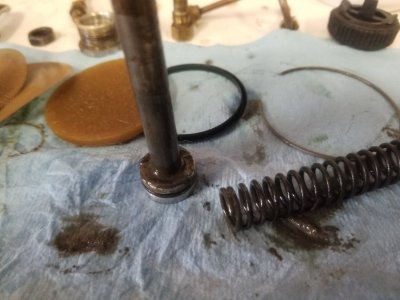
Welp, back at it today since we got snowed in (I pretend like it bothers me but I friggen love a day off, 3' of snow so far). I did a lot of cleaning, cleared all the oiler lines, polished a bunch of odds and sodds. Rebuild the Bijur oiler, and the pictures will prove why you should. Man that thing was full of shmoo. The o-ring on the pump plunger was worn right out and the check valve was not really checking anything. Got all that rectified and cleaned. Took a cotton bobbin to the top to clean it up a bit, I like shiny.
20221119_141551.jpg
20221119_141557.jpg

Look at all that lovely SHMOO! Do not want.
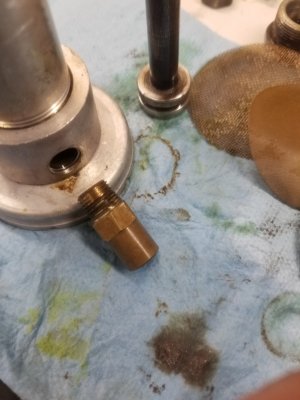
20221119_142408.jpg

This little check valve was stuck open, it took me a while, but I got the offending chip out of it.
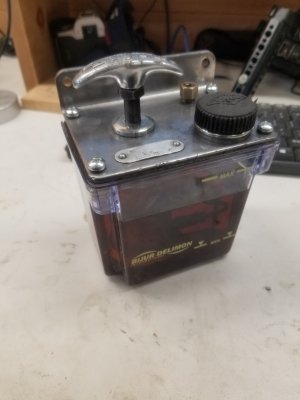
20221119_144817.jpg

Rebuilt and shinned up a bit. Not going for visual perfection. New o-rings all through, cleaned check valve, and new filter stack... Also a new tank since the old one was very very broken.
20221119_195648.jpg

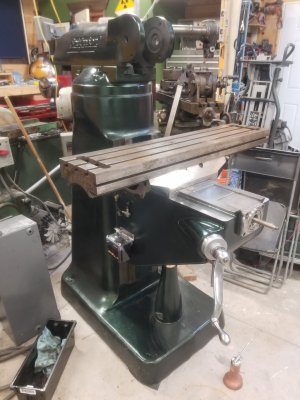
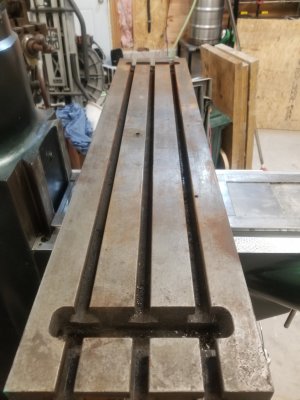
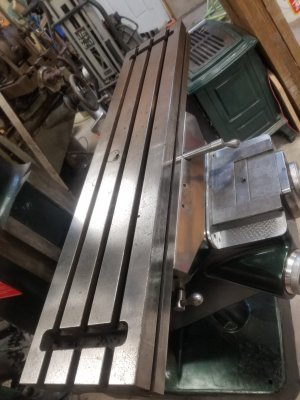
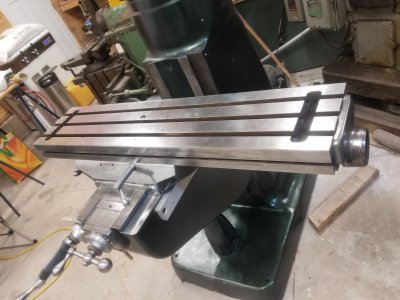
Current progress of today. I do however have a question. Below is the table, and I hate the way it looks. What would be my best options for cleaning this up. I don't need it to be 100% as it would be after a grind, but I want it a dammed sight better than this. I am apprehensive to go at it with much, as dare I mess with a flat surface, but I was tossing the idea around of using a large bench stone to just to clean up the worst of it. The aft surface cleaned up amazingly with just some lacquer thinner and some green scotch brite, the front, not so much. Any thoughts on the matter are appreciated!!!!
20221119_195655.jpg


I hope you all less snow than we got today, more tomorrow.... both snow and hopefully progress.
 
Your table looks pretty good. Stone it to removed any dings etc. then, set up a straight edge across as much of the table as you can and do a sweep with a good quality gauge. If you have a place on the table that is clean, run the gauge on the table and check it out.

My table has a few “patina” marks but still goes less than 0.001 across 42”

For your back lash / - see if you have a good feel over the range of table travel. I changed out my x and y spindles and nuts as it was fine in the middle but way too tighr at the bitter ends. Made sense to re-new with power feed. Nice and clean feed now.
 
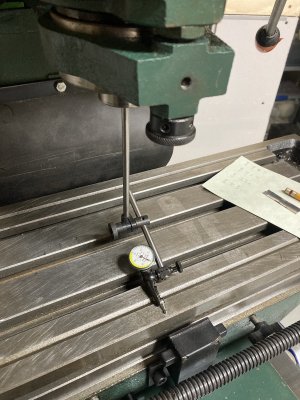
Re table clean-up, I agree with @Brent H about stoning and checking. To improve the appearance, I use a simple approach: keep the surface wet with oil for a week or more. Then use a razor scraper to remove the patches of surface rust. Finally, wipe down with fine scotchbrite or similar. My mill table had much more built-up rust than yours and it looks like this now:

tramming setup.jpg


It is not perfect--you can still see the outline of where the T-slot scraper must have laid for several years! Lots good enough for me, though.

Craig
 
Lots good enough for me, though.

I agree with both of you. A good stone will show the high spots rather instantly and fix them too. Even a table that looks horrible can usually be stoned to work great! Very very happy with the three I have done.

Also, you can easily fix any pecker marks with Devcon Steel Epoxy. A little oil and some light scraping and then stoning and they look just fine.
 
For your back lash / - see if you have a good feel over the range of table travel. I changed out my x and y spindles and nuts as it was fine in the middle but way too tighr at the bitter ends. Made sense to re-new with power feed. Nice and clean feed now.
Thanks for advice on the table, I'll get on that. So far the Y axis screw and nut have worked out great. Next to .003" backlash with a little adjustment and no tight spots along the screw. I want this as a manual machine so that's more than good enough for what I need.
Re table clean-up, I agree with @Brent H about stoning and checking. To improve the appearance, I use a simple approach: keep the surface wet with oil for a week or more. Then use a razor scraper to remove the patches of surface rust. Finally, wipe down with fine scotchbrite or similar. My mill table had much more built-up rust than yours and it looks like this now:
That table looks GREAT! Thanks for advise. Is everyone just using a bench stone (such as https://www.leevalley.com/en-ca/sho.../33018-aluminum-oxide-oil-stones?item=08M0401, since thats what I got on hand), or are we talking precision ground stones.....?

agree with both of you. A good stone will show the high spots rather instantly and fix them too. Even a table that looks horrible can usually be stoned to work great! Very very happy with the three I have done.

Also, you can easily fix any pecker marks with Devcon Steel Epoxy. A little oil and some light scraping and then stoning and they look just fine.
I see I get to go online shopping today as well! Thanks for the knowledge! This has got to be one of the best forums I've been a part of in many years.
 
That table looks GREAT! Thanks for advise. Is everyone just using a bench stone (such as https://www.leevalley.com/en-ca/sho.../33018-aluminum-oxide-oil-stones?item=08M0401, since thats what I got on hand), or are we talking precision ground stones.....?

That will work but if it is already used, it might not be the best plan. It might have bevels in it. Table dressing stones should be new and only used on flat surfaces.
I prefer a round stone and I keep it with my mill tools and only use it for my mill table and rotary table. It's also nice to check the table before mounting a vise or tooling.

This one is a bit more money but it will point you in the right direction if you go that way. Others might prefer square.

Norton 547-61463685545 Ib64 4X1 Round India Comb Bench Stone https://a.co/d/iF0ANt1
 
So far the Y axis screw and nut have worked out great. Next to .003" backlash with a little adjustment and no tight spots along the screw. I want this as a manual machine so that's more than good enough for what I need.

That sounds GREAT! LUCKY YOU!
 
That will work but if it is already used, it might not be the best plan. It might have bevels in it. Table dressing stones should be new and only used on flat surfaces.
Well, they have been ordered! I got 2 round and 2 of the rectangular ones, see what I prefer. I'll make sure to keep one of each nice and clean and away from users with less discerning tastes in stones.

On Monday I got to go play in the shop for a bit, so here are some photos.
20221120_101908.jpg


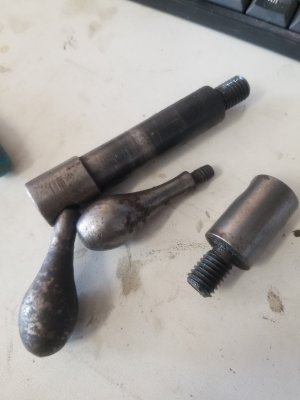
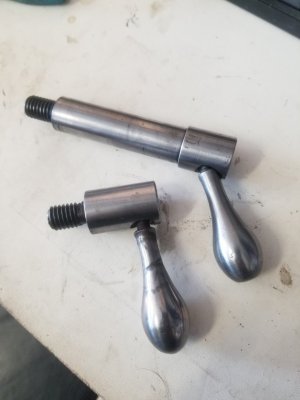
Got these nasty arse looking things cleaned up. Started with emery, moved up to an aggressive polish compound I use for badly corroded aluminum, then on to some S7 so brighten them up. They will never be perfect, but are looking a lot better! One day, time allowing, I'll make some new handles.
20221120_103857.jpg


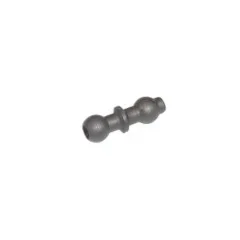
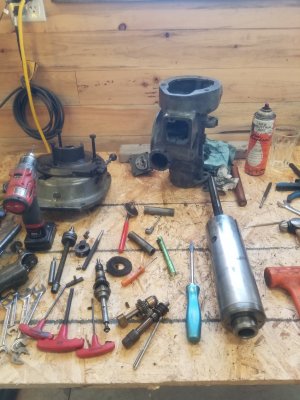
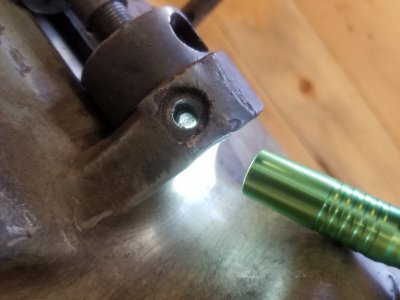
This little guy called Reverse Trip Ball Lever (PN 1033-03 at {https://machinerypartsdepot.com/quill-housing-spindle-quill-breakdown}) caused me about 4 hours of frustration to get loose. The dammed thing broke off deep. I ended up using a clamp to jam the quill stop rod down, drilled very very gingerly, ruining a few bits in the process. Then I managed to get a 4-40 tap JUST started on half a thread and ever so carefully worked it out of the home it had made for itself. There was a beer after that one! I've got a nice piece of durabar and shall try to make one of these I think.
20221120_143131.jpg

This is the way that part should look.

1033-03-.webp


20221120_154406.jpg


GREAT SUCCESS!!!

NAAAHT!

Along with that feeling of elation I got some some bitter and hard to digest disappointment. My spindle bearings, that I was so happy were in great condition, seem to have been hiding a rusty skeleton from me. With the quill assy away from the rest, the spindle sounds like a pissed off grizzly, and feels like sand.... Somehow, someway, this has been hiding (I guess all that nice thick grease up in the head covered up the feel?). After all my checking and re-checking... So I guess I've gone to far now. Ordering more parts tonight and will strip the quill in the morrow'.

More beer shall be required for this.
I'll keep everyone posted.
Cheers to all.
 
Well, they have been ordered! I got 2 round and 2 of the rectangular ones, see what I prefer. I'll make sure to keep one of each nice and clean and away from users with less discerning tastes in stones.

On Monday I got to go play in the shop for a bit, so here are some photos.View attachment 28198

Got these nasty arse looking things cleaned up. Started with emery, moved up to an aggressive polish compound I use for badly corroded aluminum, then on to some S7 so brighten them up. They will never be perfect, but are looking a lot better! One day, time allowing, I'll make some new handles.
View attachment 28199

This little guy called Reverse Trip Ball Lever (PN 1033-03 at {https://machinerypartsdepot.com/quill-housing-spindle-quill-breakdown}) caused me about 4 hours of frustration to get loose. The dammed thing broke off deep. I ended up using a clamp to jam the quill stop rod down, drilled very very gingerly, ruining a few bits in the process. Then I managed to get a 4-40 tap JUST started on half a thread and ever so carefully worked it out of the home it had made for itself. There was a beer after that one! I've got a nice piece of durabar and shall try to make one of these I think. View attachment 28200
This is the way that part should look.

View attachment 28203


View attachment 28202

GREAT SUCCESS!!!

NAAAHT!

Along with that feeling of elation I got some some bitter and hard to digest disappointment. My spindle bearings, that I was so happy were in great condition, seem to have been hiding a rusty skeleton from me. With the quill assy away from the rest, the spindle sounds like a pissed off grizzly, and feels like sand.... Somehow, someway, this has been hiding (I guess all that nice thick grease up in the head covered up the feel?). After all my checking and re-checking... So I guess I've gone to far now. Ordering more parts tonight and will strip the quill in the morrow'.

More beer shall be required for this.
I'll keep everyone posted.
Cheers to all.

Well done @That-Guy .

I had trouble with my reverse trip ball Lever too. It was stripped. I didn't take mine out to get at the quill though, I took mine apart to remove the quill play for a DRO install. Doesn't matter, it was the same challenge. I feel your pain.
 
Thanks for sharing this restoration with us! Your mill is looking GREAT and will be such a pleasure to use - after all, you turned the beast into a beauty!
Thanks for the kind words! I tried this a few years back with PM and an old lathe, and got nothing but negativity.
 
Ok so the weekly weekend update. This week wasn't the best for free time. Broken things everywhere that required more of my attention than I cared for... But I still got to do a little.

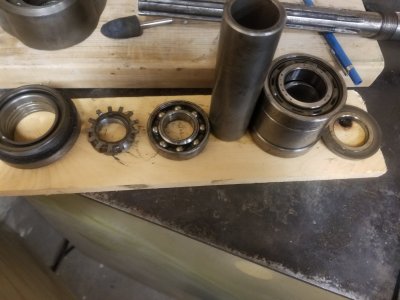
First the break down of the spindle. It went swimmingly. A little press and away it all came. I needed a bearing splitter to get the lower bearing stack off, but other than that it was butter.
20221125_061556.jpg


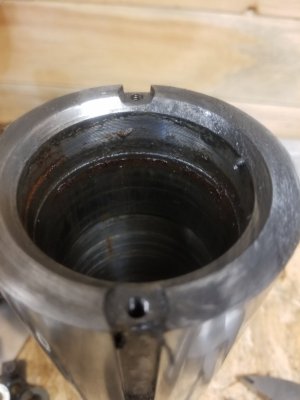
I'm guessing that the machine was put outside for an amount of time before I got it, but not long enough to totally wreck the rest.

20221125_061534.jpg

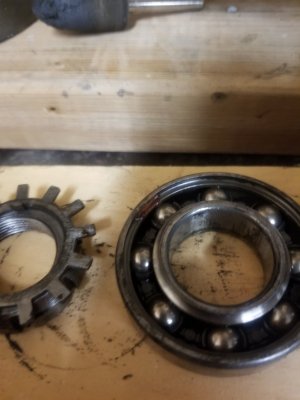
Here is a closer view of the upper spindle bearing. It's got some badness going on for sure.
20221125_061601.jpg


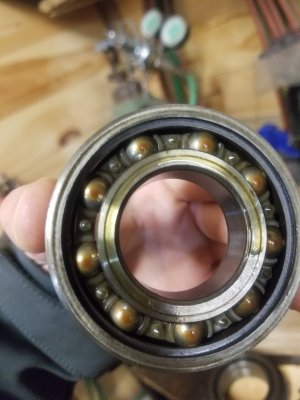
Here is the lower main spindle bearing. Not looking too happy ether. I didn't know oil could rust.... But here it is ....

20221125_061606.jpg


So on the spindle bearings.... H&M Machine remove the oiler and grease ( AHHH!!!) their bearings. What are your thoughts on this? I more prefer to maintain my things, maybe this is meant more for industrial shops where things tend to be neglected? Or is just the way things are now? I'm not sure what to think about it.....

Parts are on the way, they should be here sometime before the new year? Maybe?

Now on to happier pastures.

I tried out my nice new stones..... BOY WHAT A DIFFERENCE!!!!!! Thank you all for the advice on this!!!! I'm chuffed to bits, it looks a thousand times better, and I'm not done yet. @Susquatch I agree that the round stones seem to work a little more smoothly. I found that the rectangular ones kept catching the high spots and digging in while the round ones didn't really have the edge to roll over on me. Great recommend, Thank you.
20221127_191602.jpg
20221127_191612.jpg


That's all for this Sunday's post. Thanks to all who have been following along and for all the advise I'm receiving. Lets do this again next week!
 
H&M Machine remove the oiler and grease ( AHHH!!!) their bearings. What are your thoughts on this? I more prefer to maintain my things, maybe this is meant more for industrial shops where things tend to be neglected? Or is just the way things are now? I'm not sure what to think about it.....

I have the same questions that you do. I chose to keep my oilers. I wasn't sure it was the best choice, but that's the choice I made. Much as I like Barry's style I have a hard time ignoring the manufacturers recommendations. In the end, I concluded Barry's advice was aimed at those who don't like to perform regular maintenance. That isn't me, so I stuck with oil.

I see you have a few pecker marks on your table. Mine is worse. They don't matter functionally but if you want to improve the appearance, some Devcon plastic steel looks after them nicely.

Great job so far. You will be so proud of it when you are done! I like your writing style too!
 
So I found my first legit problems other than the bad bearing. The clock spring let go, explains the quill being heavy. I also discovered that the one shot oilers tank is cracked. Going to keep at it when I get a few minutes here and there. Life gets in the way of living some how!
View attachment 26381
I know I'm poking the hornets nest here; but what colour should I paint it? I was thinking a nice AMC metallic blue. (if I tried this on PM I figure I'd get banned! ).
my clock spring let go too.

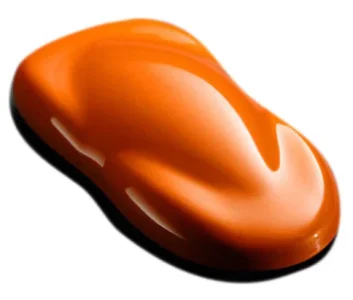
paint is this colour

tangerine pearl - Copy.webp


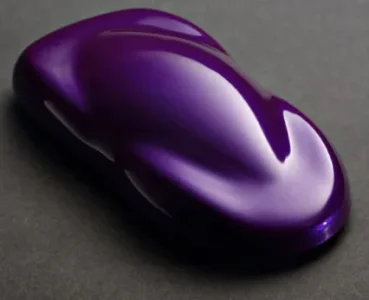
with this colour highlights

violette pearl shimrin - Copy.webp
 
Back
Top