I'm looking at adapting a small, maybe 3"or 4" chuck to my 5C spin indexer to make it more useful for larger diameter but axially short parts that don't have to extend into the spindle. I have other means of doing this but it occurred to me this might be handy for common rotation angles. I've seen some chucks with integrated 5C arbors, or machinable 5C backplates which could adapt to a plain back chuck - maybe even correct a not-so-accurate cheapo chuck. My 5C Spindex is a Bison which is a better QC than some of the knockoffs. But I'm almost to the point of just dropping the 5C headache & making a dedicated housing block more to my liking. But that would require replicating the typical dividing plate. Hence the question. I will have to think about this some more. Project number 784.
-
Scam Alert. Members are reminded to NOT send money to buy anything. Don't buy things remote and have it shipped - go get it yourself, pay in person, and take your equipment with you. Scammers have burned people on this forum. Urgency, secrecy, excuses, selling for friend, newish members, FUD, are RED FLAGS. A video conference call is not adequate assurance. Face to face interactions are required. Please report suspicions to the forum admins. Stay Safe - anyone can get scammed.
-
Several Regions have held meetups already, but others are being planned or are evaluating the interest. The Calgary Area Meetup is set for Saturday July 12th at 10am. The signup thread is here! Arbutus has also explored interest in a Fraser Valley meetup but it seems members either missed his thread or had other plans. Let him know if you are interested in a meetup later in the year by posting here! Slowpoke is trying to pull together an Ottawa area meetup later this summer. No date has been selected yet, so let him know if you are interested here! We are not aware of any other meetups being planned this year. If you are interested in doing something in your area, let everyone know and make it happen! Meetups are a great way to make new machining friends and get hands on help in your area. Don’t be shy, sign up and come, or plan your own meetup!
You are using an out of date browser. It may not display this or other websites correctly.
You should upgrade or use an alternative browser.
You should upgrade or use an alternative browser.
What's Paul up to?
- Thread starter PaulL
- Start date
DPittman
Ultra Member
So I've got all led lighting in my shop of a few different styles. When I installed my first one I thought what an improvement (and it was, lighting wise and power consumption) but the after a couple of years I figured I needed to put in a few more strips. So I did.Yes, it's all LED. What a difference! My woodshop still has old-school fluorescents, and they are on the list to change out the next time I see the LED ones on sale.
Recently I thought things in my shop were getting harder to see just because of my aging eyes. I just replaced some of the leds with a different style led and it's an improvement again. After a bit of research I find that leds do get dimmer over time, so its not just my eyesight.
My suggestions when retrofitting for Leds is to either put in more than you initially need or plan to allow for additional lights if and when needed.
Yes. Cheaper LEDs do get dimmer. Sometimes really quickly. When I was developing this LED lamp fixture I was given a bag of white LEDs to use. For the first month I thought maybe there was something wrong with my circuit and it was spiking the LEDs damaging them. Didn't matter. Even the new improved circuit didn't help. Over a month they had gone to half intensity.Recently I thought things in my shop were getting harder to see just because of my aging eyes. I just replaced some of the leds with a different style led and it's an improvement again. After a bit of research I find that leds do get dimmer over time, so its not just my eyesight.
My suggestions when retrofitting for Leds is to either put in more than you initially need or plan to allow for additional lights if and when needed.

Then I was given a bag of way more expensive NICHIA LEDs and tried them on the new improved circuit.

They were way way brighter and didn't go dimmer after a month of 24/7 operation so those are what we put into service.
That was summer 2009. Figure at least 8 hours per night and 24/7 this summer that will be almost 41,000 hours.

So don't go cheap on LED lights I guess. Although I suspect the technology has improved in 14 years.
DPittman
Ultra Member
It's hard to know quality sometimes. My brother just replaced outdoor porch light led fixtures that had burned out. I believe they were about $100 a piece and the led light was non replaceable as it was integrated in the fixture itself. The manufacturer label stated something like 27 year/30000 life span. These lights my brother replaced had a 2020 year manufacturer date on them.Yes. Cheaper LEDs do get dimmer. Sometimes really quickly. When I was developing this LED lamp fixture I was given a bag of white LEDs to use. For the first month I thought maybe there was something wrong with my circuit and it was spiking the LEDs damaging them. Didn't matter. Even the new improved circuit didn't help. Over a month they had gone to half intensity.
View attachment 32460
Then I was given a bag of way more expensive NICHIA LEDs and tried them on the new improved circuit.
View attachment 32461
They were way way brighter and didn't go dimmer after a month of 24/7 operation so those are what we put into service.
That was summer 2009. Figure at least 8 hours per night and 24/7 this summer that will be almost 41,000 hours.
View attachment 32462
So don't go cheap on LED lights I guess. Although I suspect the technology has improved in 14 years.
The first set of very expensive Philips LED bulbs we put in our renovated kitchen claimed 10 year life or about $2.50 per year.It's hard to know quality sometimes. My brother just replaced outdoor porch light led fixtures that had burned out. I believe they were about $100 a piece and the led light was non replaceable as it was integrated in the fixture itself. The manufacturer label stated something like 27 year/30000 life span. These lights my brother replaced had a 2020 year manufacturer date on them.
They were all gone in less than 3 years.
The up side though was I complained to Philips. They gave me two coupons for a total of 4 lamps. Equivalent to about $100. With that I bought different LED lamps that have lasted much longer. I did a postmortem on the broken lamps and found in all cases the soldering had separated. Poor manufacturing I guess considering much of the body of the lamp was metal heat sink.The first set of very expensive Philips LED bulbs we put in our renovated kitchen claimed 10 year life or about $2.50 per year.
They were all gone in less than 3 years.
The ones I bought from a local commercial lighting supplier were $40 each. I looked at Amazon, they were cheap but lots of reviews with bulbs going dead in a short time or being delivered in multiple extra pieces. At least buying local I can go have a chat with them if things go awry.
Here's the back of the machine:Maybe I missed it but how do you index that unit to different angles?


A decent morning in the shop. I'm still learning how to square up to tolerances. I have some castings (the Hemingway Kits George Thomas dividing head) that I need to true up.
So I went to work this morning on squaring some angle blocks. I'm reasonably happy with the result, though it's clear that either my vise or my mill's nod are giving me a bit of error:

I've been running these by clamping the block directly to the table to mill the L-shaped "top" surfaces:

That lets me easily shim under the back side to bring a previously milled face plumb by sweeping an indicator vertically in the mill spindle. Once I have the L-shaped face, I do the opposite face in the vise, indicating it in similarly.
The "vice" faces come out just about 0.5 thou out per inch of Y travel. I'll figure that out the next time I pull the vise off and back on. For now, this one is accurate enough to start drilling mounting holes to help machine its bigger cousin. It should be easier to manage shims between the two plates than between the plate and the vise bed.
So I went to work this morning on squaring some angle blocks. I'm reasonably happy with the result, though it's clear that either my vise or my mill's nod are giving me a bit of error:
I've been running these by clamping the block directly to the table to mill the L-shaped "top" surfaces:
That lets me easily shim under the back side to bring a previously milled face plumb by sweeping an indicator vertically in the mill spindle. Once I have the L-shaped face, I do the opposite face in the vise, indicating it in similarly.
The "vice" faces come out just about 0.5 thou out per inch of Y travel. I'll figure that out the next time I pull the vise off and back on. For now, this one is accurate enough to start drilling mounting holes to help machine its bigger cousin. It should be easier to manage shims between the two plates than between the plate and the vise bed.
Had a bit of fun in the shop over the last few evenings. My friend Matt who comes by for workshop wednesdays has been working on some home-built machines. This time he showed up at the shop with a DC motor and its control board from some 25 year old treadmill he found by the side of the road. (Why do I have these indelicate electronics on my metal bench? I just noticed now. I plead idiocy.)
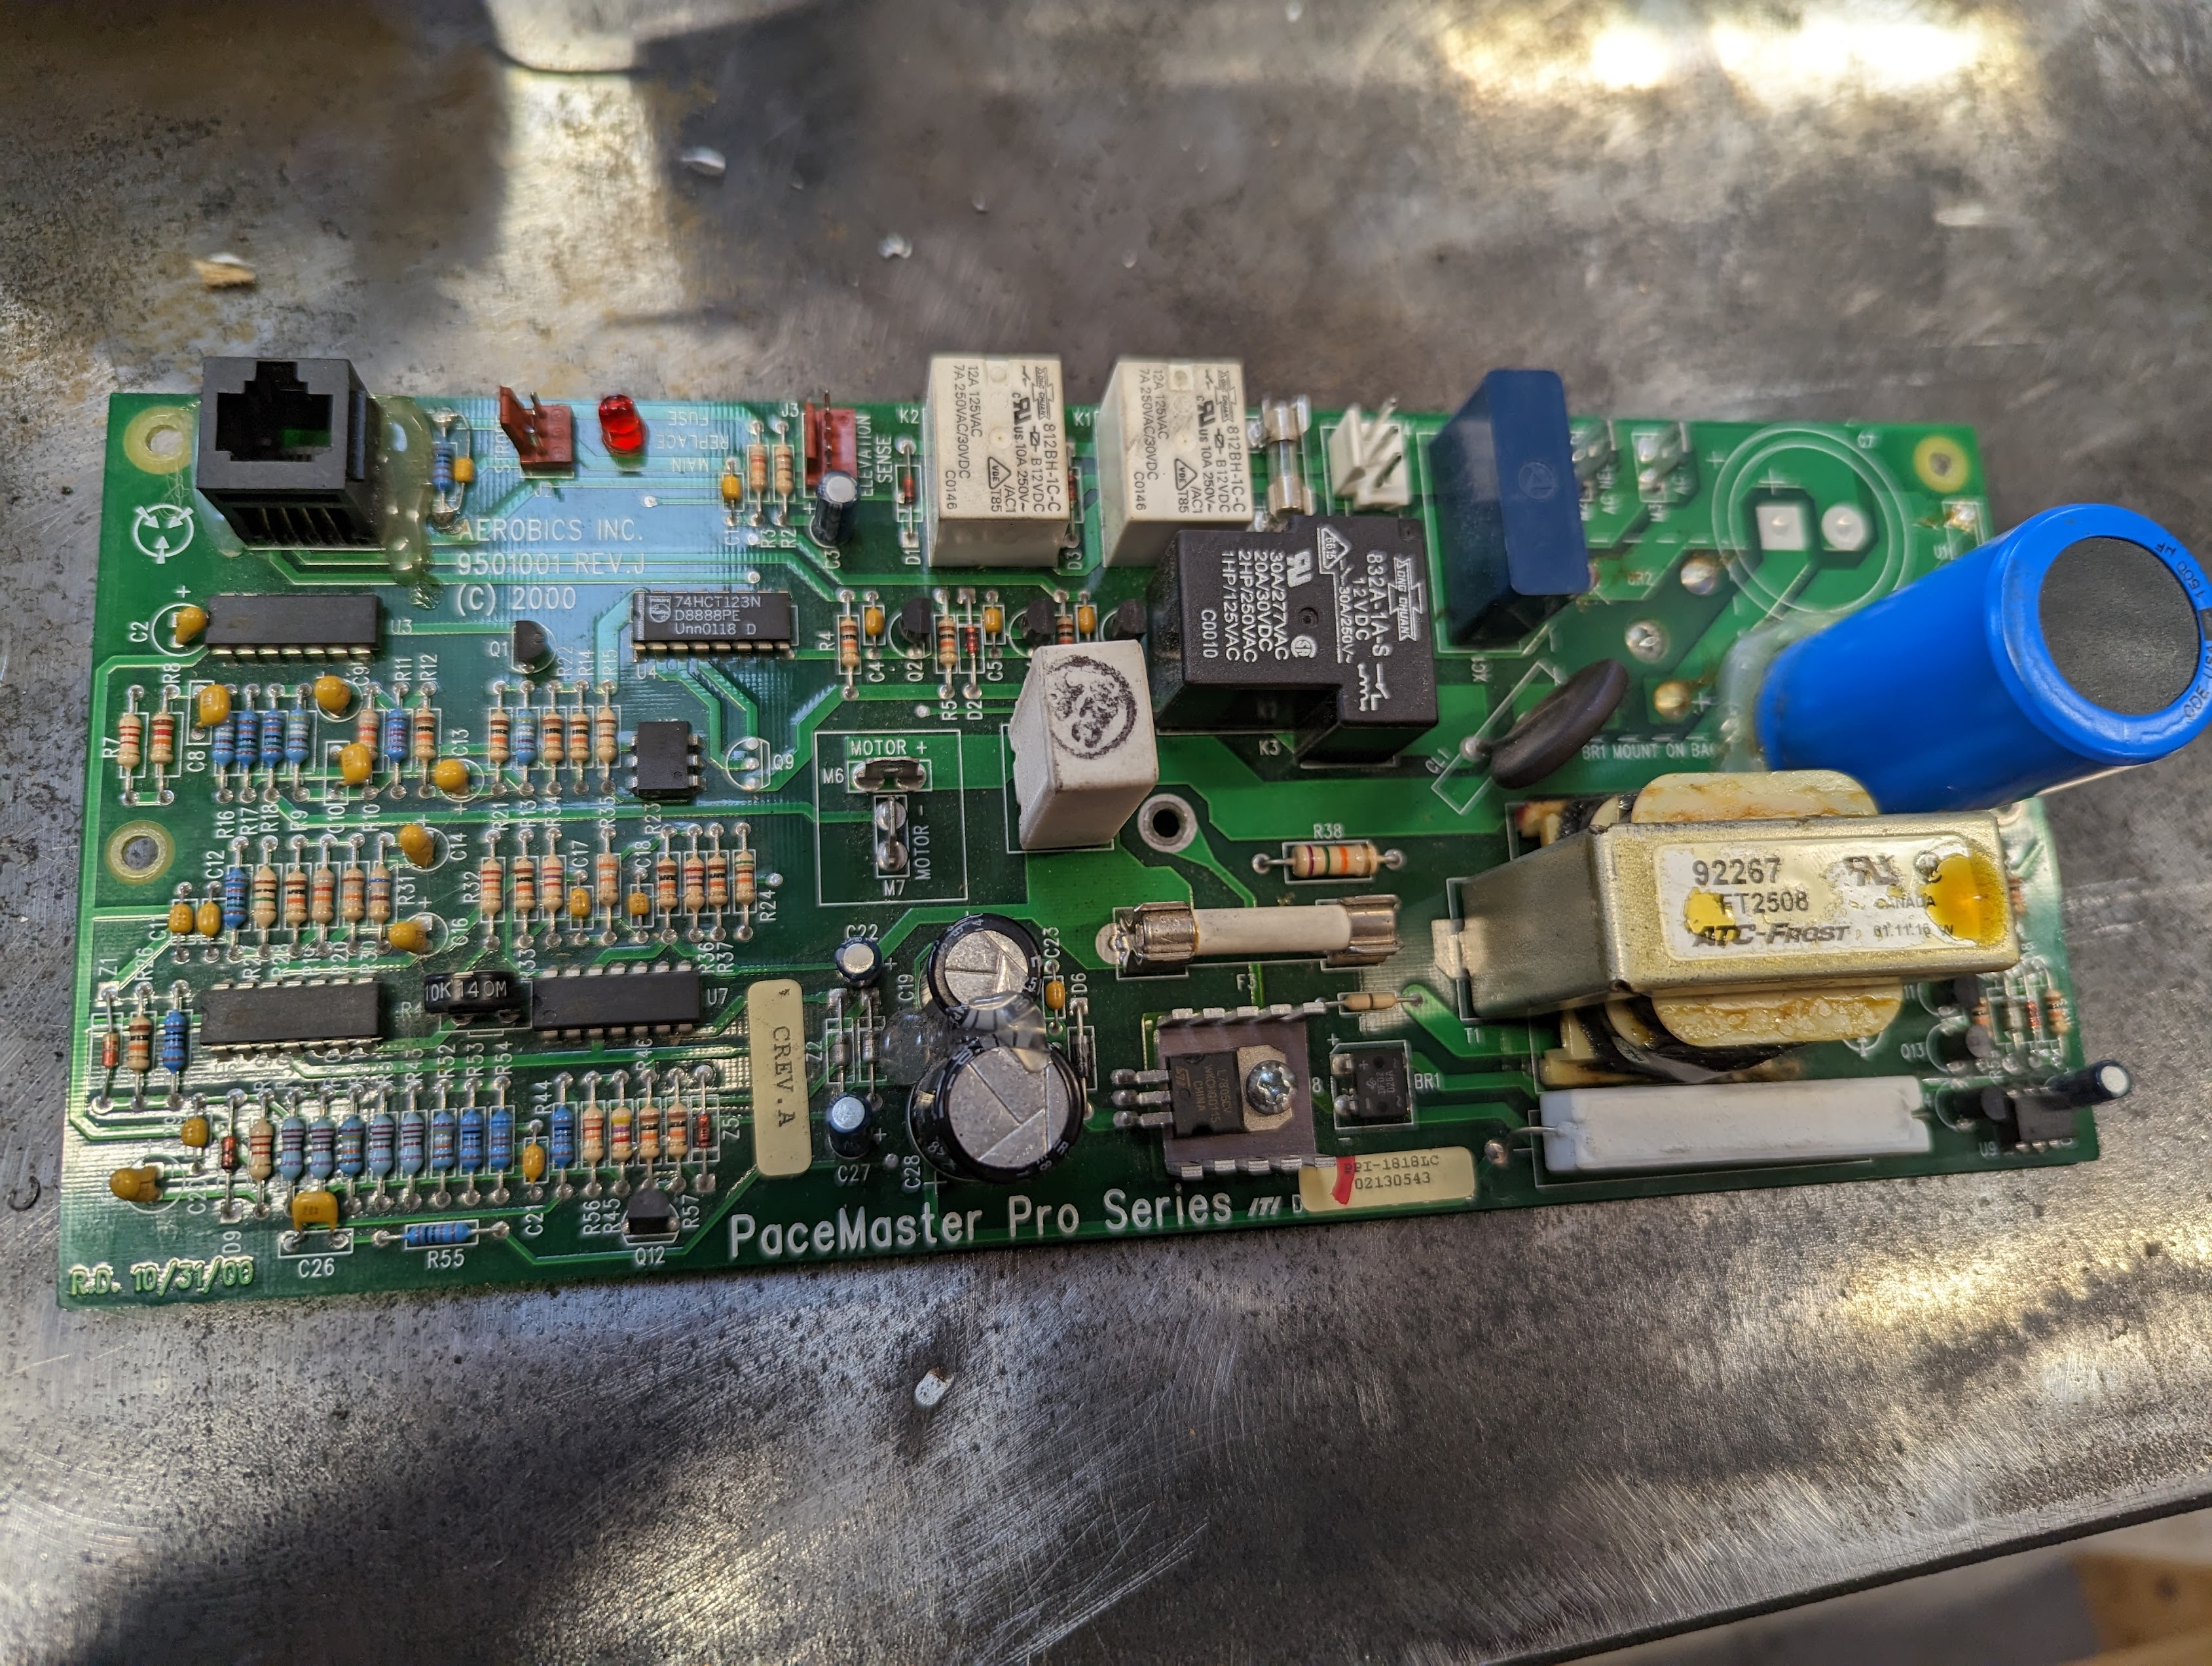
What an ugly thing. The good news is that the motor connection is right there in the middle of the board. And it's old enough that it's probably simple to reverse engineer enough to get some signal out.
The "digital" end, such as it is, is a PWM generator - theres a chip in there that takes a voltage level and turns it into a PWM signal, which is then conditioned somehow through all the goo on left. So that means there's a power transistor somewhere switching the DC power.
And there it is, dangling on the right with its three terminals.

And oddly, it's connected to this funny little island of logic. Why, there at the very bottom is that little 6-legged package that claims to be an opto-isolator! They've separated the PWM generation end of the board from the power end! That's a blessing for doing this job - I don't need to start chopping a pile of traces to isolate the PWM driving. And it means I can connect my own Arduino-based PWM signal to *just* that opto-isolator. So I wired it up with aligator clips, with a potentiometer on the Arduino to control the PWM, and...Nothing.
So more digging. Turns out, of course, there's a big relay (the big black block in the middle of the board) that needs to be controlled to turn on the DC power. And I figured this board was simple enough that one of the lines on the RJ-45 connector would control the relay, and yeah. First try poking a ground wire at the connector found the line, and there was even a handy pad to wire to ground to pull the relay open. Win. And now the motor runs, and varies speed with the potentiometer.
A bit of tidying left to do, but there's a few good places to tie the opto-isolator lines to the board, and it's getting less ugly. I was even able to power the Arduino off the 5V regulator they used for the digital end of the board.
I'll get some shots again when Matt gets all this mounted tidily in a case.
What an ugly thing. The good news is that the motor connection is right there in the middle of the board. And it's old enough that it's probably simple to reverse engineer enough to get some signal out.
The "digital" end, such as it is, is a PWM generator - theres a chip in there that takes a voltage level and turns it into a PWM signal, which is then conditioned somehow through all the goo on left. So that means there's a power transistor somewhere switching the DC power.
And there it is, dangling on the right with its three terminals.
And oddly, it's connected to this funny little island of logic. Why, there at the very bottom is that little 6-legged package that claims to be an opto-isolator! They've separated the PWM generation end of the board from the power end! That's a blessing for doing this job - I don't need to start chopping a pile of traces to isolate the PWM driving. And it means I can connect my own Arduino-based PWM signal to *just* that opto-isolator. So I wired it up with aligator clips, with a potentiometer on the Arduino to control the PWM, and...Nothing.
So more digging. Turns out, of course, there's a big relay (the big black block in the middle of the board) that needs to be controlled to turn on the DC power. And I figured this board was simple enough that one of the lines on the RJ-45 connector would control the relay, and yeah. First try poking a ground wire at the connector found the line, and there was even a handy pad to wire to ground to pull the relay open. Win. And now the motor runs, and varies speed with the potentiometer.
A bit of tidying left to do, but there's a few good places to tie the opto-isolator lines to the board, and it's getting less ugly. I was even able to power the Arduino off the 5V regulator they used for the digital end of the board.
I'll get some shots again when Matt gets all this mounted tidily in a case.
I wish this was an update about my lathe DRO install, but instead it's another episode of "do stupid things, win stupid prizes!" It appears that I won no prizes, however.
This is "Step 8. Turn the trailer over." I have no idea how this is supposed to be done.
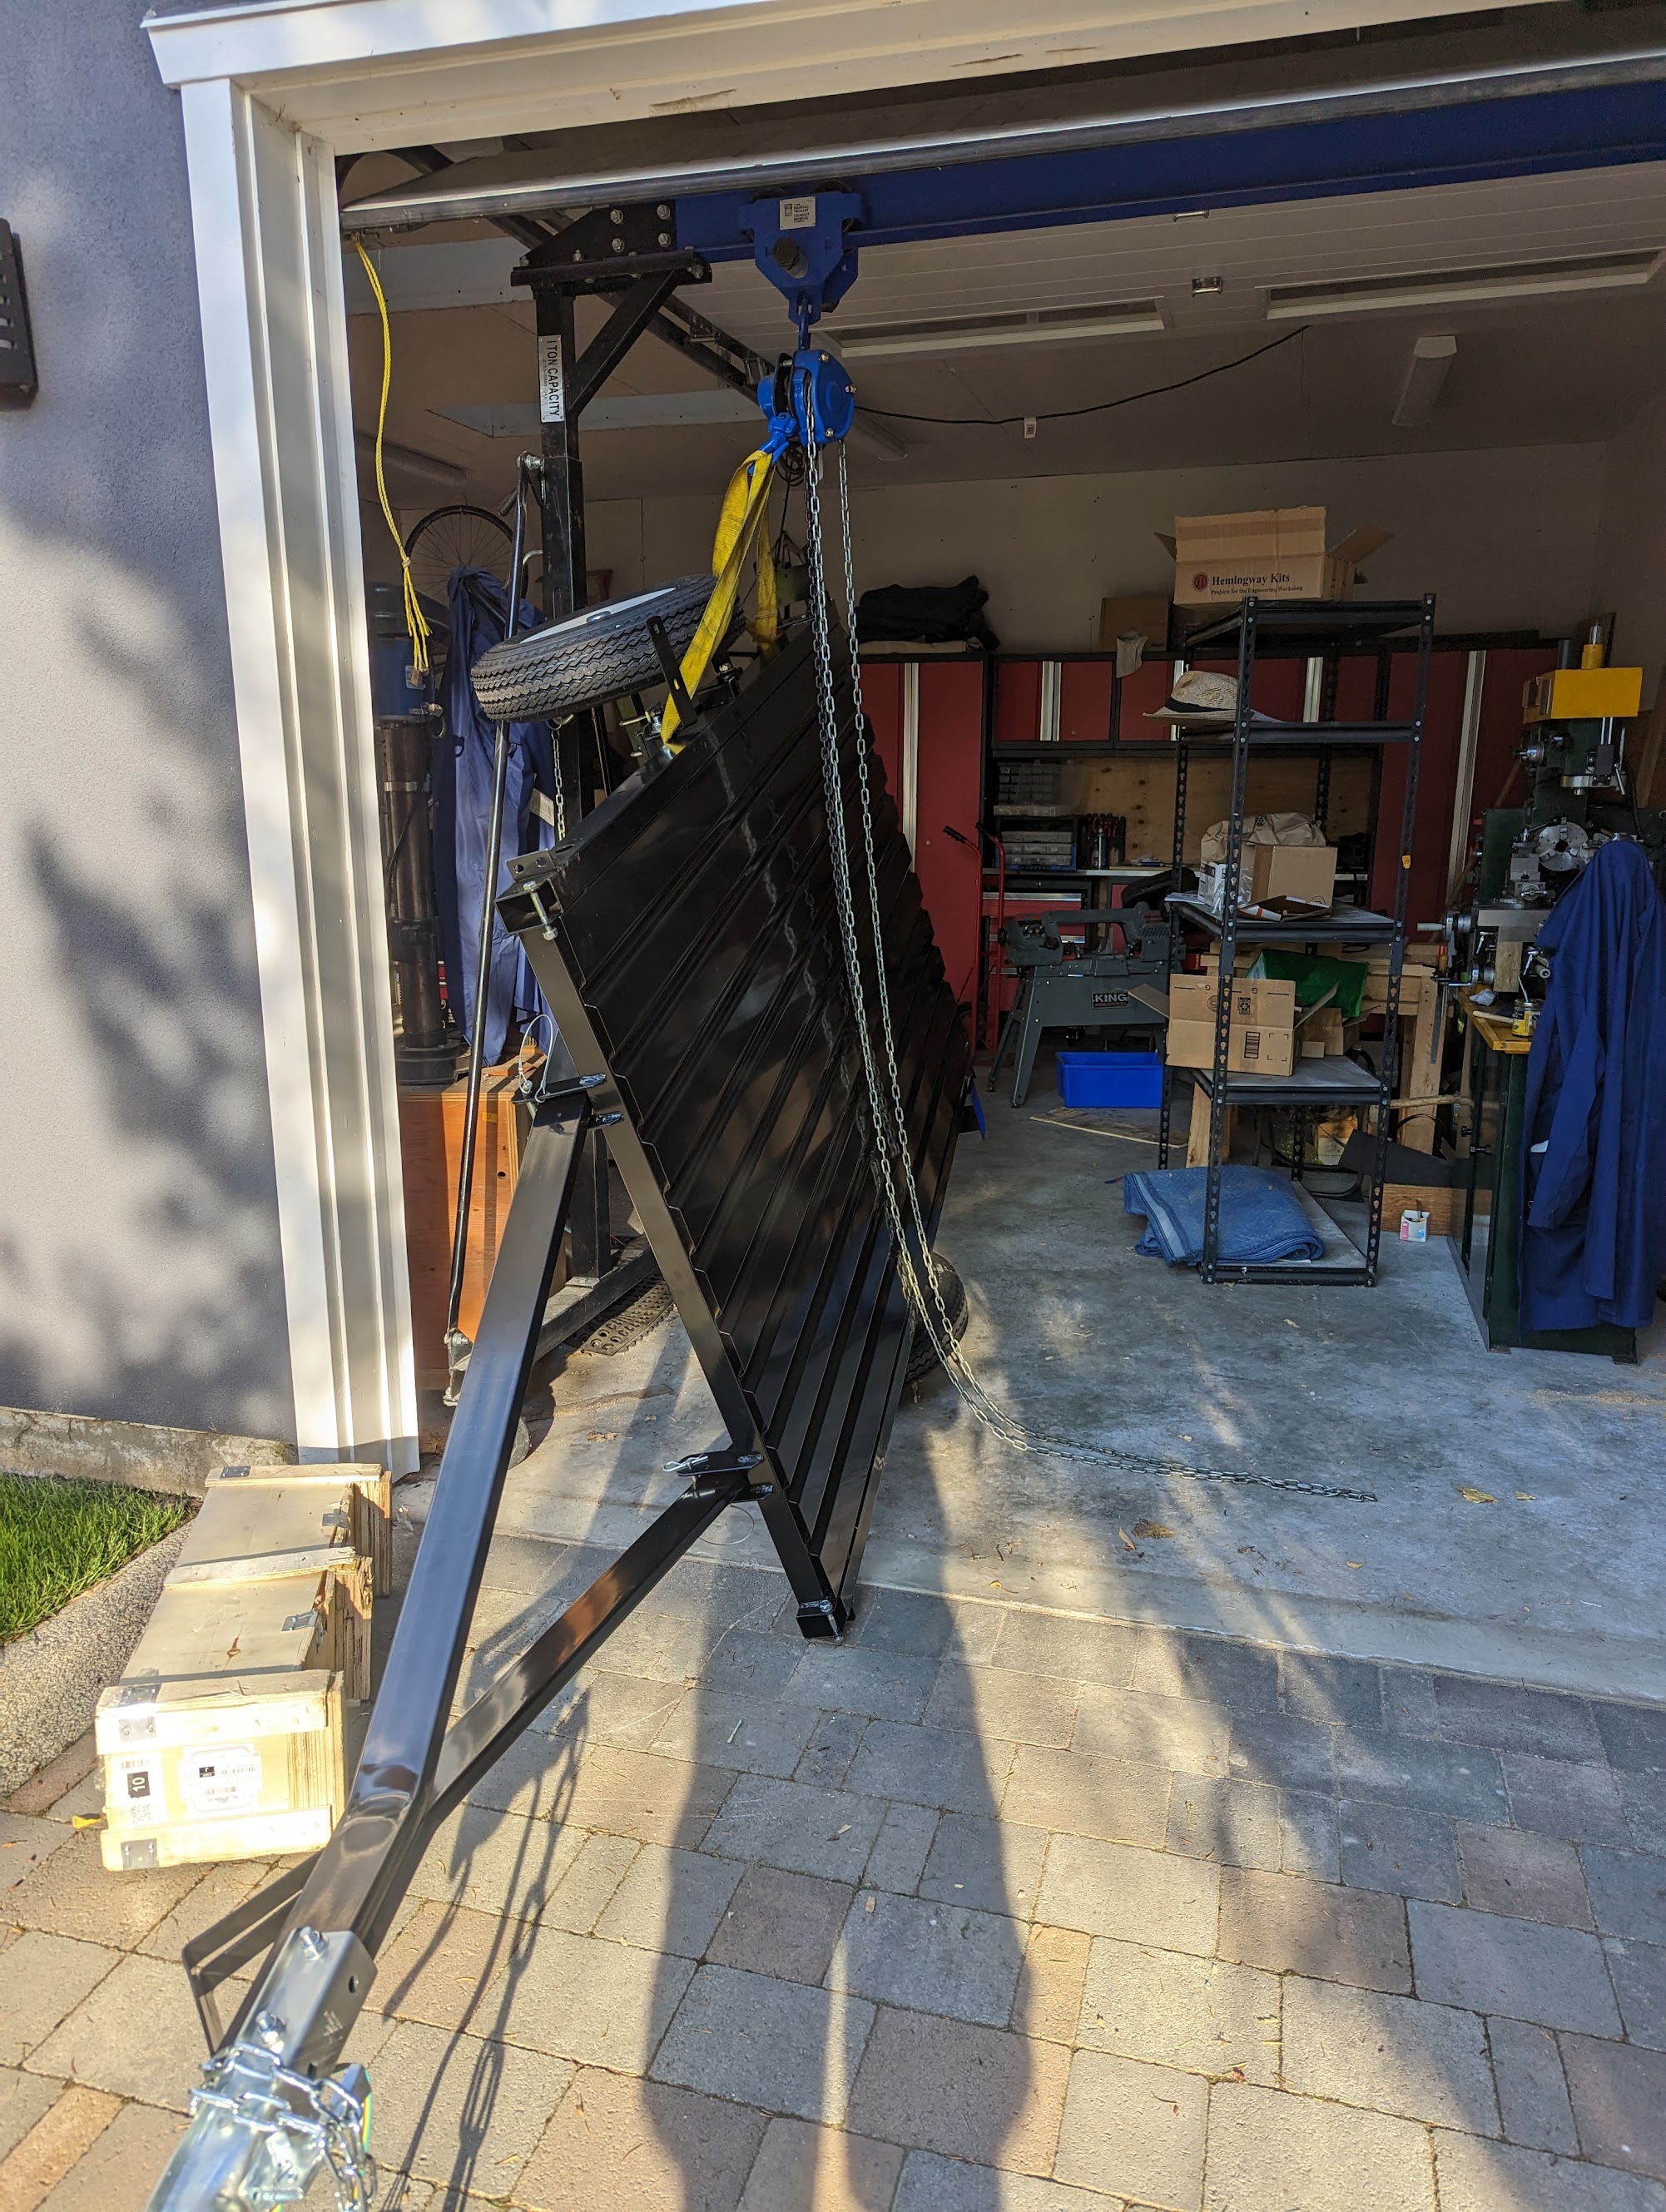
And step 8.5: On the way back down:
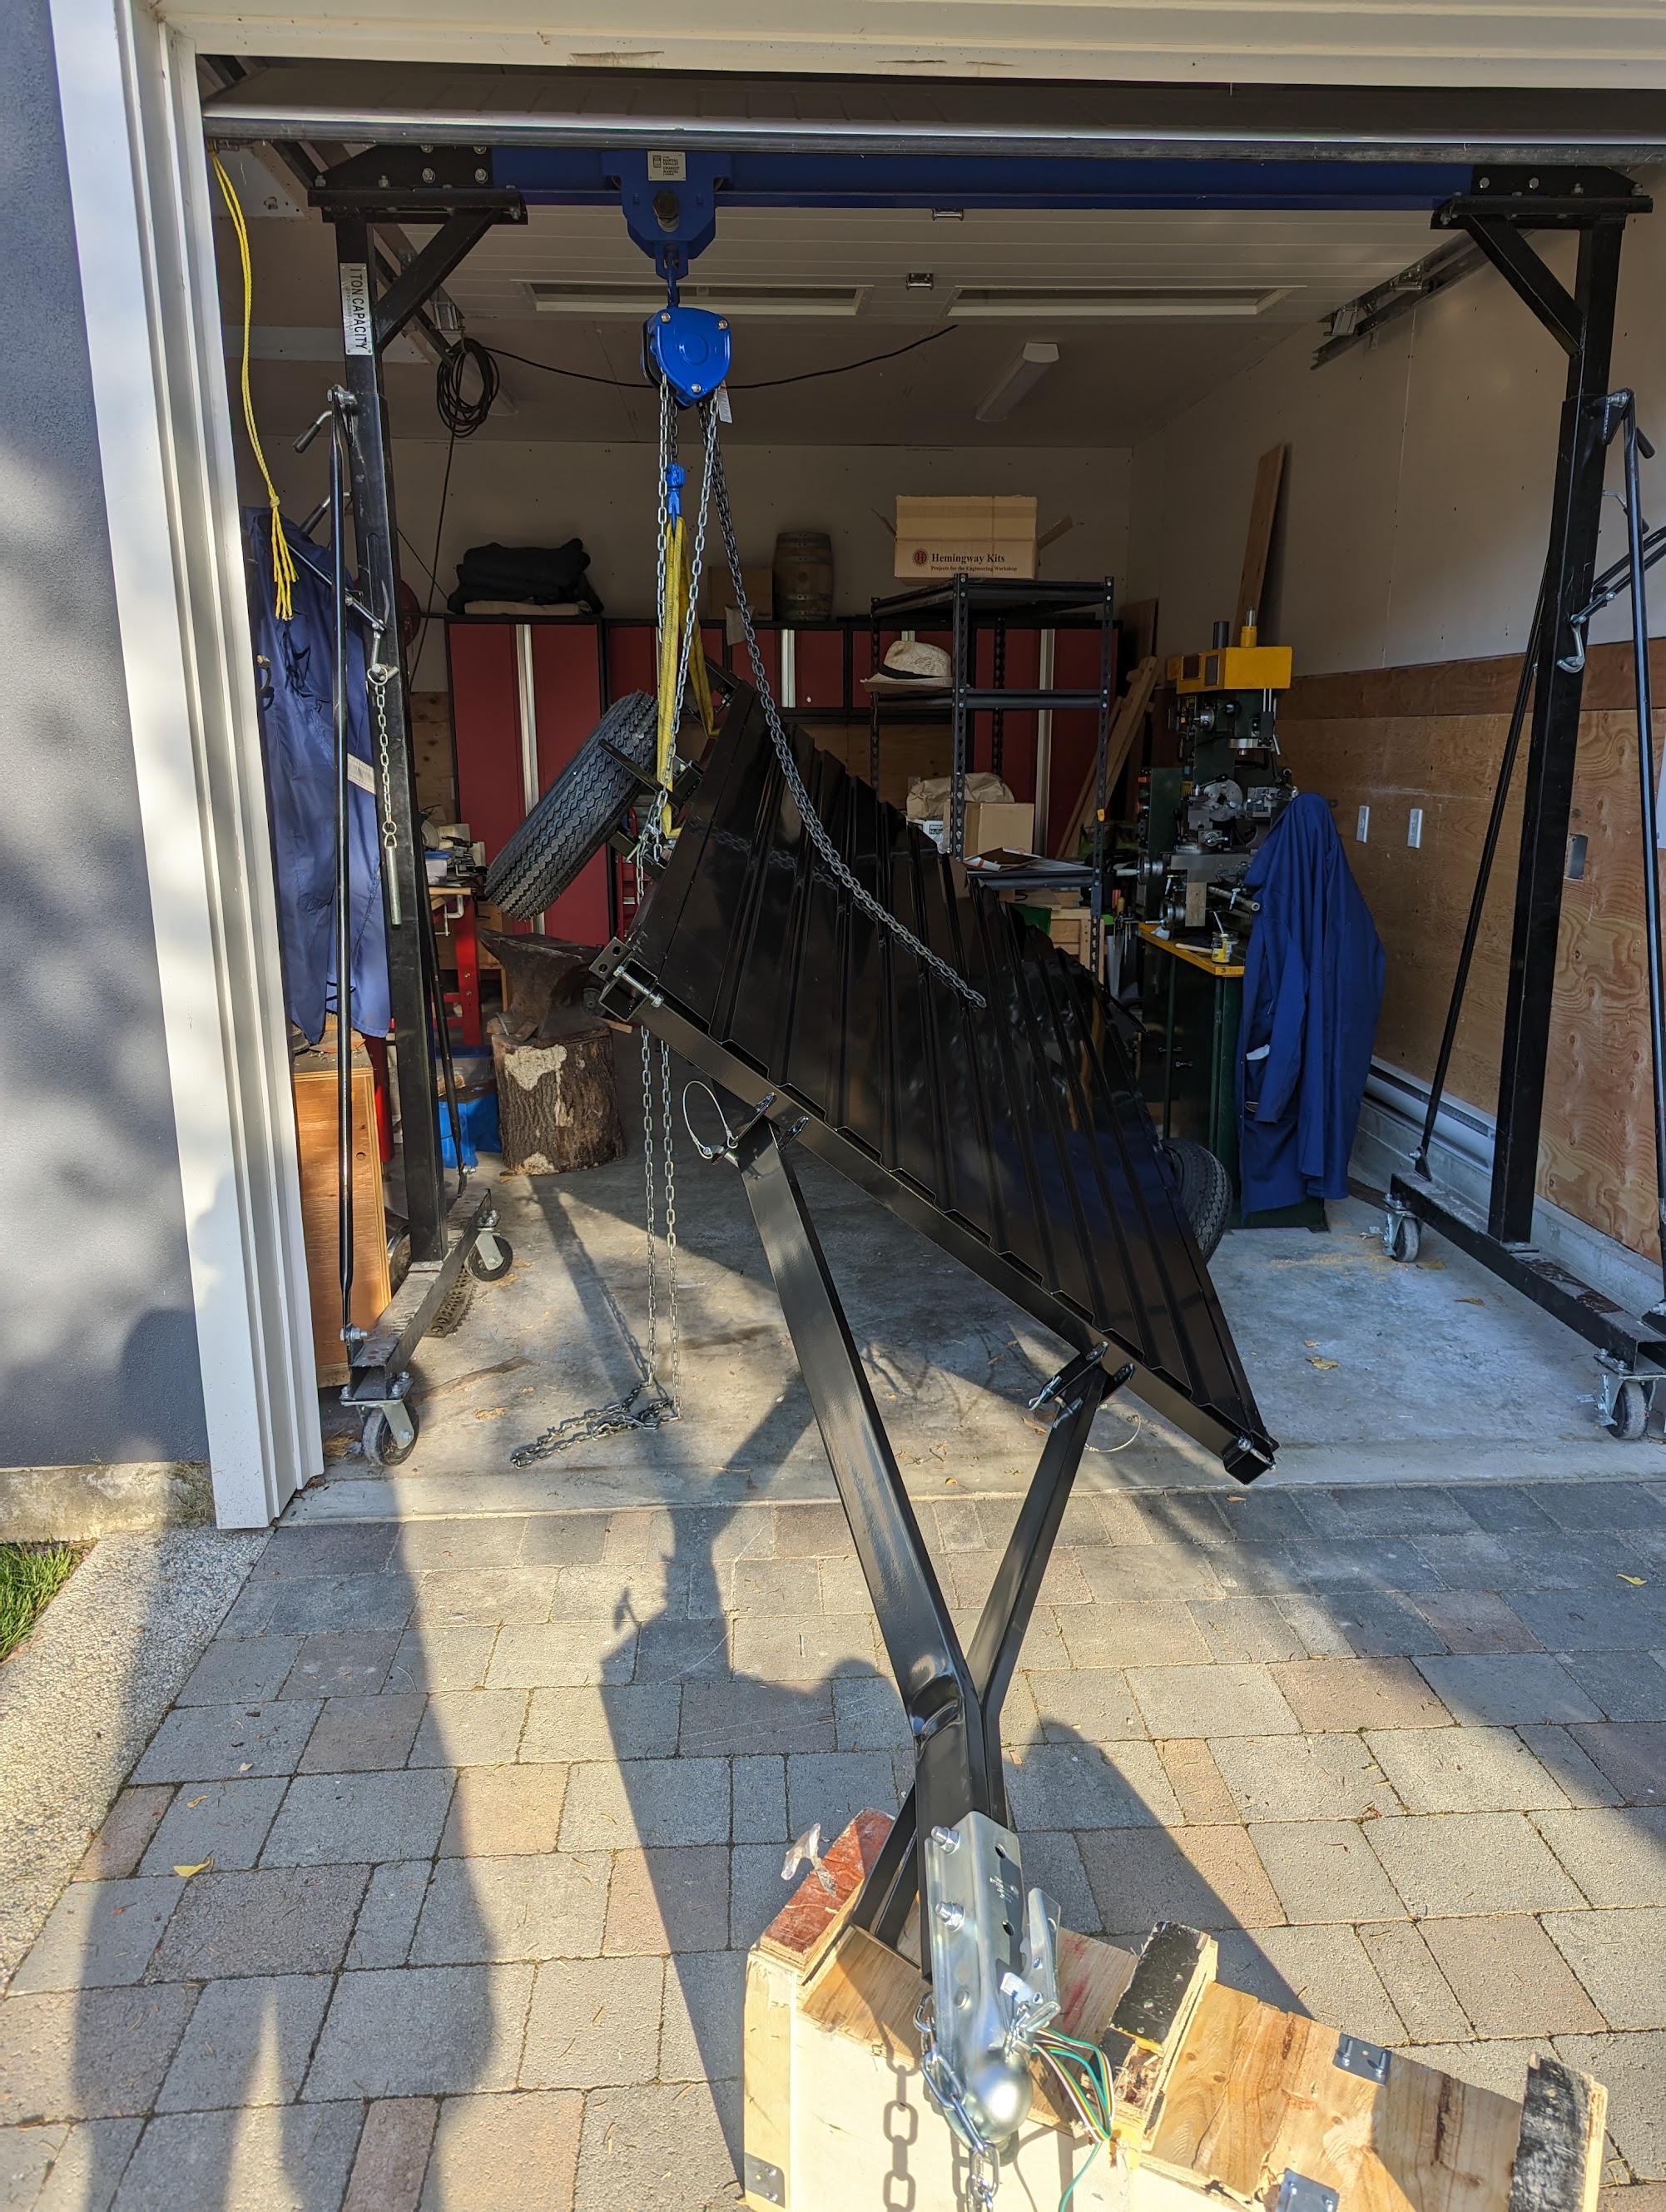
Only a bit of paint was damaged in righting this trailer.
This is "Step 8. Turn the trailer over." I have no idea how this is supposed to be done.
And step 8.5: On the way back down:
Only a bit of paint was damaged in righting this trailer.
why turn trailer over?This is "Step 8. Turn the trailer over." I have no idea how this is supposed to be done.
And step 8.5: On the way back down:
Only a bit of paint was damaged in righting this trailer.
The assembly instructions start with it upside down so you can bolt on the springs and axle. It's all simple except that one step. I don't even know how two men could do it safely.why turn trailer over?
Did the instructions state that the wheels should go on before it's turned over?The assembly instructions start with it upside down so you can bolt on the springs and axle. It's all simple except that one step. I don't even know how two men could do it safely.
Yes, quite explicitly.Did the instructions state that the wheels should go on before it's turned over?
Only a bit of paint was damaged in righting this trailer.
In my opinion, you did it ok.
I have to flip lots of stuff to service it. Perhaps the worst one being a Bush Hog (Deere rotary cutter) - that I have to flip 90 degrees to service the blades and stump jumper. (I should actually post on here about that issue cuz I could use the advice and knowledge of the members. But that will be another thread)
I typically use straps because chains do too much damage and I use my loader tractor instead of a chain fall. It's prolly best done with a car body rotary fixture, but very few of us have access to something like that.
I don't worry about paint damage much, but for those who do, you could either jack up one side and put a dolly under it before lifting the other, or mount a pivot at the front and rear centers and lift from there. One guy can do it, but two would be a hundred times easier and the ongoing debate would be way more fun!
Yeah, at the cabin this would have totally been a job for the loader. In the city, not so much.I typically use straps because chains do too much damage and I use my loader tractor instead of a chain fall.
Anyhow, this little trailer will let me get some much needed supplies to the island - deer fencing, a new anvil, a little lathe if I can find one - and get my years of accumulated debris hauled away from the cabin to the local landfill. Each back-and-forth is a barge run, but the little trailer can fit on otherwise full barges, unlike a vehicle.

This followed me home today:

It's at the very limits of what my little tractor's loader could curl and drag back from my neighbor's place. The scalloped angles, salvaged from I don't know what, are 1/2". The whole thing must weigh about 800lbs. I figure it will hold my larger leg vise just fine once I cut the legs to the right length.
It's at the very limits of what my little tractor's loader could curl and drag back from my neighbor's place. The scalloped angles, salvaged from I don't know what, are 1/2". The whole thing must weigh about 800lbs. I figure it will hold my larger leg vise just fine once I cut the legs to the right length.