-
Scam Alert. Members are reminded to NOT send money to buy anything. Don't buy things remote and have it shipped - go get it yourself, pay in person, and take your equipment with you. Scammers have burned people on this forum. Urgency, secrecy, excuses, selling for friend, newish members, FUD, are RED FLAGS. A video conference call is not adequate assurance. Face to face interactions are required. Please report suspicions to the forum admins. Stay Safe - anyone can get scammed.
-
Several Regions have held meetups already, but others are being planned or are evaluating the interest. The Calgary Area Meetup is set for Saturday July 12th at 10am. The signup thread is here! Arbutus has also explored interest in a Fraser Valley meetup but it seems members either missed his thread or had other plans. Let him know if you are interested in a meetup later in the year by posting here! Slowpoke is trying to pull together an Ottawa area meetup later this summer. No date has been selected yet, so let him know if you are interested here! We are not aware of any other meetups being planned this year. If you are interested in doing something in your area, let everyone know and make it happen! Meetups are a great way to make new machining friends and get hands on help in your area. Don’t be shy, sign up and come, or plan your own meetup!
You are using an out of date browser. It may not display this or other websites correctly.
You should upgrade or use an alternative browser.
You should upgrade or use an alternative browser.
Schematics and Circuit Board layout with Fusion 360
- Thread starter Tomc938
- Start date
Tomc938
Ultra Member
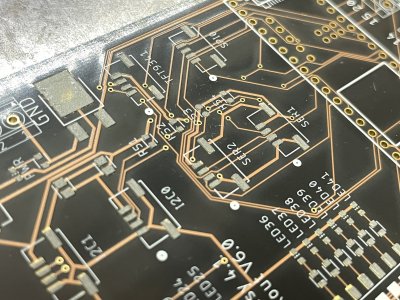
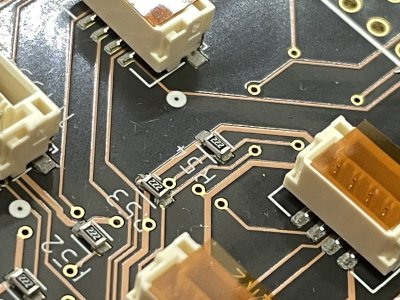
So I'm currently in a holding pattern. @slow-poke designed an awesome board layout and I've sent the files off to be manufactured. I ordered the SMT components from Digikey and they arrived a couple of days ago. Man, some of them are small!! Here's some of the resistors:
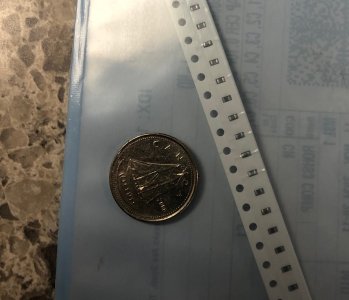
I ordered the plugs and headers from Aliexpress as they were significantly cheaper, and harder to screw up.
I'm waiting for everything to arrive so I can start to put things together. I don't think anything is Canada Post, so hopefully the strike won't be an issue.
In the meantime, I will be making a much smaller tip for my soldering station, continuing to install the power X feed on my mill, fixing the ABS on my truck (when it's not raining) and all the other things on the honey-do list. Fun and full days!
I have a set of tiny tweezers and I wear a magnifier headset to do surface mount. But my eyes and my hands are not the best. I also have a small holder that basically acts like a third hand ir i guess like a third pin. lol. I use 3m solder paste, cant remember which one of the top of my head. Do you have a rework heat gun? You will need an anti static mat as well, the last thing you want is to have components jumping off the board. Do you have a solder mask on order as well. Helps a lot but it can be a bit of work to flow the whole board. I think the hardest part of first doing solder paste is making sure to watch for the solder flow and not worry to much about the heat. You don't want to melt the parts but they do get hot. Lots of vids on ytub.
Here are some links I hope you find helpful. Smd is a bit of a different beast then through hole but once you have the stuff for very little out take and a little technique it is 100 times better.
Paste I got but we bought it from one of the suppliers. Amazon link below..
https://www.amazon.ca/gp/product/B075ZV9D2S/ref=ppx_yo_dt_b_search_asin_title?ie=UTF8&th=1
Rework stations I got for work. They were to be a stop gap till we got a better Hakko station, but we never did we just used these and they worked well.
This is the 3rd pin hand hold down thingy. A little printing, I used petg, a pen spring, a screw and a cut off sowing needle. It does help.

 www.thingiverse.com
Simple tray I use for my hobby stuff, small screws, smd stuff.

 www.thingiverse.com
Magnifiers similar to these, but the ones I have are no longer available.
The tweezers I have are different but similar to these ones. Metal tweezers act like big heat sinks so you don't want to use regular ones.
Here are some links I hope you find helpful. Smd is a bit of a different beast then through hole but once you have the stuff for very little out take and a little technique it is 100 times better.
Paste I got but we bought it from one of the suppliers. Amazon link below..
https://www.amazon.ca/gp/product/B075ZV9D2S/ref=ppx_yo_dt_b_search_asin_title?ie=UTF8&th=1
Rework stations I got for work. They were to be a stop gap till we got a better Hakko station, but we never did we just used these and they worked well.
This is the 3rd pin hand hold down thingy. A little printing, I used petg, a pen spring, a screw and a cut off sowing needle. It does help.

Third hand solder SMD by pcharvet
This small assembly makes it possible to maintain a SMD component plated on the printed circuit while it is soldered.To realize this assembly, it is necessary, in addition to two parts printed in 3D:A small spring: I got it on an old clothespinA needle: type “needle smd” into a search engine.M4...

Simple customizeable SMD parts tray by bbales
Organize your parts in this tray before soldering. You can customize the number of rows, columns and the depth of the boxes.
The tweezers I have are different but similar to these ones. Metal tweezers act like big heat sinks so you don't want to use regular ones.
This is the most important list. Happy wife is a happy life.In the meantime, I will be making a much smaller tip for my soldering station, continuing to install the power X feed on my mill, fixing the ABS on my truck (when it's not raining) and all the other things on the honey-do list. Fun and full days!
slow-poke
Ultra Member
I solder simple boards like this by hand, forget the solder paste and stencil. Probably take 20 minutes.
Magnifying goggles and tweezers are a must at this point for me. If you do get the magnifying goggles, avoid the ones with too much magnification.
I put a blob of solder on one pad of each component to start. Next with component in tweezers and soldering iron in the other hand, warm the blob and position the component, once positioned wait a couple of seconds to cool and then solder the other pad(s)
IIRC there is only about 30 SMT components to solder.
I think my magnifiers are 1.5times or maybe 2. I tried using a regular soldering iron this way, I was not very successful, but I don't think I have a steady enough hand for it. Reason why I use the paste and the heat gun. I printed a solder paste dispenser thing. I will look for it makes using the syringe easily. I do Also the heat gun has been a really great tool for smoothing 3d prints and heat shrink. I do agree that the tweezers are a must. This helped alot. I tried using regular hobby ones I had for a long time and found out they were working like small heat sinks.I solder simple boards like this by hand, forget the solder paste and stencil. Probably take 20 minutes.
Magnifying goggles and tweezers are a must at this point for me. If you do get the magnifying goggles, avoid the ones with too much magnification.
I put a blob of solder on one pad of each component to start. Next with component in tweezers and soldering iron in the other hand, warm the blob and position the component, once positioned wait a couple of seconds to cool and then solder the other pad(s)
IIRC there is only about 30 SMT components to solder.
I also use one of these for holding my pcb's. I do miss the panavises we had at work but I can't justify buying one for home.
Tomc938
Ultra Member
Thanks for the tip on the holder - I'm going to print one up tomorrow. I was wondering about that part of things.I have a set of tiny tweezers and I wear a magnifier headset to do surface mount. But my eyes and my hands are not the best. I also have a small holder that basically acts like a third hand ir i guess like a third pin. lol. I use 3m solder paste, cant remember which one of the top of my head. Do you have a rework heat gun? You will need an anti static mat as well, the last thing you want is to have components jumping off the board. Do you have a solder mask on order as well. Helps a lot but it can be a bit of work to flow the whole board. I think the hardest part of first doing solder paste is making sure to watch for the solder flow and not worry to much about the heat. You don't want to melt the parts but they do get hot. Lots of vids on ytub.
Here are some links I hope you find helpful. Smd is a bit of a different beast then through hole but once you have the stuff for very little out take and a little technique it is 100 times better.
Paste I got but we bought it from one of the suppliers. Amazon link below..
https://www.amazon.ca/gp/product/B075ZV9D2S/ref=ppx_yo_dt_b_search_asin_title?ie=UTF8&th=1
Rework stations I got for work. They were to be a stop gap till we got a better Hakko station, but we never did we just used these and they worked well.
This is the 3rd pin hand hold down thingy. A little printing, I used petg, a pen spring, a screw and a cut off sowing needle. It does help.
Simple tray I use for my hobby stuff, small screws, smd stuff.
Third hand solder SMD by pcharvet
This small assembly makes it possible to maintain a SMD component plated on the printed circuit while it is soldered.To realize this assembly, it is necessary, in addition to two parts printed in 3D:A small spring: I got it on an old clothespinA needle: type “needle smd” into a search engine.M4...www.thingiverse.com
Magnifiers similar to these, but the ones I have are no longer available.
Simple customizeable SMD parts tray by bbales
Organize your parts in this tray before soldering. You can customize the number of rows, columns and the depth of the boxes.www.thingiverse.com
The tweezers I have are different but similar to these ones. Metal tweezers act like big heat sinks so you don't want to use regular ones.
And my wife got me those magnifiers for work in the shop a year or two ago for Christmas so I'm set there. I also have a good light, that I find I need more and more.
I'm going to give hand soldering a try. I have done some, and if I was my teacher, I would give me a 70%. I think the connections would all work, but a few were not too pretty.
I ordered a few SMD kits from Ali for practice. Hopefully they are not being handled by Canada Post. There are about 300 connections in total, so I should be pretty good by the time I build them. And the $10-12 spent will be well worth it.
Tomc938
Ultra Member
Thanks for the "one blob" hint. I'll be sure to give it a try.I solder simple boards like this by hand, forget the solder paste and stencil. Probably take 20 minutes.
Magnifying goggles and tweezers are a must at this point for me. If you do get the magnifying goggles, avoid the ones with too much magnification.
I put a blob of solder on one pad of each component to start. Next with component in tweezers and soldering iron in the other hand, warm the blob and position the component, once positioned wait a couple of seconds to cool and then solder the other pad(s)
IIRC there is only about 30 SMT components to solder.
I'm looking forward to the challenge. With the strike, I might be waiting for some parts for a bit. But once the boards arrive (They are DHL delivery) I can do the surface mount.
The times I've done smd's I have had the best luck doing what @slow-poke does, melt a blob on the pads, place the part, and melt it into the blob
Blob being a relative term....really just enough to make the pad raised with solder
seems to work reasonably well, but I would like to try paste at some point
Blob being a relative term....really just enough to make the pad raised with solder
seems to work reasonably well, but I would like to try paste at some point
I did a pile of prototypes a while back with 0402 components. Squeeze some solder paste onto a toothpick, drop it on the pads, place the component with clean tweezers, repeat. Then drop the whole thing onto a hot plate (I have a scrap pan I use on a cooktop) until the paste flows. Sometimes you have to poke a component or two while they are floating to have them suck down in the right place.The times I've done smd's I have had the best luck doing what @slow-poke does, melt a blob on the pads, place the part, and melt it into the blob
Blob being a relative term....really just enough to make the pad raised with solder
seems to work reasonably well, but I would like to try paste at some point
I just might just have to try these. I think I've tested 4 AliExpress specials so far, still not entirely happy. Either junky, or fit was poor or crazy forward mass center.... My fallback is Optivisor because I can keep my glasses on & they swing out of the way. But they are limited in magnification & somewhat cheesy head band. I must have an odd head.Magnifiers similar to these, but the ones I have are no longer available.
https://shorturl.at/pB7Q2
I really like the paste over solder wire. Once a guy gets used to using the heat gun it works really well. With paste less is more. To much paste makes a bit of a mess. Easily cleaned up with solder wick so not to big a deal. I will have to try using a regular hot plate. I have one of those cheap ones with a pan I use for heating things like bearings and hobby stuff.
Here's a photo walkthrough of how I use a stencil to set the solder paste...
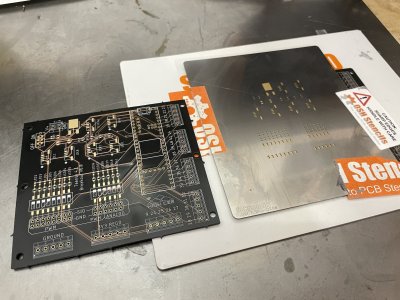
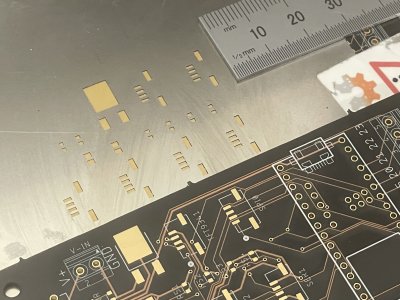
This is a laser cut stainless steel stencil, but mylar is a less expensive option. The squeegee is a credit card.
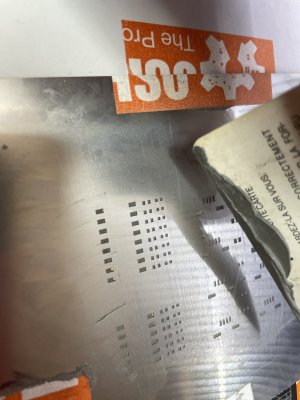
You only need a tiny amount of paste, and it is quite sticky so the tiny parts tend to stay in place unless you sneeze.
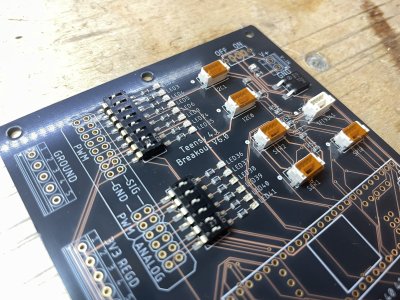
Then it is carefully loaded into a small toaster oven controlled by a PID controller set to the solder ramp.
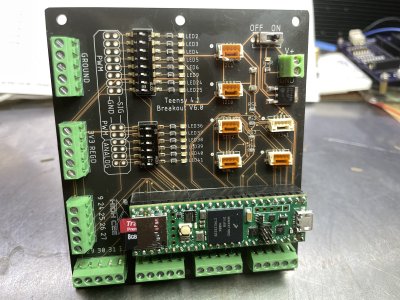
With all of the SMD parts in place, the remaining through hole parts are added.
Total time from stencil to finished is around 30 minutes for one board like this.


This is a laser cut stainless steel stencil, but mylar is a less expensive option. The squeegee is a credit card.


You only need a tiny amount of paste, and it is quite sticky so the tiny parts tend to stay in place unless you sneeze.


Then it is carefully loaded into a small toaster oven controlled by a PID controller set to the solder ramp.
With all of the SMD parts in place, the remaining through hole parts are added.
Total time from stencil to finished is around 30 minutes for one board like this.

slow-poke
Ultra Member
If you do decide to use the solder blob technique, important to only apply solder to one pad initially, if you were to do both pads, you can't get the component down to the board because the component will be sitting proud because of the second unheated pad.
I realize a lot of hobbyists use the hot plate technique, however be aware that components won't survive at elevated temperatures for an extended period of time. The component data sheets show the reflow profile of temperature vs. Time. Professional reflow ovens are programmed to provide this correct profile. Also not all components have the same profile requrements.
If you find the SMT soldering portion too onerous, send a board and the components and I can hand solder one in a jiffy. I have the luxury of Metcal soldering tools.
I'm curious what scales you plan to use?
FYI there are many and at least 3 common scale interfaces and they are not compatible, your circuit appears to be for either single ended quadrature TTL signals or if the alternate resistors are installed for the iGaging scales (which I think? use I2C)
FWIW, I2C is really meant for short distance on-board inter-IC type communication and is really not appropriate for signal transmission across wires. I'm not saying it will not work over relatively short hops, but I personally would not use it for something like scale data.
The other common interface (actually the preferred one for noisy industrial environments) is differential quadrature.
I have the luxury of Metcal soldering tools.
Please tell us which one you have, what you like about it, and how you use it - temp, consumables, process, etc?
Tomc938
Ultra Member
My scales are Accu-rite AR-5. TTL compatible open collector transistor output with internal pull-up resistor. According to the schematic on the scales.If you do decide to use the solder blob technique, important to only apply solder to one pad initially, if you were to do both pads, you can't get the component down to the board because the component will be sitting proud because of the second unheated pad.
I realize a lot of hobbyists use the hot plate technique, however be aware that components won't survive at elevated temperatures for an extended period of time. The component data sheets show the reflow profile of temperature vs. Time. Professional reflow ovens are programmed to provide this correct profile. Also not all components have the same profile requrements.
If you find the SMT soldering portion too onerous, send a board and the components and I can hand solder one in a jiffy. I have the luxury of Metcal soldering tools.
I'm curious what scales you plan to use?
FYI there are many and at least 3 common scale interfaces and they are not compatible, your circuit appears to be for either single ended quadrature TTL signals or if the alternate resistors are installed for the iGaging scales (which I think? use I2C)
FWIW, I2C is really meant for short distance on-board inter-IC type communication and is really not appropriate for signal transmission across wires. I'm not saying it will not work over relatively short hops, but I personally would not use it for something like scale data.
The other common interface (actually the preferred one for noisy industrial environments) is differential quadrature.
And I'll do one end at a time. The practice boards I ordered are coming Canada Post, but hopefully there is a resolution to the strike before they make it to our shores.
slow-poke
Ultra Member
I have two, IIRC, one is a STSS and the other is MX500.Please tell us which one you have, what you like about it, and how you use it - temp, consumables, process, etc?
They work on a completely different principal than typical soldering stations.
It goes from cold to soldering in less than 10 seconds. The drive circuit is RF and the tip(s) are induction heated using temperature specific tips that are set by the curie point of the metal in the tip, so they don't overheat and because of that technology they can just pour heat into a big mass very unlike a typical heating element style tip.
Swapping tips is effortless, takes two seconds, no tools required. Long super flexible silicone cable. Very reliable. Once you use one you never want to use a conventional soldering iron again.
They are expensive new, but sell for peanuts on eBay ($100), because there are gazillions of them out there in every part of the electronics industry
My favorite soldering iron right now is my ts100's. They use a thermocouple to heat. I also have used them a lot with my dewalt batteries and the power tap cordless. Mostly a hobby driven soldering iron but they are digital an can be set easily. Heat quickly and then they will go in to standby and cool down if they sit for to long as they have a accelerometer chip that detects movement. I think they have a bunch of new ones, on amazon they are around $100 so not the cheapest. Like slow poke posted you can get much better ones on ebay that work really well for that so kind of a toss up.
Tom if your boards are going to get caught up in the mail strike. You can see the conversation on here for using strip board. https://www.hobby-machinist.com/threads/another-chinese-magnetic-scales-thread.115231/page-3
I have two, IIRC, one is a STSS and the other is MX500.
Very good summary. Makes me want to get one! You should consider hiring on with them as a salesman! LOL!
I must have 10 soldering irons. The best I have for small stuff is a Mypovos 8588 2 in 1. (Iron & directional hot air gun). I'm not really sure how the iron works. But I like what you described. Especially the hold temp but still pour heat into the work. I hate to ask, what that costs!
