• Spring 2024 meetup in Calgary - date Saturday, April 20/2024. discussion Please RSVP Here to confirm and get your invitation and the location details. RSVP NOW so organizers can plan to get sufficient food etc. It's Tomorrow Saturday! you can still RSVP until I stop checking my phone tomorrow More info and agenda
  • We are having email/registration problems again. Diagnosis is underway. New users sorry if you are having trouble getting registered. We are exploring different options to get registered. Contact the forum via another member or on facebook if you're stuck. Update -> we think it is fixed. Let us know if not.
  • Spring meet up in Ontario, April 6/2024. NEW LOCATION See Post #31 Discussion AND THE NEW LOCATION

Parker Majestic refurb

DavidR8

Scrap maker
Administrator
Moderator
Premium Member
I had a few minutes this afternoon and so I completely removed the table so I could figure out how to approach the problem.
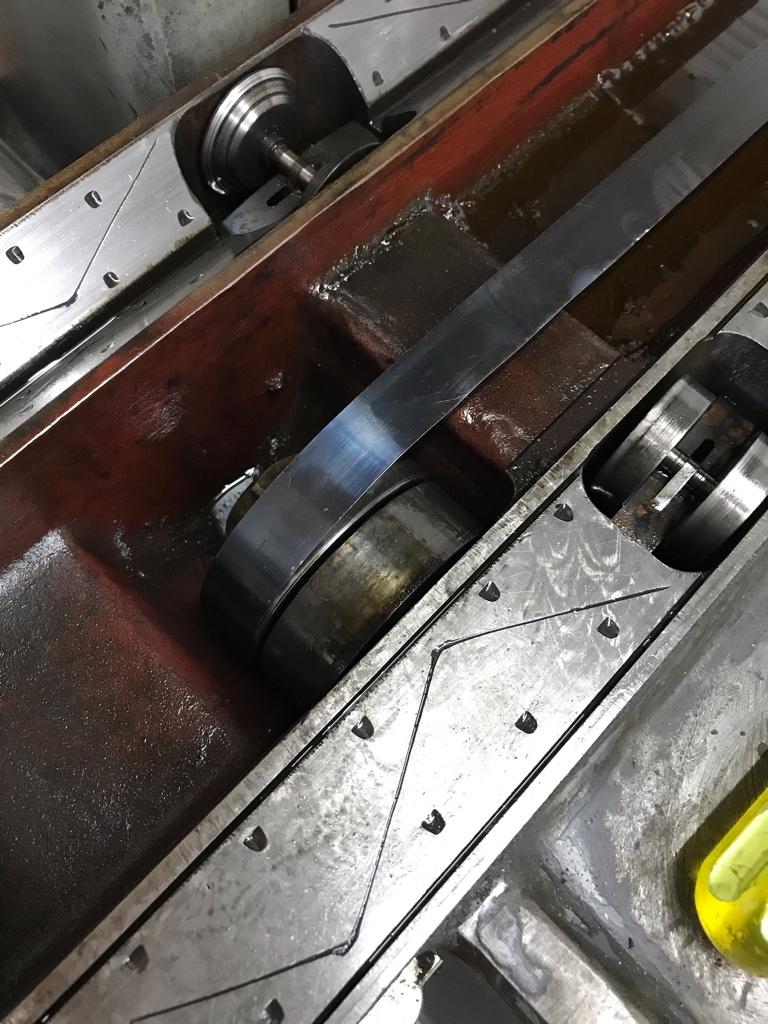
I installed the right side band and weighted the end with a C clamp so it wouldn’t unroll.

363141d935616575094a0f2407fdafa0.jpg

c734b217033018596ea1bc0b7bd8f836.jpg


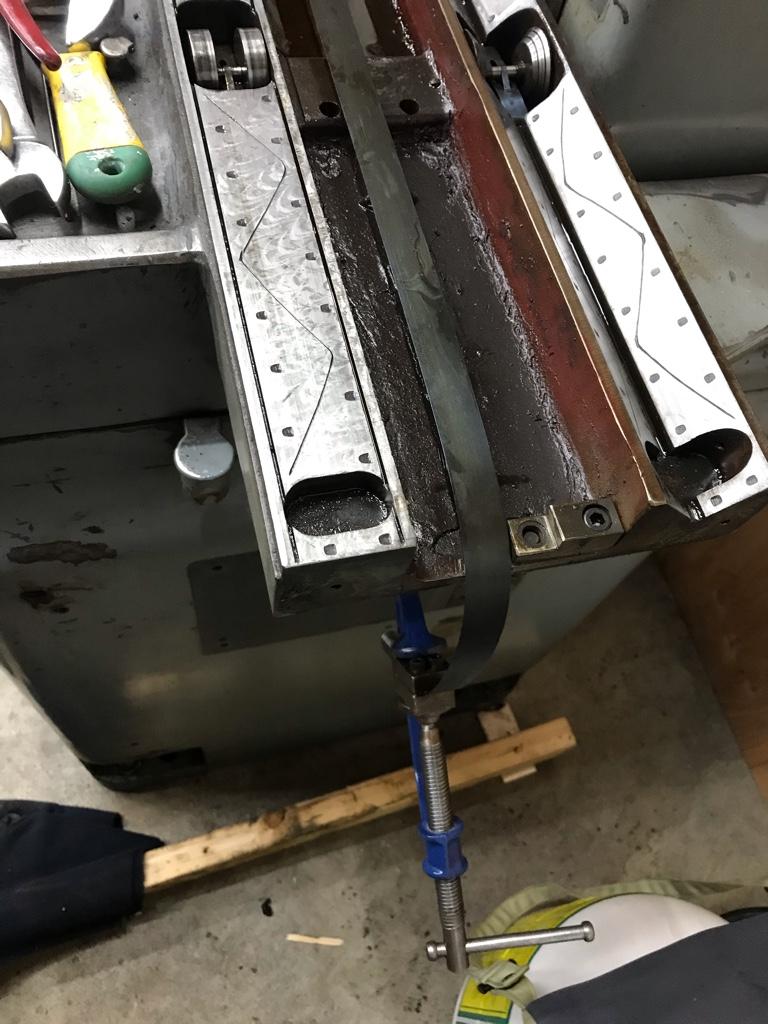
The I marked and drilled the left side band and installed it. It was absolutely easy to drill. I was about to roll it in when I realized that it had to be wound on by hand so that it was at the length it would be with the table centred. So I snaked it under the other band till it was the right length.
Attached another clamp to that end.
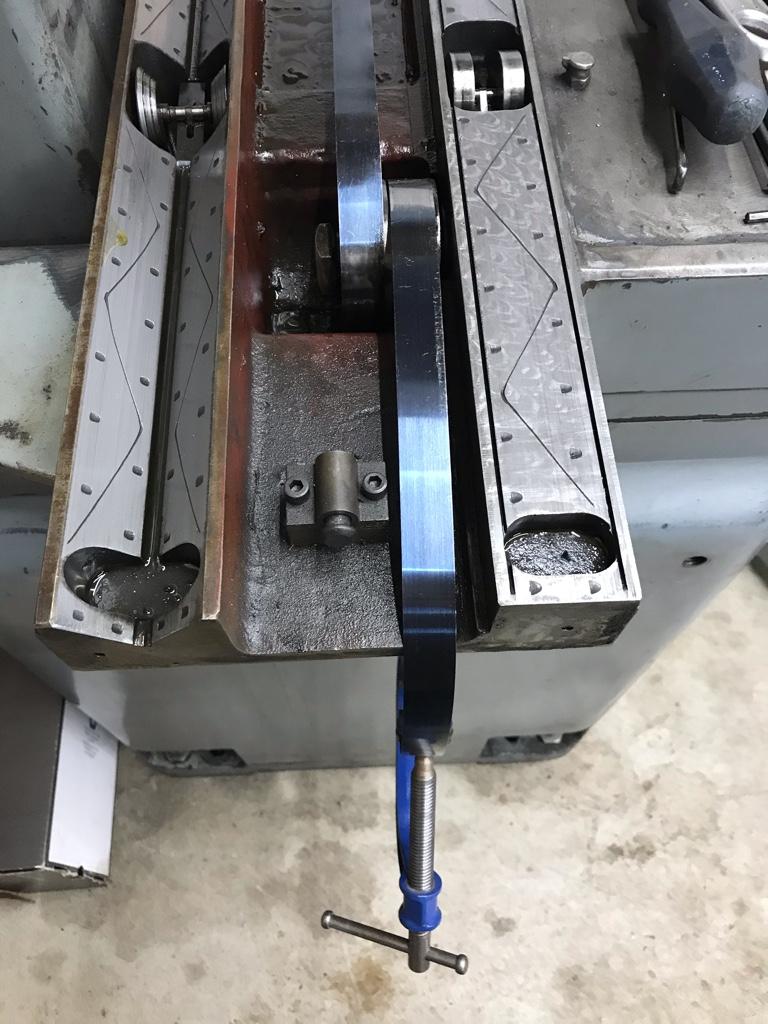
Here they are both installed.
d027f03aea8e3248e70a6f6725388d82.jpg


Sent from my iPhone using Tapatalk
 

DavidR8

Scrap maker
Administrator
Moderator
Premium Member
@David_R8 : Is there enough tape to reconnect?

There was enough. I haven’t put the table back on yet so that will be the acid test to see if I get full travel. I suspect I will but time will tell.


Sent from my iPhone using Tapatalk
 

Brent H

Ultra Member
@David_R8 : Sweet!!! Way to go. Worst case is you loose a bit of full travel until you get some full length bands- and you will be able to hook them up because you have practice!! Way to go David!!
 

DavidR8

Scrap maker
Administrator
Moderator
Premium Member
@David_R8 : Sweet!!! Way to go. Worst case is you loose a bit of full travel until you get some full length bands- and you will be able to hook them up because you have practice!! Way to go David!!

Thanks [mention]Brent H [/mention]
I’ve been thinking about it for days, trying to figure out how to put it back together.
While it’s apart I’m going to paint the top of the cross slide and the table.
I can only think it will make it easier to keep clean with a coat or two of enamel.


Sent from my iPhone using Tapatalk
 

DavidR8

Scrap maker
Administrator
Moderator
Premium Member
This Stefan Gotteswinter video shows how the drill hardened spring steel...

Thanks, I discovered that the bands are actually not hardened spring steel. I was actually able to trim off the ragged, broken end using a pair of Klein 4" scissors. Drilling new holes was a bit of a trick because of the challenges of drilling thin material.
 

YotaBota

Mike
Premium Member
I'm a bit late to the party but you could have clamped the band between two pieces of hardwood and then drilled the holes.
 

DavidR8

Scrap maker
Administrator
Moderator
Premium Member
Parker Majestic got back to me this morning.
The bands are available. $60 for a pair including hardware.
Done!


Sent from my iPhone using Tapatalk
 

DavidR8

Scrap maker
Administrator
Moderator
Premium Member
Just ordered them.
Russ at P-M was super helpful.
Told me the bands come with complete instructions on how to replace them.
Also said they have 200 machines similar to mine that they refurbish including conversion to automatic feed using ball screws.


Sent from my iPhone using Tapatalk
 

historicalarms

Ultra Member
Just a suggestion for anybody trying to drill small holes into hardened material.
I used to build home built rifles using WW 1 P14 or P17 actions. The front ring of these actions is very hard and drilling & tapping for scope mounts was an exercise in broken drills & taps until I learned how to anneal the small spot used for the screw locations and leave the rest of the ring unchanged. This was passed on to me by an old gunsmith of international renown, Its easy.
Take an ordinary 3 1/2" framing nail & cut the head off with sidecutter and chuck the nail shank into a drill press. Now clamp your hard workpiece to the press table ( clamp so it doesn't "skate around". turn your drill press on and drop the nail point to the spot you want annealed and hold it there, keeping pressure on it. The nail & the spot will shortly turn red and continue to hold until the nail fails ( the sharp end of the nail will fail very early in the process but just continue to press the nail shank). By the time the nail completely fails, the spot on the workpiece will also be red...now, immediately after letting the nail retract, dump a hand full of an insulating material on the spot so it cools as slow as possible ( common baking flour or bag cement powder work excellent).
After cooling to room temp, you can easily center punch & drill& tap that spot while the rest of that ring will retain its hardness & easily withstand 50,000 lb cartridge pressures...at least I've never heard of one coming apart.
 

DavidR8

Scrap maker
Administrator
Moderator
Premium Member
Just a suggestion for anybody trying to drill small holes into hardened material.
I used to build home built rifles using WW 1 P14 or P17 actions. The front ring of these actions is very hard and drilling & tapping for scope mounts was an exercise in broken drills & taps until I learned how to anneal the small spot used for the screw locations and leave the rest of the ring unchanged. This was passed on to me by an old gunsmith of international renown, Its easy.
Take an ordinary 3 1/2" framing nail & cut the head off with sidecutter and chuck the nail shank into a drill press. Now clamp your hard workpiece to the press table ( clamp so it doesn't "skate around". turn your drill press on and drop the nail point to the spot you want annealed and hold it there, keeping pressure on it. The nail & the spot will shortly turn red and continue to hold until the nail fails ( the sharp end of the nail will fail very early in the process but just continue to press the nail shank). By the time the nail completely fails, the spot on the workpiece will also be red...now, immediately after letting the nail retract, dump a hand full of an insulating material on the spot so it cools as slow as possible ( common baking flour or bag cement powder work excellent).
After cooling to room temp, you can easily center punch & drill& tap that spot while the rest of that ring will retain its hardness & easily withstand 50,000 lb cartridge pressures...at least I've never heard of one coming apart.

That’s a great tip!
Really appreciate it :D


Sent from my iPhone using Tapatalk
 
Top