• Scam Alert. Members are reminded to NOT send money to buy anything. Don't buy things remote and have it shipped - go get it yourself, pay in person, and take your equipment with you. Scammers have burned people on this forum. Urgency, secrecy, excuses, selling for friend, newish members, FUD, are RED FLAGS. A video conference call is not adequate assurance. Face to face interactions are required. Please report suspicions to the forum admins. Stay Safe - anyone can get scammed.

Hendey T&G Lathe

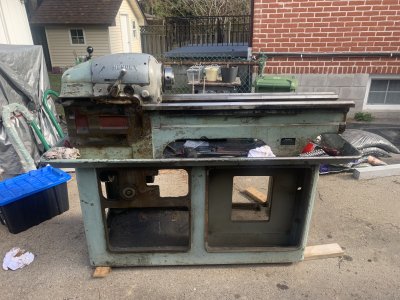
The results of my headstock check was that, at least in one plane the headstock is as aligned as I could measure relative to the flat ways (which it’s mounted on).

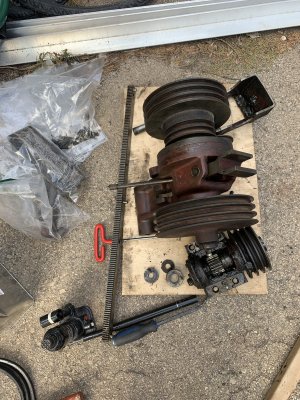
Thanks to a phone call with @Shapeaholic about order of disassembly I got the apron off along with the feed shaft and leadscrew. The gear box was fairly easy to come off next.

Wear in the feed shaft keyway isn’t too bad, so I don’t think that will need to be replaced.

I was warned that this machine is full of taper pins and that’s definitely the case. Luckily steam turbines are also full of taper pins! So I have plenty of experience there. Thinking to bring my taper pin puller home from my toolbox at work would have helped but I managed.
 

Attachments

  • CFAC2A20-7751-4355-BC12-BD32F57F13E6.jpeg
    CFAC2A20-7751-4355-BC12-BD32F57F13E6.jpeg
    636.7 KB · Views: 18
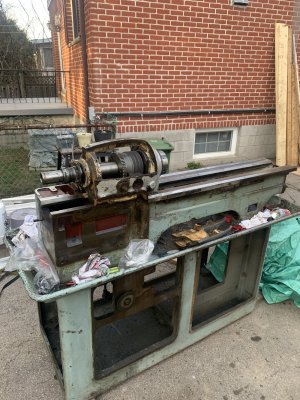
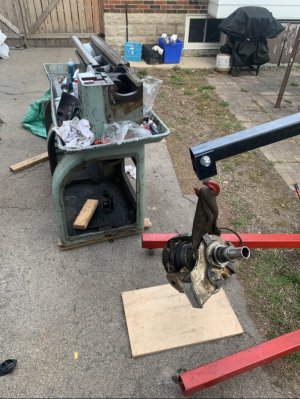
Headless hendey!

Did some more checks with my straight edge now that head is off and ways are totally clear.

The flat ways don’t seem to have much wear at all. Some light through the straight edge in spots but I can’t get a .001” feeler through anywhere with the straight edge across where the headstock mounts. The v ways are worn on the outsides mainly, the front of the front and the back of the back. Both about .005”.

I will definitely need new belts for the spindle. Back gear belts I don’t know for sure yet. Motor belts are nearly new.

I’m planning to get over to the grinding shop next week to talk about getting it ground. As much as I’d like to have all the surfaces redone just for looks, lowering the flat ways could cause some issues with the back gear mechanism. So I may just have the V ways cleaned up, scrape the carriage to suit, and then have to account for the change in height where the apron attaches somehow.
 

Attachments

  • 9D946F0C-DC05-466E-8D80-C818CC2D34CB.jpeg
    9D946F0C-DC05-466E-8D80-C818CC2D34CB.jpeg
    594.9 KB · Views: 23
  • FF77C0E4-E5BD-46DD-B605-85240C184673.jpeg
    FF77C0E4-E5BD-46DD-B605-85240C184673.jpeg
    189.3 KB · Views: 23
So I may just have the V ways cleaned up, scrape the carriage to suit, and then have to account for the change in height where the apron
The best way to do this is to align the carriage on the bed with adjustable screw blocks and then mold the carriage to the correct height with Moglice. That's what I did with my Hendey T&G and I couldn't be happier with the result.
Messing around with aligning the gearboxes is a whole lot less fun.
Peter
I’m going to take some measurements with the carriage at the back where the wear is minimal so I have a reference. What route I go to get it back into that position later might depend on how much comes off the bed when I get it ground. I found the manual for the moglice product, so I have a good idea what’s required to use that product.

Today I got the last few pieces of the power transmission out of the bed and the base. Then I started in on stripping paint from the easily accessed surfaces on the bed casting. I decided to do this now since the chip pan catches most of the paint as it gets scraped off and it’s at a convenient height. Some of the paint may have to get stripped later when I take the bed off.
 

Attachments

  • 24932353-1907-4C52-A9F4-5F80C9116287.jpeg
    24932353-1907-4C52-A9F4-5F80C9116287.jpeg
    862.2 KB · Views: 20
  • 205C12F7-947F-4B5C-AFE4-40D147A45AAF.jpeg
    205C12F7-947F-4B5C-AFE4-40D147A45AAF.jpeg
    690.6 KB · Views: 20
Not a whole lot of progress lately. I bead blasted the covers for the base last week and dropped them off to get painted with a friend.

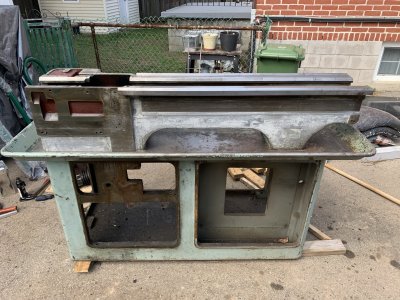
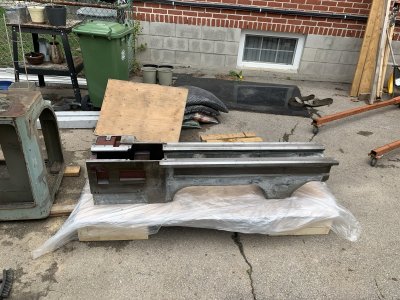
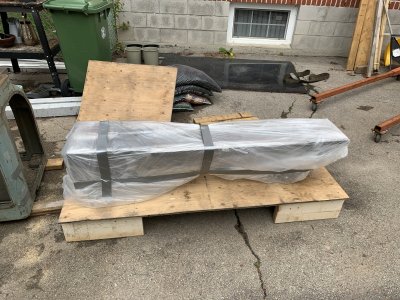
Took the bed off this morning and built a pallet for it. Hoping to get the base bead blasted in the next week or two.

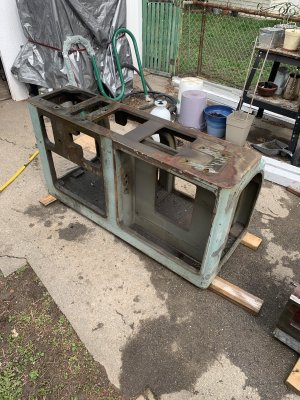
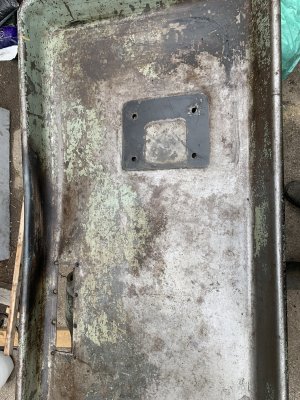
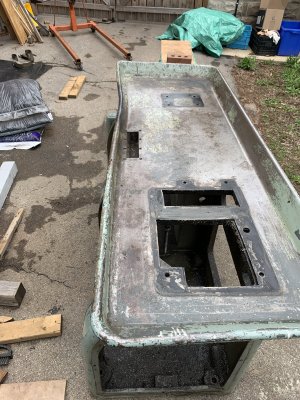
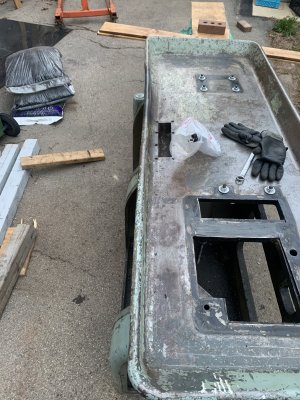
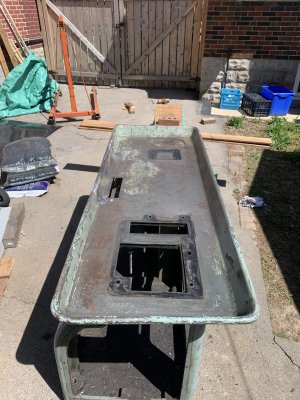
The chip pan needs to be straightened. Not sure yet how to attempt this, any advice would be appreciated.
 

Attachments

  • 109741B7-737B-4A0E-B13C-EED701A4861D.jpeg
    109741B7-737B-4A0E-B13C-EED701A4861D.jpeg
    741 KB · Views: 12
  • 75E2111B-BAA7-475F-B2DF-574BCA2B161C.jpeg
    75E2111B-BAA7-475F-B2DF-574BCA2B161C.jpeg
    871.5 KB · Views: 12
  • 0C2272F2-F565-420E-B39B-050C3AE4354F.jpeg
    0C2272F2-F565-420E-B39B-050C3AE4354F.jpeg
    757.2 KB · Views: 12
The chip pan needs to be straightened.
Can you clamp a 2x4 (you may need something a bit stiffer) on edge across the bent area and then use a clamp to pull the bend back straight? I'm guessing the chip tray is sheet metal.
Edit - is that a rolled edge on the tray?
 
Last edited:
The chip pan needs to be straightened. Not sure yet how to attempt this, any advice would be appreciated.

If the 2x4 or stiffer idea doesn't work out, it sounds like a trip to my farm might be in order. Nothing beats the weight and hydraulic ooomph of a tractor to straighten stuff out.

Typically, I'll use the front cutting edge of the loader bucket against an appropriate form to bend almost anything to almost any shape. The biggest problem I ever encounter is "whoops - I guess that was too much..."
 
Can you clamp a 2x4 (you may need something a bit stiffer) on edge across the bent area and then use a clamp to pull the bend back straight? I'm guessing the chip tray is sheet metal.
Edit - is that a rolled edge on the tray?
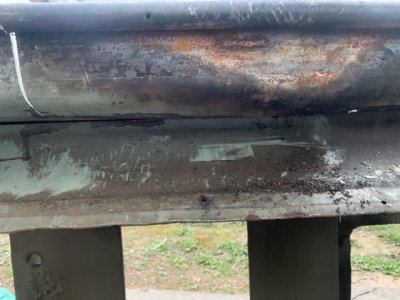
Yeah it’s a rolled edge. Not all my pictures showed up in the last post for some reason. You can see someone’s been at it with heat already.
 

Attachments

  • 049D99D1-B7BF-4E0E-8854-2F102106569F.jpeg
    049D99D1-B7BF-4E0E-8854-2F102106569F.jpeg
    829.8 KB · Views: 16
  • AE902D4B-68AC-4D5E-86D7-457FAD90E595.jpeg
    AE902D4B-68AC-4D5E-86D7-457FAD90E595.jpeg
    767.4 KB · Views: 16
Ya,,,, a 2x4 for isn't going to cut it, that thing looks 3/32 or better plate. I'd use the same principle but maybe try using the leg from the engine stand instead of the 2x4. Make the inside straight and then replace the crushed edge by welding in a piece of pipe or barstock of the same diameter. Grind smooth and paint, good as new.
 
Yeah I think making some strategic cuts through the rolled edge and then straightening against some square tube with clamps will be my approach. If needed I have a couple bottle jacks I can use with some kind of fabricobbled fixturing.

Then once I get it straightened out I can weld up the cuts and grind smooth.
 
weld threaded studs to the rolled edge,make a bridge out of heavy steel angle/channel to span the damaged area, use nuts to pull damage out and a BFH to convince it..

Or come and visit the farm @Rauce . No BFH required. Just feed the monster a little diesel and she will straighten you out lickity split! YaaaaHoooo!
 
Or come and visit the farm @Rauce . No BFH required. Just feed the monster a little diesel and she will straighten you out lickity split! YaaaaHoooo!
We’ll see how I make out with what I have lying around, if I don’t succeed I’ll make the trip!
 
We’ll see how I make out with what I have lying around, if I don’t succeed I’ll make the trip!

This is one of those things where many prolly think I'm kidding, but I'm not. My loader will lift its entire own weight with the front loader bucket. It's 84" wide with a straight lip made of 3/4" plate. All I'd do for a big pan like that is support it properly and then put the bucket on it with appropriate back structure to bend it how you want. Think of it a bit like a 5 ton press but with an 8 ft wide straight edge made of 3/4" plate. You can shorten the edge however much is needed by adding another shorter plate.
 
I have no doubt the tractor would do it! It’s not a short drive though…

I gave it a shot today, still a bit of work to do but it’s much better.

First thing I did was make two cuts through the rolled edge with a recip saw on either side of the worst part. Tweaked the outside bits mostly straight with a steel block and a big crescent wrench.

B0275ABD-20C6-4890-A95D-D23FF8900D3C.jpeg

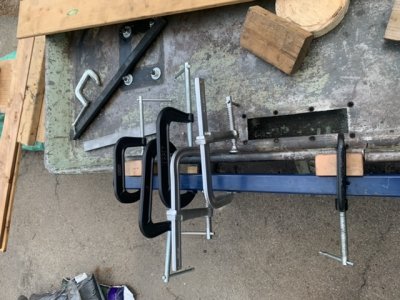
Then I used a piece of square tube, wooden blocks and pretty much all my clamps to bend the dented rolled edge back to being straightish.

3F78E573-E6C2-4BF5-B818-C64710548476.jpeg

6D2C5AFC-EB33-41A6-A9E0-D1C9F4D53D2E.jpeg

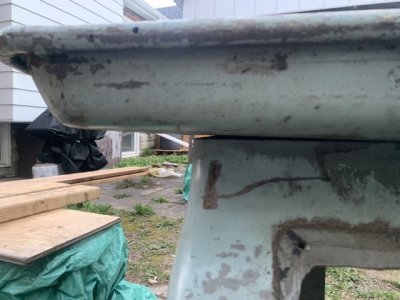
At that point the two remaining issues were a dent just inside the curve under that section and the back right corner lifting up when the pan is bolted to the base.

A68249D9-4F18-44FD-A915-62F03576E8AC.jpeg

7DBB3B97-3B64-444D-85F5-CC54667D9D2E.jpeg

I tried to undo the dent by taking the pan off, flipping it over and jumping on it/hitting with a BFH. Helped a bit but not totally fixed. Decided to move on.

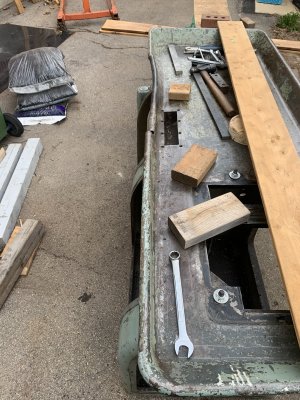
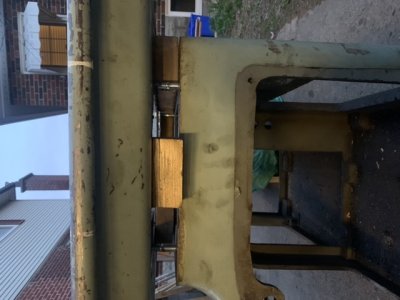
To tweak the base of the pan flat again I used long bolts and pieces of 2x4 to bolt the pan to base with space to push down on that corner. Used a calibrated weight of 225lbs to push down on it. Seemed to work, I’ll see tomorrow when I take the wood out and bolt it straight to the base.

36CE102D-79E4-41AA-8DC4-2E5F73998482.jpeg

Once I’m done I’ll weld up the cuts I made and grind smooth. Since it’s the back side I’m not too worried about perfection but I want it to not be noticeable unless you’re really looking.
 
I have no doubt the tractor would do it! It’s not a short drive though…

I gave it a shot today, still a bit of work to do but it’s much better.

First thing I did was make two cuts through the rolled edge with a recip saw on either side of the worst part. Tweaked the outside bits mostly straight with a steel block and a big crescent wrench.

View attachment 23712

Then I used a piece of square tube, wooden blocks and pretty much all my clamps to bend the dented rolled edge back to being straightish.

View attachment 23714

View attachment 23713

At that point the two remaining issues were a dent just inside the curve under that section and the back right corner lifting up when the pan is bolted to the base.

View attachment 23715

View attachment 23716

I tried to undo the dent by taking the pan off, flipping it over and jumping on it/hitting with a BFH. Helped a bit but not totally fixed. Decided to move on.

To tweak the base of the pan flat again I used long bolts and pieces of 2x4 to bolt the pan to base with space to push down on that corner. Used a calibrated weight of 225lbs to push down on it. Seemed to work, I’ll see tomorrow when I take the wood out and bolt it straight to the base.

View attachment 23717

Once I’m done I’ll weld up the cuts I made and grind smooth. Since it’s the back side I’m not too worried about perfection but I want it to not be noticeable unless you’re really looking.

Awesome @Rauce !

Calibrated weight eh? LMAO!
 
Back
Top