• Spring 2024 meetup in Calgary - tentative date Saturday, April 20/2024. Other regions are also discussing meet ups. If you want one in your area get going on organizing it! discussion
  • We are having email/registration problems again. Diagnosis is underway. New users sorry if you are having trouble getting registered. We are exploring different options to get registered. Contact the forum via another member or on facebook if you're stuck. Update -> we think it is fixed. Let us know if not.
  • Spring meet up in Ontario, April 6/2024. NEW LOCATION See Post #31 Discussion NEW LOCATION

Compound needs a better degree dial

Susquatch

Ultra Member
Administrator
Moderator
Premium Member
Good fortune in your journey Pilgrim.

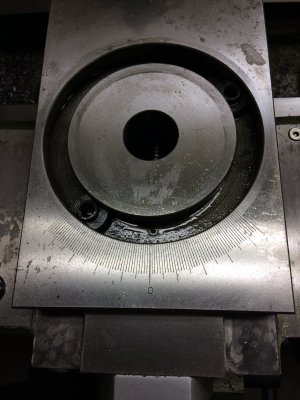
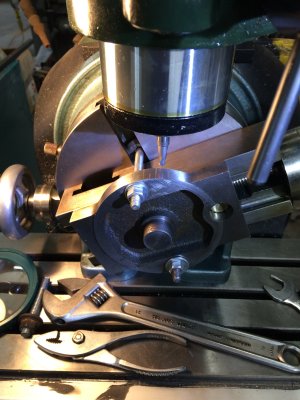
Home at last from a weekend away at a wedding. Of interest, I removed my compound and measured it. The OD is 116 mm. So it could be turned to 114.59 to use a small metric scale if desired.

Here are photos: they make it easier to see why I preferred the sleeve approach. But they also show that an electronic indexing system might work well too.

20230529_163434.jpg 20230529_163131.jpg
 

DPittman

Ultra Member
Premium Member
Home at last from a weekend away at a wedding. Of interest, I removed my compound and measured it. The OD is 116 mm. So it could be turned to 114.59 to use a small metric scale if desired.

Here are photos: they make it easier to see why I preferred the sleeve approach. But they also show that an electronic indexing system might work well too.

View attachment 34936 View attachment 34935
That's a nicer degree indicator than on my little 10x22 lathe. I'll try to get a picture of it.
 

YotaBota

Mike
Premium Member
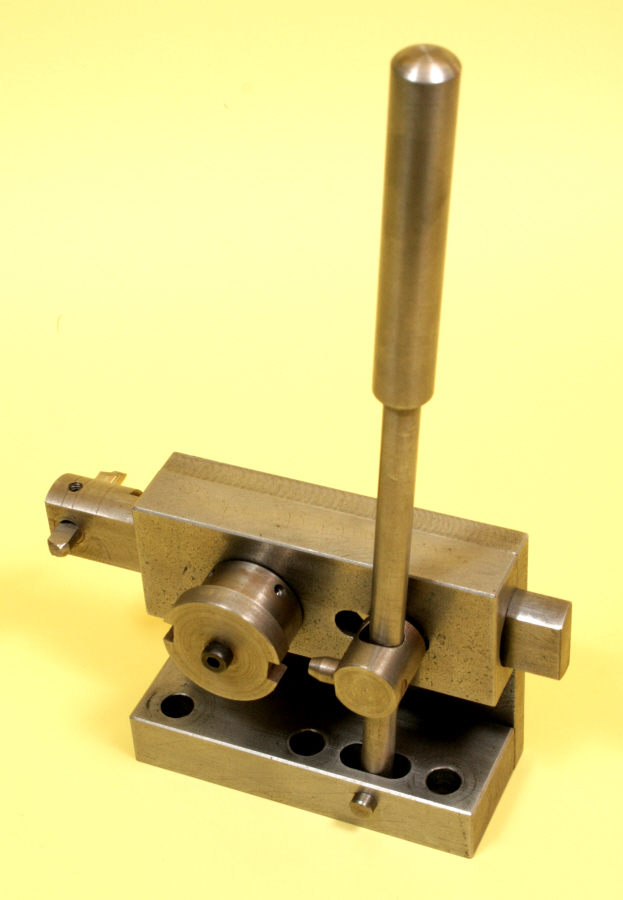
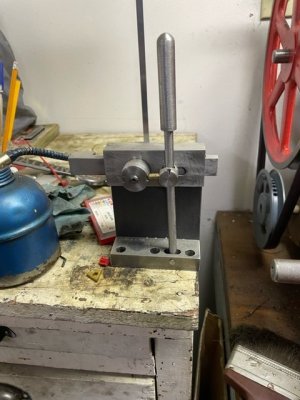
@Tom O - Is the line maker you're thinking of by Harold Hall? I have one started but it's moved into the "roundtuit" list. There's a video of it in action on the page as well.


LrgLineTool01.jpg
 
Last edited:

Dabbler

ersatz engineer
How would you mark the post?
I'd put a graver in a ciollet, lock the spindle and cut in the X direction on my mill, using stops to define line length. That way you get consistent marking lengths, and can choose short for 1 degree, longer for every 5 degrees, and extra long for every 10 degrees.
 

Tom O

Ultra Member
@Tom O - Is the line maker you're thinking of by Harold Hall? I have one started but it's moved into the "roundtuit" list. There's a video of it in action on the page as well.

Yes that’s the one I haven’t finished mine yet either but here it is I even have the 1/4” square broach for it. It’s the dividing head book by Harold hall.

image0.jpeg

image1.jpeg

image2.jpeg
 

thestelster

Ultra Member
Premium Member
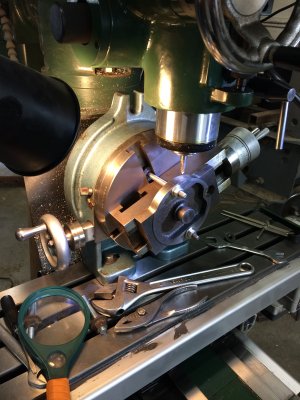
You could just mount your disassembled compound onto a dividing head and go to it.
18 hole circle=2 spaces
27 hole circle=3 spaces
36 hole circle=4 spaces
45 hole circle=5 spaces
54 hole circle=6 spaces

Then have an index mark on a brass plate on the cross-slide which is moveable to compensate for any errors.
 

whydontu

I Tried, It Broke
Premium Member
Quick-n-dirty

4” PVC is 114.3 mm O.D.. So a coupling is just a hair over at the end and flares a bit inn to the center (press fit and the PVC cement softens the plastic so the pipe and coupling can be squooshed together.)

My New Hermes ITX-L engraver (look it up) came with an indexer to engrave cylinders (bowls, mugs, etc). I think I can index fine enough to do degree markings, and might be able to do the numbers as well. Seeing as I’m learning how to use the engraver, this could be an interesting practice piece.

How high is the plinth?
 

garageguy

Super User
Premium Member
@Dabbler ,yes I see what you mean. i think you have the same lathe as me. Truly a poor design. Till now I have been setting 29 1/2 Deg. with a protractor. I was looking at it today and am considering marking degrees from the index mark on the toolpost towards the hand wheel. There are marks from 0-45deg. on the compound slide so if I add another 30 or 40 to the tool holder I can get up to 90deg. markings.
 

Dabbler

ersatz engineer
I use my indicator to set mine to 30 degrees, and leave it that way for years.... So I never use the markings at all...
 

PeterT

Ultra Member
Premium Member
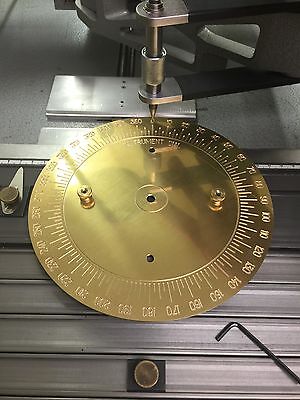
I think you could increase the accuracy of compound with 3 improvements
1. replace the pointer with a full 360-deg increment indicator as a band/sleeve over the circular base segment
2. replace the arc window degree indicator with a vernier scale to yield more exact even degrees & fractional degrees
3. add a magnifying bit of lens to enlarge the engravings of both
- either 1 or 2 should be adjustable/lockable to a less frequent compound set against using dial to some standard

1685470751674.png
 

Susquatch

Ultra Member
Administrator
Moderator
Premium Member
How high is the plinth?

The stub on the compound base is 11.75mm high and 26mm in a diameter.

The cylindrical portion of the tool holder or "plinth" is 15mm high.

I think you could increase the accuracy of compound with 3 improvements
1. replace the pointer with a full 360-deg increment indicator as a band/sleeve over the circular base segment.

This is my current direction - the plan I like best. In this scenario, I can correct the current error plus get a 360 degree readout plus add a vernier refinement someplace off the main scale.

2. replace the arc window degree indicator with a vernier scale to yield more exact even degrees & fractional degrees

YES - See above.

3. add a magnifying bit of lens to enlarge the engravings of both
- either 1 or 2 should be adjustable/lockable to a less frequent compound set against using dial to some standard

Although I am virtually blind in one eye, my other eye has good resolution - good enough to read a vernier quite reliably!

Thanks Peter!
 

Susquatch

Ultra Member
Administrator
Moderator
Premium Member
I have a 3 foot length of 5" round 4140 with a 1" hole down the center. I could send you a slice if you want to make a collar to go around the base of your compound.

Jezz John. How do I say no to that! Sounds like a plan to me. I'll try and rig up a fixture to make marks with a graver like @Dabbler suggested.

Unless I'm mistaken, I could put a calibrated vernier anywhere on an interval to give me tenths or fifths of a degree (tbd what is best).

I'll send you a PM in a day or two and we can go from there.

VERY MUCH APPRECIATED!
 

garageguy

Super User
Premium Member
I just added some 10 and 5 degree marks to my tool post. In this situation there is no need for more than 10 degree increments. @Dabbler 's setup worked very well. I ground a point on an old endmill . Worked great. It was about the only option, not having an actual round tool post. Now at least I can set my threading angle with out eye-balling it.
 

Attachments

  • IMG_1071.JPG
    IMG_1071.JPG
    448.3 KB · Views: 17
  • IMG_1070.JPG
    IMG_1070.JPG
    481.1 KB · Views: 17
  • IMG_1069.JPG
    IMG_1069.JPG
    391.8 KB · Views: 17

Susquatch

Ultra Member
Administrator
Moderator
Premium Member
I just got an advert from Lee Valley for a slightly different protractor (https://www.leevalley.com/en-ca/sho...s/114684-digital-miter-saw-gauge?item=99W6307). It has a larger display than the one mentioned earlier but costs more. It claims automatic shutoff after five minutes so it might have better battery life.

Very interesting. Right up there with finding a pre-marked sleeve the right size.

Not too expensive either. I'll bet shipping is highway robbery though.

If it is as accurate as they claim, this could be an excellent device. The equivalent i-gaging unit is not.
 
Top