Well done.Here is an outboard spider I made.
Made out of some alloy steel rod, some fine thread grade 8 hex head bolts, 5/16 for the spider and 1/4 for the retaining bolt.
The brass tips are pressed into the bolts. I drilled a 3/16 hole in the tip of the bolts using the lathe, brass tips made to size and pressed in with the shop press.
Looking forward to working on some well aligned long cylindrical objects with this thing.
-
Scam Alert. Members are reminded to NOT send money to buy anything. Don't buy things remote and have it shipped - go get it yourself, pay in person, and take your equipment with you. Scammers have burned people on this forum. Urgency, secrecy, excuses, selling for friend, newish members, FUD, are RED FLAGS. A video conference call is not adequate assurance. Face to face interactions are required. Please report suspicions to the forum admins. Stay Safe - anyone can get scammed.
-
Several Regions have held meetups already, but others are being planned or are evaluating the interest. The Calgary Area Meetup is set for Saturday July 12th at 10am. The signup thread is here! Arbutus has also explored interest in a Fraser Valley meetup but it seems members either missed his thread or had other plans. Let him know if you are interested in a meetup later in the year by posting here! Slowpoke is trying to pull together an Ottawa area meetup later this summer. No date has been selected yet, so let him know if you are interested here! We are not aware of any other meetups being planned this year. If you are interested in doing something in your area, let everyone know and make it happen! Meetups are a great way to make new machining friends and get hands on help in your area. Don’t be shy, sign up and come, or plan your own meetup!
You are using an out of date browser. It may not display this or other websites correctly.
You should upgrade or use an alternative browser.
You should upgrade or use an alternative browser.
BaitMaster’s (Work) Bench
- Thread starter BaitMaster
- Start date
Here is an outboard spider I made.
Well done!
When I was shopping for a lathe 15 years ago, I had planned to make something like that. But the lathe I ended up buying came with a backside spider built in.
I did the same thing that you did with brass tips on my screws. I've pretty much abandoned that now though. Instead, I cut sleeves out of copper pipe and I slit them. Select one that fits the long cylindrical thingy tight enough to stay on place and then tighten the spider screws onto the copper sleeve to align the thingy.
historicalarms
Ultra Member
first job I did with my lathe was build a outboard spider. I didnt install brass buttons or ever use sleeves in use, I didnt think it ever needed as the set bolts never have to drive anything, just steady long bars
BaitMaster
Ultra Member
@Susquatch good to know about the copper pipe method as well. What were the drawbacks of the brass tip method?
@historicalarms i must admit I just did what I saw people had done/recommended in various books / articles / YouTube videos.
Even the lathes that come with outboard spiders from the manufacturer have brass tips… so that’s what I did.
Perhaps down the line I will select a different method once I use said outboard spider and have issues or get bright ideas from experience.
Right now, there is a stark lack of any experience and I just decided to copycat what I saw most people do.
It’s not the first job I did…. But i do plan on getting some use out of it.
good to know about the copper pipe method as well. What were the drawbacks of the brass tip method?
I think the biggest problem was making the damn screws. I seemed to lose the brass inserts and then accidentally marred the long thingy.
The other problem was and still is the loose fit of the screws in the factory configuration.
Unlike the majority of folks doing it, I wanted to be able to align the bore axially. The best way to do that is to center the bore at the front spider and then move the long thingy in the rear spider until the long thingy is axially aligned. It's not really that simple, but that's the principle. To make sure it doesn't move does take some pressure. If I remember correctly, I accidentally marred a glass peened thingy once and then switched to a copper sleeve to stop that from happening. The sleeve worked so well that I never went back.
Same applies at the front. Some guys use aluminium L-shims to allow the thingy to bend axially. I found heavy gauge copper wire worked better. And a thin sleeve of copper pipe worked better yet.
I still have an assortment of brass tipped screws and I still use them, but my assortment of copper sleeves gets used much more often.
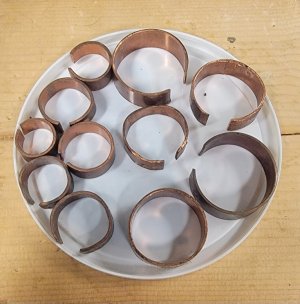
140mower
Don
Some of those sleeves are pretty big, whatcha turning? Howitzer tube thingies?I think the biggest problem was making the damn screws. I seemed to lose the brass inserts and then accidentally marred the long thingy.
The other problem was and still is the loose fit of the screws in the factory configuration.
Unlike the majority of folks doing it, I wanted to be able to align the bore axially. The best way to do that is to center the bore at the front spider and then move the long thingy in the rear spider until the long thingy is axially aligned. It's not really that simple, but that's the principle. To make sure it doesn't move does take some pressure. If I remember correctly, I accidentally marred a glass peened thingy once and then switched to a copper sleeve to stop that from happening. The sleeve worked so well that I never went back.
Same applies at the front. Some guys use aluminium L-shims to allow the thingy to bend axially. I found heavy gauge copper wire worked better. And a thin sleeve of copper pipe worked better yet.
I still have an assortment of brass tipped screws and I still use them, but my assortment of copper sleeves gets used much more often.
View attachment 45052
Some of those sleeves are pretty big, whatcha turning? Howitzer tube thingies?
Nothing huge like that. Some tubes are just bigger than others.
BaitMaster
Ultra Member
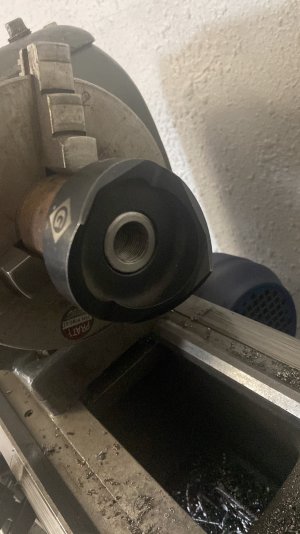
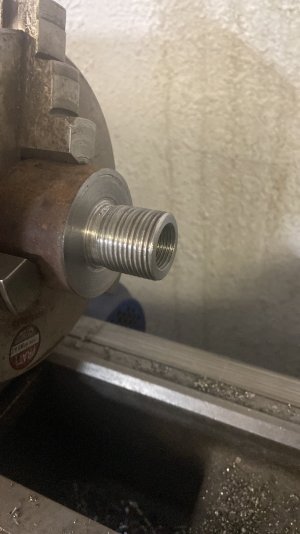
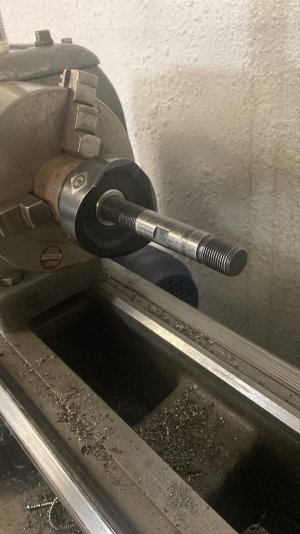
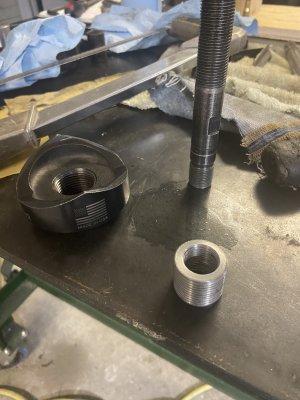
Here’s another one of those hydraulic punch pieces I made an adaptor for.
The alloy shafting seems strong enough, made it a lot faster, with a better fit and less mistakes. Getting the hang of (simple) internal and external threading. No acme or anything yet, but hey, gotta start somewhere.
The alloy shafting seems strong enough, made it a lot faster, with a better fit and less mistakes. Getting the hang of (simple) internal and external threading. No acme or anything yet, but hey, gotta start somewhere.
Attachments
BaitMaster
Ultra Member
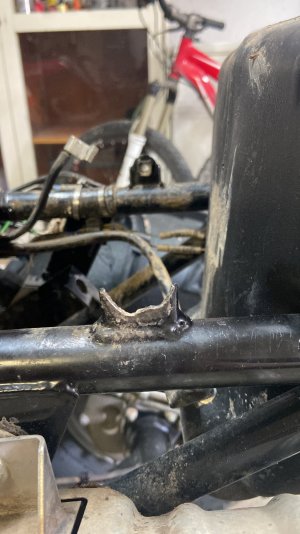
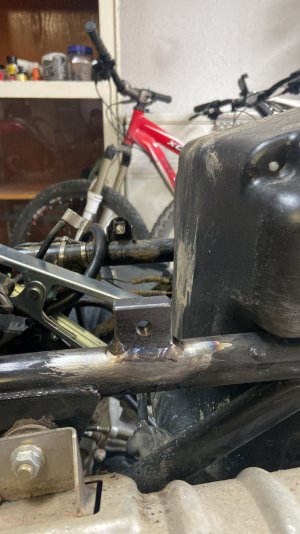
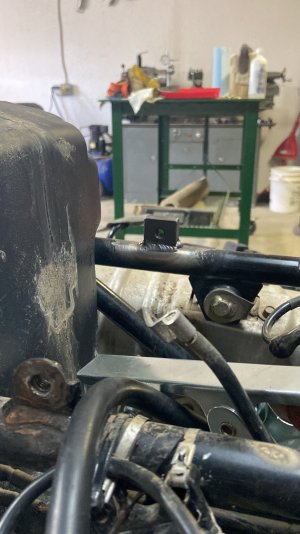
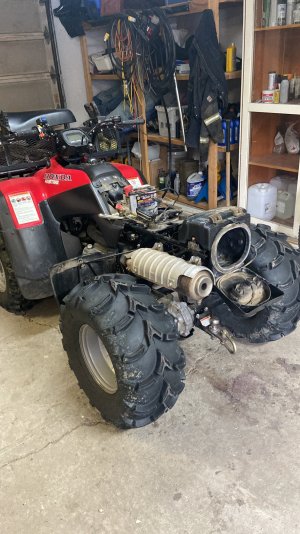
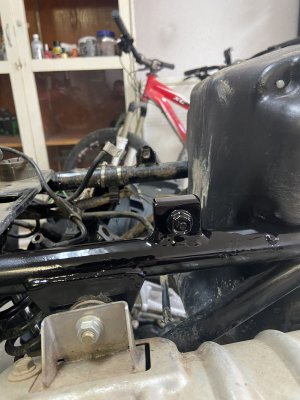
Another little project. Carrying 250lbs of bait plus gear and me has a negative effect on quad racks…. Broke the tab off the frame. Made a replacement tab from some 1/2” plate, drilled, tapped, radius’d the bottom side with a Holesaw so it fit the tube. Welded, painted, done.
I don’t even know what a shop would have charged me but it would have been alot.
I don’t even know what a shop would have charged me but it would have been alot.
Attachments
-
 0B8F1353-5C52-44B9-BA70-1E79AE0CC8ED.jpeg328.2 KB · Views: 32
 -
 AC24D4E9-B3A2-4EF0-ADE8-4055FCAE313D.jpeg328.4 KB · Views: 29
 -
 0F41C2DD-12A7-4E14-A689-DCB1C9408CAE.jpeg314.8 KB · Views: 33
 -
 40E7DB88-76EA-48C0-A5F8-A9532C3604FD.jpeg448.2 KB · Views: 31
 -
 C6414576-0D60-4C38-AF08-6241ABE85BDB.jpeg390.6 KB · Views: 32
BaitMaster
Ultra Member
I’m rebuilding my steady rest currently and need to part pieces off. I have had 0 luck with the accusize carbide parting tools off of Amazon….. I’ve broken 4!!!
Stupid me kept buying them.
I finally bucked up and bought a hss parting blade holder and blanks, learned to grind, and tried it last night.
WOW is all I can say. Best parting I’ve ever done. Bar none. I should have done it long ago. Maybe now I can turn my pathological fear of parting into a healthy respect…..
DPittman
Ultra Member
Huh, I figured I needed to buck up someday and buy myself a carbide cut off tool as all I have is hss. I do think quality of your hss blade makes a difference.I’m rebuilding my steady rest currently and need to part pieces off. I have had 0 luck with the accusize carbide parting tools off of Amazon….. I’ve broken 4!!!
Stupid me kept buying them.
I finally bucked up and bought a hss parting blade holder and blanks, learned to grind, and tried it last night.
WOW is all I can say. Best parting I’ve ever done. Bar none. I should have done it long ago. Maybe now I can turn my pathological fear of parting into a healthy respect…..
Huh, I figured I needed to buck up someday and buy myself a carbide cut off tool as all I have is hss. I do think quality of your hss blade makes a difference.
+1
After a few experiences with my HSS blade I’ve had the same thoughts about plug and play carbides.
That said I have recently had good success by grinding a nice negative rake/chip breaker, dressing it SHARP with an EZ-Lap and running as low as 32 RPM. This would be on my lightweight Myford.
D
DPittman
Ultra Member
I've had more trouble with 10x22 lathe parting off than I think I did with my Atlas 618. I think the culprit has been torque power. On my Atlas 618 it had a bull gear and it had reasonable torque. On my 10x22 it has variable speed DC motor and I can slow it down to 50 rpm which is nice but it doesn't have much torque at that speed and then it stall and all hell breaks loose.+1
After a few experiences with my HSS blade I’ve had the same thoughts about plug and play carbides.
That said I have recently had good success by grinding a nice negative rake/chip breaker, dressing it SHARP with an EZ-Lap and running as low as 32 RPM. This would be on my lightweight Myford.
D
BaitMaster
Ultra Member
I mean I’m on a 12x30 utilathe, so it’s a much larger machine.
The carbide ones are a yuge headache for me. They catch and then boom. 50$ down the drain.
The hss seemed a lot less brittle, and had better chip formation.
I can get my lathe down real slow, and it’s also not lacking torque. I can put it in low gear which is 60rpm at 60hz….
When I run it slow it has plenty of torque and it will not stall. It only will flippin x-plode the whole insert holder when it catches.
I ran it slow and made the hss very sharp. Very slight negative rake. Very nice curly chips.
The carbide I tried at all the different speeds and basically it didn’t care what speed I ran it at it would just detonate randomly.
The machinists I know say to run the carbide fast but honestly that just made an extra scary explosion when I did it.
The HSS seems much improved.
DPittman
Ultra Member
Lots of oil/coolant with hss part off I find is always good. Aluminum at high speed with WD40 is fun.I mean I’m on a 12x30 utilathe, so it’s a much larger machine.
The carbide ones are a yuge headache for me. They catch and then boom. 50$ down the drain.
The hss seemed a lot less brittle, and had better chip formation.
I can get my lathe down real slow, and it’s also not lacking torque. I can put it in low gear which is 60rpm at 60hz….
When I run it slow it has plenty of torque and it will not stall. It only will flippin x-plode the whole insert holder when it catches.
I ran it slow and made the hss very sharp. Very slight negative rake. Very nice curly chips.
The carbide I tried at all the different speeds and basically it didn’t care what speed I ran it at it would just detonate randomly.
The machinists I know say to run the carbide fast but honestly that just made an extra scary explosion when I did it.
The HSS seems much improved.
I'm away for my youngest son's wedding so I have not been able to participate much. I'm sneaking in while my wife is busy. I'm dead if she catches me.
Parting was always my nemesis until I discovered upside down parting in reverse with HSS. After that, parting was foolproof. Nonetheless, I don't like letting my problems defeat me. So I set out to improve my forward parting.
Parting is one place where perfection is a necessary goal. The tools must be sharp, they must have side shank clearance so they don't rub, and they must be perfectly square to the work. This will increase the odds of success. You always have upside down parting in reverse on the front side or forward on the backside when all else fails. Parting upside down CANNOT CRASH.
A few years ago, @Darren told me how to part with carbide. The secret is to be bold and aggressive. This is no time to be timid and careful. Some say to use power feed. My hands are good enough. Maybe I will try power feed after figuring out what my manual feed rate is.
There are more than a few threads on here about parting with carbide. Tom Lipton also has a YouTube video on it. I'm no YouTube fan, but I must say that his experience and method pretty much follows what I found.
@BaitMaster - can you tell us what carbide tool you purchased? Mine was actually a gift from another member for helping him with his lathe problems. It was an accusize tool.
Your 12" lathe should be plenty big enough to part easily and reliably as long as you do your bit too.
I can imagine you are done with carbide. If so, the rest of us can understand. I certainly can. If so, my very best advice is to try parting upside down - in front in reverse, or on the backside in forward. It's a foolproof method because it lifts the tool away from the work instead of digging in and crashing. In this isolated case, lack of rigidity is your friend. @PeterT had a nice drawing to show how this happens but I have not been able to find it.
BaitMaster
Ultra Member
I was working in a machine shop doing electrical and I asked the head machinist when I was done about my parting woes. He said to shoot for 400sfpm on my carbide parting tool and slam it in power feed on a lower feed rate if my lathe could.
I paced back and forth in my shop for about 15 minutes wondering if I was actually going to and I eventually worked up the gall to try it. It looked beautiful up until there was about 1/4” of material left at which point the carbide parting tool decided to LEAVE THE CHAT in violent manner.
I’m definately done with carbide parting on my utilathe. If I upgrade to a larger/more rigid machine one day I may try it again, but after trying the HSS and not having a single sketchy thing happen, and to be able to go nice and slow and controlled, it’s night and day.
Last edited:
historicalarms
Ultra Member
I think this is the bugaboo with parting off. If we all had very rigid machines without any stress flex it would be better....also we as hobby machinist often use any old steel that sometimes will have questionable density quality and it will have differing cutting force required at different spots in the cut-off and cutters can all of a sudden be pressured into softer parts of a shaft without any warning to us until as Bait says...."it explodes"more rigid machine one day
BaitMaster
Ultra Member
100%.I think this is the bugaboo with parting off. If we all had very rigid machines without any stress flex it would be better....also we as hobby machinist often use any old steel that sometimes will have questionable density quality and it will have differing cutting force required at different spots in the cut-off and cutters can all of a sudden be pressured into softer parts of a shaft without any warning to us until as Bait says...."it explodes"
I’m not into heavy machinery, but if you’ve ever seen the YouTube channel “Cutting Edge Engineering”, Curtis doesn’t even “square” before parting. He just eyeballs it and let’s it buck. He also uses circular insert tools indiscriminately, all without chatter or any crashes.
He also has monstrous, ridgid lathes and is working on very large, rigid parts.
The same cannot be said for the vast majority of the lathe owners on this forum.
I definately work with mystery scrap oilfield sucker rods most of the time because I get the stock for free…. Definately questionable.
I also have a lathe that you all are familiar with that is 3/4 as old as @Susquatch.
I paced back and forth in my shop for about 15 minutes wondering if I was actually going to and I eventually worked up the gall to try it. It looked beautiful up until there was about 1/4” of material left at which point the carbide parting tool decided to LEAVE THE CHAT in violent manner.
I can picture it...... Too funny! Damn carbide can be so dramatic and emotional. Just like my wife. But I love her anyway.
Yes, that's the tool I have except mine is the 1" version milled down to fit a 3/4" tool holder. It takes the larger GTN3 inserts instead of GTN2. Mine is limited to 2" stock and yours is prolly less.
OK, so your done with Carbide....
after trying the HSS and not having a single sketchy thing happen, and to be able to go nice and slow and controlled, it’s night and day.
If you think HSS is night and day, try HSS upside down. It's midnight and high noon. Absolutely zero rectal tightening required. Go slow and comfy. Feed as you need to, let the tool do its job, and relax.
All my HSS Parting tools except one are mounted upside down. I can't remember the last time I used that one.
Regarding the Carbide
He said to shoot for 400sfpm on my carbide parting tool and slam it in power feed on a lower feed rate if my lathe could.
Assuming you are cutting regular steel I think that's too slow. It's fine to start, but quickly gets too slow as the cut progresses. I'd go double that to start with. Always start parting at the high end if you can because it will be slow at the low end if you don't.
The recommended parameters for this insert for steel are:

Converting those numbers to imperial, the recommended feed rate is 0.002 to 0.008 per rev (you didn't say what you used) and my math (someone please check it) says the recommended RPM is:
2" diam - 500 to 1500 rpm
1" diam - 900 to 3000 rpm
1/4 diam - 4000 to 12,000 rpm
Your efforts broke at 1/4 inch. I'm betting big money you were cutting WAAAAY too slow as you got closer to center. And you may have been feeding too fast too.
We all know that surface speed reaches zero at the center of the cut no matter how fast the RPM is and it's impossible to set the lathe fast enough to avoid that. I usually stop the lathe partway through and increase speed as the diameter gets smaller. But lots of guys don't.
If I were doing what they do, I'd go with the fastest speed for my work diameter or slightly more knowing it will be low as it gets near center. If I think it's too slow based on feedback from the "chat box" (as you called it), I might stop the lathe and break the part off by flexing it back and forth. Of course, the better approach is to speed things up.
I suppose it might also be that a 1/2 parting tool is just too small for serious parting on a small lathe.
That's my thoughts on your carbide parting.
Anyways, try HSS upside down. I bet you gunna LUV it!

