
-
Scam Alert. Members are reminded to NOT send money to buy anything. Don't buy things remote and have it shipped - go get it yourself, pay in person, and take your equipment with you. Scammers have burned people on this forum. Urgency, secrecy, excuses, selling for friend, newish members, FUD, are RED FLAGS. A video conference call is not adequate assurance. Face to face interactions are required. Please report suspicions to the forum admins. Stay Safe - anyone can get scammed.
-
The 2026 Calgary Area Meetup is set for Saturday May 30th at 10am. The signup thread is here! Robinhood has graciously offered to host the meetup again this year. Please note that you MUST RSVP to the notice linked above if you wish to come.
You are using an out of date browser. It may not display this or other websites correctly.
You should upgrade or use an alternative browser.
You should upgrade or use an alternative browser.
3D Printer Happened
- Thread starter Susquatch
- Start date

pdentrem
Ultra Member
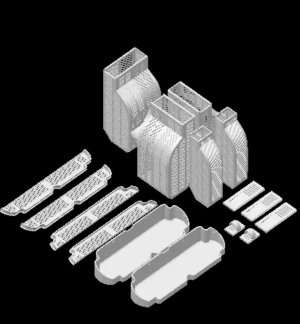
These are for eyepieces for my telescopes. I posted these at Printables.What is this part Pierre? does it stack?
Pierre

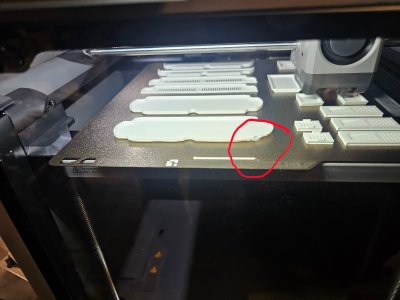
That is a lot of print pieces that looked good and one small error. Elephants foot that leads to misprint above. You can see where it lifted and then the print was pushed up against the lift as it continued to print. Adhesion issue from contamination and also from temp zones. Contamination can be just touching the build plate with your hand to take off a prior print. Could be a hot spot. Also can be an undercut that is just on the edge of being able to be printed. One way to help stop this is to use a brim, usually 5mm, I use mouse ears as they clean easy.

Adhesion issue from contamination and also from temp zones. Contamination can be just touching the build plate with your hand to take off a prior print. Could be a hot spot. Also can be an undercut that is just on the edge of being able to be printed. One way to help stop this is to use a brim, usually 5mm, I use mouse ears as they clean easy.
I don't know enough yet to say. I watched it happen. There seemed to be some filament smearing going on that caused a few spider webs at that corner and a few other places nearby (on the same part). I pulled out the webs when I could but that wasn't the norm. That head absolutely flies! The other areas were not on a corner but did the same thing. Notably smearing and spider webs. Everything was confined to that one part in the front left corner.
Right after that print, high on adrenaline and confidence, I tried to print a 9 hour job of dessicant boxes for my AMS. 17 parts altogether. Other than the front left corner part that made a gooey mess on the inside corner of the part, it printed fine. All the lids fit and the breather holes didn't leak dessicant.
BUT,,,,, Nothing fit my printer. NOTHING! Wrong kit? Did it remember my scaling for my quick mount? WTF!!! 9 hours wasted!
Updated my firmware, found another set of dessicant holders for my AMS, crossed by fingers and my lower body tools, and pressed go again.
No corner or other issues. Beautiful this time.
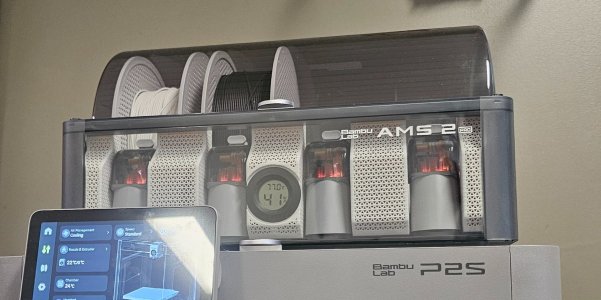
Note - The humidity is high because I just put them in. 35% as I write this now. Guessing that will dive to 12% when it settles.
Time to think about another toaster oven.
Toaster ovens as filament dryers are tricky as they get too hot. I’ve wrecked spools… buy a filament dryer. A better one.
No way in hell am I gunna dry filament. I just talking about drying dessicant.
Now down to 29%.
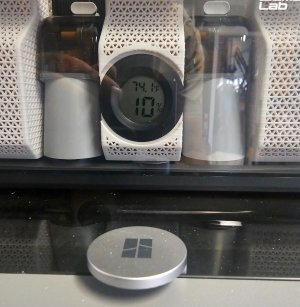
What the heck does 10% RH for the air in the AMS container mean in terms of filament dryness? My guts scream at me that the fillament shouldn't really be a lot different than dessicant is. Desicants and fillaments are not a gas so gas laws don't apply. Has anyone looked at this? How does fillament humidity relate to air relative humidity?
I think this could be a fantastic discussion. Anybody have any knowledge on the subject?
I think this could be a fantastic discussion. Anybody have any knowledge on the subject?

TorontoBuilder
Sapientia et Doctrina Stabilitas
What the heck does 10% RH for the air in the AMS container mean in terms of filament dryness? My guts scream at me that the fillament shouldn't really be a lot different than dessicant is. Desicants and fillaments are not a gas so gas laws don't apply. Has anyone looked at this? How does fillament humidity relate to air relative humidity?
I think this could be a fantastic discussion. Anybody have any knowledge on the subject?
You're speaking my language.
The translation between the air's relative humidity & a material's (3D printing filaments, or building materials such as wood & concrete) moisture content is defined by its sorption isotherm at a specific temperature.
To make this relatable, think of an Isotherm chart as a water tank level indicator...
To visualize this, think of two connected water tanks, Air Tank A, the AMS chamber interior, which is relationally tiny compared to the storage volume of the second tank, Filament Tank B which is actually much larger and holding the bulk of the water.
The catch, and where temperature comes in, is like a variable speed pump connecting the two tanks. At room temperature, the pump is throttled down to trickle (high vapour resistance). Water is being pumped from filament Tank B to air Tank A incredibly slowly.
To get water out of filament you need a vapour pressure gradient... a force to overcome the vapour resistance.
Temperature and relative humidity are the two conditions that we can manipulate to create a gradient, the greater the temperature, and/or the lower the rH the greater the vapour pressure created by the gradient... the variable speed pump increases to speed up the release of moisture from Tank B.
But now we have a problem. Air tank A is so small it fills up very quickly and the moisture transfers again slows to a trickle, because the chamber rH at the higher temperature has become saturated.
Now what? So we introduce a second pump... and third tank to transfer the moisture from Tank A to Tank C.
This is where many people will think "Oh yeah, that desiccant."
Nope.
Desiccant does have a completely different sorption isotherm profile than filament... and that does help keep filament dry, but not under the heated conditions. Under heating the desiccant too is dumping moisture into Air Tank A.
When you raise the temperature, you do two things, you change the scale on the air tank's level indicator, because warm air can hold drastically more vapor capacity,
Desiccant and filament are constantly pumping water into Tank A. If the two materials have too much moisture the chamber becomes saturated.
So we can see that a closed loop systems can backfire... because the desiccant in Tank C will also get hot. As a desiccant heats up, its ability to hold water plummets drastically.
Therefore, an open loop system is advisable. I'll still describe them like a closed loop, but of infinite capacity.... So Pump 2 and Tank C. The room environment.
Think of the old leaky, over ventilated home in the winter, with indoor air as dry as a desert. This is because humidity is relative. When freezing cold outdoor air leaks inside and gets heated up to room temperature, its capacity to hold water vapor expands exponentially. This instantly crashes its relative humidity down to near 0%, creating a powerful, natural moisture vacuum.
By utilizing an open loop venting the hot, moist air out and constantly bringing in fresh air to be heated you create that same ultra dry "winter home" environment inside the chamber, maximizing the vapor pressure gradient without ever needing a desiccant.
BUT
You are not always printing and heating your filament... so you need desiccant for when you're not heating and just storing filament between print jobs... and that means you need operable modifiable ventilation.
Vents that open and close...

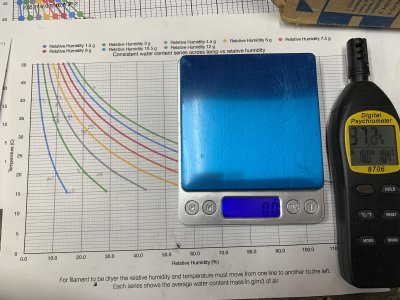
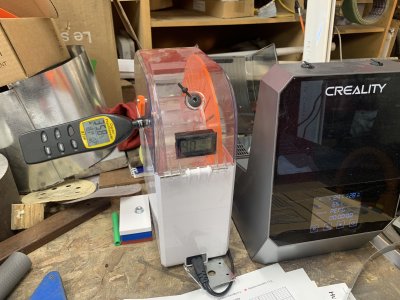
John, funny thing you should ask! I’ve been thinking about that too. So I made and printed out these charts. I also have an accurate scale and an accurate hygrometer. I weigh the spool and put in the dryer, measure the temp & humidity inside the dryer after it stabilizes to get a baseline and pick a line on the chart. After the humidity moves I weigh the spool again and see how much water did it shed? A gram or two every hour or two typically. Does the new measurement jump absolute humidity lines? In the short term it just slides up the same line hotter and less humid but same absolute humidity. You can see the Pencil marks on the graph as a spool progresses, and as it regresses when the machine turns off and I forget to check.
In the longer term the spool lightens and the absolute humidity also moves. They roughly correlate. And the filament prints better….
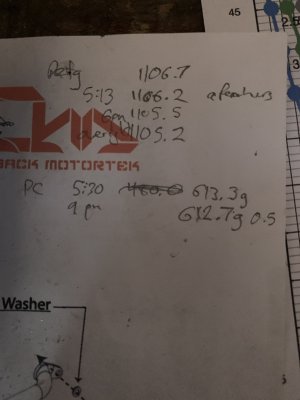
My lab book scratches for a petg and PC spool. Numbers 1106.7g are grams the spool weighs.
In the longer term the spool lightens and the absolute humidity also moves. They roughly correlate. And the filament prints better….
My lab book scratches for a petg and PC spool. Numbers 1106.7g are grams the spool weighs.
Anyone else weighing spools? How much water do they shed by total mass?? Susquatch it would be interesting to see how much water you can remove from a spool in your humid lake conditions. It’s super dry here in Alberta so a few grams seems to be all I can get out of a spool.
Last edited:
Oh and I forgot the lines in the graph are the isotherms Toronto mentioned. Each line is the same absolute humidity (same water mass per volume unit of air). So one line shows the relative humidity for a given temperature for an amount of water in air like 7.5g per m3.
If the measurements are not jumping isotherm lines then it’s not drying.
If the measurements are not jumping isotherm lines then it’s not drying.
Last edited:
TorontoBuilder
Sapientia et Doctrina Stabilitas
If the measurements are not jumping isotherm lines then it’s not drying.
YES.
When janger turns on the heater, the temperature goes up and the relative humidity on the hygrometer drops.
On the graph, the pencil mark simply slides up and to the left along the exact same colored curve. The air feels drier because of the lower rH, but the actual mass of water trapped inside the container hasn't changed. No water has left the building so to speak
When true drying happens, moisture is being vented out of the air chamber entirely, Tank A draining into the infinite room space. This forces the pencil marks to break away from the line and jump downward to a lower curve line. This visual "line jump" on the chart is the direct proof that the absolute water mass in the system is dropping.