• Scam Alert. Members are reminded to NOT send money to buy anything. Don't buy things remote and have it shipped - go get it yourself, pay in person, and take your equipment with you. Scammers have burned people on this forum. Urgency, secrecy, excuses, selling for friend, newish members, FUD, are RED FLAGS. A video conference call is not adequate assurance. Face to face interactions are required. Please report suspicions to the forum admins. Stay Safe - anyone can get scammed.
  • The 2026 Calgary Area Meetup is set for Saturday May 30th at 10am. The signup thread is here! Robinhood has graciously offered to host the meetup again this year. Please note that you MUST RSVP to the notice linked above if you wish to come.

3D Printer Happened

@PeterT & @jcdammeyer and everyone else following along. I hear you loud and clear.

Here is where I am now. I was able to figure out how to slice and cut the big collet tray. But it was a crappy process. I couldn't accurately place cut lines, or extend things like chamfers, or add bottoms to the trays. To do that, I will need to use CAD. I'm not really worried about doing that. It should be relatively simple. But it isn't going to work in the Bambu Studio. So the big collet tray is currently on hold while I do other things on my learning curve.

So I am going to find something else to practice on with Studio, and then go to CAD to design the big 5C Tray.

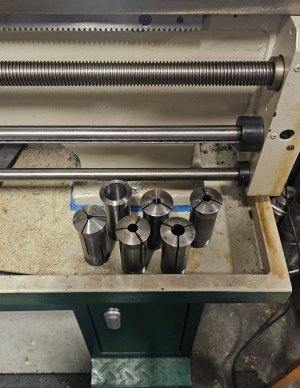
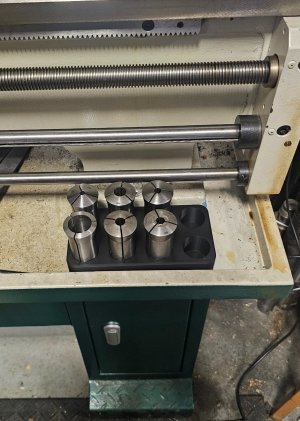
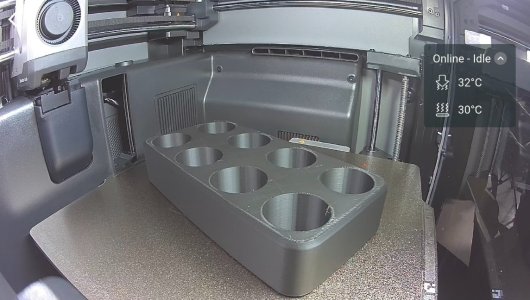
In the meantime, I am printing a small 2x4 tray to sit in my lathe splash pan where I normally keep a half dozen collets anyway. It is already half done as I write this.
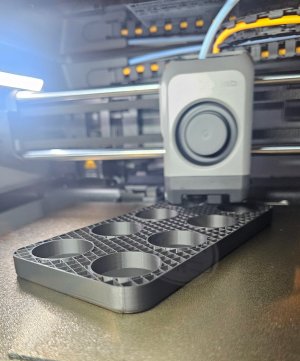
20260709_132031.jpg

I also had my first problem. I loaded the collet tray model, made some changes, and pressed go. I clean forgot to remove the filament prime line from the previous print. So I had to run out to the shop and pray that it didn't crash. It didn't, and I safely removed it before the print actually started.

@jcdammeyer - those little dessicant Trays you made for inside the AMS won't work. That area of my AMS has filament guide tubes in it. I think my best bet is to put something up front between the filament motor drives. This could be three relatively small dessicant boxes say 1.75w x 1.25d x 3.0h. I'll do a 3D prototype out of wood on my table saw to check that..... LOL! The problem I see is making the mesh on all sides to allow air in and out. How do you guys do that mesh?
 
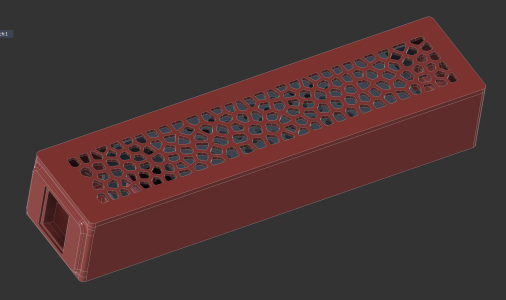
Vornoi is a pattern of "random" holes arranged to fit within a boundary.

This one is a power supply housing with vents.
1783629593516.png
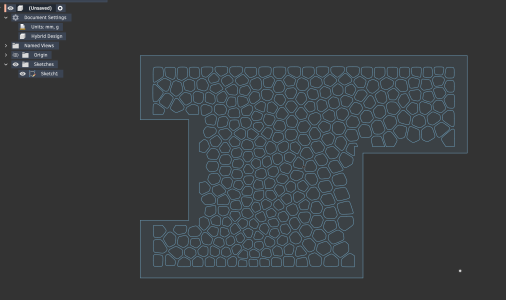
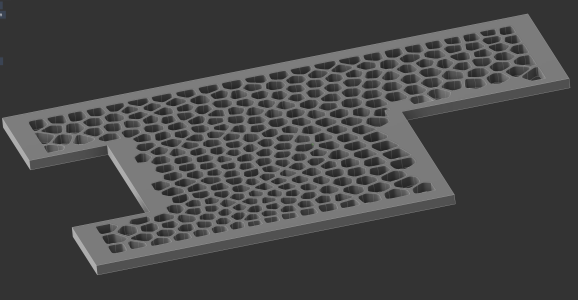
In you favorite CAD system there will usually be a scripting, extensions or add-in option. Vornoi generators are available from independent developers as add-ins, to create sketches with the "holes" auto generated. Extruding the sketch profile creates a solid.
1783630424125.png
1783630502263.png

I find this useful for decorative patterns, ventilation, weight-reduced panels, lampshades, etc. The Vornoi pattern adapts to the shape you need to fill.
 
And here it is where I wanted it. Very nice. I was tired of collets falling over all the time, but I like the standard sizes handy. So this looks after both wants.

20260709_165914.jpg

20260709_165952.jpg

As mentioned earlier, I'll do the CAD modification iteration another time.

PS - this part practically fell off the plate after it had cooled.
 
How do you know if you have enough filament for a given job, and what do you do if it runs out partway through the job?
 
In you favorite CAD system there will usually be a scripting, extensions or add-in option. Vornoi generators are available from independent developers as add-ins

Oh oh..... Add-ins eh...... That doesn't sound very user friendly at all...... Unless I can find a user who already made a container for that particular location, maybe I'll just use standard cloth bags for now. I have lots that would fit there. Someday in the distant future when everything else feels easy, maybe I'll tackle the add-in issue.
 
@jcdammeyer - those little dessicant Trays you made for inside the AMS won't work. That area of my AMS has filament guide tubes in it. I think my best bet is to put something up front between the filament motor drives. This could be three relatively small dessicant boxes say 1.75w x 1.25d x 3.0h. I'll do a 3D prototype out of wood on my table saw to check that..... LOL! The problem I see is making the mesh on all sides to allow air in and out. How do you guys do that mesh?
Please post a photo of the inside of your AMS with two reels not installed. I'm curious as to what has changed.
 
How do you know if you have enough filament for a given job, and what do you do if it runs out partway through the job?
The slicer will tell you how much filament is required for the print in grams so unless you are keeping track of that particular spools' weight then it is of limited use when you get down to the short hairs at the end of the roll. You can set the ams to change to the next spool when it runs out but it must be the same type and color as what you started with. This is the part where you just lie to the ams and tell it that the generic blue filament is indeed the same red bambu pla as the first roll. It does have to be the same type of filament, you can't mix pla and petg. It depends on what you are printing obviously but for most shop stuff it won't matter what it looks like when done. Lots of us save all the rolls with a couple of strands left on them untill you need to print something functional but not decorative.
 
Last edited:
Here is a version of desiccant box.
Pierre

Thank you Pierre! This is probably exactly what I need.

Do you know if you can see the colour of the dessicant through the mesh? Or should I drill some small holes? Or cut it and glue a clear window into it?

Does anyone make clear filament?

I'm also wondering if I can use PLA instead of PTEG? I'm guessing they chose PTEG so it could handle the temperature of the AMS Dryer function, but I don't plan to use that. I am happy with the cereal containers and dessicant trays.
 
Yes there is clear filament.
Pierre

Thank you.

What I have found looks more translucent than clear, but it sure caught my wife's eye! Oh oh..... Another Rookie Mistake.....

I guess I should just get some and try it. Worse come to worse, I can always drill a bunch of little window holes.
 
Please post a photo of the inside of your AMS with two reels not installed. I'm curious as to what has changed.

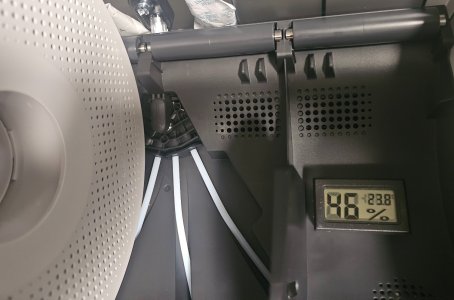
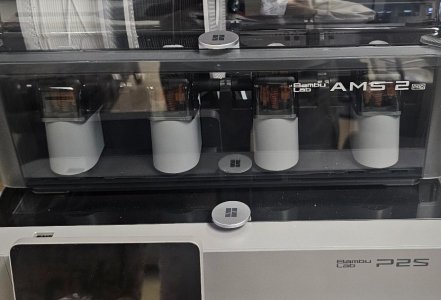
Here you go John. My AMS is what Bambu calls an AMS 2 PRO. The tubes are high in the cavity. Not much room at all.

20260710_094714.jpg

Compare that with upfront between the filament drives.

20260710_095351.jpg

Those 3 spaces in the middle between the filament drives are about 10in3 each with two 5in3 cavities on the sides.
 
Thank you.

What I have found looks more translucent than clear, but it sure caught my wife's eye! Oh oh..... Another Rookie Mistake.....

I guess I should just get some and try it. Worse come to worse, I can always drill a bunch of little window holes.
In my experience, clear filament is not really clear but like you said, translucent. You can improve that by using a bigger nozzle, 0.6 or 0.8, to make thicker layers but you are not going to end up with anything remotely like glass.
 
In my experience, clear filament is not really clear but like you said, translucent. You can improve that by using a bigger nozzle, 0.6 or 0.8, to make thicker layers but you are not going to end up with anything remotely like glass.

Thanks. I was/am afraid of that.

It's no biggie. A dessicant container for my AMS is a pretty specialized application. I'm totally willing to drill holes or even glue in a window if it comes to that.
 
Just a quick note to those following but have not drank the coolaide.

There are a shit ton of optional dessicant containers for the Bambu AMS 2 Pro. Most print as multiple parts that you snap or glue together. There are front units that fit between the filament drives as discussed above. There are rear containers that replace the stock dessicant bags, there are spool hubs that fit into the center hub of a spool. There are spool saddles that go on top of the filament on partly used spools, there is an entire dessicant spool that goes where a normal filament spool would go and I'm sure dozens of others - in fact too many to choose from.

Suffice to say that keeping your opened filament spools dry is not an issue.

I bought a big jug of dessicant and I plan to get a microwave proof tray to dry used dessicant with.

But so far, I'm having zero trouble keeping my filament below 20% inside my 45% shop.
 
The slicer will tell you how much filament is required for the print in grams so unless you are keeping track of that particular spools' weight then it is of limited use when you get down to the short hairs at the end of the roll.

Do you really have to keep records? Couldnt you just weigh the partly empty spool and subtract the fully empty spool weight to know what is left?

I'm looking forward to the day when I can test a spool transition.
 
Here you go John. My AMS is what Bambu calls an AMS 2 PRO. The tubes are high in the cavity. Not much room at all.

View attachment 84126

Compare that with upfront between the filament drives.

View attachment 84127

Those 3 spaces in the middle between the filament drives are about 10in3 each with two 5in3 cavities on the sides.
So in looking for desiccant containers you'll have to include AMS2 in your search to make sure you can print up something that fits.
 
Back
Top