• Scam Alert. Members are reminded to NOT send money to buy anything. Don't buy things remote and have it shipped - go get it yourself, pay in person, and take your equipment with you. Scammers have burned people on this forum. Urgency, secrecy, excuses, selling for friend, newish members, FUD, are RED FLAGS. A video conference call is not adequate assurance. Face to face interactions are required. Please report suspicions to the forum admins. Stay Safe - anyone can get scammed.

What's Paul up to?

But I'm not asking about the OEM's. I'm asking about rippers which are mostly part of the accessory market. I doubt any of the OEM's make one like that. From that perspective, it's just a matter of adapting the ripper tooth to the various backhoe booms that are available. I'm like you, I ain't welding that together. If I can't buy it, it ain't happening.

I was wrong @PaulL .

I went looking for other rippers and found the BXpanded Ripper for a Deere - and most other makes. Turns out that they do make the same stuff for everybody.

I'm going to call them tomorrow and see if they carry a bigger one for my bigger backhoe. Even if not, they might point me to someone who does.

Thanks for posting this!
 
I take it, that's not a picture of your unit @Susquatch, as that has a hydraulic thumb.I have seen a few setups with the ripper put on the thumb, not sure how strong that is. One had the ripper on a mechanical thumb, but seemed the bucket could roll back more then most too, and sometimes the bucket can get in the way.
 
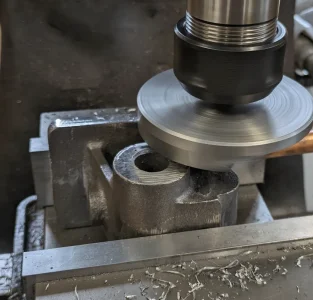
A bit of time in the shop this morning. I finally got up the nerve to tackle this casting.
First was to get one side flat. That was pretty easy to set up in the vise - there's a central hump at the parting line, and the casting was reasonably well fettled on the base, making it easy to pinch in place over a piece of copper pipe to absorb the uneven base shape.
1717006941679.webp
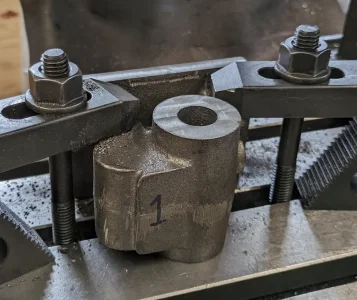
Once that was done I turned it over on the table, letting me bring the other side parallel and down to dimension. I turned it over a second time to get the first face I'd cut to dimension as well.
1717007075738.webp
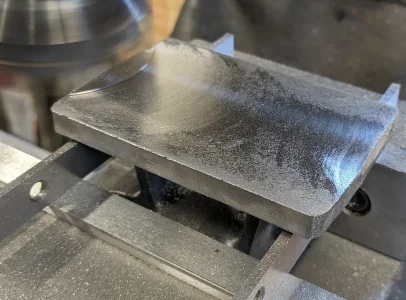
And then I could clamp it by those faces to work on the bottom. I supported the base plate on parallels across the jaws which needed very little shimming to work. Again, the parting line did me the favor of high spots I could use to have a single point of contact with the parallels.

1717007142122.webp
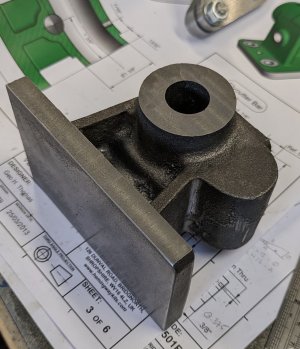
After that some more vise setups got me the ends milled square(ish). I still need to take those ends to dimension, but I'll only do that once I have the centerline bored so I can bring the ends to parallel with the bore. Until then, I have something I can think of getting on my lathe bed for the big boring operation:

Untitled.jpg

The next step will be to make a riser block to sit under this casting. That and my t-nut setup on the mill table will dictate the hold-down holes through the base, which will be a departure from the Myford-oriented design of the kit.
 
I take it, that's not a picture of your unit @Susquatch, as that has a hydraulic thumb.I have seen a few setups with the ripper put on the thumb, not sure how strong that is. One had the ripper on a mechanical thumb, but seemed the bucket could roll back more then most too, and sometimes the bucket can get in the way.

No, that isn't mine.

I would never want the ripper tooth on the thumb. It needs to be able to be curled and needs the geometry leveraging.

Tried to call BXpanded today. No answer and no voicemail! I'll try again tomorrow.
 
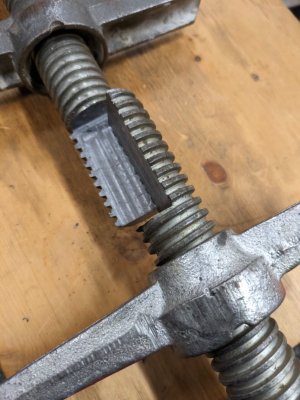
Another exciting Workshop Wednesday. My buddy Matt wanted to turn two short sections of jack screw into a 4'+ lead screw for his mill project. So we nibbled out a 2.5" section of each screw, fussed with thread alignment really quickly, and the screw looks like it's going to work. Next week we'll add a couple of countersunk bolts to hold it together.
The nuts don't even notice the transition.1000002454.jpg
 
My buddy Matt wanted to turn two short sections of jack screw into a 4'+ lead screw for his mill project.

Jack screws typically hold a lot of weight. The longer the screw gets, the more buckling becomes an issue. That joint will probably be the weakest point from a buckling perspective. If the loads are significant it might be worth some analysis.
 
Jack screws typically hold a lot of weight. The longer the screw gets, the more buckling becomes an issue. That joint will probably be the weakest point from a buckling perspective. If the loads are significant it might be worth some analysis.
Fortunately his use is non-load bearing. He's been putting together a lathe and mill out of found materials, and this will be his 4tpi lead screw for the carriage. So there will be some twisting loads bit no buckling loads to speak of.
 
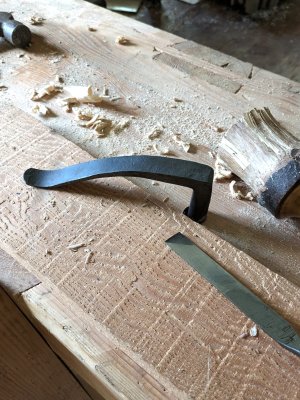
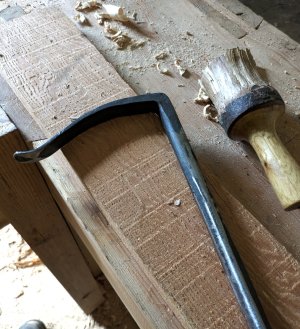
A bit of time in the forge. Was getting fed up of using a screw clamp to hold some beams I've been mortising.
holdfast.jpgholdfast2.jpg
Works like the dickens in my 2" bench top. Not so well in my 6" monster, which is where I chop mortices. Probably need to relieve the bottom half of the hole. Which means turning this monster bench upside, which I'm procrastinating doing by writing this post.
 
A bit of time in the forge. Was getting fed up of using a screw clamp to hold some beams I've been mortising.
View attachment 48444View attachment 48445
Works like the dickens in my 2" bench top. Not so well in my 6" monster, which is where I chop mortices. Probably need to relieve the bottom half of the hole. Which means turning this monster bench upside, which I'm procrastinating doing by writing this post.
.....this is a great place to come to avoid the unpleasantries isn't it.
Looks great and I am sure it will be working just as well, shortly.
 
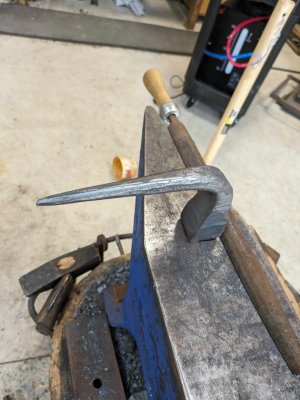
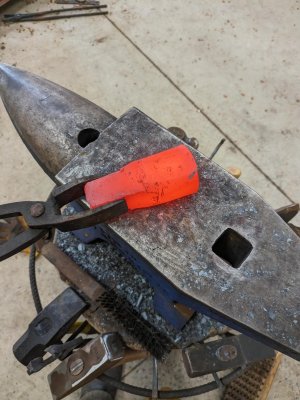
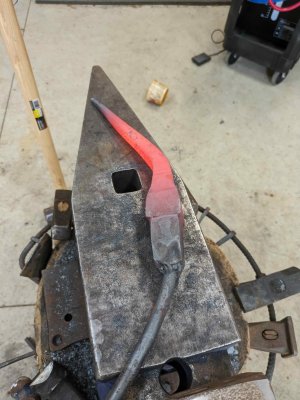
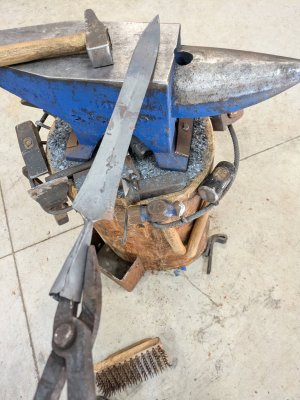
More forge time. A little bickern. Thank goodness for the little power hammer or I'd still be swelling my biceps.

PXL_20240604_221020730.jpeg
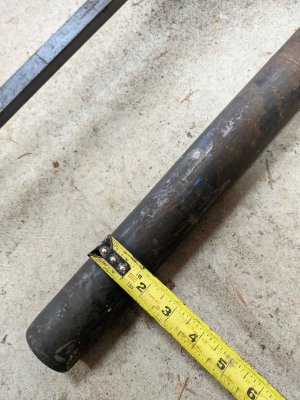
I've been wanting to make one of these for years and I now find myself with a few sockets to make and some 1 3/4" round mild steel to make it out of. Until now I've been using a punch badly held in my vise to tune up sockets and it's just no fun. This should fix it.
PXL_20240604_210217957.jpegPXL_20240604_194204376.jpeg
It also took me much too long to realize I could weld a handle on this thing instead of using my ill-fitting tongs. The handle remains a bit floppy when hot though...
PXL_20240604_220133027.jpeg
 
A friend from some 20 years ago got in touch over Covid, as happens. He really wanted to come spend a couple of days in the forge. Some time later we managed that the first three days of the week.
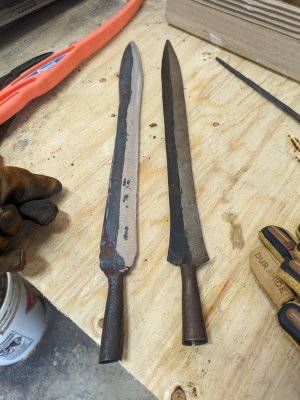
He shows up with two 18" billets of 1.5"x1.8" and says "I want to make a Maasai lion spear". He also brought an "original" he collected while travelling.
First afternoon was intro to forge work, getting him through making the butt-spike. I failed to get photos, but let's call it some cleaned up rebar with a socket on the end. Came out well enough. While he did that, I figured out how to duplicate the spear head he brought, and here's the first take, in rebar, next to the original.
spear_compare.jpg
The shape is interesting - the black half o fthe blde is hollow from the hammer work, with the segment behind flat from the anvil. That part gets ground. Looks pretty at least. The original, not mine.
But that got me through the minimal power-hammer tooling to make the blade possible - running a drawing die in the upper and a clamped-on post (missing the dies) to provide a gauge of the midpoint of the die to align the edge to. A bit of pre-shape on the billet for the leaf shape and bob's your uncle:
spear_final.jpg
I'm sitting on mine a bit before grinding as we ran out of time. But I also want to figure out how to get such a nice line. I need to follow the peak without going over, and I'm really not sure how to hold it right at the grinder. Rob's came out Ok, but the grinding was a total sh*tshow. Suggestions welcomed.
 
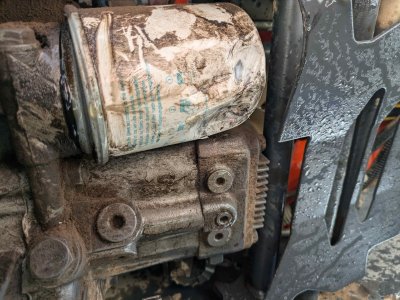
And now for something completely different: I tried to mow my lawn today. I managed to not seat the mid-body PTO socket quite well enough. It did this on the way out:
Oil_filter.jpg
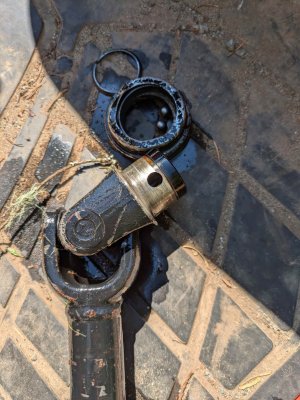
And took itself to expensive pieces, with a $416 quote to replace - I'm going to try to rebuild it. I've since found the spring and third ball in the 2' tall grass. At least there was lots of hydraulic fluid to mark the spot:
PTO-socket.jpg
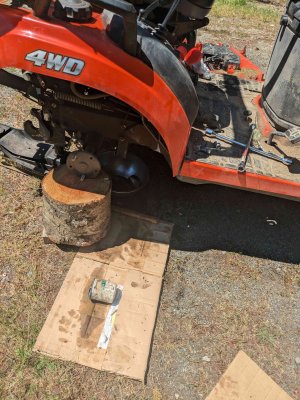
And though this isn't news for tractor owners, a deformed oil filter is hard to remove, so pulling the wheel added a bit of fun to my day. At least I was able to drag it to somewhere flat using my electric ute. I'm glad electrics have torque.
grr.jpg
So I hauled myself into town for a Lordco run, and of course the filter is out of stock. So I'm overnighting in Vic and back out tomorrow, when they'll have it in. Everything takes longer.
 
And now for something completely different: I tried to mow my lawn today. I managed to not seat the mid-body PTO socket quite well enough. It did this on the way out:
View attachment 48902
And took itself to expensive pieces, with a $416 quote to replace - I'm going to try to rebuild it. I've since found the spring and third ball in the 2' tall grass. At least there was lots of hydraulic fluid to mark the spot:
View attachment 48904
And though this isn't news for tractor owners, a deformed oil filter is hard to remove, so pulling the wheel added a bit of fun to my day. At least I was able to drag it to somewhere flat using my electric ute. I'm glad electrics have torque.
View attachment 48905
So I hauled myself into town for a Lordco run, and of course the filter is out of stock. So I'm overnighting in Vic and back out tomorrow, when they'll have it in. Everything takes longer.
OMG. Ouch!
 
And now for something completely different: I tried to mow my lawn today. I managed to not seat the mid-body PTO socket quite well enough. It did this on the way out:
View attachment 48902
And took itself to expensive pieces, with a $416 quote to replace - I'm going to try to rebuild it. I've since found the spring and third ball in the 2' tall grass. At least there was lots of hydraulic fluid to mark the spot:
View attachment 48904
And though this isn't news for tractor owners, a deformed oil filter is hard to remove, so pulling the wheel added a bit of fun to my day. At least I was able to drag it to somewhere flat using my electric ute. I'm glad electrics have torque.
View attachment 48905
So I hauled myself into town for a Lordco run, and of course the filter is out of stock. So I'm overnighting in Vic and back out tomorrow, when they'll have it in. Everything takes longer.
If I recall correctly I did something very similar as a young ‘un.
Dad was not happy.
 
And now for something completely different: I tried to mow my lawn today. I managed to not seat the mid-body PTO socket quite well enough. It did this on the way out:
View attachment 48902
And took itself to expensive pieces, with a $416 quote to replace - I'm going to try to rebuild it. I've since found the spring and third ball in the 2' tall grass. At least there was lots of hydraulic fluid to mark the spot:
View attachment 48904
And though this isn't news for tractor owners, a deformed oil filter is hard to remove, so pulling the wheel added a bit of fun to my day. At least I was able to drag it to somewhere flat using my electric ute. I'm glad electrics have torque.
View attachment 48905
So I hauled myself into town for a Lordco run, and of course the filter is out of stock. So I'm overnighting in Vic and back out tomorrow, when they'll have it in. Everything takes longer.
You really subscribe to the go big or go home crowd don't you.:rolleyes: On the plus side, it gives you another data point on the savings from your new prop.....;)
Better days are just around the corner.......:cool: (some days I would just like to kick the guy that originally coined that phrase right in his optimistic nuts:p)
 
Thats always the hardest part of mounting the mower on my Kubota, that damn PTO hookup is awkward to reach for an old cripple . I havent had it come off yet as yours did but am always nervous for the first couple hours use after a change.
 
It's magic. The cabin is so much quieter that people actually *talk* in transit.
And 300l of fuel later I've made 42 crossings, probably make 44 before I fill. I used to get 34-36. So it's 25-30% more fuel efficient.
Wow, that is significant........ It's nice to put one in the win bag once in a while, it helps offset the cost of those custom clearanced oil filters and hands free driveshafts.
 
I had one come off mine, but thankfully didn't do any big damage, just wrecked a pair of boxers. I gave it a tug and everything (the pto shaft...), was 100% sure it was seated on the detent. Have no idea how it came off.
 
Back
Top