• Spring 2024 meetup in Calgary - tentative date Saturday, April 20/2024. Other regions are also discussing meet ups. If you want one in your area get going on organizing it! discussion
  • We are having email/registration problems again. Diagnosis is underway. New users sorry if you are having trouble getting registered. We are exploring different options to get registered. Contact the forum via another member or on facebook if you're stuck. Update -> we think it is fixed. Let us know if not.
  • Spring meet up in Ontario, April 6/2024. NEW LOCATION See Post #31 Discussion NEW LOCATION

Tips of the Trade

thestelster

Ultra Member
Premium Member
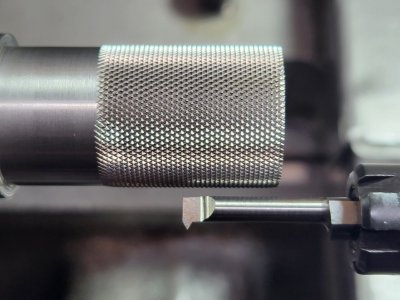
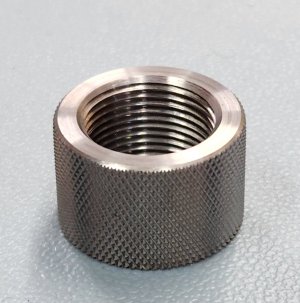
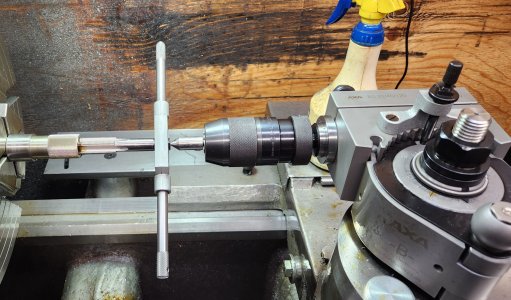
Today I needed to accurately and precisely drill and ream two holes, which for a number of reasons, I was only able to use a transfer punch. The operation in question was to install dowel pins as anti-rotation pins for my Multifix QCTP.

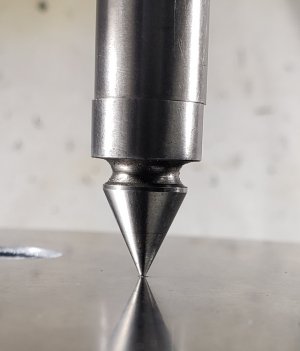
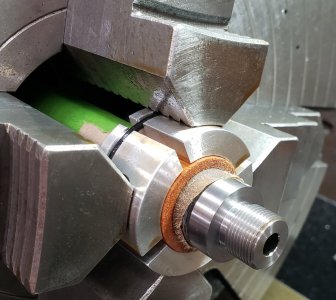
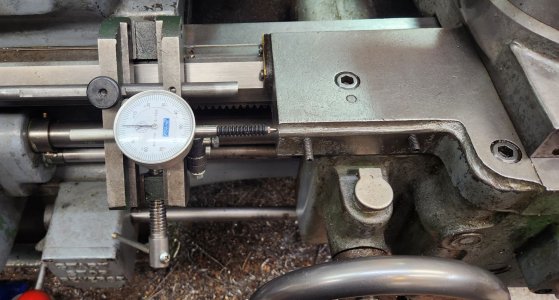
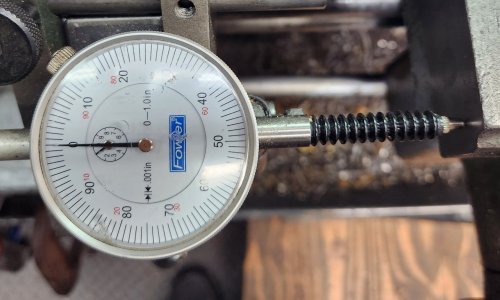
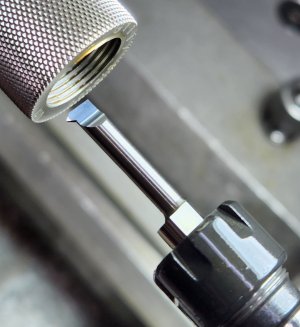
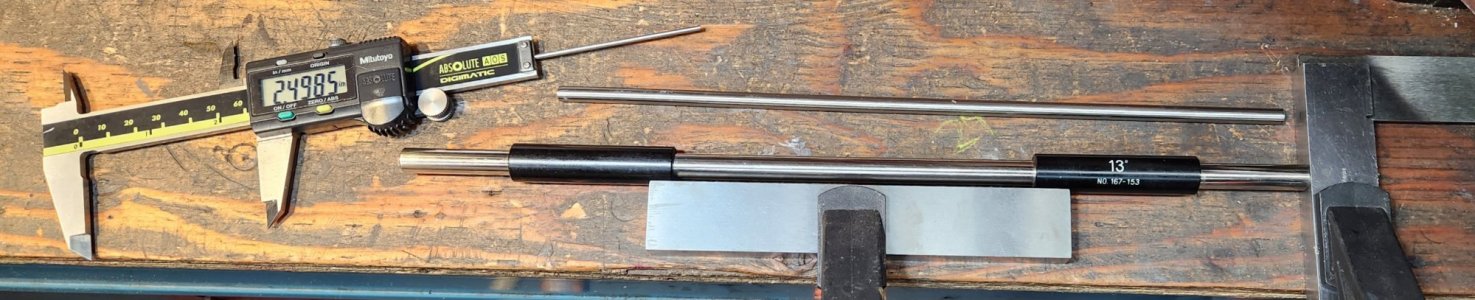
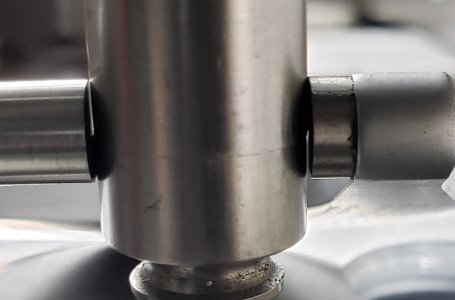
I used an edge finder with the pointed tip down, spindle NOT rotating, and held in the collet chuck. I lowered the quill gently until the point entered the punch mark. As you can see there was a displacement of the tip section from the main body of the edge finder. Using your fingers to feel, you moved the table until it felt as one. I the put the micrometer at the joint and used a back light to see the gap. Moved the table until the gap was gone. Do it in both axis. I've never done this before so I was happier than a pig in poop, when the Multifix barrel slid on perfectly with no effort, and with no perceptible movement.
 

Attachments

  • 20221025_103422.jpg
    20221025_103422.jpg
    176.2 KB · Views: 18
  • 20221025_105448.jpg
    20221025_105448.jpg
    258.1 KB · Views: 18
  • 20221025_115830.jpg
    20221025_115830.jpg
    473.1 KB · Views: 18

Dan Dubeau

Ultra Member
Nice job. When I use a pointed edge finder like that I hold a gauge block up to the shank and gently apply downward pressure. Move the table until it will slide past the joint. For ultimate accuracy rotate the spindle 180* and do it again in the other direction to cancel out collet/chuck runout. Also do the same in the opposite 90* direction. It's surprising how accurate you can be with one of those. I use mine a lot at work.
 

PeterT

Ultra Member
Premium Member
I use the pointed edge finder occasionally too. They are relatively quick to set up. I've noticed they can be influenced by the condition of hole edge perimeter though & how good your fingernails detect flushness. Maybe its a 0.005" tool, not a 0.001" tool which may be perfectly fine. If I can access an existing hole to reference, I actually prefer a DTI. You can dial it in slightly deeper & avoid the crest, detect non-circular holes. Similarly you can position the DTI ball in a spot drill.

I always thought the center the cone would be more useful if it's angle matched a standard center drill angle, but I'm pretty sure mine is different. I don't really trust my own center punching unless its for looser tolerance stuff. But I thing aging eyesight & impatience are the culprits there.
 
Last edited:

Dan Dubeau

Ultra Member
Where mine shines, is when I cut 3d contoured blocks in the CNC, and need to locate holes on compound angled faces in subsequent setups. I use a fine tip scriber in the 1st op to "drill" a small 0.005" deep divot in the part. When I do the other operations I can clock up the part in a double vise on the compound angle, and use my pointed edgefinder to pickup that divot from the first op. I can be anywhere from 0.002-0.005" true position from the original setup, depending on angle of the surface in the first op. The more steep the angle, the less accurate it is. One can compensate for that if you want/need better with a little thinking and windage, but for what I need it for, that is usually more than plenty. Any tighter than that and I set buttons in the CMM. The holes I usually put in with this method are for SPC checking ports and I usually have 0.01" (0.25mm) positional on them, so pretty wide open.

A few of the the manual guys on the floor do use the mic method though. They find it easier and more repeatable than moving the table in finer increments until the block slides. A few guys just use the pointed tip on a wiggler and eyeball it too. I've never had an issue bumping a handwheel with the block method, but will admit I've probably only done it manually a dozen or so times. A couple few hundred in the CNC's though. I get spoiled with 0.0001" jog mode in the CNC sometimes......It can be a crutch. Some of the guys like crosshairs to pickup (the wiggler guys), and the others like the small fine divot. It's a nightmare sometimes to remember who's going to be working on which job, but it's certainly easier than listening to the pissing and moaning about "doing it wrong"......

I'm working on a job like that right now, I'll try and post up an example later today. This one has a bit of everything.
 

thestelster

Ultra Member
Premium Member
Often, when we want to turn or mill something, we'll protect the part to prevent damage from the jaws. We usually use aluminium, brass, or copper shims. Sometimes the part is especially delicate.

In this case, I had to do some machining on a carbon fibre wrapped rifle barrel. I wasn't sure how delicate the carbon fiber is, and I wasn't about to test it by squashing it with my four jaw chuck. So I decided to wrap some kraft paper once around the barrel, then use a wooden bushing I made from a wooden dowel, then gripped that with this 4-piece aluminium bushing I had made from a previous project, then chucked that in the four jaw. The wood is soft enough to conform to the delight contour of the barrel, but also quite rigid when compacted in this manner. Well, it worked perfectly.
 

Attachments

  • 20221206_163448.jpg
    20221206_163448.jpg
    676.2 KB · Views: 16
  • 20221206_162544.jpg
    20221206_162544.jpg
    503.9 KB · Views: 12
  • 20221130_104016.jpg
    20221130_104016.jpg
    267.7 KB · Views: 13
  • 20221209_145457.jpg
    20221209_145457.jpg
    251 KB · Views: 15
  • 20221209_145915.jpg
    20221209_145915.jpg
    180.6 KB · Views: 15

thestelster

Ultra Member
Premium Member
Internal Threading on the Lathe...Blind!

Often, I have to machine threads into a hole of a bushing, tube, whatever, that either there is no available threading tap, or that I just want to start the threads perfectly straight, then use a tap to clean up the threads. To make matters worse is if that part is not drilled right through....A blind hole!

Often the hole is small, or deep, or blocked by the tool post that you can't easily look inside the hole. This is what I do:
1. I determine how deep I want to put threads into the hole, by placing the threading tool next to the part.
2. I position the carriage stop indicator so that the needle is zeroed at 0.100". But do not use the hard stop.
3. When I start to thread, I watch the carriage approach the dial indicator.
4. When the carriage touches the indictor, the needle moves, and I now have to disengage the feed and get out of the cut, within the one sweep of the dial when it hits "zero".
Practice a number of times before you actually start threading. It's surprising how precisely, within a couple thou, you can hit your mark.
 

Attachments

  • 20230211_081021.jpg
    20230211_081021.jpg
    427.2 KB · Views: 40
  • 20230211_080921.jpg
    20230211_080921.jpg
    320.3 KB · Views: 40
  • 20230211_081124.jpg
    20230211_081124.jpg
    364.6 KB · Views: 37
  • 20230211_081354.jpg
    20230211_081354.jpg
    281.8 KB · Views: 40

Susquatch

Ultra Member
Administrator
Moderator
Premium Member
Internal Threading on the Lathe...Blind!

Most of the time, I do exactly the same thing. Except I'm no where near as coordinated as you are. On a really good day I'm lucky to be +/- 50 thou not 5.

I'm fond of doing such threads in reverse.

Imperial is easy peasy. But I really really really hate reverse threading metric threads.

How/where did you get that 6.5PRC caliber marking to look like that?
 

thestelster

Ultra Member
Premium Member
Most of the time, I do exactly the same thing. Except I'm no where near as coordinated as you are. On a really good day I'm lucky to be +/- 50 thou not 5.

I'm fond of doing such threads in reverse.

Imperial is easy peasy. But I really really really hate reverse threading metric threads.

How/where did you get that 6.5PRC caliber marking to look like that?
Yeah, reverse is the way to go, especially if you have to do metric threads.

Laser engraved. Not by me. I take it to a company in Toronto. They'll do it within a couple hours, so I visit with my parents until it's done.
 

thestelster

Ultra Member
Premium Member
That flexible sleeve on the dial indicator plunger. Are those available separately some where?
I think you can buy them separately, but I needed and indicator for that purpose and found one with those accordian sleeves, knowing full well that it would be covered in swarf. If you look close enough, you'll see the effects of hot shavings melted on the dial face.
 
Last edited:

Susquatch

Ultra Member
Administrator
Moderator
Premium Member
Laser engraved. Not by me. I take it to a company in Toronto. They'll do it within a couple hours, so I visit with my parents until it's done.

There is a place 10 minutes away that told me they could do it for me, but I've not had the courage to even let them try. Just too fussy I guess. I love what your source did for you.
 

PeterT

Ultra Member
Premium Member
Nice work.
BTW is that an ER collet shank holding the cutter? Maybe you already know, but you can get the corresponding holders pretty cheap right? Net result is probably the same but their set screws will always orient the cutter on the shank flat, therefore rotation angle relative to the bore ID. Anyways, I'm a fan of these mini boring/grooving/threading tools. A fraction of the cost of USA equivalents.

1676133408536.png
 

thestelster

Ultra Member
Premium Member
Nice work.
BTW is that an ER collet shank holding the cutter? Maybe you already know, but you can get the corresponding holders pretty cheap right? Net result is probably the same but their set screws will always orient the cutter on the shank flat, therefore rotation angle relative to the bore ID. Anyways, I'm a fan of these mini boring/grooving/threading tools. A fraction of the cost of USA equivalents.

View attachment 30571
Hi Peter, thank you. (I'm really liking that knurling tool. No more trepidation about doing the process anymore and the results are exemplary!)

Yes, it's an ER11 collet chuck. I use it more often held in the ER40 collet chuck in the milling machine, but obviously it works great holding boring bars.

I like the idea of those tool holders you've shown, and I have one as well, but I've read that clamping down on cutters with set screws is not the best tool hoding methods, and especially not on solid carbide cutters. ???
 

PeterT

Ultra Member
Premium Member
I like the idea of those tool holders you've shown, and I have one as well, but I've read that clamping down on cutters with set screws is not the best tool hoding methods, and especially not on solid carbide cutters. ???

Its a good point I had not thought of before. The set screw is making contact on its small area, but I suppose its spreading the load somewhat as log as a good fit to socket. I've seen that set screw retention on other different commercial holders & boring heads. But others like PJ Horn have a teardrop shank (maybe so you are forced to buy their toolholders, or spend many hours making them).

1676162117538.png
 

thestelster

Ultra Member
Premium Member
A neighbour down the street asked me to cut some 6mm stainless rods down to size, and drill and tap the ends for M4-.70 screws. I said, ok, no problem, how long? He says about 10 1/2". I hate that. Because I'm going to give him something more precise than "around" tolerance.

Anyway, I could have just taken a yard stick, and mark the rods with a Sharpie, and he would have been happy....but I can't do that.

I don't have a caliper that long. So after I cut them to approximate length....see photos.

So, considering he wanted around 10 1/2", I'm sure he won't mind that they're within 0.010". (I could have gotten more accurate if I had faced both ends of the rods, instead of just one).
 

Attachments

  • 20230311_105220.jpg
    20230311_105220.jpg
    215.4 KB · Views: 15
  • 20230311_105335.jpg
    20230311_105335.jpg
    134.7 KB · Views: 14
  • 20230311_105528.jpg
    20230311_105528.jpg
    180.8 KB · Views: 13
  • 20230311_110144.jpg
    20230311_110144.jpg
    391.9 KB · Views: 13
  • 20230311_110403.jpg
    20230311_110403.jpg
    150.9 KB · Views: 17

PeterT

Ultra Member
Premium Member
How eerily familiar. I think his brother is MY neighbor haha. I turned one end on the lathe, set to on a stop on my mill table & trusted my DRO to mill the end to length. He didn't come back so I assume it fit.
 

thestelster

Ultra Member
Premium Member
@Dabbler recently made a post regarding a file card available at PA. I'd like to expand on this a bit.
Any method used to keep your files clean is an essential part of using files to do proper work.

"During filing, it’s possible for small chips of material to get stuck in the teeth of the tool. This is referred to as ‘pinning’.

If left with clogged teeth, the ‘pins’ in the file can scratch the material you were trying to smooth, defeating the purpose of filing in the first place.

Therefore all files should be cleaned regularly."

For coarse files I'll use the file card. For finer toothed files, I use a stainless wire toothed brush.

For stubborn pins that won't come out, I'll use a brass rod and push it into the teeth in the direction of the rows. This works best for mill files, which only have a single row of teeth, but will also work on others.
 

Attachments

  • 20230718_085657.jpg
    20230718_085657.jpg
    935 KB · Views: 4
  • 20230718_085800.jpg
    20230718_085800.jpg
    750.2 KB · Views: 4
  • 20230718_090026.jpg
    20230718_090026.jpg
    353.9 KB · Views: 4
  • 20230718_090129.jpg
    20230718_090129.jpg
    566.1 KB · Views: 4

Dan Dubeau

Ultra Member
Any soft deformable material will work. We have a pile of this annealed aluminum we used to use for nameplates at work (for stamping info on) that works great for cleaning out file teeth, but I've used brass, plastic, and wood with great results before. While I do have a file card, it's not always the first thing I reach for when a file needs cleaning. The important thing is to clean them regularly.
 
Top