-
Scam Alert. Members are reminded to NOT send money to buy anything. Don't buy things remote and have it shipped - go get it yourself, pay in person, and take your equipment with you. Scammers have burned people on this forum. Urgency, secrecy, excuses, selling for friend, newish members, FUD, are RED FLAGS. A video conference call is not adequate assurance. Face to face interactions are required. Please report suspicions to the forum admins. Stay Safe - anyone can get scammed.
-
Several Regions have held meetups already, but others are being planned or are evaluating the interest. The Calgary Area Meetup is set for Saturday July 12th at 10am. The signup thread is here! Arbutus has also explored interest in a Fraser Valley meetup but it seems members either missed his thread or had other plans. Let him know if you are interested in a meetup later in the year by posting here! Slowpoke is trying to pull together an Ottawa area meetup later this summer. No date has been selected yet, so let him know if you are interested here! We are not aware of any other meetups being planned this year. If you are interested in doing something in your area, let everyone know and make it happen! Meetups are a great way to make new machining friends and get hands on help in your area. Don’t be shy, sign up and come, or plan your own meetup!
You are using an out of date browser. It may not display this or other websites correctly.
You should upgrade or use an alternative browser.
You should upgrade or use an alternative browser.
Tips of the Trade
- Thread starter thestelster
- Start date
Haha!! Maybe. You never know!Maybe even sharpens the file at the same time?
Chip Maker
Super User
Copper works well also.
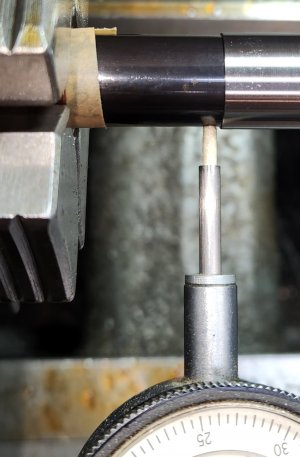
Often I have to dial in a finished part in the 4-jaw chuck. But if I was to use the standard dial indicator tip, it will leave a mark all the way around the part. I could pull back the indicator spindle, but that's a PITA. So I remove the indicator tip, and screw in a piece of Q-tip shaft. It's soft enough not to mar the finish, but also hard enough that there's very little give and gives reliable readings.
Attachments
Often I have to dial in a finished part in the 4-jaw chuck.
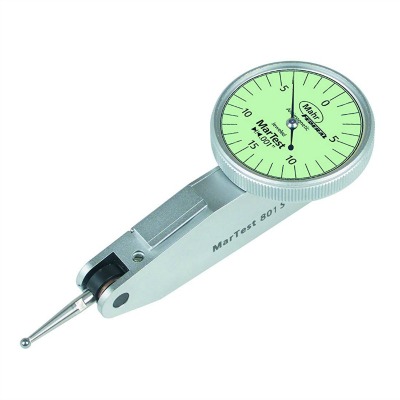
I've never really appreciated using a plunge style dial indicator for this kind of job EVEN when the surface isn't sensitive to marking. I almost always use a lever type dial test indicator for this task. They have only a tiny fraction of the force and the ball is usually replaceable with bigger or smaller ones. For centering, the exact deflection doesn't matter but the best way to use them is still to drag them along a tangent line from the part's OD. I've never experienced a part getting marked using an indicator that way. But I suppose it's still possible that it might mark something like polished aluminium.
Truth is that I didn't even own a regular plunge test indicator till 30 years ago or so.
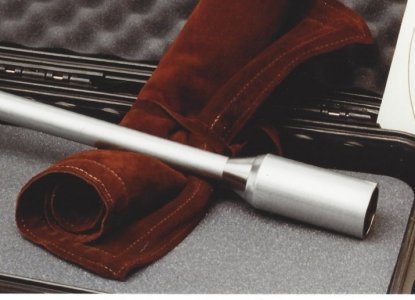
For most work, you don't need one like this, but this is my goto dial test indicator. It's a well made very sensitive indicator that can even be reversed (although I have never had to).
For you, one of its many features that you will love is its barrel size. It will fit down inside the chamber of a 308 or 6BR to dial in a throat.
 www.itm.com
I sometimes use mine with a longer needle to reach further down a bore. This reduces the precision of the indicator but they are so sensitive that you can still dial in your work below a tenth by looking for tiny movement between the scale marks. According to Long Island Indicator Repair, the Tip Thread on the Mitutoyo and Interapid is 1.7mm-0.35 (Starrett is 4-48). But I see conflicting info all over the interweb. If anyone has better info, I'd love to hear about it. My tip selection includes:
- 1.7" (43mm) w 1.4 mm ball
- 2.75" w 0.75mm ball
- 1.2" w 2mm ball
- 0.6" w 0.4mm ball
- 0.6" w 2mm ball
- 0.6" w 3mm ball
Contact Points for Dial Test Indicator 2mm Carbide Ball Tips 44.5mm Long M1.6 Thread Mitutoyo 136013 https://a.co/d/5x0Y9Dc
Note the above link says M1.6, not 1.7. But I have one of these and it fits.... Go figure!
For you, one of its many features that you will love is its barrel size. It will fit down inside the chamber of a 308 or 6BR to dial in a throat.
Mitutoyo 513-504-10T Indicator, Pocket Type, .01in, .0001in
Mitutoyo 513-504-10T Indicator, Pocket Type, .01in, .0001in. Great savings PLUS Free Shipping when you order today on ITM.com.
I sometimes use mine with a longer needle to reach further down a bore. This reduces the precision of the indicator but they are so sensitive that you can still dial in your work below a tenth by looking for tiny movement between the scale marks. According to Long Island Indicator Repair, the Tip Thread on the Mitutoyo and Interapid is 1.7mm-0.35 (Starrett is 4-48). But I see conflicting info all over the interweb. If anyone has better info, I'd love to hear about it. My tip selection includes:
- 1.7" (43mm) w 1.4 mm ball
- 2.75" w 0.75mm ball
- 1.2" w 2mm ball
- 0.6" w 0.4mm ball
- 0.6" w 2mm ball
- 0.6" w 3mm ball
Contact Points for Dial Test Indicator 2mm Carbide Ball Tips 44.5mm Long M1.6 Thread Mitutoyo 136013 https://a.co/d/5x0Y9Dc
Note the above link says M1.6, not 1.7. But I have one of these and it fits.... Go figure!
Let me explain the purpose for me to try to find a way to do multi start and how I did it.
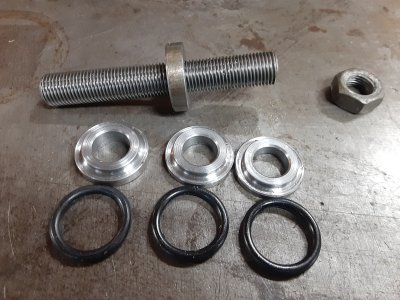
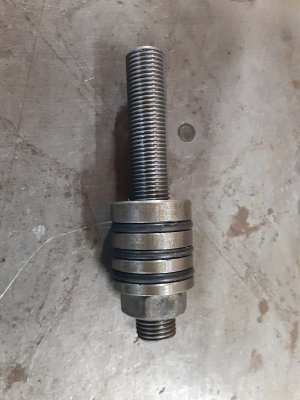
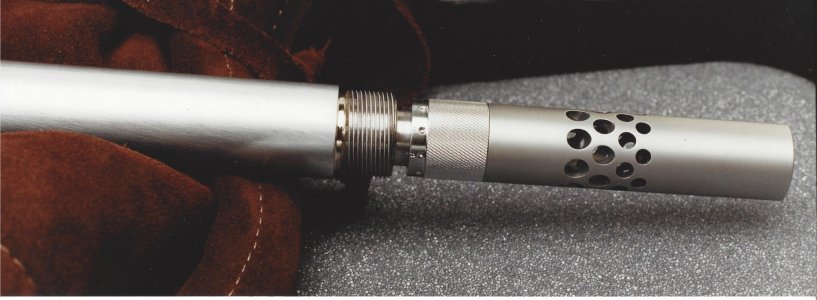
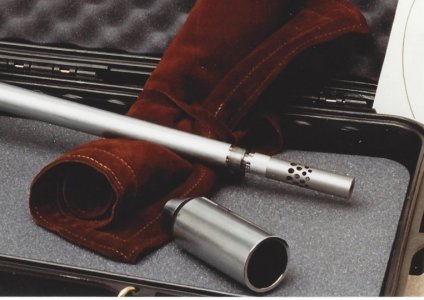
I had a customer who wanted a tuning muzzle brake installed. Easy peasy. But, he was concerned about the additional noise that occurs with a muzzle brake. What he wanted me to make is a tube that went around the muzzle brake that would push noise forward., we'll call it the Cone of Silence, ok this is a little more difficult. But he also wanted to be able to put it on and take it off quickly so that he could adjust the tuner.
Hence the idea of multi-start thread. After asking all my machinist buddies, this was about 20 years ago, so before I knew you guys, and before my internet days, they were giving me suggestions, like advancing the compound axially, or turning between centers but still having the 3 jaw chuck in position, using a lathe dog, and the tail of the dog to be driven by the jaw of the chuck, then going to the next jaw, cut the thread, go to the next jaw, cut the thread. 3 jaws equals 3 start thread. But I didn't like those methods. So I spent hours looking and thinking and reading. I then a light bulb happened. EUREKA!!!


I'll use the new plate that @Darren made, which is a copy of the plate on my lathe.
It says that if I need to cut a thread with 1/4 tpi, I need to close the half-nuts at the same numbered line. So if I need to cut a 5 3/4 tpi thread (which my lathe is capable of doing, I have to close the half-nuts at either 1 or 2 or 3 or 4.
Ok, sure if I use a 5 3/4 tpi thread for the Cone of Silence, it will come off and go on very quickly, but the depth of that thread is 0.094" that's way too deep for our purpose.
Lets say for now we want to cut 5 3/4 tpi. We set our QCGB to 5 3/4, and we start our threading at #1 on the thread chasing dial. We do that first pass, disengage our half-nuts, go back to the beginning, and wait until the #1 comes around again (because, remember to cut a 1/4 thread we have to close the half-nuts at the same number always), and when it does we engage.
Now if we close our half nuts at the #1, make a cut, and the next pass we close the half nuts at the #3 (which is the number directly opposite #1 on the thread chasing dial), we will have made a cut in between the previous thread. So now we have two threads being formed, so now we have 2 x 5 3/4 tpi threads, which is 11.5 tpi. The depth of cut for 11.5 tpi is 0.047". So if we close our half-nuts alternating between the #1 and the #3 on the chasing dial, and cut to a depth of thread of 0.047", we have a perfect 2-start thread.
But that was still too deep.
So lets keep our QCGB set to 5 3/4 tpi but this time we close our half nuts at the 1 and 2 and 3 and 4 marks on the chasing dial. We have now made 4 x 5 3/4 tpi thread = 23tpi. A 23 tpi thread has a depth of cut of 0.024". So now we have a 4-start thread with 23 tpi. And at 0.024' depth of thread, that works perfectly for my purpose.
I have even made an 8 start thread, by using the lines in between the numbers of the chasing dial. (just as an experiment)
The only issue when cutting multi-start threads is that you must have enough clearance on your threading tool so that it doesn't rub on the tread due to the greater helix angle. For carbide inserts you can get angled shims which sit below the threading insert. For HSS you have to grind the relief.
Does this work with every lathe? I really don't know. But my lathe has a lead screw of 4tpi, I can only hypothesize that any other lathe with the same lead screw pitch will work similarly, but you have to try it out.
This is absolutely the fastest, easiest method of cutting multi-start (at least 2-start and 4-start).
But, my lathe only has 4 different pitches with 1/4 threads (2 1/4, 2 3/4, 3 1/4, 5 3/4 tpi), so I am limited at the pitches I can cut. If I was asked to do a 3-start, then I have to use a different method.
If I was asked to do a 3-start, then I have to use a different method.
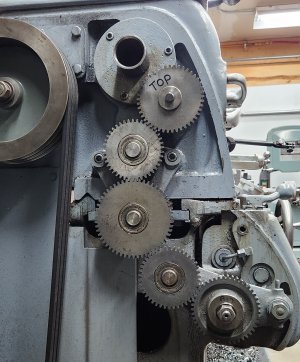
Does your lathe have any backside gears at all Stel?
Back side? This is my gearing.Does your lathe have any backside gears at all Stel?
Attachments
Back side? This is my gearing.
Is that a banjo near the bottom? It looks like the bottom gear is the one driving your lead screw. If so, you could cut new gears to get the pitches that are missing in your gearbox. I wouldn't do it unless I was desperate though.
I made a set of metric gears, so I'm good there. But the only Imperial gear I wish I had is a 30tpi. One of these days!Is that a banjo near the bottom? It looks like the bottom gear is the one driving your lead screw. If so, you could cut new gears to get the pitches that are missing in your gearbox. I wouldn't do it unless I was desperate though.
One of these days!
Knowing you, one of these days will come a lot sooner for than it does for me!
Ironman
Ultra Member
You will never have that issue, if before you start using the file you take a stick of soapstone from the welding bench and rub the file teeth with it. Do this every time and you can clean a lathe file with a soft brush.Those pesky aluminum bits in the file teeth? Your nice sharp carbide scriber pops them out in one pass, just run it along the tooth gullet. Maybe even sharpens the file at the same time?
Or if that's not your bag, WD40 sprayed on will prevent aluminum sticking to steel.
Canadium
Ian
In one of Guy Lautard's books, I think V1 he recommends "railroad chalk"(just a large piece of chalk). Similar idea as @Ironman .You will never have that issue, if before you start using the file you take a stick of soapstone from the welding bench and rub the file teeth with it. Do this every time and you can clean a lathe file with a soft brush.
Or if that's not your bag, WD40 sprayed on will prevent aluminum sticking to steel.
Ironman
Ultra Member
I'd love to have that plate but....
I measured /counted my lead screw and got 6tpi. I don't know if it is a metric screw, but all the dials are inch and metric. So, I guess that idea won't work here.
I'd love to have that plate but....
I measured /counted my lead screw and got 6tpi. I don't know if it is a metric screw, but all the dials are inch and metric.
What does your lathe say about your threading dial in your user manual?

