• Scam Alert. Members are reminded to NOT send money to buy anything. Don't buy things remote and have it shipped - go get it yourself, pay in person, and take your equipment with you. Scammers have burned people on this forum. Urgency, secrecy, excuses, selling for friend, newish members, FUD, are RED FLAGS. A video conference call is not adequate assurance. Face to face interactions are required. Please report suspicions to the forum admins. Stay Safe - anyone can get scammed.
  • Several Regions have held meetups already, but others are being planned or are evaluating the interest. The Ontario GTA West area meetup is planned for Saturday April 26th at Greasemonkeys shop in Aylmer Ontario. If you are interested and haven’t signed up yet, click here! Arbutus has also explored interest in a Fraser Valley meetup but it seems members either missed his thread or had other plans. Let him know if you are interested in a meetup later in the year by posting here! Slowpoke is trying to pull together an Ottawa area meetup later this summer. No date has been selected yet, so let him know if you are interested here! We are not aware of any other meetups being planned this year. If you are interested in doing something in your area, let everyone know and make it happen! Meetups are a great way to make new machining friends and get hands on help in your area. Don’t be shy, sign up and come, or plan your own meetup!

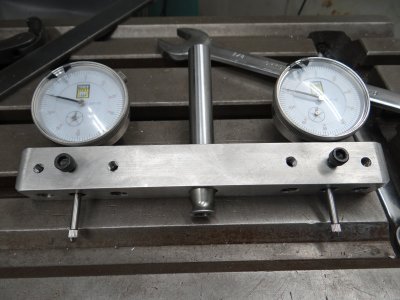
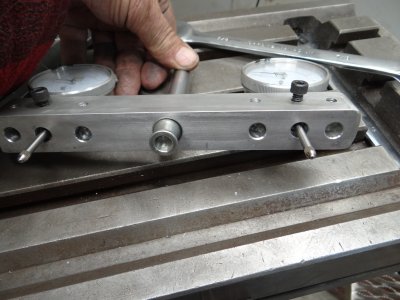
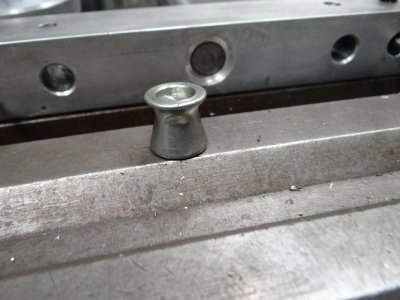
Spindle square

@slow-poke - is there a member in your area with a surface grinder? If not, I'll happily grind you a matched set of 3 blocks if you pay the shipping and provide the blocks.

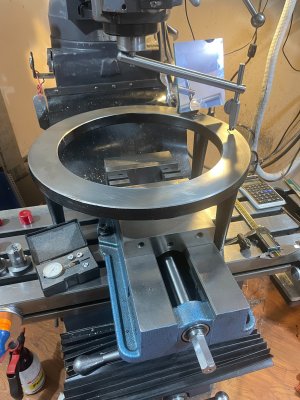
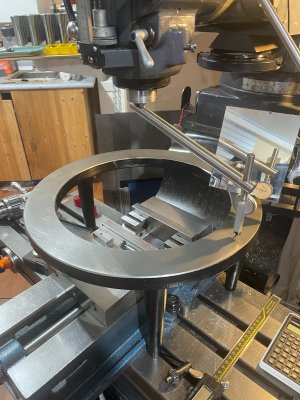
I forgot to mention that I made blocks that were taller than my vise so I could tram without removing the vise. (ya ya ya, they are not really 1-2-3 blocks.)

As a bonus, grinding your own tall blocks provides a great platform for a grinding wheel balancer.

Last, but not least, using a brake rotor has 3 more BIG advantages.

1. You don't need to jump the T-Slots. It's a solid surface all the way around.

2. A new 11 or 12 inch rotor is cheap.

3. A brake rotor extends the surface of the bed back another 3 or 4 or more inches so you get a longer distance to improve the tram.
 
@slow-poke - just thinking out loud.....

One doesn't really need square ground blocks to lift the rotor off the table evenly. It would be easy to put 3 round bars in the lathe simultaneously and turn them all to the same length with a HSS bit. If you didn't make yourself a chuck stop yet, maybe put some temporary epoxy in the center of the bundle so you can square both ends easily. I wish I had thought of that when I was making mine. It would have been 20x easier.
 
I think......

After a good cleaning, I will just place the rotor directly on the bed (vise off). thanks for the grinding offer.

Once tweaked It will be interesting to then check my vise(s).

Next up find a suitable rotor, something common as nails perhaps a Corolla millions of them out there.
 
I made my own a few years ago, after using a new 12" brake disk for tramming the head long enough that I was sick of it. The spindle square tram produced the same result and did it much easier. I use a small round magnet about 3/4" long for zeroing the indicator, and it stays stuck to the t-bar. I would not do without one again.....but since my friend gave me his shop when he died, I now have 2 of them.
It is un-necessary to have the worlds most expensive dial indicator, because once zeroed, all you are looking for is deflection, and adjusting to get no deflection of the needle.
Picture please
 
My method is quite rudimentary but seems pretty accurate. I just grip my Noga arm with 10ths DTI in the quill chuck. I set my finest Chinese parallels on the table either side of quill (even with mill vise on the table) to the extent of the arm & indicate off the top surfaces swinging the arm 180-deg. The parallels are within 1-2 tenths of one another in thickness so at ~12" reach on the table axis that works out to a pretty teeny net angle deviation. Its over with in minutes. You could make a longer arm & reduce the angle even more, but you need to convince yourself the table ends are coplanar with the inner portion where one does majority of work. If its way out of whack from a prior setup & you cant trust the gradations on the machine, put a dial plunger gage on first. You can bump it within a thou quite quickly then mount the DTI.

The cross axis, nod adjustment is the same deal but might be a bit shorter distance just based on maximum swing. Theoretically one should be able to adjust one axis independent from the other but I admit there can be a bit of interplay futzing on certain machines. I appreciate a full disc would be good because you can spin & check all 4 quadrants rather simultaneously, bumping & snugging the bolts. But for me, its never been a strong enough urge to actually buy or make something unless you do this a lot. Unless you have a real big disc, the vise must be removed. The disk is residing on a surface, therefore taking an average of that surface in whatever condition its in. What is inside or outside the donut footprint hole might be slightly different depending on wear or how the table is loaded but we are talking pretty tiny numbers now. Not many people are milling to a tenth. The big thing is don't forget to check your vise. No sense having a perfect quill / table orientation with a canted vise. I've seen certain import models deviate over time.
 
Yeah, tramming the Bridgeport used to be a pain. So much so that I caved in and bought one of those cast iron tripod-rings.
The selling point for me was that there is no need to remove the vice:

Tramming7.JPGTramming6.JPG
Theres a strategically placed mirror for when the DTI is facing the back.

Rethinking that and the brake disk idea - a very inexpensive and simple tram surface can be made with 3, 1-2-3 blocks and a sheet of float glass.
 
Last edited:
Rethinking that and the brake disk idea - a very inexpensive and simple tram surface can be made with 3, 1-2-3 blocks and a sheet of plate glass.

Very cool idea. I wonder how flat glass really is?

My system is almost like yours but has home-made 1-2-6 blocks - 2 on one side and 1 on the other instead of cast in legs. They lift the brake disk above the vise. I don't remember exactly what the brake disk I chose cost me, but I'm certain it was under a hundred dollars. Glass - even cut glass - should be less.

I used a dial test indicator facing up so no mirror is needed.

If I were doing it over, I'd give the glass idea a thorough assessment. It looks like a winner to me.

I think the nicest thing about glass or a disc is being able to do nod so easily.
 
Out of curiosity where do you purchase that gizmo and what do they sell for?
The company is Accudyne and the product is called the EZ-TRAM. No longer made unfortunately.
They had two models - the larger one is 14" diameter - the smaller was about 8" diameter IIRC.

It ran me a couple of hundred about 20 years ago.

Once in a blue moon I see them on eBay.
 
Back
Top