• Scam Alert. Members are reminded to NOT send money to buy anything. Don't buy things remote and have it shipped - go get it yourself, pay in person, and take your equipment with you. Scammers have burned people on this forum. Urgency, secrecy, excuses, selling for friend, newish members, FUD, are RED FLAGS. A video conference call is not adequate assurance. Face to face interactions are required. Please report suspicions to the forum admins. Stay Safe - anyone can get scammed.

Tips/Techniques Show your shop related 3DP

Tips/Techniques
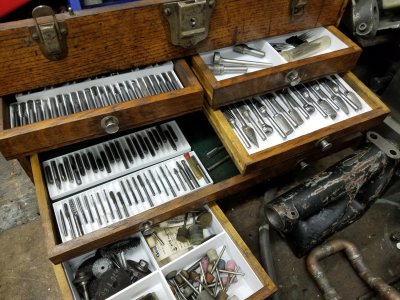
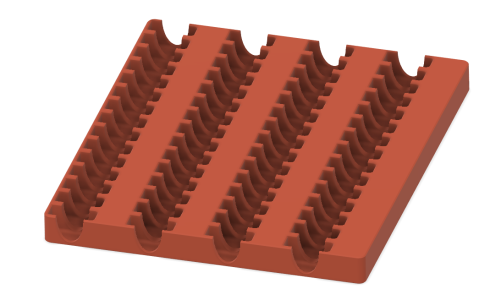
Soooo many organization items, drawer insert, trays, a couple of electrical panel labels and patterns for casting.

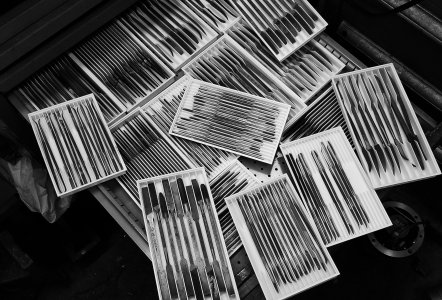
Here are some needle file and rasp containers - that's not quite half of it. Yeah, its too much, but I bought them as a lot and its easier to inventory them than make sure I've got at least one each and deal with kijiji characters.


20210725_203541 bw.jpg
 

Attachments

  • gerstern chest drawer organizers 3d printed 2.jpg
    gerstern chest drawer organizers 3d printed 2.jpg
    288 KB · Views: 9
Last edited:
Dang, that seems like cheating. I had to make mine out of aluminum.
Why not make one die for the whole nose rib ?
Nice job.

3d printers are like cheating! not as nice as your aluminum ones im sure, but they seem to do the job

the thought had crossed my mind to make a die for the whole rib...however...printer isnt big enough, would have to be multiple prints, not sure if the 45t press i have would be enough. I think it would be a whole project to figure out how to do it successfully....but...works pretty good for the dimple dies, and cheap, 4.36$ worth of pla for the top and bottom pieces (slicer says 129g and 89g of pla)

i cant take full credit, ive seen it done on the internet before, just not with this big of a diameter. So i did have to model it, and test it, im tempted to test it to failure and see how many tons it would take to destroy it.....but maybe not, it was like 10+ hrs combined on the two printers
Have seen some builds online that have 3d printed die sets similar to your idea and they could take a lot of pressure. Maybe look at printing with a higher shell count and or even higher infill. One Idea as well is that you can add parts in to the build that act like a form of rebar. You would have to design for the cavity. Then with your die you could print to a certain height then pause the print, put in a large washer and continue the print. Another idea is to print a hollow cavity inside the print and then fill the hollow with an epoxy.

I would test the idea until it breaks, that way you know what it and your equipment can do. If it breaks then just print some more. The best part of 3d printing is that we get to break our prints in prototype and not have to spend weeks remaking the parts.
 
3d printers are like cheating! not as nice as your aluminum ones im sure, but they seem to do the job

the thought had crossed my mind to make a die for the whole rib...however...printer isnt big enough, would have to be multiple prints, not sure if the 45t press i have would be enough. I think it would be a whole project to figure out how to do it successfully....but...works pretty good for the dimple dies, and cheap, 4.36$ worth of pla for the top and bottom pieces (slicer says 129g and 89g of pla)

i cant take full credit, ive seen it done on the internet before, just not with this big of a diameter. So i did have to model it, and test it, im tempted to test it to failure and see how many tons it would take to destroy it.....but maybe not, it was like 10+ hrs combined on the two printers
Apparently it's good for one so I would imagine you'll get 4 no problem.
My aluminum was definitely more than $4, but I guess at least I can repurpose it at some point.
 
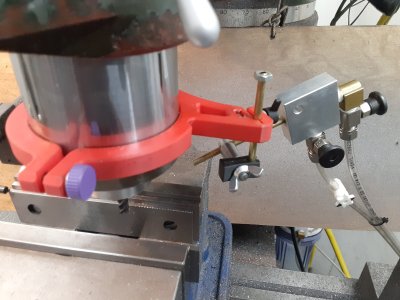
Quill mounting bracket for home-brewed Fogbuster. https://repables.com/r/826/
The little black clamp was designed in FreeCAD. I could have made ten of them in steel in less time, but learn by doing is a long slog.

View attachment 61680
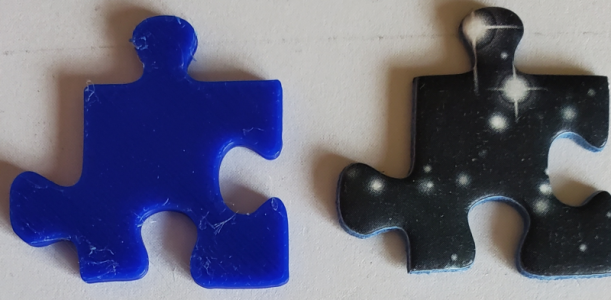
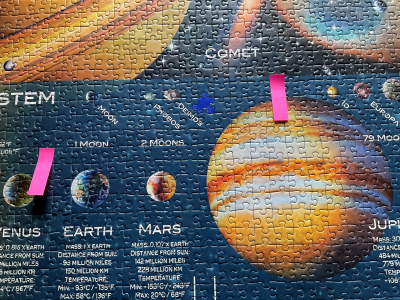
It does get easier. A friend and his disabled son just finished a 5000 piece puzzle that took them a year. At the end they found they were missing one piece. A different piece did fit so it was possible to scan a piece rather than photograph the empty spot. A bit of CAD and 3D printing...

I'll take it over there tomorrow to see how well it fits.

1742353435242.png
 
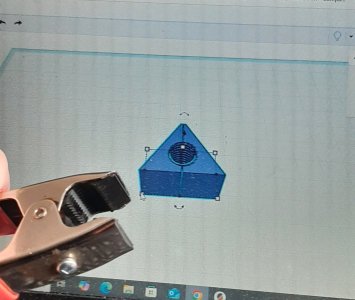
My drill press quill depth adjusting nuts would never stay put. They are both knurled, but never tight enough using my fingers and kept vibrating loose. A extra nudge with a pair of pliers did the trick, but it was annoying. So I made this drill press quill depth adjusting screw clamp, which is much quicker to set and does not come loose. Printed a triangle with a tread and a space in the middle. Then mounted it inside a common spring clamp . I can now adjust the quill depth quickly and securely.
20250210_150901.jpg
 
It does get easier. A friend and his disabled son just finished a 5000 piece puzzle that took them a year. At the end they found they were missing one piece. A different piece did fit so it was possible to scan a piece rather than photograph the empty spot. A bit of CAD and 3D printing...

I'll take it over there tomorrow to see how well it fits.

View attachment 61681
Just got a reply from my friend. Here's a small bit of the puzzle. Look for the bright blue. Apparently fits perfectly.

1742419207578.png


Feels good to use this technology and do something nice.
 
Excellent! The colour is off a bit but easy to fix if they even want to.

Nicely done!
Thanks. Yes. His son paints figurines so I thought they were going in that direction but he told me he may just try photographing a blue piece and printing it and gluing it on the piece. He's quite an accomplished photographer and even has a photo book published of pictures of old barns. He and his wife visited all 49 states and 10 provinces on an extended holiday. Only two states could he not find barns.
I said if he needs the piece thinner due to thick photo paper it's easy enough to print a thinner one.
 
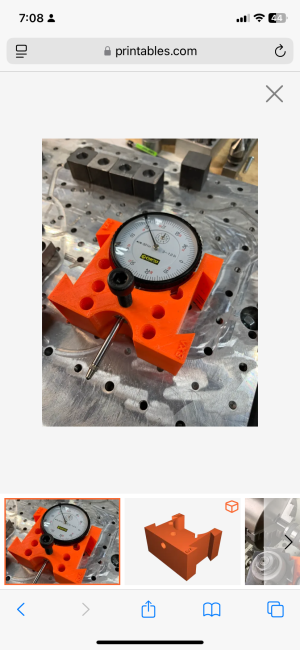
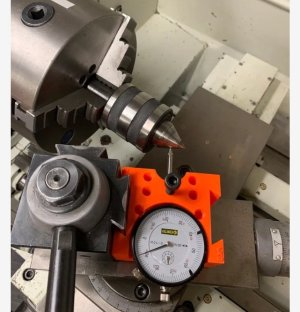
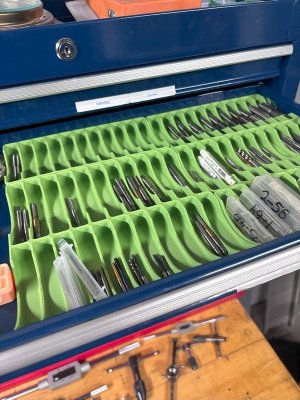
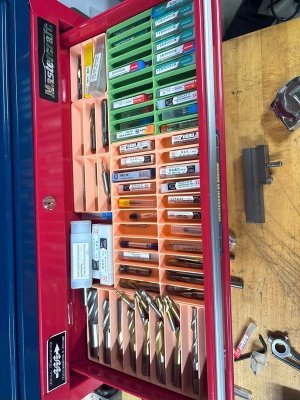
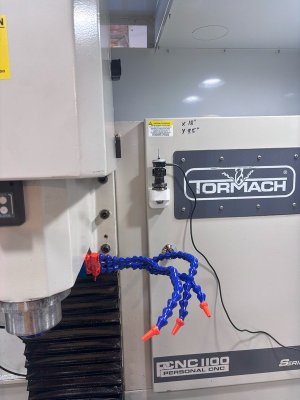
Staring simple with my 3D printing, endmill & tap organization, and a block to hold the touch probe up and out of coolant spray territory, but still in reach.
Currently printing is a tray for the dies. On this one I'm trying to leave some area beside the dies for a label. We'll see how it works out.
IMG_1944.jpgIMG_1945.jpgIMG_1936.jpgIMG_1937.jpg

1742433830865.png
 
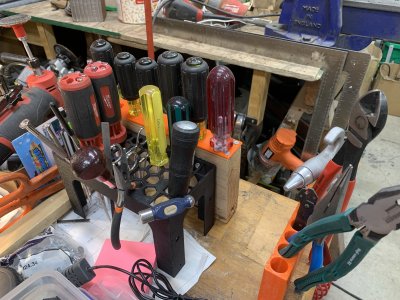
3 kinds of bench tool holders.
The one at the back with the 2x6 bottom was an attempt to Mcgyver 3dp and wood into a productive combo. I drilled out 6 big holes with the drill press and a 1” speed bore. It wasn’t productive as the DP only has a 4.5” DOC so it meant a lot of fussy chuck adjustments. And an amazing amount of wood swarf.
 

Attachments

  • IMG_6816.jpeg
    IMG_6816.jpeg
    1.8 MB · Views: 11
No, Loc line was a long ago purchase from Banggood. 10 pack with shutoff valves for $10 or so many years ago now. I've used up about half of them now on various projects, I think that was a good buy. I just saw a video (Blondihacks) where 3DP loc line is troublesome due to failure at the layer lines. One of those items that may just be better off bought.
 
Back
Top