• Scam Alert. Members are reminded to NOT send money to buy anything. Don't buy things remote and have it shipped - go get it yourself, pay in person, and take your equipment with you. Scammers have burned people on this forum. Urgency, secrecy, excuses, selling for friend, newish members, FUD, are RED FLAGS. A video conference call is not adequate assurance. Face to face interactions are required. Please report suspicions to the forum admins. Stay Safe - anyone can get scammed.

Craig's Craftex CX706 Comes Clean

@whydontu If I understand correctly, I think the CX706 already has such a spring. See the following:

View attachment 42751
It doesn't show very well, but the spring (#38) and washer go on top of the clamping plate ((#36). I wondered if the spring was really necessary but I guess your experience suggests it is?

Craig
The #38 spring is to preload the cam, so the assembly doesn’t flop around too much when the #11 arm is released. For mine, I have the spring between #36 and #31. I think a spring in both locations would be an advantage.
 
One of my 'maybe-one-day' plans has been to add a collet chuck to this lathe. Finding the correct backing plate to adapt from the spindle nose to the chuck has stymied me. Previously.

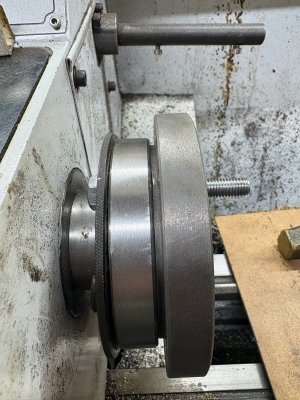
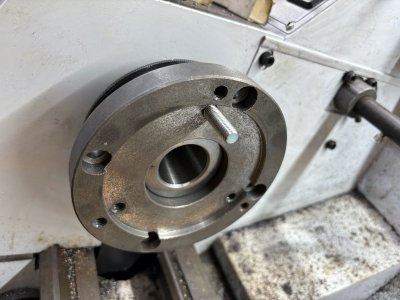
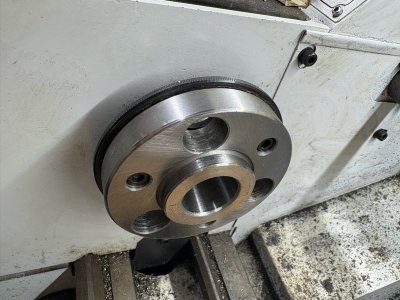
BusyBee, in their Christmas in July sale, was offering an adaptor plate for the CX615 (lathe/mill combo machine). It turns out it also fits my CX706 (10 X 22). Here are 2 views of it on my lathe:

1 mockup attachment.jpg

5 mockup attachment.jpg

I found that the threaded holes for the mounting studs are different. The CX706 chucks come with M10 threaded studs but the pre-drilled holes in this adaptor plate are M8. I've use a simple M8 bolt as a mock-up above. The adaptor plate does not come with any mounting studs at all.

To work around this, the adaptor plate could be drilled out and re-threaded for M10. Or, I could make a custom set of studs with M8 on one side and M10 on the other. I think I'll go the latter direction since I'm going to need studs anyway.

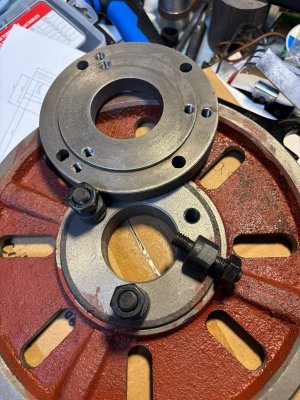
For comparison, the picture below is the CX615 plate compared to the CX706 face plate.

CX615 adapter v CX706 face plate.jpg

I paid $127 plus HST for the plate but the sale ends tomorrow (August 3, 2025) when it will go back up by over $30. I probably could have gotten a slice of Durabar for maybe a little less money. It would not have been easy to handle on a machine of my size.

Now I can start looking for a decent collet chuck!

Craig
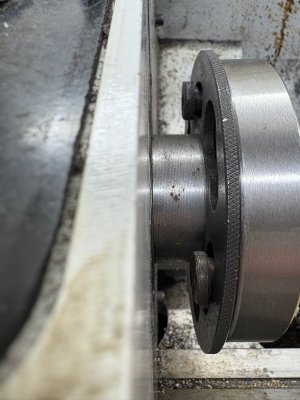
(Also attached a couple of picture of the bare spindle nose for those curious.)
 

Attachments

  • CX706 spindle nose side.jpg
    CX706 spindle nose side.jpg
    165.8 KB · Views: 6
  • CX706 spindle nose.jpg
    CX706 spindle nose.jpg
    216.5 KB · Views: 6
Nice work. I opted for an aliexpress chuck and a amazon D1-4 backing plate.
I have if memory serves me right - 0.005mm TIR. Or was that .001mm....

Here is the link for the collet chuck. quality is top notch for 70$ shipped !
I just found this on AliExpress:
C$18.78 | ER16 ER50 ER25 ER32 125 ER40 chuck 100mm 80mm Mini Flange Four Axis cartridge Collet Fixture Chuck For CNC Milling Lathe Tool

The register on my backing plate was machined for a snug fit and thus my TIR is superb. 1 project done. 93748 left lol.

Gluck to you !
 
Now I can start looking for a decent collet chuck!

Nice progress!

Before you get too far down the road you should try to decide if you want a 5C chuck or an ER and if the latter, then what size?
 
I'm leaning more toward a 5C chuck. I have a good range of 5C collets already and I would really hate to duplicate all those sizes in ER.

Craig
 
Can you link to an example? My spindle taper is MT4 so won't hold a 5C collet inside...

Craig
This is a MT3 one off Amazon.

MT3 tends to be popular but I imagine MT4 is available too. Ali Express is also a good place for such.
 
This is a MT3 one off Amazon.

MT3 tends to be popular but I imagine MT4 is available too. Ali Express is also a good place for such.
Sorry i should have put a bit more effort into looking for a better link for you. My excuse is I'm distracted.

 
I'm leaning more toward a 5C chuck. I have a good range of 5C collets already and I would really hate to duplicate all those sizes in ER.

Craig

That's what I have and I love it. You have prolly heard me say that my 5C Collet chuck lives on my lathe more than all my other chucks combined.

As you prolly know, the 5C is best done with a full collet chuck that handles the 5C collet threads directly. Ya, you can do a custom MT4 collet holder but then you need a drawbar. It's just easier with a chuck.

If you decide you want an ER system later, you can adapt a drawbar for the holder and then just use the collet nut when changing collets.

If you already have the 5C collets, it's just a matter of adding the chuck which is where you were when you started this thread....

Throwing up distractions is one of my worst character flaws. Sorry about that... .
 
Now to reassemble the tailstock...this can't be hard, right? And it wouldn't be if I had room to slide it on from the end of the bed. Or if I had three to four really small hands. 😉

The clamping block needs to be held up against the bottom of the bed so there is room to start the nut underneath. However, I need to push down on the threaded stud from above because the spring is causing it to lift. Eventually I found that an extra long bolt in my machinist's jack under the clamping block would hold it up while leaving my hands free to get the nut started.

View attachment 42747

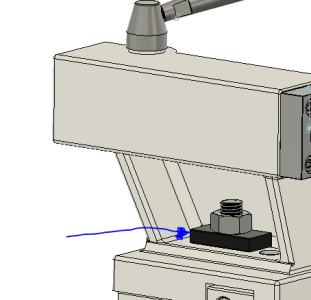
Note that there is a groove or slot cast into the underside of the clamping block. This captures the nut to prevent it from backing off after you get it set. The quick-lock lever is adjusted by this underside nut--a 1/6 turn of the nut is the difference between the lock working decently or being uselessly loose.

A digression about the nut on the top side. It has nothing to do with the quick-lock lever. If you only ever used the quick lock, you could leave it off entirely. If you wrench it down tight, then the tailstock will be locked and the quick-lock lever will do nothing. Seems like a weird design but that's the way it is. All I can think is that the quick-lock lever uses an eccentric shaft to provide the locking force. This shaft is not all that thick and it is possible that it could get bent due to ham-handed operation or even just over repeated use. The top side lock nut would allow the tailstock to be locked in the event that the quick-lock is destroyed. The top side nut probably also locks the tailstock more securely than the quick-lock lever is capable of. Why that would be necessary in normal use escapes me.

(Cont.)

Was just in the process of putting it back together and found that the adjustment of the nut is hyper critical to get the eccentric lever to work properly. Was kinda wondering if I was missing a part or something and I remembered that I had read someone else's take on this machine and came across your post. Geessh, wonder who design this thing, seems like a chance in a million to make it work. Anyways, I've modeled it up in CAD if interested. Cheers!!!!
 
Was just in the process of putting it back together and found that the adjustment of the nut is hyper critical to get the eccentric lever to work properly.

Mine is the same way. I believe it's in the nature of an eccentric clamp to be very sensitive to the position of the nut.

I have access from the right side so small hands are not required.
 
Just for the record, the following part is not mentioned in the parts list in the CX706 manual, but I guess it's on every machine:

1767757299145.png

Unless I can't read the manual right 🙂
 
I have that part. My manual shows an M10 washer in that position (#25, page 35) rather than the beefy rectangular piece that is actually there.

@Susquatch that nut doesn't help the cam over at all. It will defeat the cam over if you crank it down, however. That was what my post a year ago was trying to document. It is the nut underneath that gets you in the locking range.

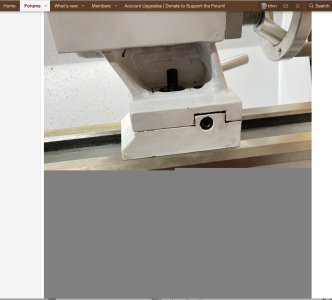
BTW, do the photos in my old post display for you guys? I get about 40% of each photo:

CHMW cut off picture.jpg

I remember the software problems with the board. Just checking if these photos are still broken for everyone.

Craig
 
I remember the software problems with the board. Just checking if these photos are still broken for everyone.

As I understand it, the photo itself is damaged. It doesn't matter how it is viewed. The only way to fix it it to reload the photos.

that nut doesn't help the cam over at all. It will defeat the cam over if you crank it down, however. That was what my post a year ago was trying to document.

I see. That's too bad. I wonder if there is a way to modify the system so it can do that. If so, it would be a great feature.
 
Hi Guys,

Loosening the nut and using the Allen screws on either side will allow you to set over the tailstock. The clamp lever should lock the tailstock down. If that nut is too tight you won't be able to move the tailstock at all. It only needs to be tight enough for the clamp lever to work.
 
Back
Top