CNC plasma cutter build

David_R8

Scrapper of metal
Moderator
Premium Member
Thanks @ShawnR I'm still rather amazed that it worked to be totally honest.

At my non-skill level I'm not inclined to write the g-code directly. I suppose if it was something simple like a square it could be done. But add in radius corners etc and it would quickly become too complicated for me. Adding code to stop and start the torch or add a pause is easy to do.
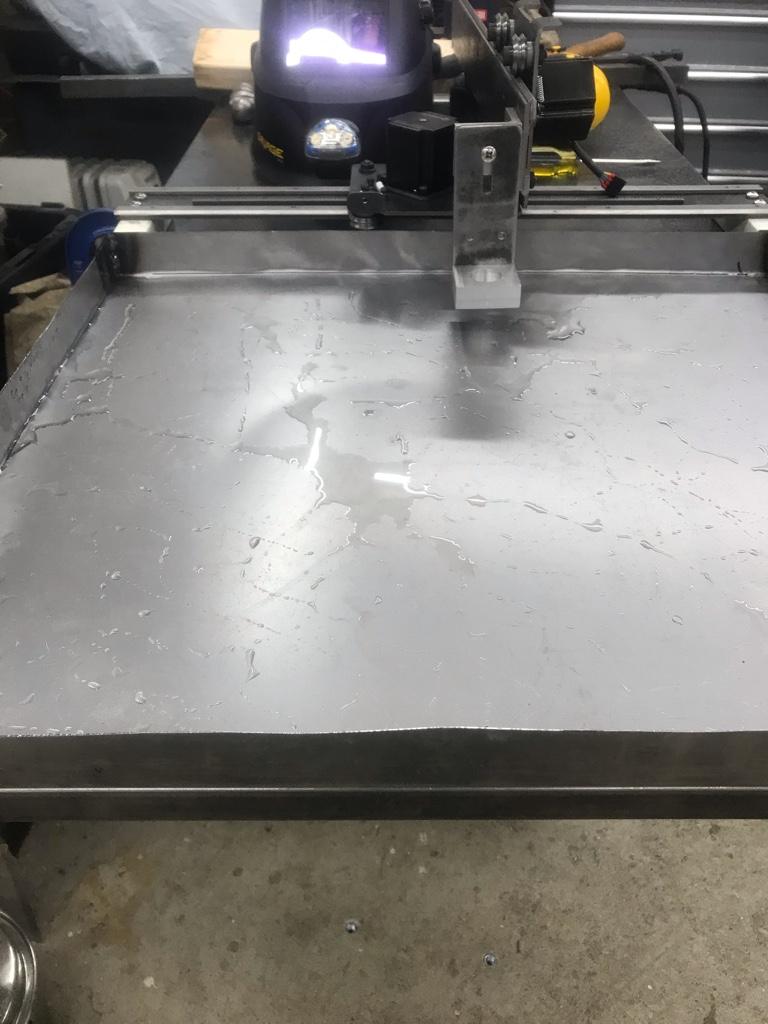
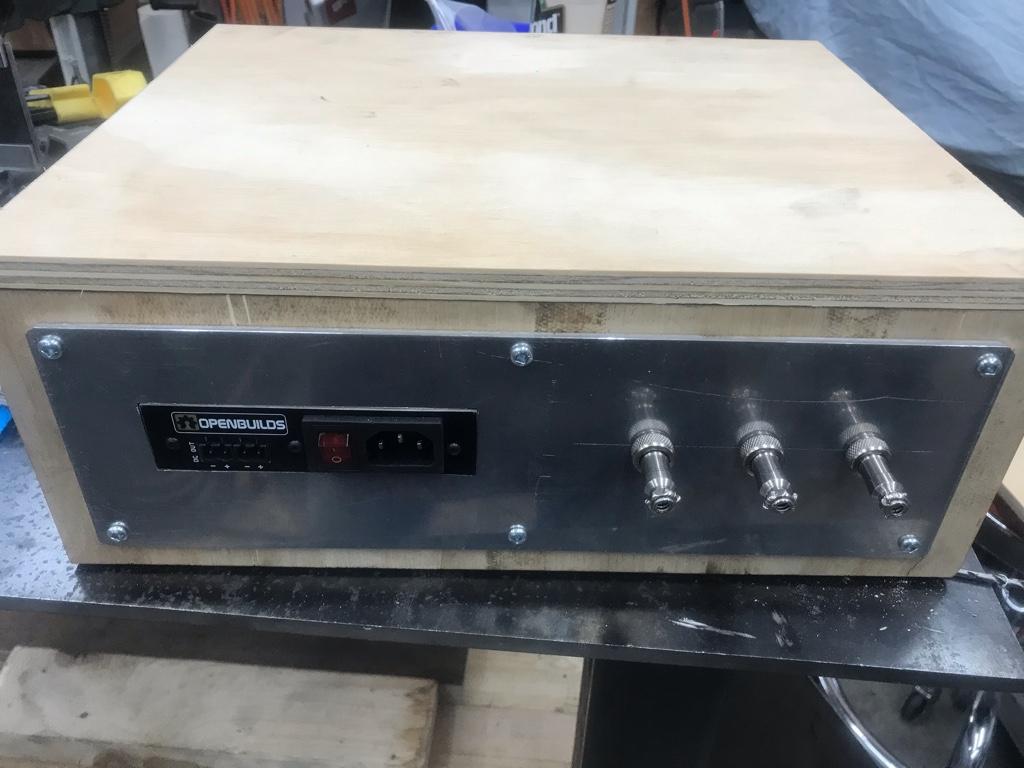
My workflow now is to draw and do the CAM in Fusion360. That gives me a g-code file which I then load into the controller software. I was using UGS (Universal GCode Sender) but I've since found the OpenBuilds control software which is much easier to use. The demo last night was a simple 5" square that I quickly did in F360, did the CAM setup, exported the G-code which I opened with the OpenBuild control software.
 

David_R8

Scrapper of metal
Moderator
Premium Member
How many lines of G-Code did your simple 5" square generate?
This is the code. The first five lines are autogenerated by F360.
%
(1001)
(Machine)
( vendor: Autodesk)
( description: Generic Cutting Machine)
G90 G94
G17
G21

(2D Profile1)
G54
G0 S255 M4
G0 X-4.952 Y132.84
G1 X-4 Y131.191 F1000
G2 X-3.809 Y131 Z0 I0 J-0.191
G1 Y4
G2 X-4 Y3.809 I-0.191 J0
G1 X-131
G2 X-131.191 Y4 I0 J0.191
G1 Y131
G2 X-131 Y131.191 I0.191 J0
G1 X-4
G1 X-3.047 Y132.84
G1 S0
M30
%
 

YYCHM

(Craig)
Premium Member
This is the code. The first five lines are autogenerated by F360.
%
(1001)
(Machine)
( vendor: Autodesk)
( description: Generic Cutting Machine)
G90 G94
G17
G21

(2D Profile1)
G54
G0 S255 M4
G0 X-4.952 Y132.84
G1 X-4 Y131.191 F1000
G2 X-3.809 Y131 Z0 I0 J-0.191
G1 Y4
G2 X-4 Y3.809 I-0.191 J0
G1 X-131
G2 X-131.191 Y4 I0 J0.191
G1 Y131
G2 X-131 Y131.191 I0.191 J0
G1 X-4
G1 X-3.047 Y132.84
G1 S0
M30
%

That's not bad. I thought it would be a lot more.
 

David_R8

Scrapper of metal
Moderator
Premium Member
For simple shapes it's straightforward. For shapes with lots of features there can be hundreds if not thousands of lines.
 

Tom O

Ultra Member
That seems to work quite well, I was thinking that the torch holder might expand during use maybe you could slit it and use a pinch bolt to snug it up.
 

David_R8

Scrapper of metal
Moderator
Premium Member
That seems to work quite well, I was thinking that the torch holder might expand during use maybe you could slit it and use a pinch bolt to snug it up.
Indeed. Originally I was going to cut it in half vertically to allow for a machine style torch but since I don't have one (yet) I left well enough alone.
 

Tom O

Ultra Member
I bought one probably 16 years ago with a 25 foot lead I haven’t used it yet if I remember right it was pricey and last year I came across the manualy adjusted torch holder.
 

David_R8

Scrapper of metal
Moderator
Premium Member
I bought one probably 16 years ago with a 25 foot lead I haven’t used it yet if I remember right it was pricey and last year I came across the manualy adjusted torch holder.
I have done some searching for a machine torch but not having much luck because this I have a blowback start machine.
 

David_R8

Scrapper of metal
Moderator
Premium Member
Major progress today.
Built the removable table. Used 1” square tube for the receivers under the table.
3/4” square table arms with 1” cross members.
4b809ebb9a5c88bfc235a6f334c0c20b.jpg

054d850f62baa1b7f3b0522021e2cdcd.jpg

Made a water tray out of 22ga sheet metal. Folded and MIG welded the corners. It’s watertight shocking no one more than me.
b540e83e6d66230603ec8f40af833eaf.jpg

9dfe82b16aafb4d7b11607d5d232775c.jpg
 

David_R8

Scrapper of metal
Moderator
Premium Member
Thanks @ShawnR and @Tom O
Lots of progress today.
Built the electronics enclosure.
Thought about buying a readymade enclosure but I couldn’t find one with the right dimensions.
So went into my lumber pile found some sanded 1/2” plywood.
Used a piece of 1/8” aluminum sheet to mount all the bits and cut another piece to make a panel to mount the aircraft connectors and 24v power supply.
Once I get all the wiring done I’ll paint it.
Black of course because the magic happens inside the black box :D
d22ffb2bc8037800b4ecb92a85e5b1d7.jpg

a8b573f68c10b4899373b474cc5f9500.jpg

e0dc9330837f03af9d0b703f85394557.jpg

cfd49a0adf800b221506aa2256cc3bbf.jpg

Left to right is power supply, X, Y axis and torch control. Still need to do the internal wiring and then make the wiring to go from the box to the motors and torch.
And I sorted out the v-wheel tension screws.
fd136b3e5939e4ff223bc1cea67f61ea.jpg
 
Last edited:

David_R8

Scrapper of metal
Moderator
Premium Member
Almost like you knew what you are doing ;)

Do you think a lock nut will be needed to keep the tensioning nut from backing off?

Yes, I think so. There’s enough room for them.
The top ones are a bit of a different story as the hole is further outboard of the nut.
13ebeed185e2b5213f50ad65060b5f33.jpg

I’m not really keen on rebending the tabs or cutting them off and replacing them.
I may TIG up the holes and redrill them closer in.
 

YotaBota

Mike
Premium Member
I may TIG up the holes and redrill them closer in.
If you redrill is there room for a longer bolt and have the lock nut on the outside of the tab using the end of the bolt to tension the v-wheel. This would mean one bolt and one nut, saves on hardware.
 
Top