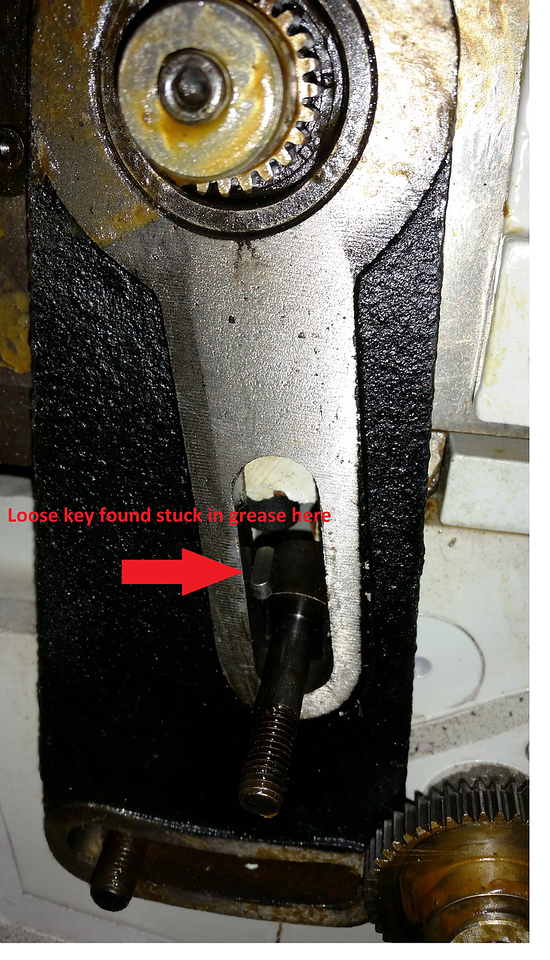
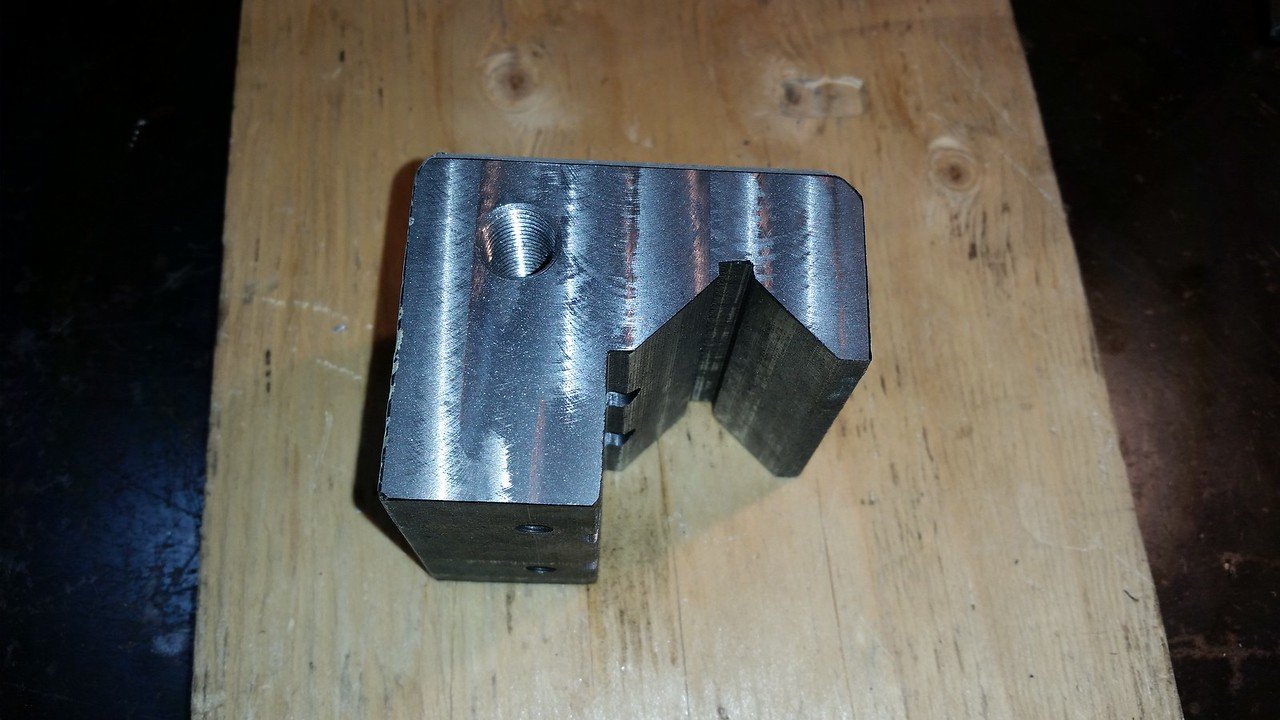
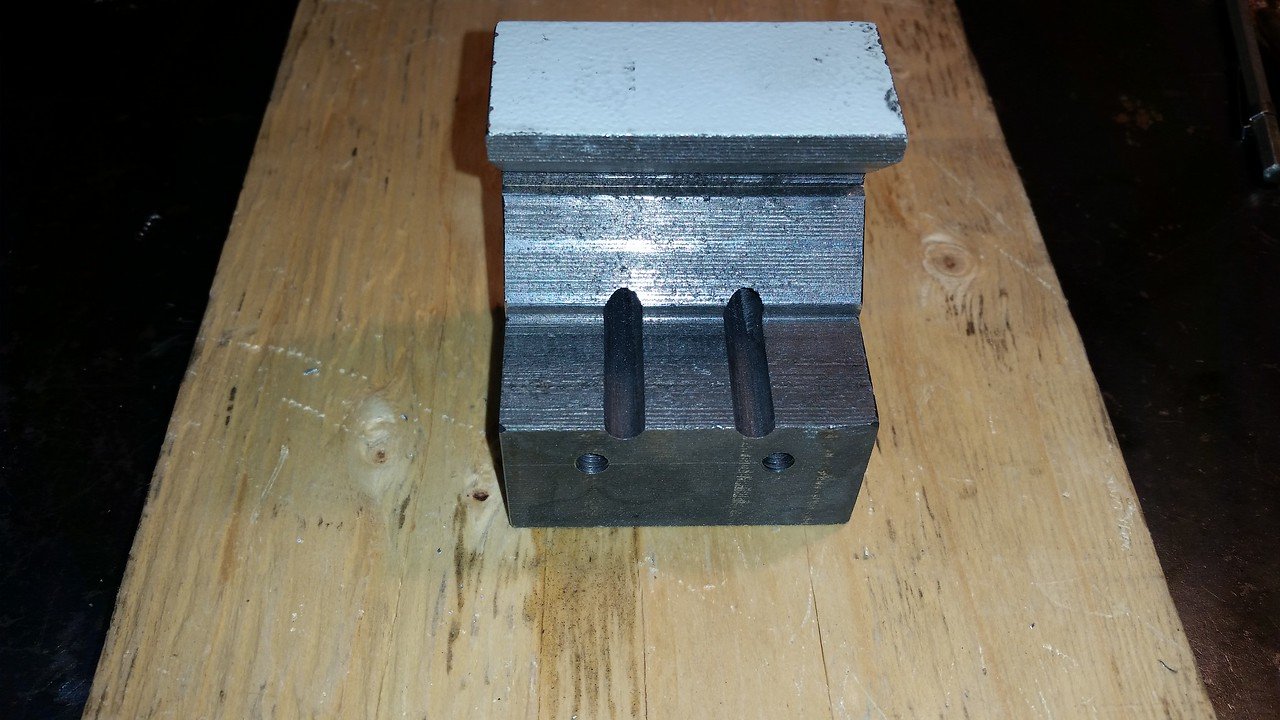
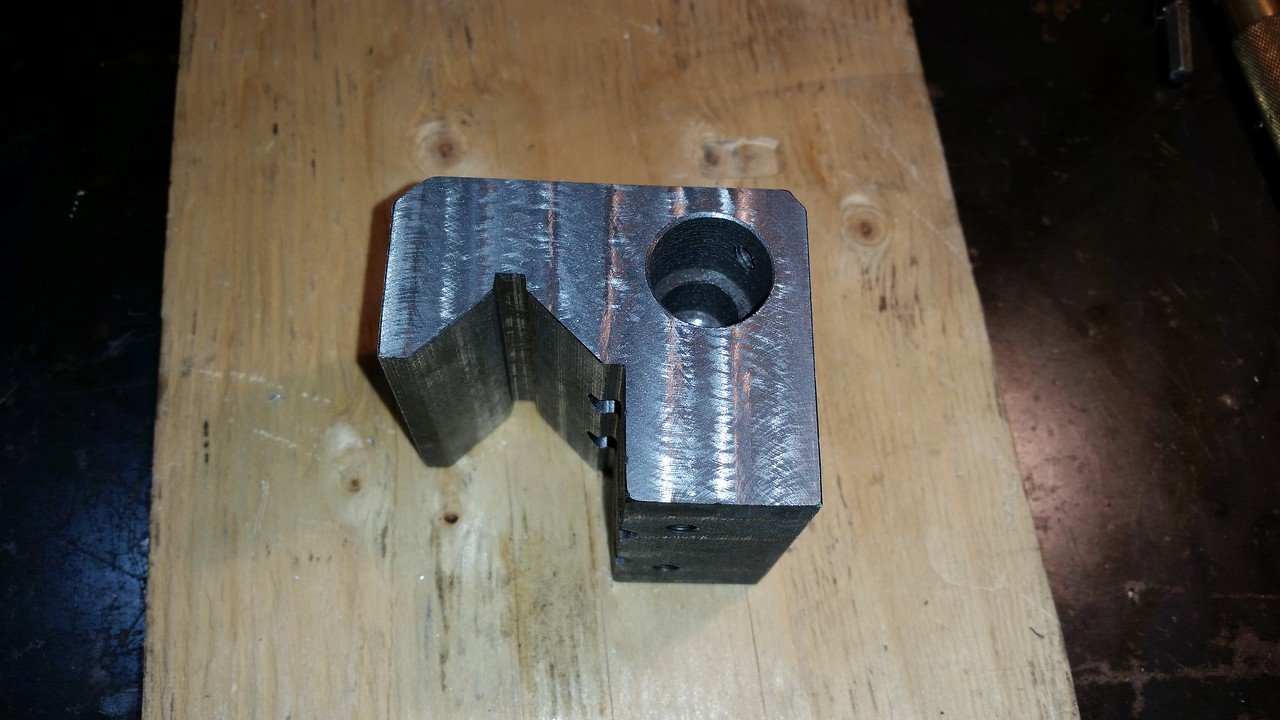
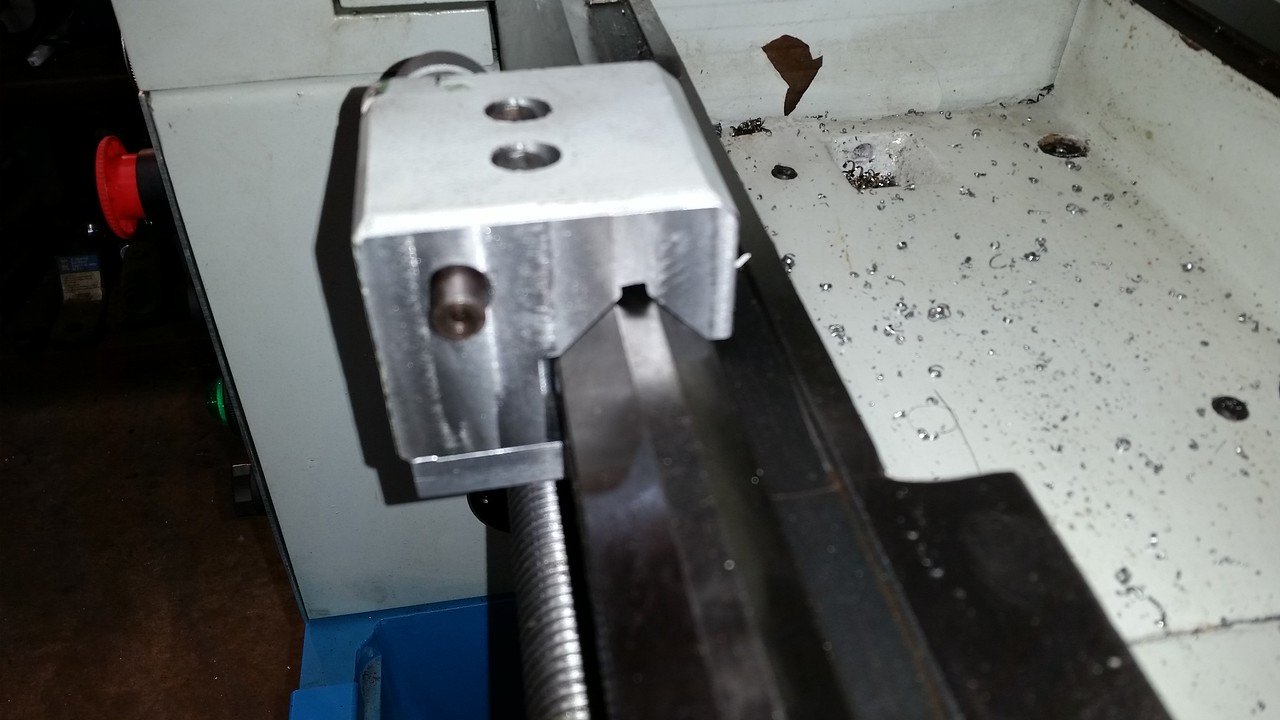
Another accessory item that often causes complaints on Asian lathes is the "micrometer carriage stop". They all seem to have the fasteners attach from the bottom where they are hard to access. I've seen a lot of posts on other forums where people made better versions from aluminum etc. I wanted to improve mine but not build a new one. One of the design problems I saw with mine was the fasteners are so far from the clamping area that it was not really secure even with the bolts tight. There is room to put the fasteners through from top to bottom and not run into the micrometer thimble and that moves the bolts right up against the side of the V way, which improves the leverage they have for tighter clamping. By changing the shape of the bottom plate by adding a fulcrum at the outside edge even more leverage can be applied to clamp the assembly tighter.
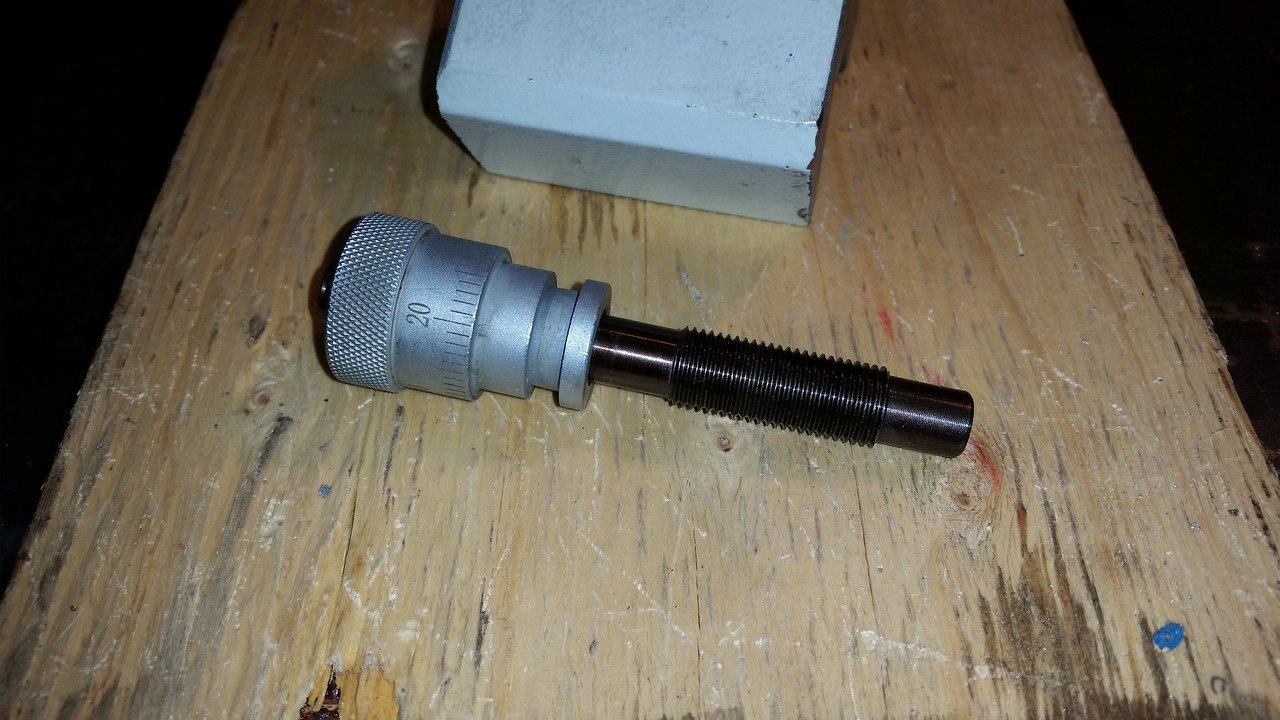
I "drilled" the two 1/4" holes with a long 1/4" end mill since the bottom 1/2 of the holes are only partly supported by the cast iron body. I elongated the holes so the bottom plate and bolts can be moved right against the V way before tightening. I made a new bottom plate from 1/2" steel with a raised outside edge to serve as a fulcrum when tightening. Just for esthetics I milled both sides flat as they originally were very roughly machined. The threads for the micrometer part were very rough and hard to turn but they are M12 X 1.25mm and I have a tap that size so they cleaned up nicely. I wondered how they could have the mic graduations shown as .050" per revolution with metric threads. When I checked the threads with thread pitch gages 1.25mm thread is the same as 20TPI imperial. It turned out to work quite well.

I "drilled" the two 1/4" holes with a long 1/4" end mill since the bottom 1/2 of the holes are only partly supported by the cast iron body. I elongated the holes so the bottom plate and bolts can be moved right against the V way before tightening. I made a new bottom plate from 1/2" steel with a raised outside edge to serve as a fulcrum when tightening. Just for esthetics I milled both sides flat as they originally were very roughly machined. The threads for the micrometer part were very rough and hard to turn but they are M12 X 1.25mm and I have a tap that size so they cleaned up nicely. I wondered how they could have the mic graduations shown as .050" per revolution with metric threads. When I checked the threads with thread pitch gages 1.25mm thread is the same as 20TPI imperial. It turned out to work quite well.
Last edited: