• Scam Alert. Members are reminded to NOT send money to buy anything. Don't buy things remote and have it shipped - go get it yourself, pay in person, and take your equipment with you. Scammers have burned people on this forum. Urgency, secrecy, excuses, selling for friend, newish members, FUD, are RED FLAGS. A video conference call is not adequate assurance. Face to face interactions are required. Please report suspicions to the forum admins. Stay Safe - anyone can get scammed.
  • The 2026 Calgary Area Meetup is set for Saturday May 30th at 10am. The signup thread is here! Robinhood has graciously offered to host the meetup again this year. Please note that you MUST RSVP to the notice linked above if you wish to come.

3D Printer Happened

Selfish ba$tard.... 🙄😉 😛

He is kinda selfish 🙄

Right now I'm actually feeling spoiled.

We had grandkids arrive for a few days here, so no 3D printers got opened, molested, or injured.

I almost asked if they know anything about TinkerCad. But I don't think my ego could handle it if they did. So I didn't.
 
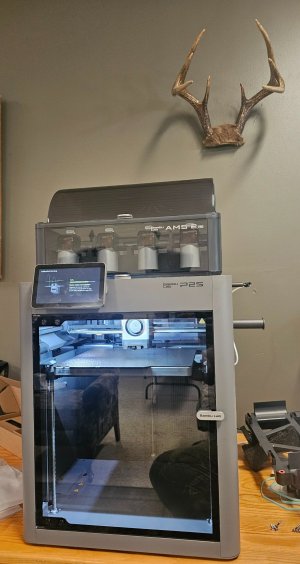
Today was unboxing. Here it is setup and doing its self calibration thing as I write this.

20260702_120643.jpg

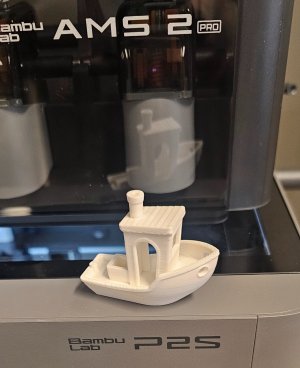
I have not done the benchy yet and can't really comment on any printer strengths until I actually use it. The setup video is ok, but nowhere near perfect - it flat out misses a few steps.

At this point my biggest gripes are:

1. A REALLY LENGTHY process of removing tape, packing foam, and unscrewing things with a supposedly magnetic Allen wrench that was definitely not magnetic enough to reliably extract the screws.

2. Instructions to install two dessicant bags - way too early for that! Don't even have filament installed yet. Surely the built in dryer isn't just dessicant....... If so, those tiny bags will need serious upsizing.

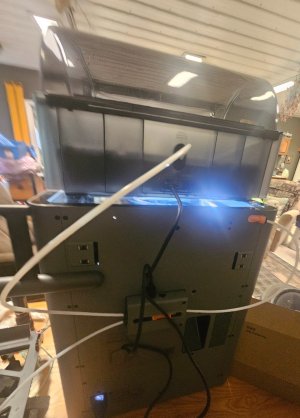
3. Ugly little filament control tubes everywhere - surely they can do better than that!

20260702_122300.jpg

4. The printer wifi didn't like the wifi subnet in my barn. I had to redo my network so the printer could call home. That also required a startup reset with no instructions on how to do that and no way out. In the end, I just unplugged it and thank God it started over.

5. It's really amazing to watch it evaluate the in-place natural frequencies. Also quite obvious I need to change the stand/desk. It's plenty strong but not nearly rigid enough. When that head dances, so does the table. It will be interesting to see how well it eliminates resonance in use.

So far I have not needed to know anything. Just follow the instructions.

Tomorrow I'll try to print something.
 
The next fun job is to CALIBRATE the filaments!!! LOL and you thought this was plug and play. HAHAHAHAHAHAHAHAHAH.

Bambu filaments all ship with their profiles set at 100% shrinkage, per the RFID and Bambu's presets. Out of the box ,the Bambu default settings do not (normally) produce dimensionally accurate parts.

Non-Bambu filaments, or your copy of the Bambu filament need to have this shrinkage adjusted if the parts are to be dimensionally accurate.

Theres a whole process to calibrate filaments which you should research carefully if accuracy is important. For example PETG-CF calibrated shrinkage is 99.7%, PETG-HF - 99.4%, PA6 - 98.6%, etc. I have found that each manufacturer's filaments are slightly different, and there are differences between colours of the same material too.

This is a complex subject and probably needs a separate thread. 🙂
 
One thing I learned the hard way was handling the spools at first I was careless with the ends not securing them with a clip or into the spool and then wondered why I was getting tangled up spools, a quick search revealed my sin and I have repented and haven't had a new roll tangle since.
 
The next fun job is to CALIBRATE the filaments!!! LOL and you thought this was plug and play. HAHAHAHAHAHAHAHAHAH.

Bambu filaments all ship with their profiles set at 100% shrinkage, per the RFID and Bambu's presets. Out of the box ,the Bambu default settings do not (normally) produce dimensionally accurate parts.

Non-Bambu filaments, or your copy of the Bambu filament need to have this shrinkage adjusted if the parts are to be dimensionally accurate.

Theres a whole process to calibrate filaments which you should research carefully if accuracy is important. For example PETG-CF calibrated shrinkage is 99.7%, PETG-HF - 99.4%, PA6 - 98.6%, etc. I have found that each manufacturer's filaments are slightly different, and there are differences between colours of the same material too.

This is a complex subject and probably needs a separate thread. 🙂
I'll say. I have no idea how to calibrate my filaments. Never done it. Just normally scale the part up by a small percentage to handle shrinkage. Much like casting metal.

So looking forward to a tutorial on this.
 
One thing I learned the hard way was handling the spools at first I was careless with the ends not securing them with a clip or into the spool and then wondered why I was getting tangled up spools, a quick search revealed my sin and I have repented and haven't had a new roll tangle since.
There are all sorts of those things. Or just run it through the holes in the side of the reel.
 
Have you figured out something to print for the Wife yet?

Not yet Dan. That isn't as important since it became a gift from her to me. But I'd still like to do it. I keep watching for problems she has that could benefit from a thingy. I did buy some filament in her favorite colour - mint blue.

For now, there are lots of things I need for myself. First up is a benchy.
 
Last night, I pulled the plug and ordered a Bambu P2S Combo. Since diving into the 3D water pool is so intimidating I decided to dedicate a new thread to the adventure. My earlier posts are all over the place. The last full thread is here:

'Filament Recommendations'

I've jumped all over the place but the deciding factor was a wife who had just got a new laptop from her decrepit abused hubby and didn't know what to get the old goat for his own birthday and an anniversary sale at Bambu. The stars were finally aligned, so late last night I pulled the trigger. Best of all, I don't have to hide the damn thing and I get to use my Visa points for something else.

I truly dislike Bambu's cloud policy and closed environment, but neither are really big deals to me as a newbie. I will survive them at least until they change or the need to get out is truly compelling. In the meantime, it should be a lot of fun.

The anniversary sale isn't exactly earth shattering, but it's a sale. It also gets me a wheelbarrow full of filaments at close to half price when purchased with the printer.

I don't have a ship date yet.

Time to read the manual.

Many thanks (or not) to all the members who pushed me into the pool.

You can do this dude.
 
One Matt Ivory benchy in process. Says 20 minutes. Most of that seems to be calibration and bed levelling.

The fill squirts are brutal. Printer oscillates a good inch. Doesn't seem to matter. The head knows where it is. The main benchy is looking great.

Anybody know where the "swarf" goes? I know it's making some but it disappears inside someplace.

There is also a "test" line separate to the benchy at the front of the bed. What is that all about?
 
One Matt Ivory benchy in process. Says 20 minutes. Most of that seems to be calibration and bed levelling.

The fill squirts are brutal. Printer oscillates a good inch. Doesn't seem to matter. The head knows where it is. The main benchy is looking great.

Anybody know where the "swarf" goes? I know it's making some but it disappears inside someplace.

There is also a "test" line separate to the benchy at the front of the bed. What is that all about?
The printer poop spits out the hole at the rear of the machine. Some folks print poop chutes to direct the bits into a bin.
The line you see at the front of the build plate is a priming move for the head to make sure theres filament extruding when the print starts.
🙂
 
The printer poop spits out the hole at the rear of the machine. Some folks print poop chutes to direct the bits into a bin.
The line you see at the front of the build plate is a priming move for the head to make sure theres filament extruding when the print starts.
🙂

I see that now! It's all on the floor behind the table the printer is on.

Yes, a collection pot seems appropriate.

How do I know when to remove the benchy? Is there a process?
 
1. A REALLY LENGTHY process of removing tape, packing foam, and unscrewing things with a supposedly magnetic Allen wrench that was definitely not magnetic enough to reliably extract the screws.
Well you probably wouldn't have wanted it shipped loose in a plywood crate.
Dessicant bags.

There are lots of models to chose from that will print dessicant holders to fit in all the nooks and crannies of the AMS

3. Ugly little filament control tubes everywhere - surely they can do better than that!

The PTFE tubes all need to make fairly gradual bends or the filament is too difficult for the extruder to push and pull. Bad things can happen.
 
The PTFE tubes all need to make fairly gradual bends or the filament is too difficult for the extruder to push and pull. Bad things can happen.

Oh, I see! Those tubes feed the filament to the print head? Ok, I thought it was compressed air or something. I guess it's ok if they carry filament.

The machine will tell you on the screen.

It didn't. Maybe it's a setting?
 
Back
Top