Shouldn't look like that. Where did you get the calibration part. I'll try a first layer here.Calibration first layer patch. I'm now running with the 1.750 mm extruder offset.
View attachment 42900
-
Scam Alert. Members are reminded to NOT send money to buy anything. Don't buy things remote and have it shipped - go get it yourself, pay in person, and take your equipment with you. Scammers have burned people on this forum. Urgency, secrecy, excuses, selling for friend, newish members, FUD, are RED FLAGS. A video conference call is not adequate assurance. Face to face interactions are required. Please report suspicions to the forum admins. Stay Safe - anyone can get scammed.
-
Several Regions have held meetups already, but others are being planned or are evaluating the interest. The Calgary Area Meetup is set for Saturday July 12th at 10am. The signup thread is here! Arbutus has also explored interest in a Fraser Valley meetup but it seems members either missed his thread or had other plans. Let him know if you are interested in a meetup later in the year by posting here! Slowpoke is trying to pull together an Ottawa area meetup later this summer. No date has been selected yet, so let him know if you are interested here! We are not aware of any other meetups being planned this year. If you are interested in doing something in your area, let everyone know and make it happen! Meetups are a great way to make new machining friends and get hands on help in your area. Don’t be shy, sign up and come, or plan your own meetup!
You are using an out of date browser. It may not display this or other websites correctly.
You should upgrade or use an alternative browser.
You should upgrade or use an alternative browser.
What's Paul up to?
- Thread starter PaulL
- Start date
Shouldn't look like that. Where did you get the calibration part. I'll try a first layer here.
First Layer Calibration Squares! Fast Easy Print! by JeepingJohnny | Download free STL model | Printables.com
Download 3D printable STL models
www.printables.com
Heading out. Will try that on mine when I get back.Adjusted part way through to go from the crappy looking bottom left to the better looking top right.First Layer Calibration Squares! Fast Easy Print! by JeepingJohnny | Download free STL model | Printables.com
Download 3D printable STL modelswww.printables.com
Benchy McBoatface worked, now that I glued it down.Heading out. Will try that on mine when I get back.

First useful part!

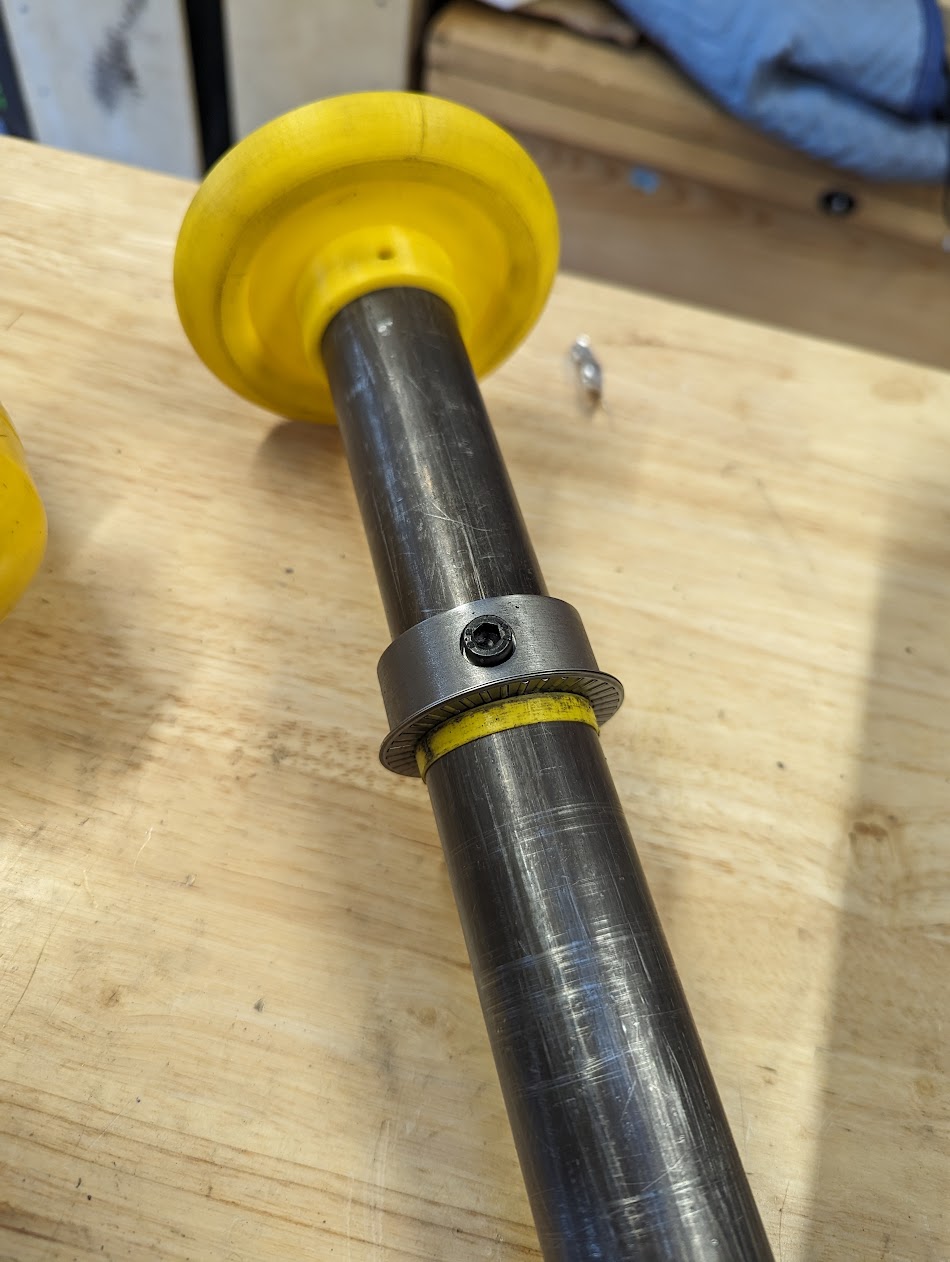
It takes up the slop between the nominal 1.5" lathe bore and the nominal 1.5" draw tube. It's gently tapered to make insertion easy.
Certainly easier than turning this bushing.
I should add - this was worth about 2 10th on the collet runout. Still waiting for the thrust bearing that will let me tighten down a bit better.
Ok, this is nutty easy at this point. Probably needs a post in "waited too long".

Handwheel for my drawtube. Just printing the hub now with 5% infill for a full sizing test, then tomorrow I should have a handwheel.
I can see how awesome this would be to couple with some aluminium casting technology.
Handwheel for my drawtube. Just printing the hub now with 5% infill for a full sizing test, then tomorrow I should have a handwheel.
I can see how awesome this would be to couple with some aluminium casting technology.
Dan Dubeau
Ultra Member
I can see how awesome this would be to couple with some aluminium casting technology.
It's pretty awesome. I have a couple new projects working their way up the list that will be sand cast from 3dprinted patterns I will post about when I get there. But here are a few of my older ones
https://bbs.homeshopmachinist.net/forum/general/1993667-todays-casting-adventure
Last edited:
Test fit is tight enough to turn the draw tube without any sort of pin holding it. It won't last, but it's nice.Handwheel for my drawtube.

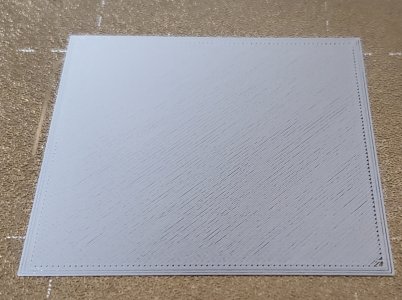
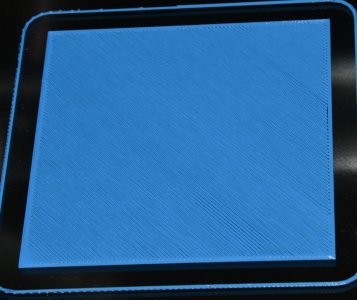
So here's my two shots at it. The glass bed printer height is set with 4 knobs on 4 corners and a feeler gauge. Since the printer is sitting on a wooden top that can expand and contract with temperature I find I periodically have to tweak it. The SOVOL I put onto a 1.25" granite sink cutout slab. So although the folding table shifts a bit back and forth the granite keeps the SOVOL at one spot and it has a touch sensor and can map the entire 300x300 build area.
It looks like the Glass Bed could be tweaked a fraction of a hair closer so the filament runs together a bit more (NIKON camera). The SOVOL (Cell Phone Camera) is better for height. I should probably map it again. Haven't done a full bed mapping for a while.
It looks like the Glass Bed could be tweaked a fraction of a hair closer so the filament runs together a bit more (NIKON camera). The SOVOL (Cell Phone Camera) is better for height. I should probably map it again. Haven't done a full bed mapping for a while.
Attachments
My reading of those is that I want to let up a tiny bit on mine to avoid the over squish of adjacent lines?So here's my two shots at it
For the first layer you do want the squish of adjacent lines but you don't want so much that it oozes out and up creating bumpy layers.
If you look at the SOVOL choices you see initial layer height and line width. With the 0.4mm nozzle it feeds enough filament out at a given travel speed to create the 0.4mm width and the height above the last layer or bed is 0.2mm. Each pass is 0.4mm over so the lines theoretically touch and bond before cooling.
The extra parameter for Initial Line Width as a percentage would make the 0.4mm width actually 0.6mm wide and 0.2mm high squished against the surface of the nozzle.
I'm finding the SOVOL (or CURA slicer) doesn't seem to pay attention to that 150% value I have there. It could be I'd have to slow down the printer. Perhaps it can't feed 50% extra material at the printing speed. It's on my investigate the issue list.

The reason you need the first layer touching tightly is to create maximum surface area on the build plate for adhesion. There is something called a BRIM which you can enable. That adds extra surface area around the perimeter base attached to the base and keeps the corners from lifting for from it coming loose.
A small tall part might only be 2mmx2mm and expand outwards. Adding a large BRIM that sticks to the plate and to the adjacent strands will hold the tall skinny part down on the plate. But if the BRIM tracks don't touch or even touch the main part then they are just a series of loops that do nothing.
If you look at the SOVOL choices you see initial layer height and line width. With the 0.4mm nozzle it feeds enough filament out at a given travel speed to create the 0.4mm width and the height above the last layer or bed is 0.2mm. Each pass is 0.4mm over so the lines theoretically touch and bond before cooling.
The extra parameter for Initial Line Width as a percentage would make the 0.4mm width actually 0.6mm wide and 0.2mm high squished against the surface of the nozzle.
I'm finding the SOVOL (or CURA slicer) doesn't seem to pay attention to that 150% value I have there. It could be I'd have to slow down the printer. Perhaps it can't feed 50% extra material at the printing speed. It's on my investigate the issue list.
The reason you need the first layer touching tightly is to create maximum surface area on the build plate for adhesion. There is something called a BRIM which you can enable. That adds extra surface area around the perimeter base attached to the base and keeps the corners from lifting for from it coming loose.
A small tall part might only be 2mmx2mm and expand outwards. Adding a large BRIM that sticks to the plate and to the adjacent strands will hold the tall skinny part down on the plate. But if the BRIM tracks don't touch or even touch the main part then they are just a series of loops that do nothing.
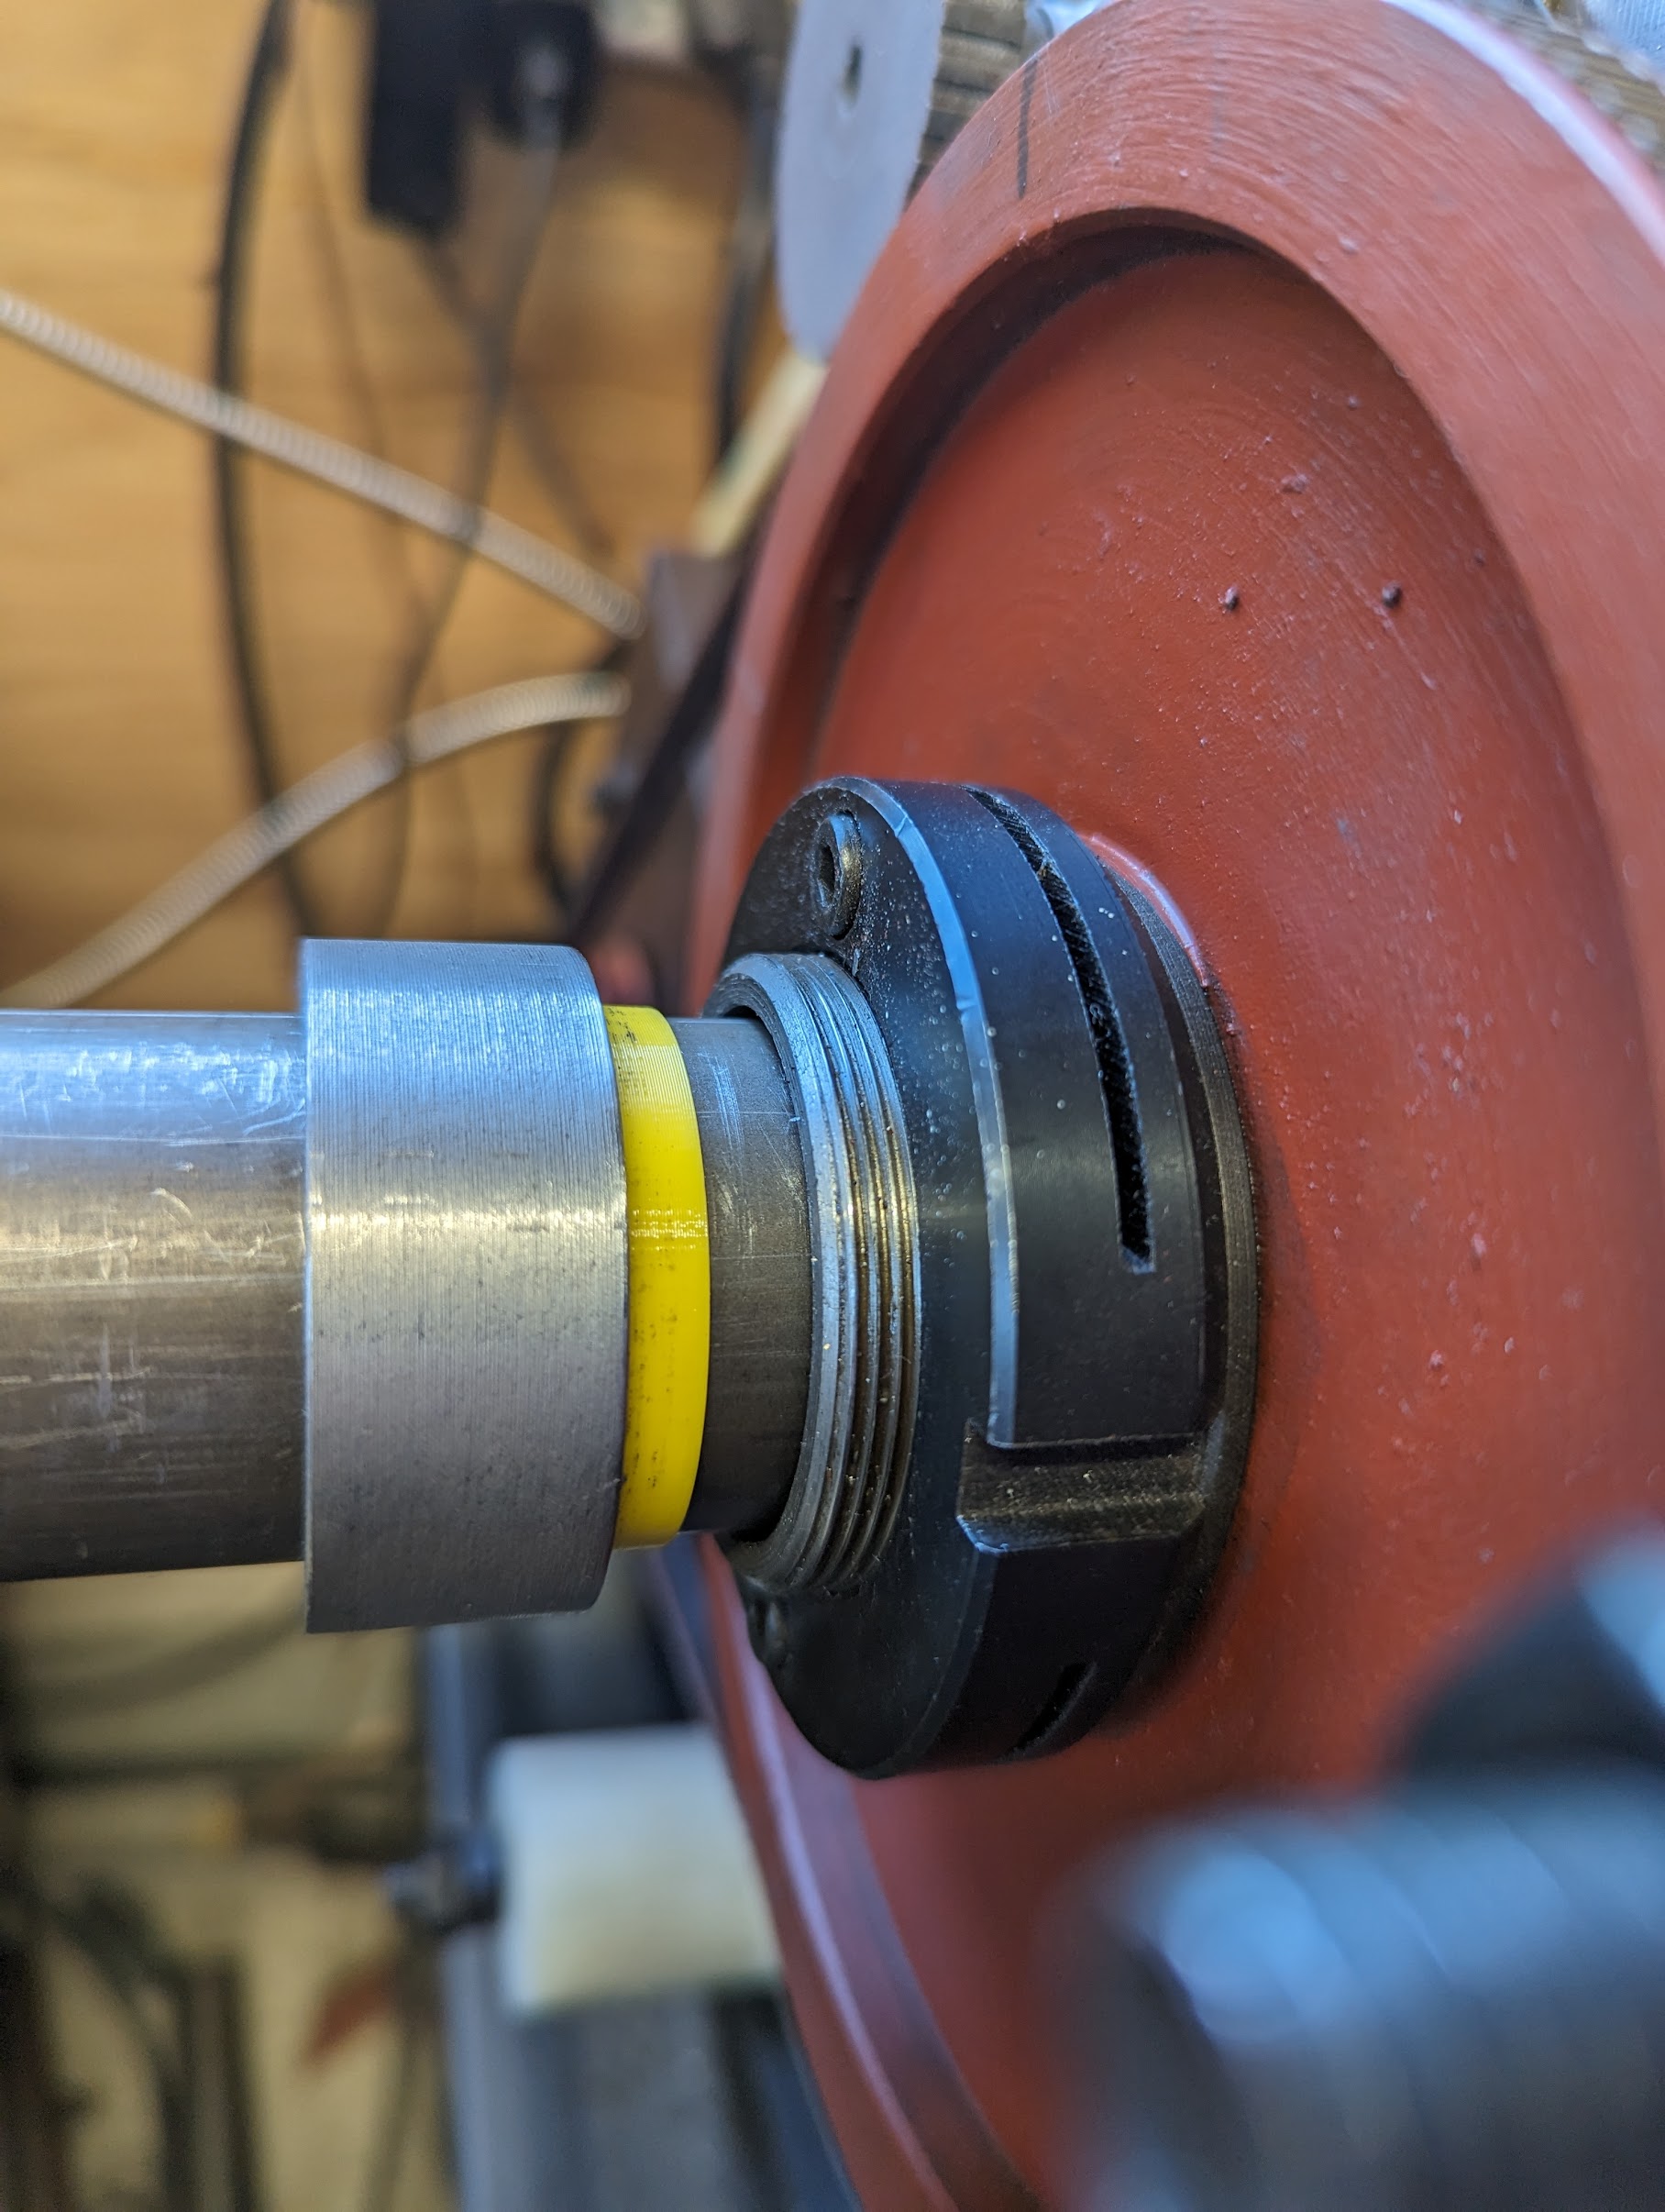
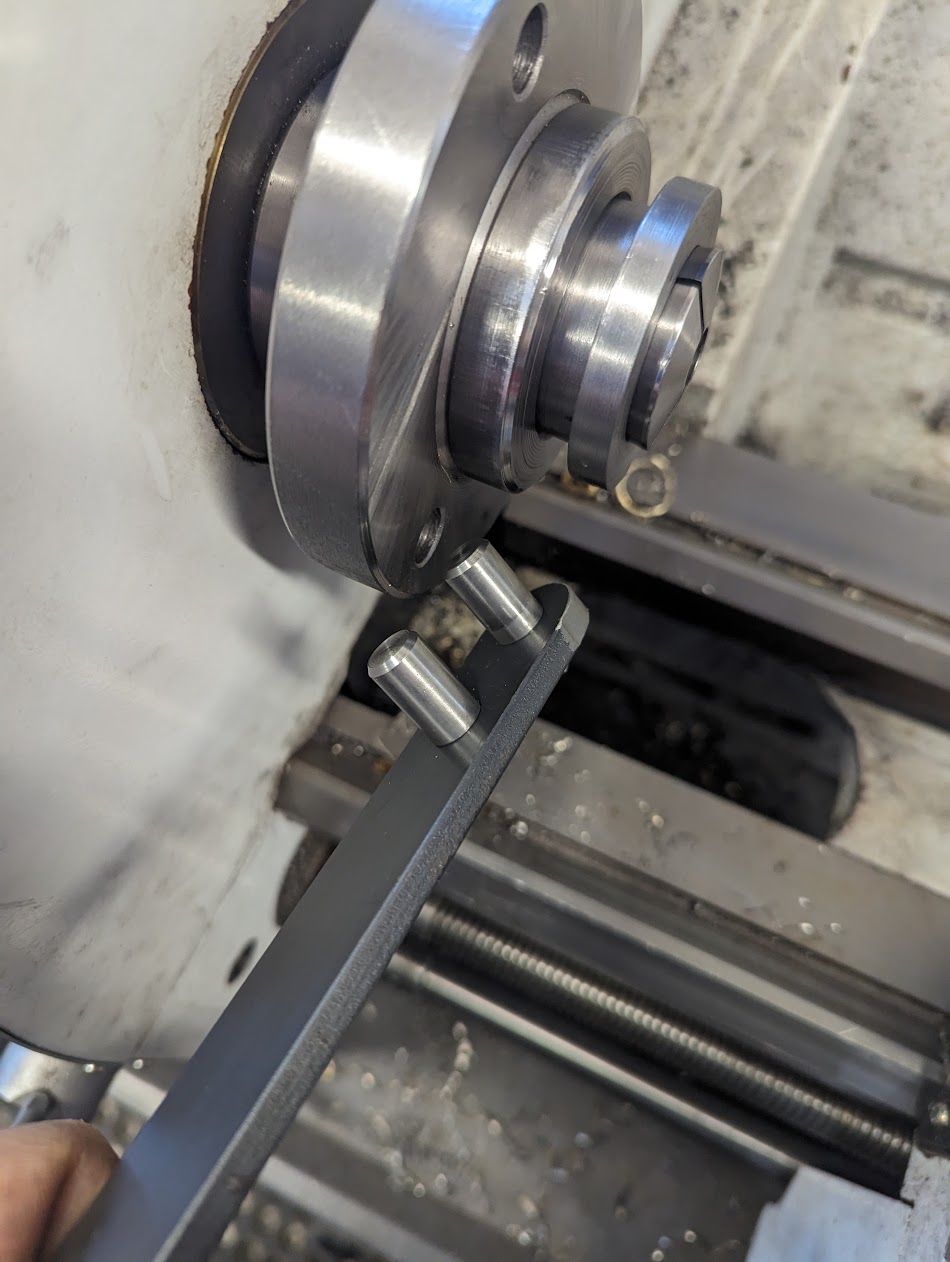
Thrust bearing came for my draw tube. Easy firm fit on the shaft, inserted between the collar and the plastic bush. It's not a high speed rotation it's absorbing, so I don't mind not having nice ground surfaces for it to ride in. Made a real difference on the amount of effort needed to tighten the collet down. That translated to another couple of tenths. I'm now down to just under 5 10th runout with my cheap import collets - I'm calling that success.
I also made up a little tool for holding the spindle still while tightening. Of course I made the pins in the new collet setup - it was a joy compared to messing around with the 3-jaw.
I also made up a little tool for holding the spindle still while tightening. Of course I made the pins in the new collet setup - it was a joy compared to messing around with the 3-jaw.
So I worked some on my gridfinity-compatible OpenSCAD bin maker, largely driven by the lack of text support in the other solution:
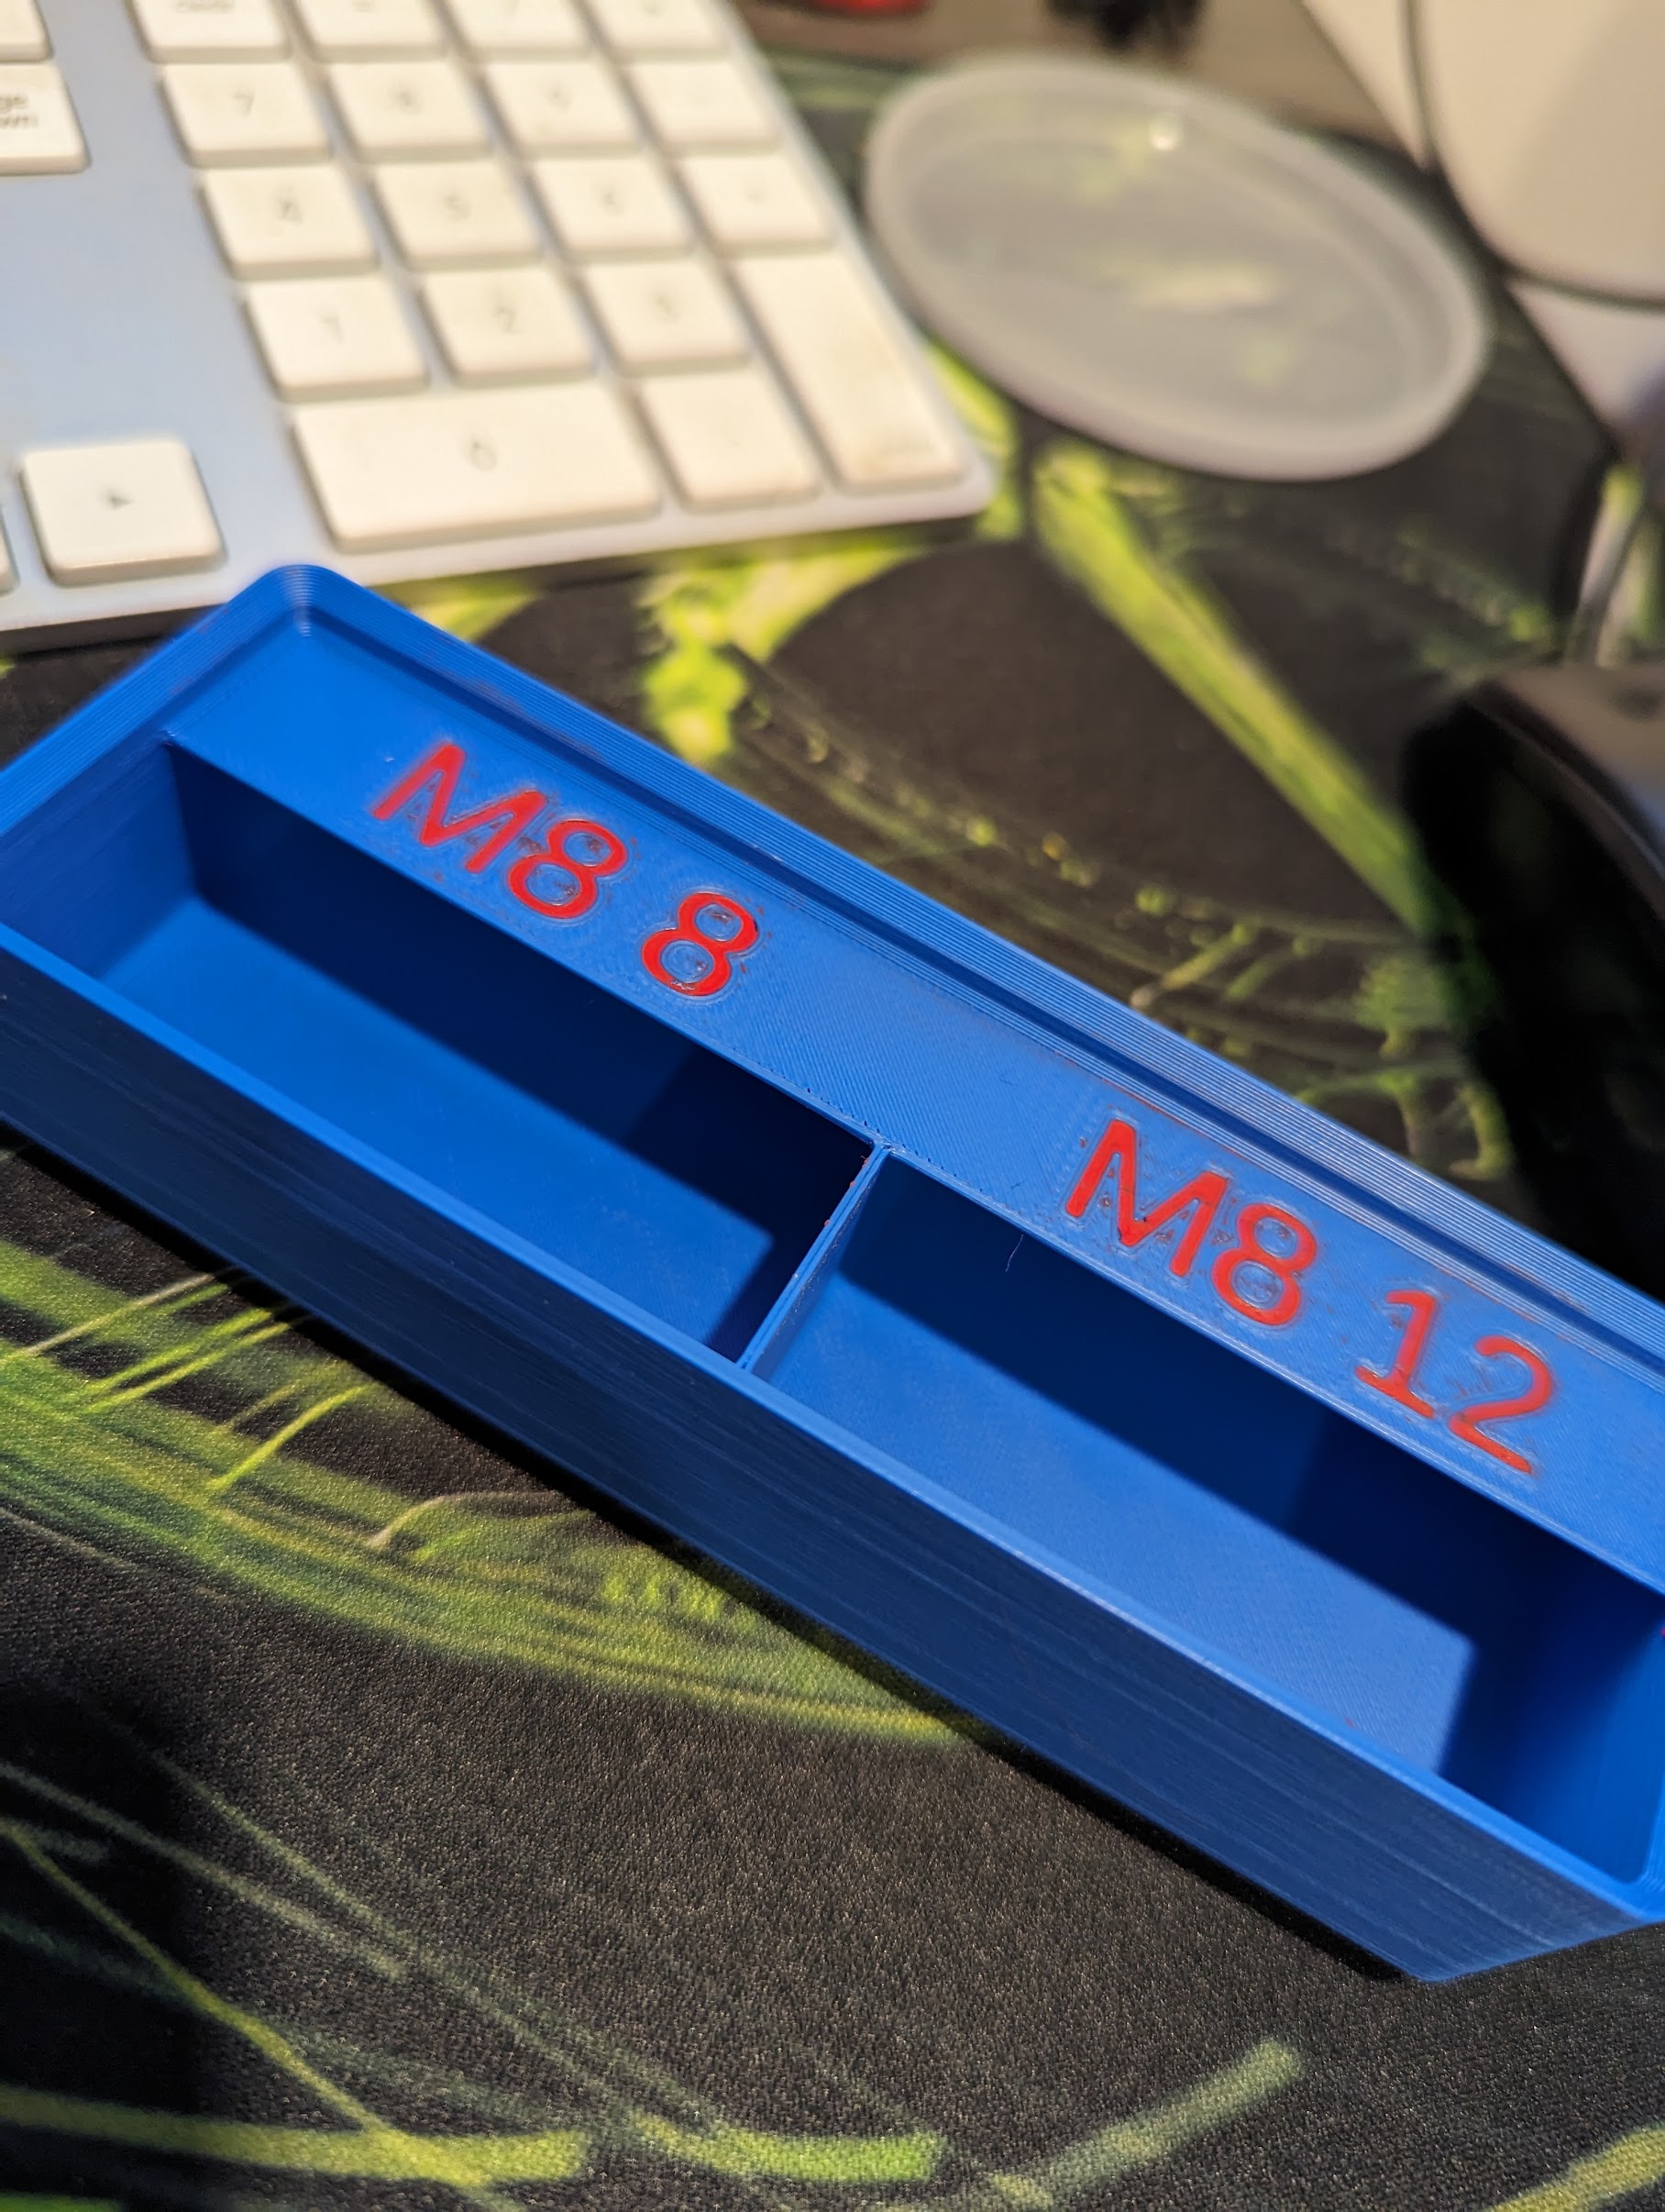
The text is adaptive in size depending on its length, and can be either on the whole bin or on the sub-bin. I used the poor-man's multi-material method, squeezing some modeling clay into the lettering reliefs. This is now complete enough to satisfy most of my needs, though clearly that won't last.
If anyone wants to follow along, the git repo is hosted at https://github.com/paul-lalonde/gridfinity-flux, and I'm open to requests as long as my attention is pointed in its direction.

DPittman
Ultra Member
Yes I've had that happen also, no doubt quality of materials was the biggest factor in my failure but I've also found that tightening the jaws down very well on tap helps limit the failuresMy mastercrap tap holder exploded! The jaws seem to have sheared right along the hole that the sprin pin slots into:
View attachment 43194
Not the end of the world as I have a few other tap holders, but still vexing.
Hard to believe that the jaws of the tap holder are more brittle than a tap.My mastercrap tap holder exploded! The jaws seem to have sheared right along the hole that the sprin pin slots into:
View attachment 43194
Not the end of the world as I have a few other tap holders, but still vexing.
DPittman
Ultra Member
I believe one of my tap holder jaws is cast iron, (or cast iron like)Hard to believe that the jaws of the tap holder are more brittle than a tap.
The real question - how many times do I need to make saw arbors before I start getting it right? This is my 4th, I think?
Previous one was way excentric, probably because I put the seat for the blade on the screw-part instead of the body. Wasn't thinking.
This one seems to run much more true. Also, monstrous 1" wrench flats on both parts. Not skimping there again.


Previous one was way excentric, probably because I put the seat for the blade on the screw-part instead of the body. Wasn't thinking.
This one seems to run much more true. Also, monstrous 1" wrench flats on both parts. Not skimping there again.
Yeah, that's basically my analysis after looking at them for a bit. Knowing how I killed my first 3, there's no way the one-size would have survived.I bought one of those one size fits all from Busy Bee I never could get it apart after the first use. From what I have seen they all pretty well run a bit eccentric but no worries there’s another tooth coming up. ( They use a Allen key to tighten theirs )
It's also not a particularly big deal to make one up, once the principles are understood and the stock is on hand.