• Scam Alert. Members are reminded to NOT send money to buy anything. Don't buy things remote and have it shipped - go get it yourself, pay in person, and take your equipment with you. Scammers have burned people on this forum. Urgency, secrecy, excuses, selling for friend, newish members, FUD, are RED FLAGS. A video conference call is not adequate assurance. Face to face interactions are required. Please report suspicions to the forum admins. Stay Safe - anyone can get scammed.

Machine Vevor MR13A/B Drill Bit Grinder Users

Machine
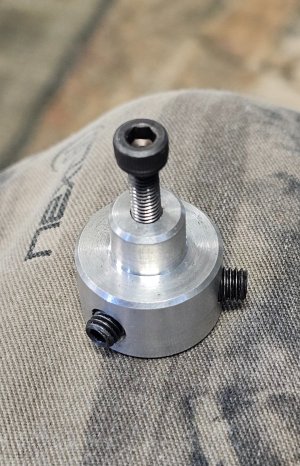
It's unfortunate that they torqued the mandrel screws down so hard that they damaged the shaft and now the mandrel won't come off.

I had the same problem. But, guess what? The mandrel has a built in puller!

Substitute a longer M8 screw for the existing one and screw it in till it contacts the end of the motor shaft and then just keep tightening it till the mandrel comes off! Easy peasy!

Gotta love it when easy solutions just pop out right under your nose!

20260208_120551.jpg

For what it's worth, my 3 mandrel screws were over tightened too. Came off quite easily with a small 3/8 adjustable impact gun. A few very very light impacts and they each spun out easily.

In all cases, I held the collar with some small hardwood blocks and a small vise grip. The motor shaft needs some repair from excessively tight screws. I'll prolly use small grinding stones on a small rotary tool to grind off the burrs. I suppose I could also just spin the motor, but I'd be too afraid of undersizing the shaft.
 
WARNING to everyone. That motor shaft Mandrel is a tight fit even without any shaft marring from tight screws. Don't over do the cleanup by thinking you didn't get it all.

Nonetheless, I'm very pleased with the end result.

The set screw holes in the mandrel are quite deep. I will prolly make and use brass keeps in the holes to stop future marring. I may also make new mandrels with an even bigger OD that permits really nice keeps.
 
@jcdammeyer - One of the things that needs to be done (and I think that @TorontoBuilder already did it) is to design a B fixture for the A, and an A fixture for the B. It might also be possible to make an A/B fixture. The new A fixture also needs an adjustable block like the B which would have clobbered your issue.

I think we also need to develop a setup alignment procedure for the factory systems and for any modifications we develop.

Notwithstanding your issue, I remain very impressed by these devices. When is the last time you saw a drill bit sharpener with such a thick strong structure? This structure will pay heavy dividends as we start to develop modifications for improvements and new functionality.

I did both of these conversion items and more.

I had temporary files uploaded for 3d printed testing. But I took them down when I found a couple of issues that needed resolving before final high performance 3d printed parts could be confidently printed.

Then I had health flare up and other shit happen. Shit is still happening... but I am going to outsource some of this work soon and try to nail the dimensions and everything for a final 3D print set.

God knows when I'll get to machine the metal versions.
 
As I'm not allowed to lift heavy things or bend over to do yard work etc. for the next few weeks I'm sitting in front of the TV with the laptop using CAD.

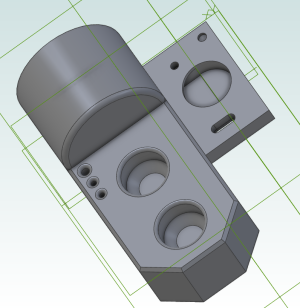
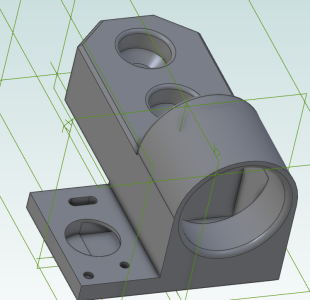
Since my MR-13A has two collet holders I thought I'd redesign the one that @DavidR8 linked me to so that it would hold both collets and the extra wrench 4mm needed for adjusting the back rake set screw stop.

1770845780238.png


1770845827304.png

I have not yet 3D printed this so user beware but I have included the STEP file so it can be looked at and if someone wants to do a modification let's see where it goes.
 

Attachments

With support it's 6.5 hours printing time. Not sure I'm going to do it. I tried the original with the shop vac which is so loud that I can't hear the grinding noise on the drill bit. Don't really know when the relief grinding is complete.

Perhaps a home type built in vacuum system might be better for this. Or put the shop vac outside and plumb it in with some two inch ABS.
 
Perhaps a home type built in vacuum system might be better for this. Or put the shop vac outside and plumb it in with some two inch ABS.

Or forget the vacuum and just set it on a dish towel and shake it off outside when done.
 
Or forget the vacuum and just set it on a dish towel and shake it off outside when done.
I've found that every time I sharpen drill bits without the vacuum I end up coughing upstairs. That happened several times before I started paying attention.

Today I sharpened a 1/4" drill bit with the vacuum running. No coughing this time.
 
I've found that every time I sharpen drill bits without the vacuum I end up coughing upstairs. That happened several times before I started paying attention.

Today I sharpened a 1/4" drill bit with the vacuum running. No coughing this time.

That's serious stuff John. My respiratory system is severely compromised by too many episodes of pneumonia. Takes very little to plunge me into coughing fits. I will have to watch that carefully.

If it turns out to be a problem, I'll have to try masks - a vacuum is too much of a space hog.
 
That's serious stuff John. My respiratory system is severely compromised by too many episodes of pneumonia. Takes very little to plunge me into coughing fits. I will have to watch that carefully.

If it turns out to be a problem, I'll have to try masks - a vacuum is too much of a space hog.
I too tended towards mild pneumonia every time I caught a cold or the flu until Linda brought home several different vaccines for that. Now I may still get a bad cold but it never goes down into my lungs anymore. So happy about that.

I don't intend to keep the VEVOR on a bench. It will sit under a bench on a shelf until I need it. I have little enough horizontal surface as it is. And therefore it's light enough to also just take outside even for one drill bit. I'll try that next time although I have run out of drill bits to sharpen at the moment. Most of the original Imperial/Letter/Numbered drill bits are still more than sharp enough.

Oh and just checked my Amex Statement and sure enough there's a $100 credit from VEVOR so they came through on that.
 
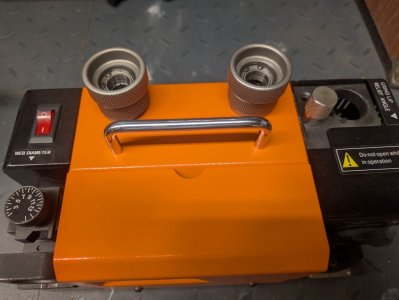
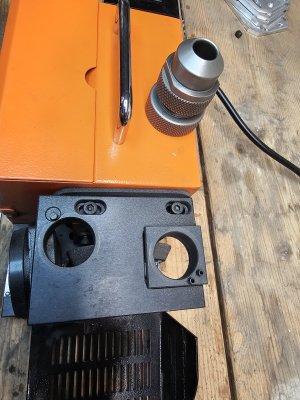
Probably voided the return policy. 😀 While I like the printed dust port/accessory holder, I don't have a 3D printer to churn one out. I decided this was a simple way to store the collet holders on the machine. Just used a step bit to make a pair of 1 1/8" holes in the cover.

PXL_20260213_174455068.jpgPXL_20260213_174445386.jpg
 
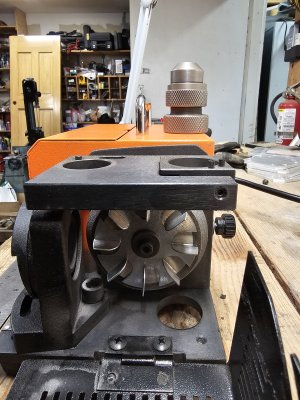
Just picked up the "D" model. Works like a champ.

Very nice. I see that it does both web thinning and split point. But I don't see a mechanism for adjusting it other than sliding the entire top block sideways. That seems odd to me. Is there more to it than what we can see in your photos?
 
Very nice. I see that it does both web thinning and split point. But I do1000001916.jpgn't see a mechanism for adjusting it other than sliding the entire top block sideways. That seems odd to me. Is there more to it than what we can see in your phot
There is a set screw to allow the web thinner to slide in and out of the top block.
 
There is a set screw to allow the web thinner to slide in and out of the top block.
Isn't web thinning done on the other hole?

I guess it doesn't matter. The stone can be adjusted for the left hole and then the sliding block adjusted for the right hole. Correct?
 
Isn't web thinning done on the other hole?

I guess it doesn't matter. The stone can be adjusted for the left hole and then the sliding block adjusted for the right hole. Correct?
Web thinning is done on the back hole and the front hole splits the point.
 
Back
Top