
-
Scam Alert. Members are reminded to NOT send money to buy anything. Don't buy things remote and have it shipped - go get it yourself, pay in person, and take your equipment with you. Scammers have burned people on this forum. Urgency, secrecy, excuses, selling for friend, newish members, FUD, are RED FLAGS. A video conference call is not adequate assurance. Face to face interactions are required. Please report suspicions to the forum admins. Stay Safe - anyone can get scammed.
You are using an out of date browser. It may not display this or other websites correctly.
You should upgrade or use an alternative browser.
You should upgrade or use an alternative browser.
Machine Vevor MR13A/B Drill Bit Grinder Users
- Thread starter Susquatch
- Start date
Machine


Rob Beaupre
Active Member
Received my MR-13A today, and already sharpened 10 bits from a set that was definitely abused. Really pleased with the results! Thank you for everyone's guidance in this and the other threads on this sharpener.
This may not be the thread to ask but if any of you folks that have previously ordered replacement CBN wheels, if you can provide the site, (Ali Express, Amazon, etc) and the 'seller' that you ordered from (as long as there were no snags with your order) I would kindly appreciate the info. I'd like to order a spare wheel or two, just in case for the future.
Thanks
Rob
This may not be the thread to ask but if any of you folks that have previously ordered replacement CBN wheels, if you can provide the site, (Ali Express, Amazon, etc) and the 'seller' that you ordered from (as long as there were no snags with your order) I would kindly appreciate the info. I'd like to order a spare wheel or two, just in case for the future.
Thanks
Rob

I'd like to order a spare wheel or two, just in case for the future.
You can get them on Amazon by searching for "MR13A grinding wheel". Best be sitting down. They are roughly 100 each.
I'd recommend giving Aliexpress or Bangood or Temu a try too - assuming you can navigate their flaky system.
Search on "MR13A wheel" or "CBN Grinding Wheel and look for one with the right dimensions - 78 x 30° x 10 with 12.7 ID Hub. The 30° might be labelled as 60. For certainty, it's 30 relative to the spindle shaft or the table the grinder sits on - in other words not as steep a wheel as a 60 would be.
Here is an example.
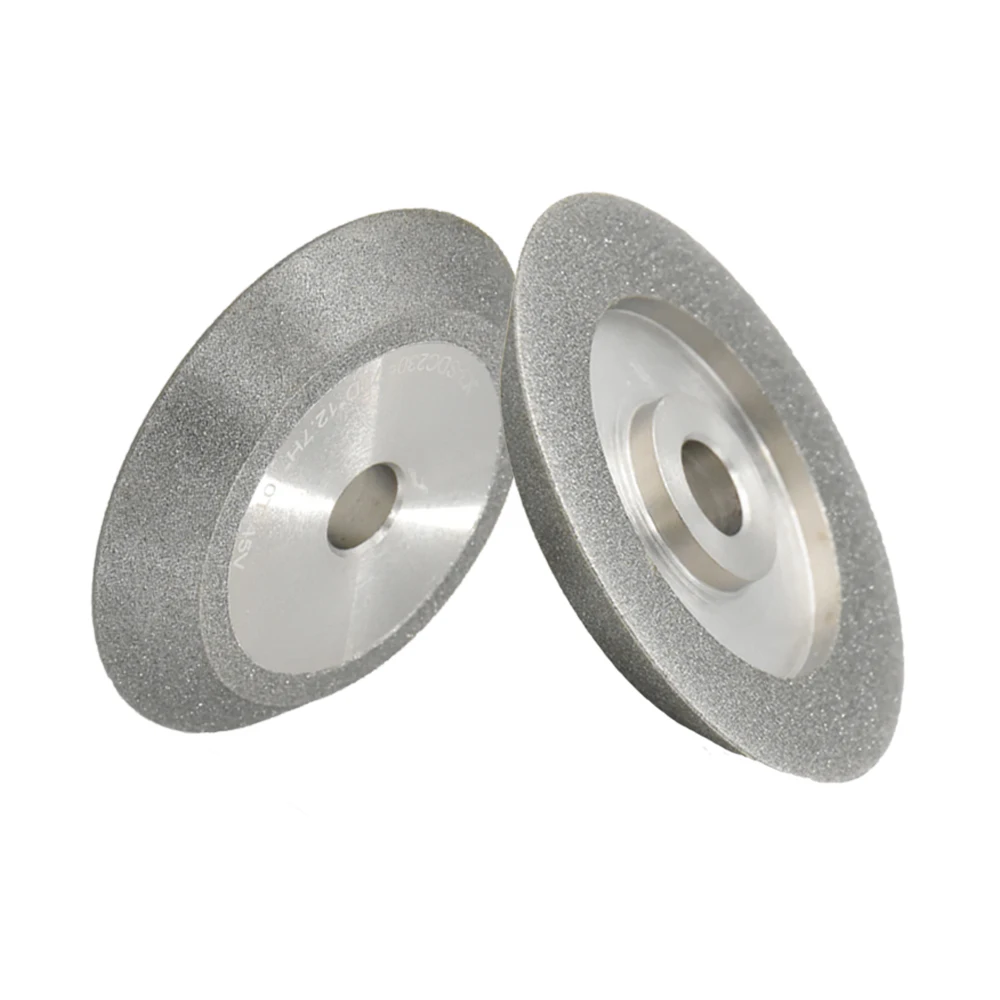
CBN SDC230 Grinding Wheels for Tungsten Steel Tools
Smarter Shopping, Better Living! Aliexpress.com
If you want a validated sale, you will probably have to wait a while for someone else to lead the way and hopefully find a better price.

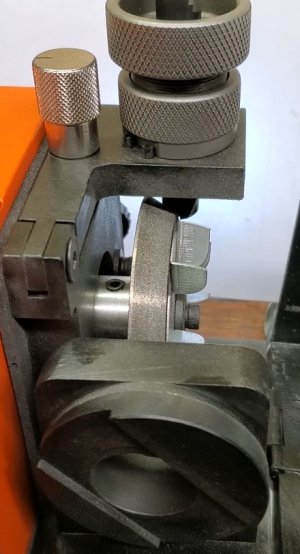
I am still waiting for support back from VEVOR. When I look at the drill bits that @DavidR8 did compared to mine it looks like the wheel is not in the correct position. I sent this photo to VEVOR showing how the split grinding on one that David did doesn't touch the edge of the wheel. There's nothing I can adjust to make it come closer.
I can't turn it any further because the pins prevent that. They said they'd respond within 48 hours. Not quite there yet. And I even bought an extra year of warranty for the darn thing.
The set screws on that arbour must be thread locked and I can't grip the wheel well enough to twist the center screw that holds the fan in place.
I can't turn it any further because the pins prevent that. They said they'd respond within 48 hours. Not quite there yet. And I even bought an extra year of warranty for the darn thing.
The set screws on that arbour must be thread locked and I can't grip the wheel well enough to twist the center screw that holds the fan in place.

Doggggboy
Ultra Member
Can you shim the back of the wheel to move it out? I guess that would only work if you can get the arbor loose.I am still waiting for support back from VEVOR. When I look at the drill bits that @DavidR8 did compared to mine it looks like the wheel is not in the correct position. I sent this photo to VEVOR showing how the split grinding on one that David did doesn't touch the edge of the wheel. There's nothing I can adjust to make it come closer.
I can't turn it any further because the pins prevent that. They said they'd respond within 48 hours. Not quite there yet. And I even bought an extra year of warranty for the darn thing.
The set screws on that arbour must be thread locked and I can't grip the wheel well enough to twist the center screw that holds the fan in place.
View attachment 77649
Looks to me like the wheel is too far inward. Put the hex driver in a small impact wrench and just hold the wheel with your hand. It loosens counterclockwise. Then put a very thin shim washer behind the wheel. Might need to play with the shim thickness. I'm guessing that will do the trick.
I have not yet taken the arbour off of mine but it's on my list of things to do. I want to make a variety of shims for different purposes and index them all on a common arbour further back. The screws should come out easily, but as you say, it's possible that they are loctited in. If so, careful heat should do the trick.
@CWret ?
I have not yet taken the arbour off of mine but it's on my list of things to do. I want to make a variety of shims for different purposes and index them all on a common arbour further back. The screws should come out easily, but as you say, it's possible that they are loctited in. If so, careful heat should do the trick.
@CWret ?

What is the diameter of the bit in your picture?
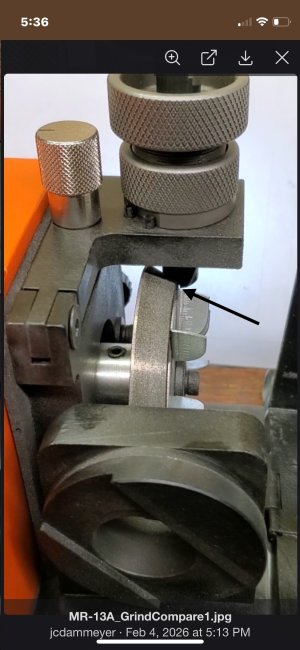
The little gap (pointed out in the pic below) is confusing. It seems that the bit is not at the right distance/location from the motor. (too far away). This would be an unexpected manufacturing problem. The grinder seems solid and well built. But even with this apparent inconsistency, it should still give a vertical edge on the split point - but your other pictures showed a rounded edge at the inside of the split point.
Did you have the bit correctly clamped in the chuck? Did you review (use) the method of installing the bit it the chuck as was described in the link above? The bit cutting edges must be parallel to the edges on the chuck.
I assume you did install the bit correctly in the chuck and therefore it will be very interesting to hear Vevor’s response to your question.
The little gap (pointed out in the pic below) is confusing. It seems that the bit is not at the right distance/location from the motor. (too far away). This would be an unexpected manufacturing problem. The grinder seems solid and well built. But even with this apparent inconsistency, it should still give a vertical edge on the split point - but your other pictures showed a rounded edge at the inside of the split point.
Did you have the bit correctly clamped in the chuck? Did you review (use) the method of installing the bit it the chuck as was described in the link above? The bit cutting edges must be parallel to the edges on the chuck.
I assume you did install the bit correctly in the chuck and therefore it will be very interesting to hear Vevor’s response to your question.

@CWret that's a 1/2" bit that I sharpened on my MRCM-13A sharpener. I gave it to @jcdammeyer to see if his machine would meet the bit placement on the split point op.
@CWret that's the first 1/2" bit that I sharpened on my MRCM-13A sharpener. I gave it to @jcdammeyer to see if his machine would meet the bit placement on the split point op.
@CWret that's a 1/2" bit that I sharpened on my MRCM-13A sharpener. I gave it to @jcdammeyer to see if his machine would meet the bit placement on the split point op.
Good idea David. In my view, that's crappy assembly quality control. They prolly had to bring in a new crew to meet the CHMW demand.
Nonetheless, it should be an easy adjustment. I guess that's one of the tasks we can all help each other with. Not just how to use it, but also how to adjust it.
John can elaborate but getting the wheel off was a no-go.
In that case, rather than risk damaging it, I'd want to exchange the whole grinder.
That's why I haven't tried super hard to take the wheel off. If I break it I'm not sure it's covered by warranty. I'm hoping they will think it's the wheel and will send me a new one. Then I can try the shim stuff and have a spare wheel.In that case, rather than risk damaging it, I'd want to exchange the whole grinder.
Those are really good questions. Since it was removed from David's holder the chance of getting it exact is not very likely. So what I did was set it in the arbour loosely (but still held straight) and then with it held against the front pin, I twisted the drill bit so the back relief fit perfectly against wheel. There's the gap.What is the diameter of the bit in your picture?
The little gap (pointed out in the pic below) is confusing. It seems that the bit is not at the right distance/location from the motor. (too far away). This would be an unexpected manufacturing problem. The grinder seems solid and well built. But even with this apparent inconsistency, it should still give a vertical edge on the split point - but your other pictures showed a rounded edge at the inside of the split point.
Did you have the bit correctly clamped in the chuck? Did you review (use) the method of installing the bit it the chuck as was described in the link above? The bit cutting edges must be parallel to the edges on the chuck.
I assume you did install the bit correctly in the chuck and therefore it will be very interesting to hear Vevor’s response to your question.
View attachment 77651
Now if I do the opposite and turn the drill bit clockwise so the gap is filled the back relief is way off the stone.
To me it looks like the wheel is too far back.
One option is to pester @DavidR8 again but mount the drill bit in my holder, have him sharpen it and add the back relief and split point. Then take it home still firmly clamped and see how it fits against my wheel.Those are really good questions. Since it was removed from David's holder the chance of getting it exact is not very likely. So what I did was set it in the arbour loosely (but still held straight) and then with it held against the front pin, I twisted the drill bit so the back relief fit perfectly against wheel. There's the gap.
Now if I do the opposite and turn the drill bit clockwise so the gap is filled the back relief is way off the stone.
To me it looks like the wheel is too far back.
Happy to do that John!One option is to pester @DavidR8 again but mount the drill bit in my holder, have him sharpen it and add the back relief and split point. Then take it home still firmly clamped and see how it fits against my wheel.

^ that sounds like a good idea to zero in on the problem and determine if it is the grinder or the way the bit is being clamped in the chuck.One option is to pester @DavidR8 again but mount the drill bit in my holder, have him sharpen it and add the back relief and split point. Then take it home still firmly clamped and see how it fits against my wheel.
- a manufacturing/assembly misalignment (grinding wheel and motor placement) could be the cause, but comparing yours and David’s would certainly help to resolve that issue. @YotaBota ‘s comment above is very interesting - maybe that is a simple fix.
A conflicting thought - If you are getting a good grind on the bit face and the bit cutting edges, that suggests the wheel placement is ok. Otherwise I think there would be a tiny unground centre portion (point) in the middle of the bit. ???
And here goes another thought:
Maybe the motor and the grinding wheel placement are perfect but it is this bracket-
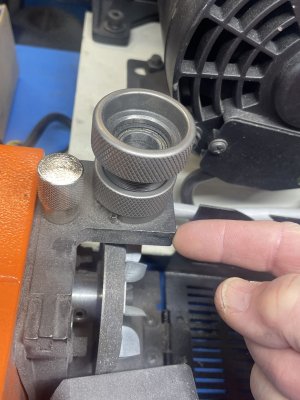 that needs to be shimmed to the left instead of shimming (or moving) the grinding wheel to the right. Adjusting this bracket might be easier than trying to change the motor/wheel geometry (also messing with the wheel location could adversely affect the grind on the bit face.
If it proves to be a Vevor manufacturing/assembly problem - tell them to exchange it OR you are willing to keep it if they give you a 50% rebate.
I could live without split points if I had nicely sharpened bits. + i think shimming the split point bracket (or simply adjusting the motor as YotaBota did) would be an interesting and fairly easy project 😎