I’ve never seen such lab coats.

Navy Poly/Cotton Shop Coat | Direct Workwear
Navy Poly/Cotton Shop Coat 7.5 oz (255 GSM) poly/cotton, permanent-press, wrinkle-free, sanforized for shrinkage of less than 1%.

I’ve never seen such lab coats.
I went to Canada Linen and asked for a couple of Shop Teacher Coats because I was tired of being covered in shmutz when I came in.I blinged them up with embroidered names ;-)![]()
Navy Poly/Cotton Shop Coat | Direct Workwear
Navy Poly/Cotton Shop Coat 7.5 oz (255 GSM) poly/cotton, permanent-press, wrinkle-free, sanforized for shrinkage of less than 1%.directworkwear.com
Ok I totally love these.I blinged them up with embroidered names ;-)![]()
Navy Poly/Cotton Shop Coat | Direct Workwear
Navy Poly/Cotton Shop Coat 7.5 oz (255 GSM) poly/cotton, permanent-press, wrinkle-free, sanforized for shrinkage of less than 1%.directworkwear.com
I think I bought my last one on Amazon and I think i may have gotten them from Princess Auto once before also.I’ve never seen such lab coats.
I took my prusa printer to spool3d for repair. They did a nice job.FWIW, I would describe my situation was just as you described, I will try to convince you to make the leap. My experience........
I'm trying to squeeze in the largest ballscrews into my new mill. It basically comes down to either 20mm or 16mm. The 20's are tight on the X axis. So tight that I can't tell if they will fit, 1mm this way yes, 1mm the other way no. I don't want to order the 20's to find out they won't fit. So I sketched up the mounting block to replace the nut. The thought of machining this and tweaking in an iterative process feels pretty painful. So I thought this is a perfect situation for a printed mounting block with hole to match the ballscrew mounting, if it's not quite right, tweak it and reprint, when its just right make it.
I noticed 3D printers on Marketplace for as low as $100 supposedly in working order with lots of filament included so what do I have to lose?
Guy has three more or less the same Prusa i3, he says pick one, so I look and I pick. Bring it home refuses to calibrate, I try for about 4 hours and no success so I call the seller and he tells me I'm leaving another one on the step for you, just take it.
Second time a charm after maybe 30 minutes of tweaking it calibrates and I print my first part. I have printed about 5 parts since then and the quality is excellent.
I want to fix the first one, but no luck getting help on every 3D forums I tried, I suspect it's the PINDA sensor but not sure yet.
One of my concerns was generating the required code for the printer. Prusa comes with a slicer program that basically takes your 3D image and slices it up vertically to about a gazilion lines of gcode one for each pass of the extruder. The slicer program is beyond intuitive it will take you about 1-2 minutes first time to generate the gcode for the printer they did a bang up job.
I generated the 3D model in my PCB program (Altium) because I'm very familiar with it. There is one big drawback to that approach and that is I cant easily make holes, I sort of can but the holes get obliterated by the other aspects of the 3D portions that I add to the model. I called my son (architect), with the details of the holes and it took him about a minute to add them as requested. I will need to learn some sort of real CAD program for generating the models, but for now I'm up and running
Am I happy I dropped the $100 bucks? Beyond ecstatic!
One limitation (that I'm aware) for this entry level model is the single extruder instead of a dual extruder. I thought this was for multicolor parts but it has a much more important function, imagine your printing something that part way up juts out, well the printer can't print on air, with a dual extruder it prints a base (with some sort of water dissolvable material) under where the projection is, so when done put it in water and the support just disappears. I don't have this luxury so the slicer program detects this and prints a breakaway base.
View attachment 40718View attachment 40719View attachment 40720View attachment 40721
If anyone has any experience fixing a Prusa I would love to hear from you.
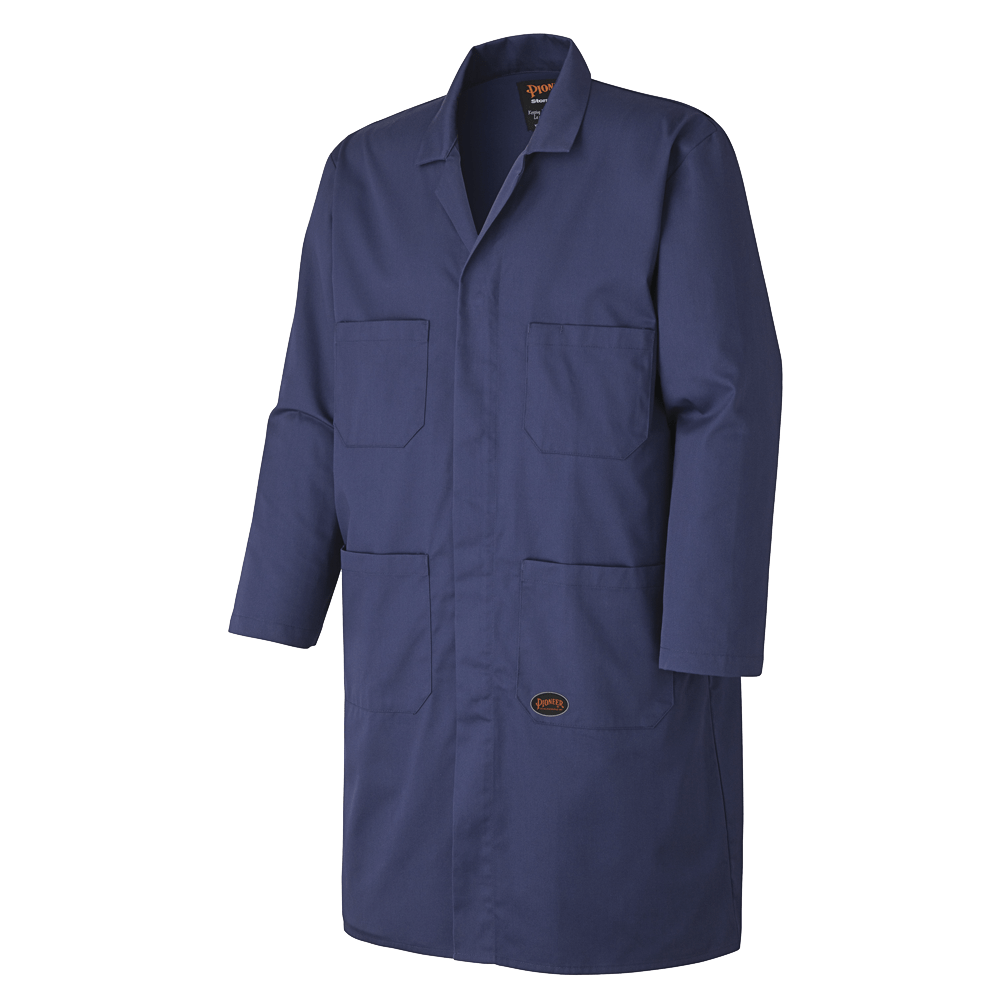
I have a camo house coat, worked great to hide me from SWMBO back in the day.But I do love camo because it doesn't show the dirt and grease.
To piggy back on that, buying proper 90* spot drills in a few sizes for spotting holes instead of using center drills, saves time picking out broken tips too.
Here we go.....You probably meant the 118 spot drills? At least that's what I've bought before and the work well......120's might even be better, compensates if the dill is slightly more than 118 ..... anything that stops the initial messy drill's gone wild the dig into the edge of the countersunk hole routine.
Here we go.....![]()
The "Proper" way to spot holes has long caused internet, and shop floor disputes. In my experience there is no right answer, but a lot of viable ones. I admittedly do the same with small drills sometimes. Just depends what I'm working on. Under about 0.05-0.06 I'll use the tip of a centerdrill, but anything above that up to an inch and beyond I have 90* spots. Biggest one being 5/8", smallest 3/16". Due to the chisel tip they don't work the best on tiny drills as they leave a flat bottom, hence the switch at smaller drill diameters.didn't know it was contentious (although there was the one scene in Drills Gone Wild Daytona Beach but we won't talk about that ). The other common thing I do is use a large CD but only the tip and stop before the straight section. Provides a 118 divot for the drill to start in.
When I redo the little patio out behind my garage, one of the things I want to put there is a downdraft table, and a plasma/torch table combo for all the grinding dirty work etc. I've watched enough videos of guys that have built them now, and their utility is instantly clear to me. Right now it's just a crappy wooden workbench where I try to do all my dirty work, but a built in downdraft table is going to be a priority.I'm going to add a Downdraft Table for sanding. Primarily I sand Aluminium to get a swirl finish which leaves a lot of ultra fine dust which is not healthy for you, time to control it better.
Yeah, I've got really good at either watching them at 1.5-2x, or scrolling through the bottom progress bar for visually interesting parts. I don't fault anybody for using youtube for trying to make a living. I just like being efficient with my viewingDown draft table is a great addition to any work area. Video was full of good ideas/info that could have been explained in 1/3 the time. Typical YouTube.
No! Guys! it needs to be embroidered JOHN!My blue lab coat is embroidered “Bob”. My name isn’t Bob, but it did seem to be traditional. Other choice could have been “Jimmy”, but my 93 year old MIL was not too sure her embroidery skills could handle five characters.