• Scam Alert. Members are reminded to NOT send money to buy anything. Don't buy things remote and have it shipped - go get it yourself, pay in person, and take your equipment with you. Scammers have burned people on this forum. Urgency, secrecy, excuses, selling for friend, newish members, FUD, are RED FLAGS. A video conference call is not adequate assurance. Face to face interactions are required. Please report suspicions to the forum admins. Stay Safe - anyone can get scammed.

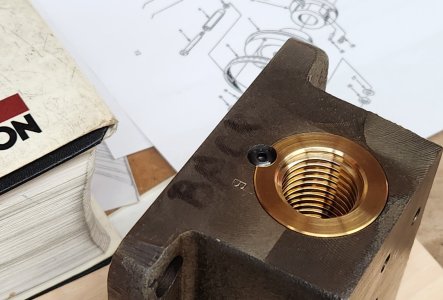
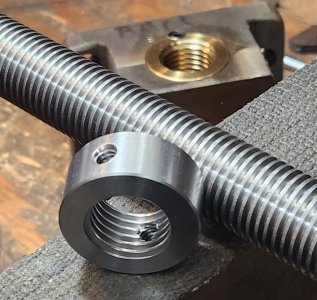
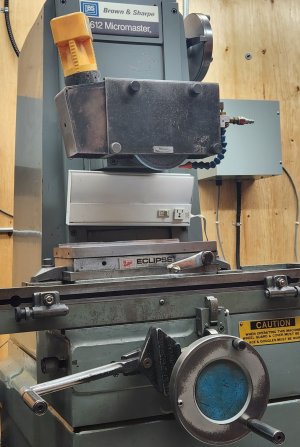
Surface Grinder Cross-feed Nut

Fantastic job!
Thank you.

- did you see any difference in thread fit on the leadscrew after it was mounted in the CI block?
Haven't tried yet. I'll let you know later this morning.
- just curious, when it comes time to replace the nut insert from the CI block, what's the plan?
Hopefully, when that time comes I'll be turning parts on Swiss lathes in the big machine shop in the sky. (Or maybe cleaning out putrid coolant sumps in a really hot place down under, and I don't mean Australia!!)

Seriously though, with only about 0.001" shrink, I should be able to just press it out.
 
1 step closer to completion. Drilled and tapped 2 #8-32 button head cap screws, one on each end, to act as a dutch key.

Looking at the schematic, there seems to be a stop collar missing, so I'll hopefully do that tomorrow.
 

Attachments

  • 20240516_184601.jpg
    20240516_184601.jpg
    262.7 KB · Views: 11
Indeed! Great job, great photo's and great write up covering a very professional approach to an advanced project - you should think of submitting works like this to Home Shop Machinist. Seriously.
Wow!! Thank you @Mcgyver for saying that. Where's the blushing emoticon?!!

I would never have thought about making a submission to a magazine. (Is there money in it? :oops:)
 
I made the stop collar as per the parts schematic. It uses 2- 1/4-20 set screws with brass pads. But of course I don't have set screws that short. The parts list calls for the set screw to be 1/4" length. I might cut down the 3/8" long ones I have. Or order brass tipped ones. Never the less, I can start putting everything back together.
 

Attachments

  • 20240519_085718.jpg
    20240519_085718.jpg
    406.8 KB · Views: 4
Its always the parts you DON'T have isn't it? Depending on how much fiddle-fart time you want to spend vs buying them
- solder or epoxy brass pad onto steel set screw
- turn some 1/4-20 thread from brass but make a slit on end for screwdriver (vs hex)
- drop a small brass disc into hole & then use regular steel set screw. I've done this myself but I would not recommend if hole is deep because getting it out can be fun.
 
Drop a small brass disc into hole & then use regular steel set screw. I've done this myself but I would not recommend if hole is deep because getting it out can be fun.

@thestelster - Peter has lots of good ideas.

Unless the set screw has a high torque requirement, I like hard lead balls for this. Or you can make a plug by dropping molten solder into a drilled hole the right size. In both cases use them under a regular steel set screw with a cupped end. Forget getting them out. They can just stay there.
 
I thought about the solder, I've seen that used against on solid shafts. But if its acting against the threads, might just get chewed up?
 
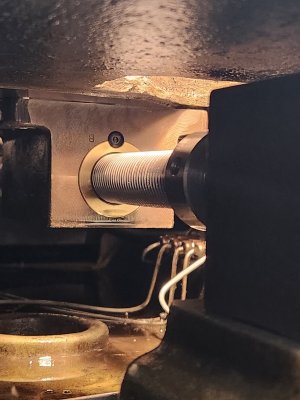
Well, she's done, except for those 2 set screws. I might as well just order them. Everthing moves well, so all is good.
Excellent, so now you have figured out all the bodges you should see if you can make a perfect one, then when mine craps out I'll help you clean out your shop a bit. :)
 
I thought about the solder, I've seen that used against on solid shafts. But if its acting against the threads, might just get chewed up?

Maybe, but I don't think so. If there are threads under it, the lead slug would just conform to the threads and spread the load even more. On the other hand, if the threads perform an auger function, almost anything in there is toast.
 
Maybe, but I don't think so. If there are threads under it, the lead slug would just conform to the threads and spread the load even more. On the other hand, if the threads perform an auger function, almost anything in there is toast.
Well, on UN threads which are pretty shallow and fine, a soft material might work fine. But with 10tpi acme, we're looking at least 0.050" deep and 0.050" between threads, so a soft material, I would think, will get squashed and possibly jam up the works. I think that a brass or bronze piece that can span the crest of two threads would be perfect.
 
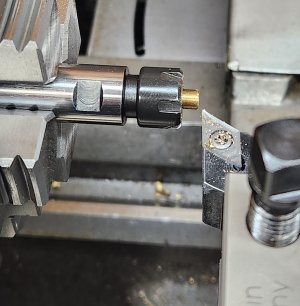
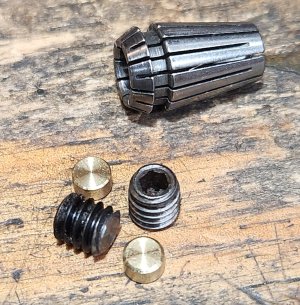
I couldn't wait to order those 1/4" set screws, so I just chucked a couple of 3/8" long ones in the ER11 collet chuck, held in the 4-jaw. Shortened them down and then made the brass pads.

I positioned the stop collar to the proper location and put the brass pads and set screws, tightened them down, put the back covers on the SG, and all is good....until it's not!
 

Attachments

  • 20240521_093734.jpg
    20240521_093734.jpg
    326.2 KB · Views: 6
  • 20240520_184043.jpg
    20240520_184043.jpg
    630.8 KB · Views: 6
According to a thread at Centroid cnc an article for Digital Machinist pays about $500. That would be in USD so a lot more in Canadian $.

In my humble opinion, if you look at it as an opportunity to make money, you will go broke. Don't let the $ enter the equation. Do it as an opportunity to share your knowledge and skills and perhaps encourage others. This is enough reward on its own.

Lastly, don't forget the tax man. Cross border business like that gets close scrutiny by CRA. The fine for hiding it grossly outweigh any benefits. I look at it as equal $ cuz the exchange almost covers the taxes.
 
Back
Top