• Scam Alert. Members are reminded to NOT send money to buy anything. Don't buy things remote and have it shipped - go get it yourself, pay in person, and take your equipment with you. Scammers have burned people on this forum. Urgency, secrecy, excuses, selling for friend, newish members, FUD, are RED FLAGS. A video conference call is not adequate assurance. Face to face interactions are required. Please report suspicions to the forum admins. Stay Safe - anyone can get scammed.

Surface Grinder Cross-feed Nut

I thought it was acme thread, but the picture of the new nut does't really look acme. A tricky picture? The same with the insert. I can see the topping part of the insert, but the there does not appear to be a bottoming part for an acme thread, looks like for a regular thread. Another tricky picture? Or?
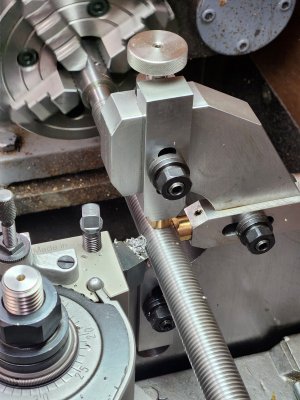
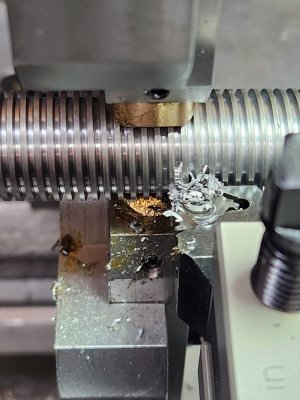
The insert in the 4th picture was to cut a relief groove deep inside.

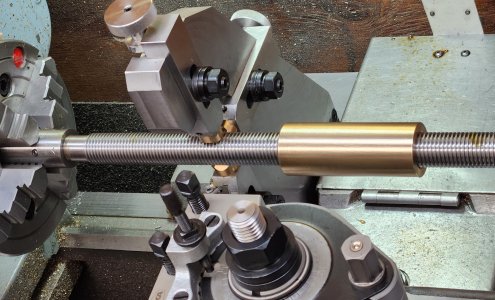
The acme thread is shown in picture 6.
 
Well, that makes sense now! (The pictures). Is there enough top on those grafted on ones to tune them as it's .040 over size. The same pitch?
 
So now comes the rant.....

Well, I just erased my ranting and raving. Felt good to blow off some steam but you guys don't need to hear that.

I more upset at myself for not checking the screw first.

The nut is near perfect. It's at the maximum dimension for a class 4 nut, so I'll part it off and use it.

I will chuck the crossfeed screw, pick up the thread and go to the proper form and pitch diameter that will fit my nut.
 
Hey, don't feel to bad. I just spent 16? Hrs on the shaper machineing a casting. Thought I could line up things to machine parallel to a bore, levelled the bore, done test cut , looked good, carried on, could not take very big cuts as casting oversize for size of shaper (table smaller then casting, hard to hold). Got the roughing done one side, set up on other side, made a light cut. Got to thinking about the set up, realized may not have levelled the shaper after moving it, hell was only out 0.040 in 5 inchs one way, and over 0.060 in 7 inchs the other axis. Damm good thing they were only roughing cuts.
Lots to be said about wisdom with older age, to bad can't remember it.
 
Sorry to read about the oops. This was my week of helmet fires too.

I just bought some bronze from a different supplier for my next engine. They carry different flavors than what I was using in the past. Mostly I've used 932 (aka SAE 660). This time I'm trying 936 which, from what I can tell has similar properties to 932 but better machineability. I haven't tried aluminum bronze but from what I read supposed to be harder, but a bit more finicky to machine. Your part looks great so no issues that way. Just curious what your reasoning was to choose it for a leadscrew nut?

-95400 aluminium bronze
 
Just curious what your reasoning was to choose it for a leadscrew nut?
A while ago I had to make the nut for my lathes compound (I posted the adventure). It was my first time so I spent hours reading about bronze, scouring the different machinist forums, and decided that C95400 bronze was one of the best materials for feedscrew nuts. Especially for high wear, high load applications. Now, the lathe compound isn't either of those, but decided to try that material anyway. So I've used that bronze for the lathe compound, and crossfeed nuts, and now for the surface grinder. And the crossfeed screw is moving the SG tower which probably weighs close to 800 lbs. So the aluminium bronze would be a perfect candidate for it.

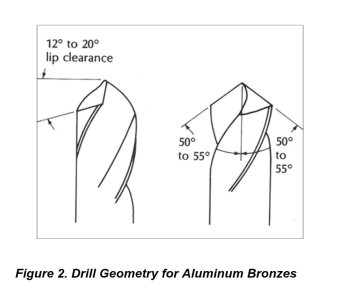
It machines well in stable set ups with either hss or carbide. Just make sure the tools are sharp. Drilling it is difficult. I had to sharpen the drill bits to different geometry. You have to keep it cool otherwise the bronze seems to contract around the drill bit and gets more difficult. Pecking works too to prevent sustained heat at the drill tip.

For carbide inserts, use the ones designed for aluminium.

For sawing, the blade better be sharp...meaning new!!
 

Attachments

  • aluminum_bronze (2).pdf
    aluminum_bronze (2).pdf
    535.3 KB · Views: 1
  • Screenshot_20240507_064830_Adobe Acrobat.jpg
    Screenshot_20240507_064830_Adobe Acrobat.jpg
    48.3 KB · Views: 0
My table only goes left right. The tower that houses the spindle and motor moves forward and back.

I've always held those machines in high regard. An eon or so ago I went up somewhere near Queensville or Keswick with a friend to look at one. The seller had 2 or 3 and my friend bought one. Figure there was a good chance you were the buyer of one of the others?

Nice work on the nut. (I'd have probably bought one lol). So what now? Buy/make a new screw to fit the nut?

Weird stuff. A 15/16 x 10 tpi acme would have a pitch diameter of 0.864 so that matches up ..... but doesn't explain the thread form mismatch.

EDIT .... I see you have a plan ..... note to self: read thread before posting :)
I live in Keswick, feel free to drop by at any time, especially since I work from home. But, I bought this SG from one of the machinery auctions a couple years ago, $500.00!! (It cost as much to rent the 26' truck with a tailgate!)
 
Ok, I 4-jaw chucked the feed screw, attached and adjusted the follow rest, dialed everything in, picked up the thread and away to the races. The basic pitch diameter for a 7/8"- 10 acme thread is 0.825". A class 4 tolerance gives us anywhere between 0.816"- 0.821".

I got it down to 0.826" and the nut was too tight. Took another 'thou depth of cut, and the pitch diameter is 0.824" and a very good fit was had.

So, next step is to put the nut into the housing, and...and... and....
 

Attachments

  • 20240515_121108.jpg
    20240515_121108.jpg
    408.2 KB · Views: 16
  • 20240515_121127.jpg
    20240515_121127.jpg
    301.1 KB · Views: 16
  • 20240515_130034.jpg
    20240515_130034.jpg
    410.8 KB · Views: 16
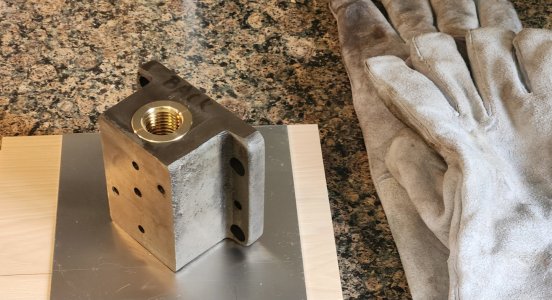
The bore of the housing for the feed nut is 1.375". I turned the feed nut to 1.376". So only 0.001" shrink fit.

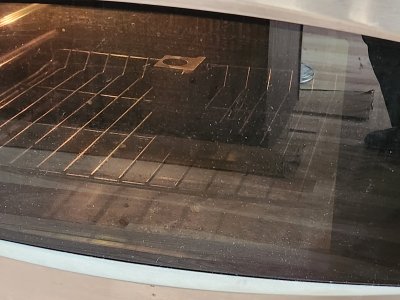
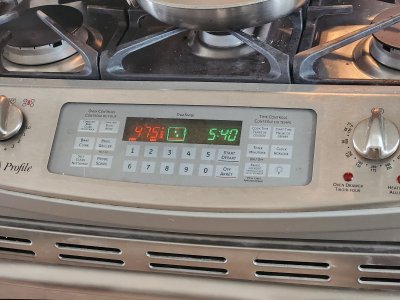
I set my kitchen oven to 475°F Convection. Put the cast iron housing in and waited about an hour total time. With an IR thermometer, the housing was showing 462°F. Took the housing out and aligned the bronze nut and it dropped in. It's now cooling.

Originally it had 2 pins that went in through the side of the housing and part way into the nut. But I think I'll use a dutch key on each end of the housing.

Dutch key or scotch key are axially drill and tapped to accept a set screw or flathead/pan screw between the sleeve and the housing.
 

Attachments

  • 20240515_174142.jpg
    20240515_174142.jpg
    366.6 KB · Views: 10
  • 20240515_174150.jpg
    20240515_174150.jpg
    384.9 KB · Views: 10
  • 20240515_174450.jpg
    20240515_174450.jpg
    377.1 KB · Views: 10
I set my kitchen oven to 475°F Convection. Put the cast iron housing in and waited about an hour total time. With an IR thermometer, the housing was showing 462°F. Took the housing out and aligned the bronze nut and it dropped in. It's now cooling.
Good stuff Stell. Glad you are making progress.

BBQs work well for that sort of stuff too, in case the Better Half objects to “stinky machine parts in the house”. Don’t blame her really, old CI can off gas for a long time when heated, even after a thorough cleaning.
 
Fantastic job!
- did you see any difference in thread fit on the leadscrew after it was mounted in the CI block?
- just curious, when it comes time to replace the nut insert from the CI block, what's the plan? (Bronze expands at +7X that of CI so will just get tighter & tighter at elevated temp).
 
Back
Top