@Gearhead88, @Tecnico , @jcdammeyer, @Tom O ,@DPittman
Whatever works, works.
But surely it can't get easier than this. I made it out of a big rusty old bolt.

Here it is sitting on my flat way.

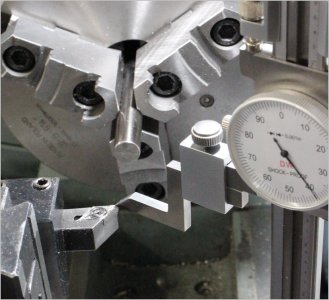
And here is a closeup of how you use it. Just rub your finger across where they touch. You can easily feel a thou and some of the characters on here can feel a half thou.

In use, nothing is faster or more accurate.
And just for the record, that's the high-speed tool I ground to make 12 thou needles for @DPittman. Needless to say, that job required very very very precise setting on center! I never did get to 10, but the opera lady didn't sing yet!
Whatever works, works.
But surely it can't get easier than this. I made it out of a big rusty old bolt.
Here it is sitting on my flat way.
And here is a closeup of how you use it. Just rub your finger across where they touch. You can easily feel a thou and some of the characters on here can feel a half thou.
In use, nothing is faster or more accurate.
And just for the record, that's the high-speed tool I ground to make 12 thou needles for @DPittman. Needless to say, that job required very very very precise setting on center! I never did get to 10, but the opera lady didn't sing yet!
Last edited: