• Scam Alert. Members are reminded to NOT send money to buy anything. Don't buy things remote and have it shipped - go get it yourself, pay in person, and take your equipment with you. Scammers have burned people on this forum. Urgency, secrecy, excuses, selling for friend, newish members, FUD, are RED FLAGS. A video conference call is not adequate assurance. Face to face interactions are required. Please report suspicions to the forum admins. Stay Safe - anyone can get scammed.

Rockwell 11" Lathe

Today the serious scrubbing began. Unbolted the ways from the base, but have to wait for a bit more muscle to lift them off. In the meantime I took some kerosene and a brush and started washing away decades of neglect as best I could. Gonna need some kind of plastic scraping tool apparently. No photos because there isn't really anything to show, but I'm starting to see paint in places again.
 
Yeah john, fun it is not. I'm also taking this thing more apart than I initially planned on, but I'm actually pretty happy about it. Since it turned out that I need to replace the belts right now it just made sense to go right through it. I still haven't taken all the sub-assemblies down to nuts & bolts, but I might consider doing them one by one as I put it back together. We'll see. I need to pull the jack-shaft for the vari-speed drive out of the cabinet too it looks like, because the plate in the middle that should move back and forth to adjust the ratio doesn't want to move at all.
 
I don't know about you, but I have often wondered to myself "Eric, what would it look like if half a mouse spent a few decades in a lathe cabinet?" Well boys, now I know. It looks a little something like this:

10372327_10153834604154581_2035985500695383003_n.jpg


The FUN part is...

...I haven't found the other half yet! Always need something to look forward to. In other news, I went to town today and pulled the ways off the cabinet. I hadn't planned on it, but there was so much crap to clean out that it seemed worthwhile. I found Skittles, Spitz shells, chips, dust, what I think used to be insulation, gum, and a bunch of cigarette butts. Made for an appetizing afternoon.

998982_10153834605529581_5432041231166989424_n.jpg


166791_10153834605699581_4754208189783689357_n.jpg


I also noticed the other day that the plate over my switch says that this is a 3-phase 550 machine with 1.5hp!

5781_10153834606064581_5518583301511478833_n.jpg


Which is funny since the motor (both the switch and the motor are OEM) disagrees.

6192_10153834607984581_7425968954092655932_n.jpg


I also pulled out the Reeves drive sheeves because the middle plate that is supposed to slide back and forth to adjust the drive ratio doesn't want to move. No pictures of that, though. I'm getting closer and closer to the point where I may as well just to a complete tear-down and paint, but I want it running NOW! :P I guess this just means I have to buy another lathe to use while I fix up this lathe...
 
Hahah! Classic find.

Nice work Eric. I ran my lathe a bit over Christmas and I'm going to build a new stand. Since I still remain inspired by your tear down, I figure I might as well build it back on a new stand. Now of course I'm dazzled by VFD research and the ease of a DRO and QCTP. Ahh the acronyms....

I'm really looking forward to seeing how far you go with yours, and I agree, you're this far, show the gang some shiny new paint! :)
 
Haha thanks Matt! Oh man, the acronyms. Just wait until you get into inserts. They aren't actually acronyms, because they don't stand for anything but they have letter designations. "For this step I'd probably take down the DNMG 432 and put up a VNMG 331. Then on the boring bar use a TNMG 433..." the "NMG" part of all those can change too based on the features of the insert like different chip-breakers and wipers. It gets pretty ridiculous.

What did you make on the lathe? Keep us up to date on what you go with as you upgrade it too, I for one need to choose a QCTP and would love to hear some reviews. I'd be interested in your stand-build too.

Dammit Matt, you're not supposed to ENCOURAGE me to keep tearing further into this! You're like the guy who brings a bottle of scotch to an intervention!! Hmmmm, what colours to use... :p

EDIT: On a further note, I think I've decided that I can't in good conscience hand over money for those cheap knock-off caster/leveling feet I was looking at. Instead I'll be looking at making some feet like @sorrelcreek suggested and for ease of moving it seems like a good excuse to start fabbing up a lathe dolly, possibly a toe-jack, and at some point I need to get to work on a small gantry crane. I had to get my brother's help to lift the ways off the cabinet, and I should have asked for help pulling the headstock off too (this thing has some heft to it) so the gantry crane sure would have come in handy a couple of times already.
 
Last edited:
It's funny you mention the insert acronyms, I had a "Kijiji Haul" as referenced by @Jwest7788 in another thread, I literally ended up with handfuls, so that leads to more reading and well exactly as you indicated, it gets deep quick.
Speaking of which, would a "Kijiji Hauls" sticky be of any fun?

As for what I made, let's call it a it a round thing with some shoulders. Nothing more and just me fooling around to feel the machine cutting. It did alright with just grabbing one of the hss tools that came with it. I honestly didn't even look to see if it needed to be ground, just lined it up and went. I noticed some vibrations in the whole lathe that are related to it not being levelled on the floor and the stand needs to be wider with more bulk in my opinion. I had to buy a 10' length of 10" channel iron the other month and since I only needed 16" of it, I instantly realized I now have a perfect place to use most of the rest. The stand right now is just a few thoughts on design, but my wife heard me talking about hockey pucks as levelling feet and sure enough Santa brough four of them! I'd love to simply bolt it to the concrete, but when I built my garage I heated my floor, so drilling isn't an option. I'm sure I can make it work fine without having to do so.
Haha it's all about encouragement now, I think you've passed the point of wipe it down, oil it and go. I've been wondering myself if I'd keep the factory green color on mine, or change it up...

Here is the piece I turned.
image.jpeg
 
Keep up the good work Eric, by the way if you need to borrow an engine crane I have one taking up space in my garage.

John

P3150873_zpsffybufx9.jpg
 
Last edited:
Gotta start somewhere, Matt! In third-year we made the same little stepped piece like 8 times. It had 1 tight tolerance on OD, a radius, some chamfers, etc. You can learn a lot from goofy little things like that. I think a Kijiji Hauls thread is a good idea, @Jwest7788 is the man to talk to about it. As for bolting it to the floor, that really makes a difference on large lathes with nice thick pads, but for a small lathe you really don't need it. The lathes at NAIT aren't even bolted down. To get a nice finish in a bore at school one time I ran a really high RPM and got that little bugger shaking around a tiny bit. One of the CNC instructors looked a bit concerned. :P

@John Conroy it's funny that you offer that, I know a guy who has one I was trying to borrow but he shares it with a few other guys. That sure would have come in handy! I might have to take you up on that at some point. I'd just like an excuse to come see your shop :P Had the first day of school today too, sounds like this year might not have as much free-time in the shop to make the shaft I need, so I might bug you for that too. I might also use it as an excuse to get a bit more chummy with my neighbor who will hopefully help me get a job at one of the University machine shops some day. :P
 
I welded up a base for my mill and my lathe from 2"X 2" square tubing with 1/4" wall thickness. I welded 1" nuts on each corner and used 1" threaded rod to make up the leveling legs and then added some 2" round by 3/4" thick stainless steel feet. This allow leveling, raising the machine high enough to move with a pallet jack or screwing on the heavy duty wheels I made up so it can be moved around easily.

P7161126_zps6vcvjhul.jpg


P5251066_zpstg2horiu.jpg


P5241063_zpsz2o2k3lg.jpg


P5241055_zpsuda2vfws.jpg


P7161124_zpsisurjjnq.jpg


P2150741_zps1408677d.jpg


P2150746_zps766a8f5e.jpg


P2150749_zps017c450a.jpg


P2160757_zps7e8520b4.jpg


P2150744_zpsf8588fdb.jpg
 
You aren't kidding those are heavy duty, John! Have you tried it yet, and does it roll smoothly with the wheels on? I forgot about a pallet jack, that might be the way to go, just pick up a cheap used one off Kijiji and make sure I can get it under my machines. I don't really NEED to build a frame at the bottom of my cabinet since it has 4 tabs for leveling feet already, but I might look at putting one together anyways. The only issue with a pallet jack is the room it will take up. I was thinking it would be pretty damn easy to fab up a system like what's shown below for moving machines around. They'd take up basically no space when not in use, but would definitely be more work than the pallet jack. I'll have to think on it for a bit.


EDIT: Hmmmmm, a pallet jack WOULD be just the ticket to move the motorcycle-stand around too though...
 
Last edited:
I like his set up but I wonder if those plastic wheels would carry the weight of that big lathe. I'd be tempted to use some 4" steel wheels like you find on an engine crane. I moved my big mill around easily with the heavy duty wheels I made up. The first set of wheels I made used bearings like Tom Liptons front skate but I had trouble with the races splitting, they seemed to be brittle like glass,
however Tom used larger bearings. The heavy duty wheels I made are pretty much bullet proof.

One of the reasons I built the frame under the lathe is that I felt it was too low and I was always bent over when using it, and I'm only 5'8" tall. Raising it 4" made it a much better height for me.
 
They're supposed to be pallet jack wheels, so they should handle a fair bit of weight, but you might be right. If I remember right I think in his blog post when he actually moves his lathe in he has different wheels on there. Either way, for the stuff I'd be moving around I'm sure it would have a long service life, plus it would be easy enough once the lathe is set-up and running to make some steel wheels myself.

Yeah, I'm 6' so I'll have to take that into consideration as well. Honestly I actually prefer to be leaning over the machine a bit when I work, but I don't want to turn into a hunch-back either. I still haven't gotten that solvent tank or heard back from Motion Canada (less impressed now) about my belts, so maybe I'll have to switch gears a bit and go start fabricating some of this stuff. Better get cutting!

giphy.gif
 
Hey Eric, not sure what your lathe weights, but I did use a Canadian Tire ATV jack to scoot mine across the garage on its present stand. I believe mine lists at 800lbs. I only lifted it a half inch and it made the journey fine, slow and easy. You might find one cheaper on Kijiji than a pallet jack, just a thought if you're in a pinch.

I can't stop laughing at the wood cutting!
 
Matt, I have an ATV/motor-scooters jack, but it's not the most stable thing in the world and the lathe is pretty top-heavy. I'd be a bit scared. [emoji14]

Sent from my B15 using Tapatalk
 
What's that? Something resembling PROGRESS??? Oh my lanta!

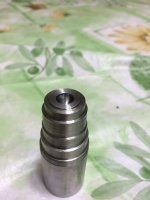
Yup, school's done! Had some fun, made some bottle openers, but now it's time to get back to work and try to get this lathe together. The last of the 4 belts I needed finally came in a couple of days ago, and today I machined the shaft that was broken. It's actually made out of non-mag (basically nickle) because it's what we had lying around. :P I have decided not to bother with paint for now (as much as I'd love to) because I need this thing together and working. Hopefully someday I can get another lathe and do a full nuts and bolts tear-down on this lathe, but right now that's not in the cards. Anywho, here's a picture of the new shaft:

1988_10154017779169581_8315799921201647588_n.jpg


I actually made it stronger than the last one, because on the last one that small diameter you see came to a sharp point which made for a stress-point. I ground a braze-on to the width I needed and then radiused the end, so there is a nice large radius there (it's basically just a little oil reservoir) Now I need to crank out some leveling feet when I have a chance! Oh, and just for fun here's a photo of the bottle-opener I mentioned. It has HammerRing engraved on one side and Metal-Works on the other. That's the name of the small side business I'll be starting once the garage is up to snuff. I made a bunch for family and close friends and then had them anodized. The non-machined areas were sandblasted (before machining of course) and so it came out as kind of a two-tone colour since the bits of sand that were embedded don't take the dye:

12802970_10153995692929581_1100036358581548653_n.jpg
 
Oh! I forgot the other thing that is helping move this forward: I finally picked up the parts washer my buddy offered to lend me. I had to clean a shocking amount of junk out of it, it needs a new hose and new filters, but then I'll be able to wash the head-stock and start reassembly! I don't have any photos of it right now, but it's an older Zep Dyna Clean. (he got a bottle opener :P )
 
Back
Top