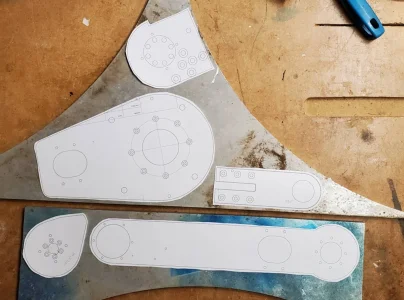
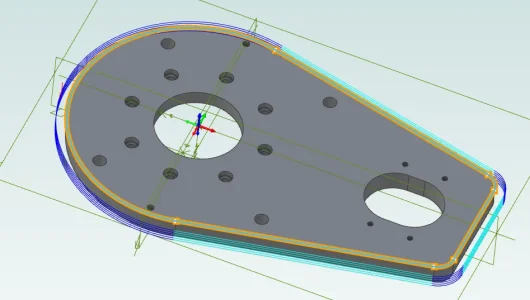
-
Scam Alert. Members are reminded to NOT send money to buy anything. Don't buy things remote and have it shipped - go get it yourself, pay in person, and take your equipment with you. Scammers have burned people on this forum. Urgency, secrecy, excuses, selling for friend, newish members, FUD, are RED FLAGS. A video conference call is not adequate assurance. Face to face interactions are required. Please report suspicions to the forum admins. Stay Safe - anyone can get scammed.
-
Several Regions have held meetups already, but others are being planned or are evaluating the interest. The Calgary Area Meetup is set for Saturday July 12th at 10am. The signup thread is here! Arbutus has also explored interest in a Fraser Valley meetup but it seems members either missed his thread or had other plans. Let him know if you are interested in a meetup later in the year by posting here! Slowpoke is trying to pull together an Ottawa area meetup later this summer. No date has been selected yet, so let him know if you are interested here! We are not aware of any other meetups being planned this year. If you are interested in doing something in your area, let everyone know and make it happen! Meetups are a great way to make new machining friends and get hands on help in your area. Don’t be shy, sign up and come, or plan your own meetup!
You are using an out of date browser. It may not display this or other websites correctly.
You should upgrade or use an alternative browser.
You should upgrade or use an alternative browser.
Robot Arm
- Thread starter jcdammeyer
- Start date
resin alteration?John,
You are getting to like this 3D printing a little too much.
Next thing, you will be reinforcing the structure of the parts with composites !!
Is that just a resin alteration ?
There's a story behind the box. (Isn't there always...)
The AR3 and AR4 use slightly different sets of connectors but the designer is fond of using shielded network cables sliced and half and panel network cable connectors. I don't like that approach so I designed a similar box but with holes to match what I wanted to use. The two large ones were copied from the original.
The other issue is that the designer used to sell STP files for an extra $100 but now doesn't because of Chinese copying. He only distributes STL files which can be very complicated to to translate back to STP format. A friend of mine using Fusion360 is able to do the ones I can't with the 8 year old CAD software I have a USB key for. It does most but not really complex ones.
Here's the original STL one ready to be sliced into G-Code for the 3D printer.
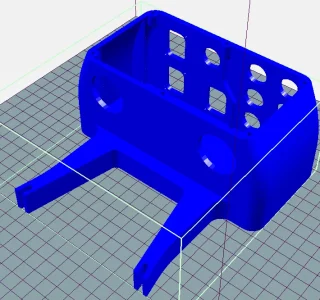
I'm using the same idea but with the aviation connectors for everything so I did my own from scratch but mucked up on the size of the two large holes.
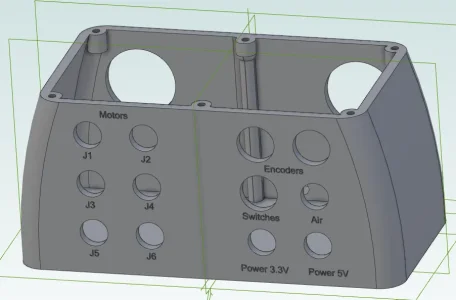
Designs are only limited by the imagination.resin alteration?
There's a story behind the box. (Isn't there always...)
The AR3 and AR4 use slightly different sets of connectors but the designer is fond of using shielded network cables sliced and half and panel network cable connectors. I don't like that approach so I designed a similar box but with holes to match what I wanted to use. The two large ones were copied from the original.
The other issue is that the designer used to sell STP files for an extra $100 but now doesn't because of Chinese copying. He only distributes STL files which can be very complicated to to translate back to STP format. A friend of mine using Fusion360 is able to do the ones I can't with the 8 year old CAD software I have a USB key for. It does most but not really complex ones.
Here's the original STL one ready to be sliced into G-Code for the 3D printer.
View attachment 39001
I'm using the same idea but with the aviation connectors for everything so I did my own from scratch but mucked up on the size of the two large holes.
View attachment 39002
You are utilizing parts and processes from your experiences.
That is a characteristic of an open-minded developer with more ideas to produce.
Far too often creative minded industrial designers have been told that they cannot do the technical work involved with taking a process to the next level.
Designs go thru many drafts before the best final product is presented.
Looking forward to the next ‘revision’.
Here's my next revision and why one shouldn't really do things in the machine shop it there's even the slightest idea there might be COVID brain fog.
I found a short piece of 1/2" stock. Long enough to hold in the 1/2" 5C Collet for transfer to the Spin Indexer on the mill.
I was careful. Used my ELS for the exact metric lengths required. Came out perfect. The XL series pulley that needs a keyslot slid on with no friction and no play. I'm usually never that good.
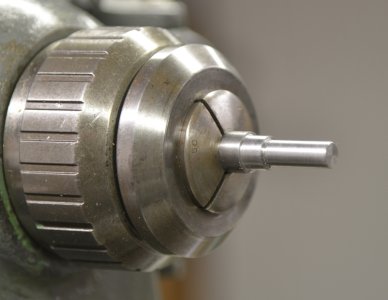
Then on to the mill. First I put a 7/8" rod about 16" long into the spin indexer. Used my probe to ensure it was parallel to the X axis on the table so the key slot I'd eventually carve would be straight. Perfect!
Swap in this little guy. Find the center line by probing front and back using the probe on either side icon.

Well that operation wiped off the probe needle so fast I couldn't get to the ESTOP fast enough. No idea why. Luckily it didn't shatter the probe like I did the last time.
I used my old standby that makes electrical contact to find the center. Then positioned the touch probe again over the center line this time to establish the Z=0 position. This is where the brain fog starts to show.
Click on on the probe surface button. Perfect.

Do a tool change to remove the probe and insert the 3mm end mill holder. Verified the length was correct in the tool table. All looked good.
Jogged a line at a time in the G-Code.
The G0 Z0.235 should have put the tool bit just above the part and then stopped so I could measure and check clearance.
BANG!
Bits of HSS embedded in the softer steel. Collet has marks (it was turning) against the 5C collet.
AC Servo on Z axis faulted out for encoder not going where motor was told to go. Possibly even the spindle faulted. By then I'd hit the ESTOP.
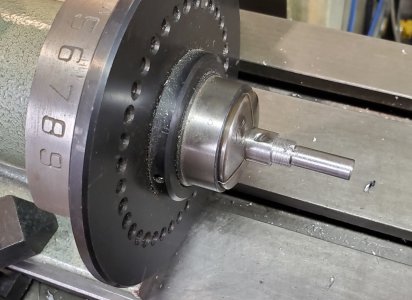
I tried to clean up the area on the but it's not as pretty as it used to be.
So what went wrong?
Late tonight I finally figured it out. To make this long story short, after I had damaged my first 3 way probe I made a spindle button probe just to be able to set Z=0. That probe was much shorter. The new replacement probe arrived in June or July. I did testing and then went on and did other things.
Totally forgot to change from the short Z axis button probe to the longer (by 2" needle probe). The system thought the 3mm mill was 2" further from the part than it actually was. ie. At about 2.235" and it was trying to reach 0.235". At 150 ipm.
Once I edited the tool table and the INI file parameters for this expensive fixed length probe I went down and tried it again. This time the probing and tool length works.
I'll go through and do a full calibration again just to get the precise value but moral of the story. Don't play in the shop with COVID fog brain.
I found a short piece of 1/2" stock. Long enough to hold in the 1/2" 5C Collet for transfer to the Spin Indexer on the mill.
I was careful. Used my ELS for the exact metric lengths required. Came out perfect. The XL series pulley that needs a keyslot slid on with no friction and no play. I'm usually never that good.

Then on to the mill. First I put a 7/8" rod about 16" long into the spin indexer. Used my probe to ensure it was parallel to the X axis on the table so the key slot I'd eventually carve would be straight. Perfect!
Swap in this little guy. Find the center line by probing front and back using the probe on either side icon.

Well that operation wiped off the probe needle so fast I couldn't get to the ESTOP fast enough. No idea why. Luckily it didn't shatter the probe like I did the last time.
I used my old standby that makes electrical contact to find the center. Then positioned the touch probe again over the center line this time to establish the Z=0 position. This is where the brain fog starts to show.
Click on on the probe surface button. Perfect.

Do a tool change to remove the probe and insert the 3mm end mill holder. Verified the length was correct in the tool table. All looked good.
Jogged a line at a time in the G-Code.
The G0 Z0.235 should have put the tool bit just above the part and then stopped so I could measure and check clearance.
BANG!
Bits of HSS embedded in the softer steel. Collet has marks (it was turning) against the 5C collet.
AC Servo on Z axis faulted out for encoder not going where motor was told to go. Possibly even the spindle faulted. By then I'd hit the ESTOP.

I tried to clean up the area on the but it's not as pretty as it used to be.
So what went wrong?
Late tonight I finally figured it out. To make this long story short, after I had damaged my first 3 way probe I made a spindle button probe just to be able to set Z=0. That probe was much shorter. The new replacement probe arrived in June or July. I did testing and then went on and did other things.
Totally forgot to change from the short Z axis button probe to the longer (by 2" needle probe). The system thought the 3mm mill was 2" further from the part than it actually was. ie. At about 2.235" and it was trying to reach 0.235". At 150 ipm.
Once I edited the tool table and the INI file parameters for this expensive fixed length probe I went down and tried it again. This time the probing and tool length works.
I'll go through and do a full calibration again just to get the precise value but moral of the story. Don't play in the shop with COVID fog brain.
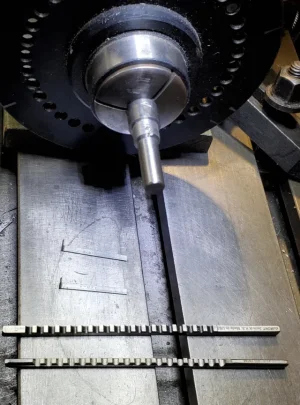
Well crap. The 2mm broach arrived in the mail today. Now I no longer have an excuse to not finish the broach guide. The last time I tried to make the guide I busted a 3mm end mill and knocked the tip off the probe. And since then I've had issues with setting Z height on a tool change. Here I thought I'd have another month's worth of procrastination.🙁

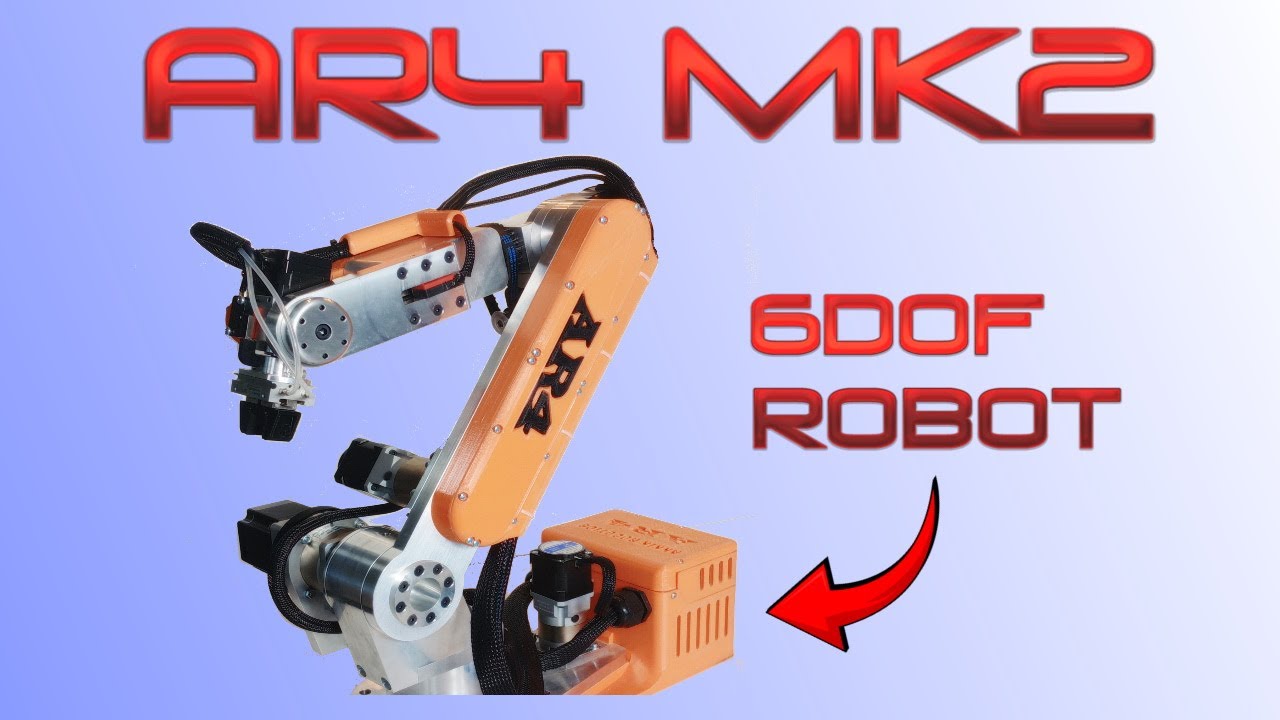
Oh gosh. He's got a new version that does even more and packs all the motor drivers into the base of the robot arm.
 www.anninrobotics.com

Check out the latest version of the AR4
 www.anninrobotics.com
Is the AR4 entirely open source? If so, the guy is modern day hero.
Must not start another new project.
Must not start another new project.
Must not start another new project.
Must not start another new project.
Must not start another new project.
Must not start another new project.
.......
Must not start another new project.
Must not start another new project.
Must not start another new project.
Must not start another new project.
Must not start another new project.
Must not start another new project.
.......
140mower
Don
...... thinking about a new project are ya'. ........So many of my purchases and projects begin the same way ...😉Is the AR4 entirely open source? If so, the guy is modern day hero.
Must not start another new project.
Must not start another new project.
Must not start another new project.
Must not start another new project.
Must not start another new project.
Must not start another new project.
.......
Don't forget, we like pictures. 😛
Yes. Open source for the Arduino interface. I don't recall it the PC side is open source. I think it is.Is the AR4 entirely open source? If so, the guy is modern day hero.
Must not start another new project.
Must not start another new project.
Must not start another new project.
Must not start another new project.
Must not start another new project.
Must not start another new project.
.......
Actually already deep down this rabbit hole if you go back a few pages of this thread. The final toothed belt for one of the joints finally arrived. I now have the 3mm and 2mm broach keys for the pulleys and was working on the broach guide. A box full of motors, electronics, hardware....... thinking about a new project are ya'. ........So many of my purchases and projects begin the same way ...😉
Don't forget, we like pictures. 😛
Biggest thing holding me back now is to make a few patterns to cast the larger aluminum pieces. Not interested in paying $40 to $50 for a chunk of metal that I screw up when milling it. Much easier to melt it down and make it again.
What usually happens with me is something goes wrong and I go do something else for a while rather than break things due to frustration. The Z180 S100 card is now working other than having CP/M work with the MicroSD card.
This new AR4 version looks to have changed some things so I might be able to put off building mine because I need different parts. Here's hoping...
I have a rule. With a G0 Z xxx first time to the position above the part - 25% rapid feed max. I might do 25% and then 5% when it's close. The whole time my finger is on the stop button. I'm also eyeing the Z height on the screen as it goes down. I invented this rule after ramming a 1/2"+ sized drill right into the part at rapid 400ipm. Busted the drill - I'm grateful that was all that went wrong. Can you bend a mill doing that? omg.The G0 Z0.235 should have put the tool bit just above the part and then stopped so I could measure and check clearance.
BANG!
The biggest issue will be that my mill can do 13" and the long arm is 15". So I have to probably create a reference hole or point and be able to flip the arm end for end to be able to cleanly mill the outline.
ha ha. I'd get bored. Bad enough I still have 12 PC boards that need connectors soldered on and tested. My excuse is I'm waiting for 10 more LED light pipes.John,
That is the way to increase your machining ‘window’.
Next you will be completing mass production in your shop !!
But if I could teach the arm to replace TTS tools automatically and place raw material and remove finished parts who knows. I might make 2 of something. Or more... Maybe even 42....
mickeyf
Ultra Member
Just read through this whole thread, even though I likely don't have enough time left in my life for a project like this. (Well, if I dumped all the other partly finished ones...)
I imagine you are already well aware, but when I was in Victoria I found that Fastener Force was a good source of metric fasteners. Probably not everything you'd want, but worth a try.
Also:
My late father in law worked on the Avro Arrow, then later at NASA with the other engineers who moved there when the Arrow was so abruptly terminated.
I imagine you are already well aware, but when I was in Victoria I found that Fastener Force was a good source of metric fasteners. Probably not everything you'd want, but worth a try.
Also:
Lots of Canadian breakthroughs have fallen into the scrap heap.
My late father in law worked on the Avro Arrow, then later at NASA with the other engineers who moved there when the Arrow was so abruptly terminated.
Hey Mickey,
I used to manage development programs for a company that built the tire-making machinery for the Space Shuttles. I even travelled to the Kennedy Space Center about 20 years ago.
BTW: Avro still has a few operations in Mississauga (Malton area).
I used to manage development programs for a company that built the tire-making machinery for the Space Shuttles. I even travelled to the Kennedy Space Center about 20 years ago.
BTW: Avro still has a few operations in Mississauga (Malton area).
This guy posted his AR4 Robot Arm construction. A bit long for the video but love that 3D printer he used.

