Gearhead88
Ultra Member
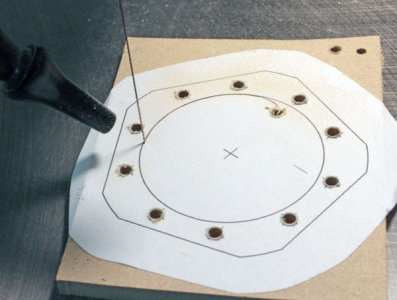
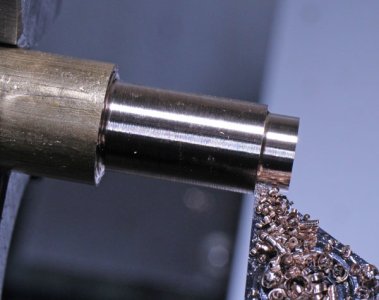
Cool , I've got Mitutoyo bore gauges from .2" to 6" in a variety of flavoursNext engine - I'll bring the bore gage & the beer! LOL
Cool , I've got Mitutoyo bore gauges from .2" to 6" in a variety of flavoursNext engine - I'll bring the bore gage & the beer! LOL


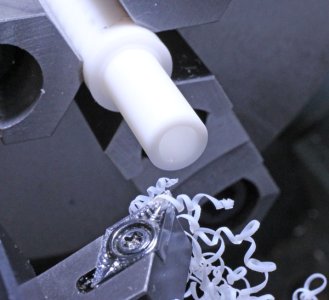
The cutters are Nikcole, kind of spendy but last forever & I've used them for many aspects on this project.
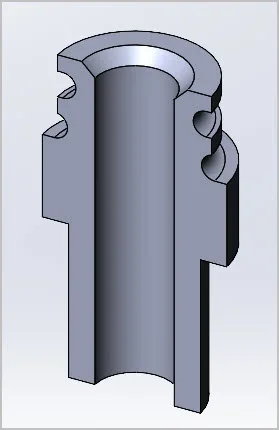
Yes, many standard widths, square, vee, profile, 2-way cutting, left hand, right hand.... They must have changed the web link but here is some catalog info. I bought a combo shank / insert set many years ago from KBC for like 150 on sale, but they are nutty prices now. Unfortunately I haven't found a clone to these. I can tell you the shank is made from Kryptonite. I wanted to squeeze a bit more depth on my cylinder finning & wanted to take a bit off the shank end that was interfering. The end mill just skipped across & said, nope, not gunna do it.So they are different profile inserts for a holder? Are they an ISO standard or something proprietary?
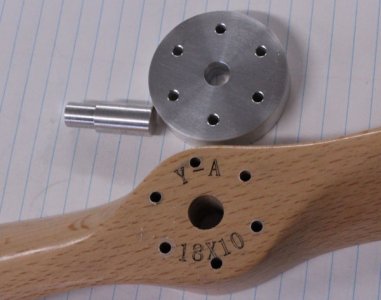
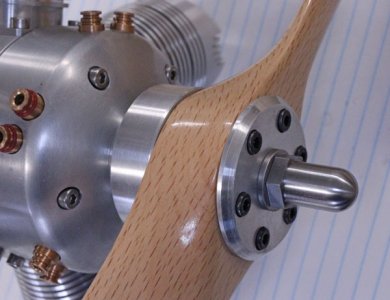
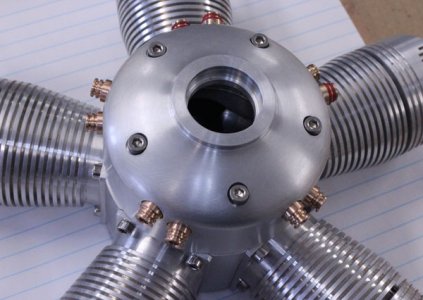
I don't believe you've mentioned it in a previous post but if you have pardon me.... do you have an end use for this fantastic engine (rc plane) or will you just enjoy it on its' own?Thanks for nice comments. Yes hoping this will be the summer of smoke & noise!
@CWelkie thanks for reminder about Falcon. You even mentioned same on the other forum & I've bookmarked it. Hope your projects are going well!
Wow that is something huh.@DPittman Haha, this question comes up a lot. I haven't given a model much thought. I mean I'm capable of constructing something that would suite the engine but I guess the short answer is Scale modelling was never really my 'thing' although I certainly appreciate that facet of the hobby. With somewhat limited play time, I'm more looking forward to the 'next' engine. Maybe inline, maybe Vee, maybe spark ignition. I have some plans & thoughts, but first things first, this radial must run!
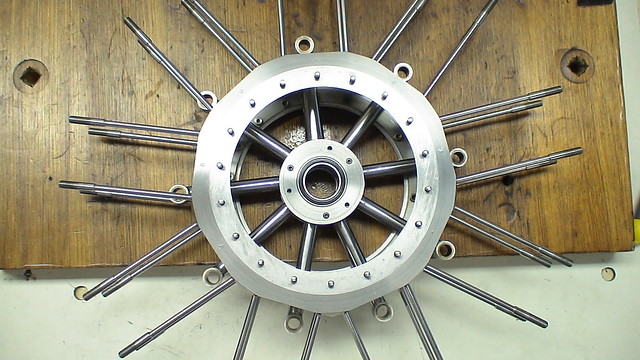
Speaking of the package deal, check out this guy. Because building a rotary wasn't enough, he is doing an excellent job on an airframe. That's dedication.
Maybe you should just build another 2 or 3 of those same engines and hang them on a full size ultralight and we can go flying together.