• Scam Alert. Members are reminded to NOT send money to buy anything. Don't buy things remote and have it shipped - go get it yourself, pay in person, and take your equipment with you. Scammers have burned people on this forum. Urgency, secrecy, excuses, selling for friend, newish members, FUD, are RED FLAGS. A video conference call is not adequate assurance. Face to face interactions are required. Please report suspicions to the forum admins. Stay Safe - anyone can get scammed.

Quick survey on Foundries

It works Tom! is it loud? like annoy the neighbors loud?
It is no worse than a vacuum and heats up fast. If I ever make another one for bigger castings I’d flip it so the barrel part slides up on rails making larger pours possible as well as easy access to the crucible.
 
What makes you guys decide to cast it instead of milling it? Especially people with CNC mills. You can cast it, then you have to mill it anyways I assume for precise surfaces. Just wondering what the advantages are having never done any casting myself.
That's a really good question. I've only recently had a CNC mill. Most of the time the Aluminum is free or a very low cost. Yes, the pattern costs money. And if I'm only making one then it's probably not a good idea to always cast. It's like the 3D printer rabbit hole.

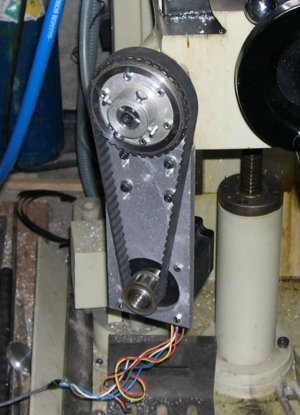
In either case for me it's mostly cost as the price for the thick plate to make something like this for the knee of my mill would have been way more than the paint, primer and natural gas.

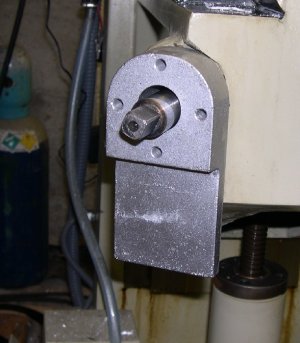
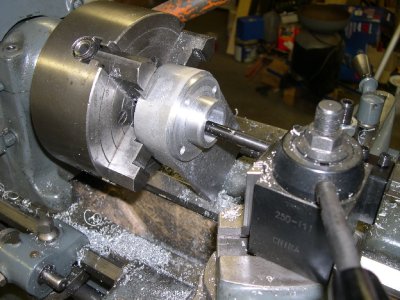
When you look at the casting for the knee motor mount, for example. It's quite deep due to the shoulder than fits inside the mill knee casting. It was just small enough to fit in the 4-Jaw for boring the bearing recess. I shudder to think what that would have cost as plate.
 

Attachments

  • KneeDrive.jpg
    KneeDrive.jpg
    66.3 KB · Views: 4
  • BracketTrialFit.jpg
    BracketTrialFit.jpg
    65.9 KB · Views: 4
  • BoringKneeBracket.jpg
    BoringKneeBracket.jpg
    155.5 KB · Views: 4
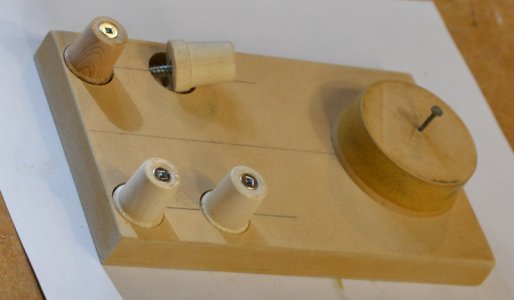
Also the patterns can be fun and challenging to make. So as a hobby that's just part of it. This one has the 4 standoffs turned from pine on the Gingery lathe using the taper mode.

The bottom motor mount could be made from plate aluminum. The stand-offs could just be turned aluminum rod spacers. But the hub to hold the two bearing races etc. would have to come from expensive plate. And if I screwed up the machining a second expensive plate. OTOH, if I screwed up this one I melt it down and make it again.

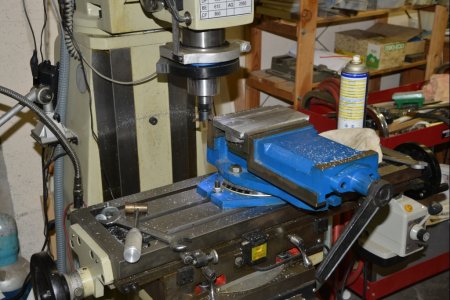
Oh and one of the few times I actually used the vise that came with the mill from House of Tools.
 

Attachments

  • YAxisCastings-1.jpg
    YAxisCastings-1.jpg
    124.9 KB · Views: 8
  • YAxisPattern-2.jpg
    YAxisPattern-2.jpg
    46 KB · Views: 6
  • YAxisPattern-1.jpg
    YAxisPattern-1.jpg
    30.9 KB · Views: 8
  • YAxisMachining-3.jpg
    YAxisMachining-3.jpg
    125.5 KB · Views: 7
I have a little import 3kg electric foundry that works great for the sporadic usage it gets. I have the stuff to build a bigger propane/waste oil one, but a few other projects are in the way ahead of it. I've been scrounging cast aluminum car parts (heads, rims, etc) for a few years, so I have enough to keep me going for a while. Alloys like 6061, extrusions, sheet scrap and others make poor castings. Not bad for some stuff, but for stuff that I care about, I stick to castable alloys. In general if it WAS cast it can be RECAST. Most auto parts are A356, that melt and recast beautifully.

I haven't tried chips, but can't see that working out that great. Aluminum oxide builds up on the surface layer of aluminum. Due to the high surface area of chips, they have a lot of oxide (slag) per volume. It ends up being just not worth it for the energy in for the output. Plus, unless it was a castable alloy in the first place, you're at an even further deficit. If you scrounge enough, decent scrap to melt is pretty easy to find for cheap/free, and you'll be much further ahead working with the proper alloys. I'd rather turn clean chips into the scrap yard, and pick up a couple car rims on the way out of there. You'd end up with better yield, and better parts, with much better mechanical and surface finish properties. Unless of course your chips were a356 to begin with, then you'd just end up with better yield.

I've read about guys pressing chips into pucks and getting better results with less slag, but I'm not 100% sold on that being a good use of energy. The oxide problems still exist on the chip itself (ignoring the alloy problem in the first place). It might reduce the overall slag a bit, but I can't se it being comparable to casting ingots, or larger sections of scrap. I would like to try it someday though, because I like playing around and learning stuff.

So far I've only cast aluminum, but my foundry will do copper/brass/bronze apparently. Would like to give it a shot one day, as I've been saving up a big pile of copper to melt. This is the one I have https://www.amazon.ca/TOAUTO-Automa...jbGlja1JlZGlyZWN0JmRvTm90TG9nQ2xpY2s9dHJ1ZQ==

The price fluctuates a bit on it, and there are other ones out there that are similar. For ease of use it's pretty plug and play, and very handy to just flip it on, and pour. It takes about 45 minutes to charge up a full crucible of aluminum to pouring temp. Subsequent ones are quicker at about 15-20 minutes. I got about 20-25 melts on my last crucible and have a new one I just bought waiting to go for a couple projects which I might get to this weekend. So far I have only used green sand that I made myself from kitty litter and playsand. It works, but I would recommend starting with a commercial offering if you can. Theres already enough variables, it just makes it tougher to start with one more. Buying proper sand is high on my list......But not at the top yet.....lol.
 
I have a little import 3kg electric foundry that works great for the sporadic usage it gets. I have the stuff to build a bigger propane/waste oil one, but a few other projects are in the way ahead of it. I've been scrounging cast aluminum car parts (heads, rims, etc) for a few years, so I have enough to keep me going for a while. Alloys like 6061, extrusions, sheet scrap and others make poor castings. Not bad for some stuff, but for stuff that I care about, I stick to castable alloys. In general if it WAS cast it can be RECAST. Most auto parts are A356, that melt and recast beautifully.

I haven't tried chips, but can't see that working out that great. Aluminum oxide builds up on the surface layer of aluminum. Due to the high surface area of chips, they have a lot of oxide (slag) per volume. It ends up being just not worth it for the energy in for the output. Plus, unless it was a castable alloy in the first place, you're at an even further deficit. If you scrounge enough, decent scrap to melt is pretty easy to find for cheap/free, and you'll be much further ahead working with the proper alloys. I'd rather turn clean chips into the scrap yard, and pick up a couple car rims on the way out of there. You'd end up with better yield, and better parts, with much better mechanical and surface finish properties. Unless of course your chips were a356 to begin with, then you'd just end up with better yield.

I've read about guys pressing chips into pucks and getting better results with less slag, but I'm not 100% sold on that being a good use of energy. The oxide problems still exist on the chip itself (ignoring the alloy problem in the first place). It might reduce the overall slag a bit, but I can't se it being comparable to casting ingots, or larger sections of scrap. I would like to try it someday though, because I like playing around and learning stuff.

So far I've only cast aluminum, but my foundry will do copper/brass/bronze apparently. Would like to give it a shot one day, as I've been saving up a big pile of copper to melt. This is the one I have https://www.amazon.ca/TOAUTO-Automatic-Graphite-Crucible-Aluminum/dp/B0814HF9DV/ref=sr_1_1_sspa?crid=317ATOOWYEMWB&keywords=3kg+foundry&qid=1673663091&sprefix=3kg+foundry,aps,193&sr=8-1-spons&psc=1&spLa=ZW5jcnlwdGVkUXVhbGlmaWVyPUFTWERIMEpDQU04RUkmZW5jcnlwdGVkSWQ9QTA3MDg2MDAyWEQyTUY4M1VIOFBVJmVuY3J5cHRlZEFkSWQ9QTA1NTUzOTYxWFFGNFBIMUpaOVAxJndpZGdldE5hbWU9c3BfYXRmJmFjdGlvbj1jbGlja1JlZGlyZWN0JmRvTm90TG9nQ2xpY2s9dHJ1ZQ==

The price fluctuates a bit on it, and there are other ones out there that are similar. For ease of use it's pretty plug and play, and very handy to just flip it on, and pour. It takes about 45 minutes to charge up a full crucible of aluminum to pouring temp. Subsequent ones are quicker at about 15-20 minutes. I got about 20-25 melts on my last crucible and have a new one I just bought waiting to go for a couple projects which I might get to this weekend. So far I have only used green sand that I made myself from kitty litter and playsand. It works, but I would recommend starting with a commercial offering if you can. Theres already enough variables, it just makes it tougher to start with one more. Buying proper sand is high on my list......But not at the top yet.....lol.
That furnace looks pretty good! Another thing to buy... :>

Do you think you could you heat treat things with it? for hardness? maybe not sophisticated stuff like knives.?
 
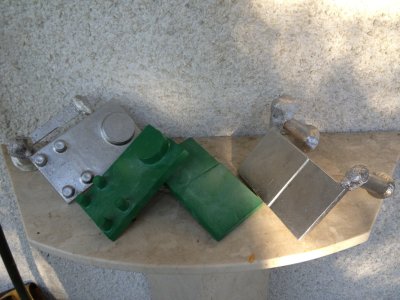
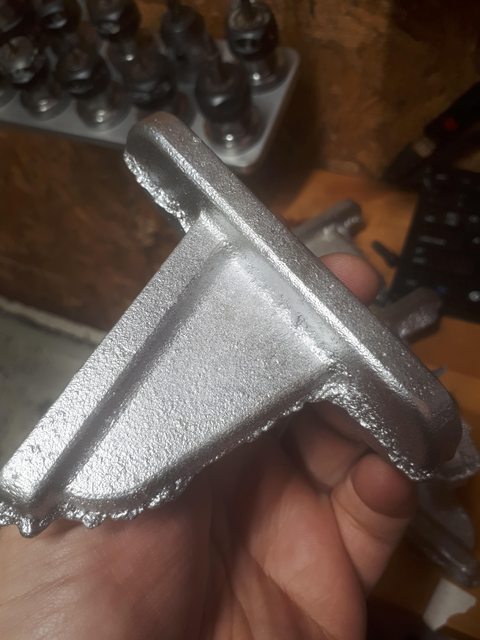
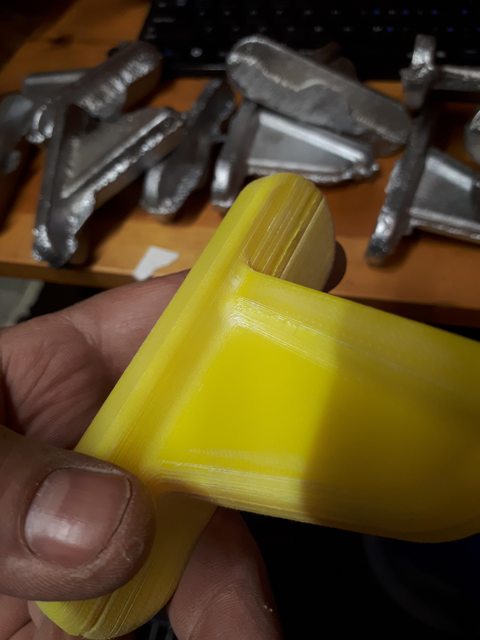
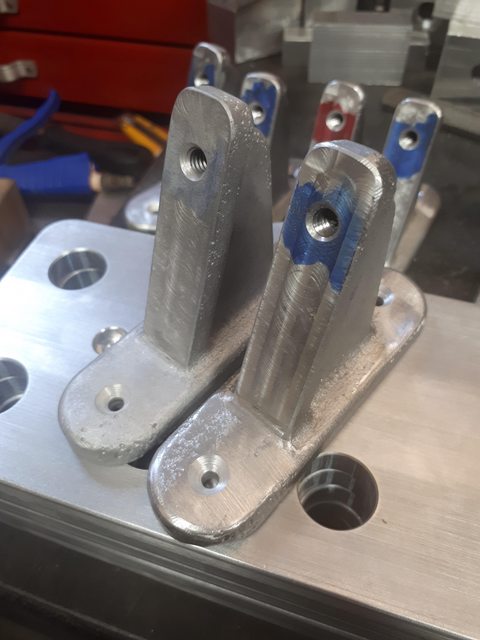
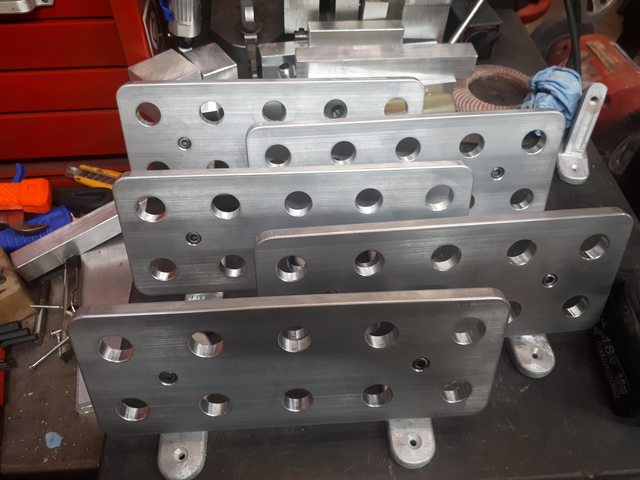
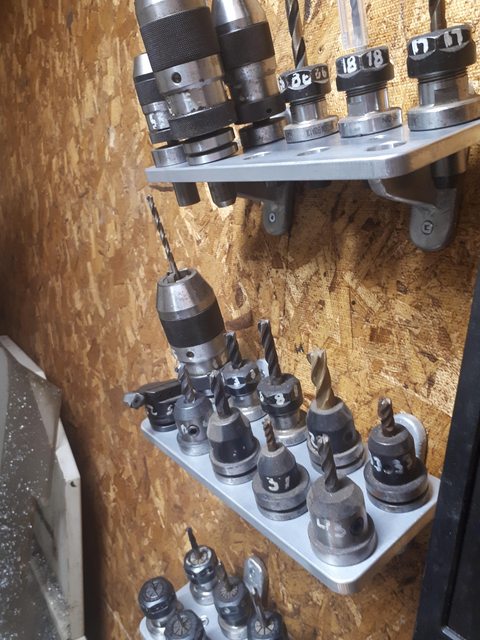
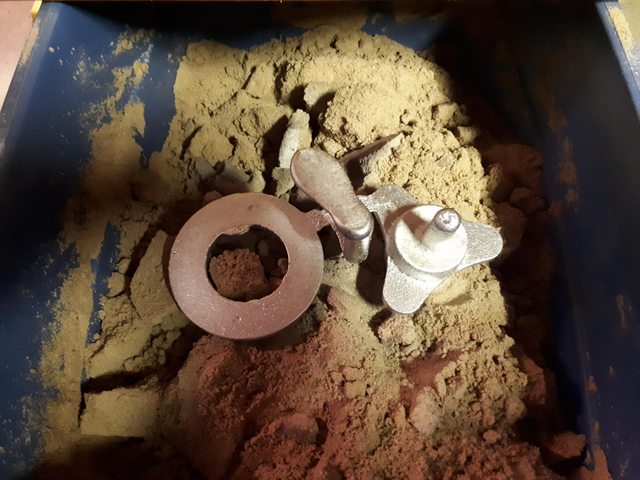
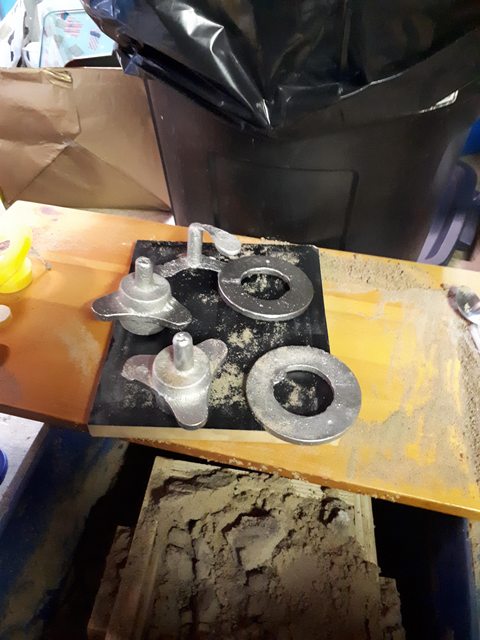
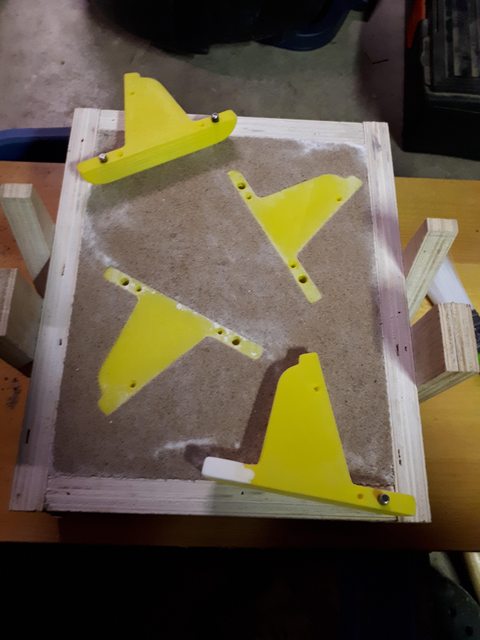
This is one of the last projects I did. Brackets cast from 3d printed (unfinished patterns) to make some mill tooling racks.

x12BTk5l.jpg

DhuRj0El.jpg

ideB9MCl.jpg

L2avwMwl.jpg

WJAIgzrl.jpg


It was an exercise in seeing how quick I could go from cad model, to 3d print split pattern, to cast part with as little human effort as possible. I learned a lot, and have made improvements, but it's a pretty damn quick process for rough and simple parts like this. Better finishing of the patterns, yields much better results, but not everything needs that high of quality. There is a point of diminishing returns, and I found a pretty good workflow for simple shop projects like this. I need to cast a few more of these brackets again.
 
Last edited:
That furnace looks pretty good! Another thing to buy... :>

Do you think you could you heat treat things with it? for hardness? maybe not sophisticated stuff like knives.?
Possibly if it fit into the crucible/opening? but It would be a bit cludgy. I don't know how it would hold the heat if you had to hold the lid open. You might be able to make it work if you really wanted too.

I gotta say though, I'm a bit miffed at the import clone shops. For what this foundry is, and the required parts to make it, I can't believe they haven't started knocking off heat treat ovens, or what I'd like, burnout kilns for investment casting. They're practically the same things with the same components, yet the knock off burnout kilns they sell are $1000. I've been wanting to build one for awhile (same with a heat treat oven), but have been holding out hope I'd stumble into a import version for a few hundred and it would save me the work lol. I am way too cheap to buy one from from a north American source as I just don't have the work to justify the cost, and for the money it's much cheaper to build one.
 
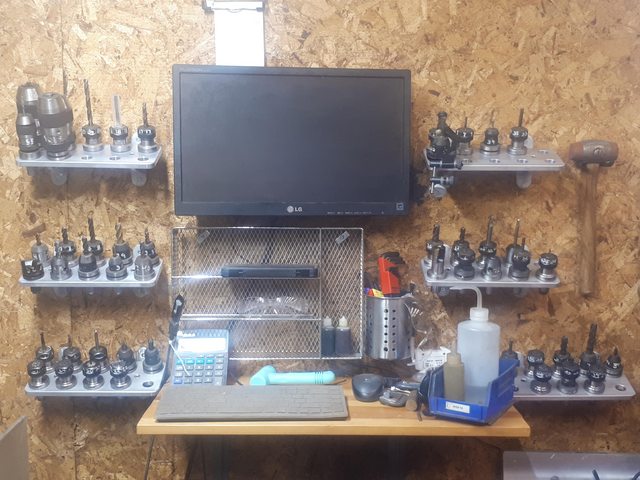
Wow Dan. You can really crank out the work. Are those numbers on the holders tool table id's? offsets table ids?
 
I get stuff done in small batches of free time when I can, but my shop and in process projects can gather dust for months while I get busy with other stuff. I didn't get much done at all this year to to a variety of reasons, but have this weekend free to catch up on some things. It comes and goes in waves and I tend to make it worse by biting off way more than I can chew at times..........

Those brackets were done about 9 months ago (according to my imgur upload date), and it seems like yesterday. I went to cast some more about a month ago and discovered my crucible was too worn for me to trust, so I ordered another one. It's taken that long to get around to casting some again. That's a pretty typical timeline of how projects go around here lol.
 
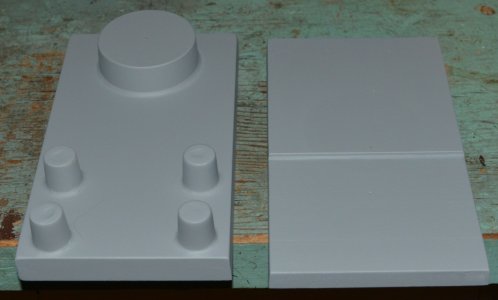
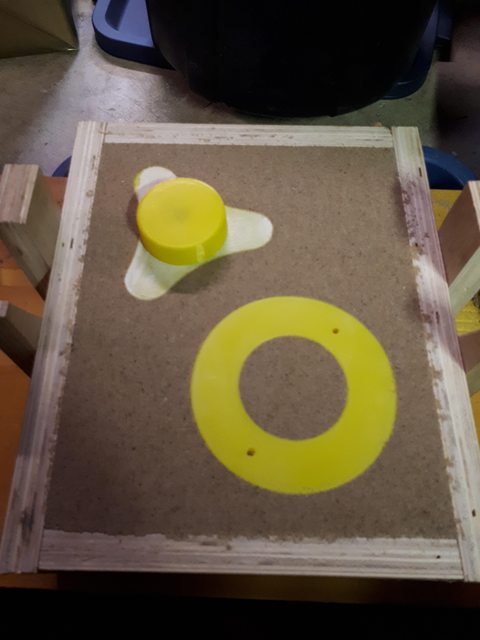
I have another similar project I did where I wanted to make a quick and dirty print to casting, and after I cast them I took the time to sand, fill and paint the printed patterns as I wanted to see the improvements to gauge whether the time is worth the effort for stuff like this, and get a sense of where the effort is worth it.

z4izxBtl.jpg

E5jEJwOl.jpg

rsJJJKGl.jpg


Stupid me though, those parts aren't something I needed more of lol. I should have done it with the brackets, and at least I would have had extra parts I could use. I only needed 4 of these hubs, and got my 4 the first time around. Then I spent an hour or two (total over a few nights) sanding, filling, and spraying multiple coats of paint on them. Sometimes I wonder about myself.....

If I get around to casting tomorrow/sunday, I'll make a new thread about it.

I'm still a rank beginner, and learn new stuff everytime I do it. It's been so long I'l probably have to start over again lol. I know my sand is all dried out and will need reconditioning. Fun times, guess I need to build a muller next :D. Luckygen and oldfoundryman have taught me a lot via youtube. Working in a couple patternshops, and with some good pattern makers over the years I picked up some stuff there too, but most of my learning has been via internet. It's a pretty cool facet of the trade to get into, and with a small electric foundry like mine the bang for the buck considering the capabilities it adds to the home shop is huge. Coupled with a 3dprinter for patternmaking, and the possibilities are near endless.
 
This is one of the last projects I did. Brackets cast from 3d printed (unfinished patterns) to make some mill tooling racks.

x12BTk5l.jpg

DhuRj0El.jpg

ideB9MCl.jpg

L2avwMwl.jpg

WJAIgzrl.jpg


It was an exercise in seeing how quick I could go from cad model, to 3d print split pattern, to cast part with as little human effort as possible. I learned a lot, and have made improvements, but it's a pretty damn quick process for rough and simple parts like this. Better finishing of the patterns, yields much better results, but not everything needs that high of quality. There is a point of diminishing returns, and I found a pretty good workflow for simple shop projects like this. I need to cast a few more of these brackets again.
OK. you win on the number of TTS holders. Nice job. Did you do lost PLA or use it as a pattern?
 
OK. you win on the number of TTS holders. Nice job. Did you do lost PLA or use it as a pattern?
ybikdrsl.jpg

They all came with the Tormach when I bought it, but I have added/made a few more since.

It was a symmetrical split pattern. I have yet to do any lost PLA/foam casting, but would really like to try in the future.
9enBJKMl.jpg


Kelly Coffield has a really great channel for lost foam casting for those interested. His electric foundry is a thing of beauty too. https://www.youtube.com/@kellycoffield533 Someday I'd like to give it a try and replicate his process. He seems to have it down, and gets great results.
 
Nicely done. Registration pins. The whole works.
A friend on Saltspring Island used to do lost foam. His CNC machine based on the JGRO design had a hot wire cutter assembly and he'd turn out foam patterns very quickly.

He had a floating sand system that used air pushed in from the bottom creating in effect quicksand but dry not wet.
The patterns were just put on the top of the barrel of sand and with light pressure went down until only the sprue and risers were visible. Then he'd turn off the air and the sand would collapse around the foam. Pour, pull the casting and repeat. It was pretty cool. He's moved away from metal working etc.

I tried some lost foam under more conventional circumstances. Couldn't stand the stink which also stayed in the green sand.

Latest project with 3D printing and patterns is to 3D print the core mold. The sand cores with molasses were baked in the oven. All to pre-cast T-Slots in the 4th axis face plate. As yet not cast. To dry this summer with fear of fire. Too busy in the fall. Maybe this weekend.
 
What makes you guys decide to cast it instead of milling it? Especially people with CNC mills. You can cast it, then you have to mill it anyways I assume for precise surfaces. Just wondering what the advantages are having never done any casting myself.
I just hate taking a nice piece of 3” round and turning 70% of it into swarf. Depending on how precise your pattern is this can drop to 10% swarf.
One of the more satisfying things is if you decide to change your design or screwed up when machining, you just remelt and start over.
 
Back
Top