• Scam Alert. Members are reminded to NOT send money to buy anything. Don't buy things remote and have it shipped - go get it yourself, pay in person, and take your equipment with you. Scammers have burned people on this forum. Urgency, secrecy, excuses, selling for friend, newish members, FUD, are RED FLAGS. A video conference call is not adequate assurance. Face to face interactions are required. Please report suspicions to the forum admins. Stay Safe - anyone can get scammed.

New vise jaw product

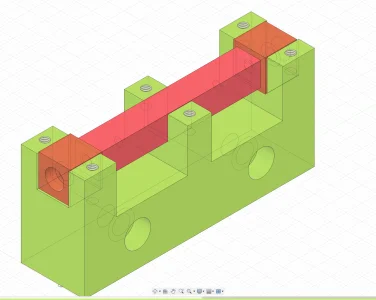
I think you only need one through bolt. If the bolt goes all the way through from one side to the other, it will pull both orange blocks together simultaneously against the center block. You can use a bigger bolt that way and only have to tighten once.

Btw, I'm still thinking you don't really need that square clamping system. Just take up the backlash and go ..... ;)
One bolt seems like a good idea - I was thinking twisting forces with one bolt might be a problem with the red bar trying to rotate on it's axis. Probably over worrying that as the fingers should hold it tight.

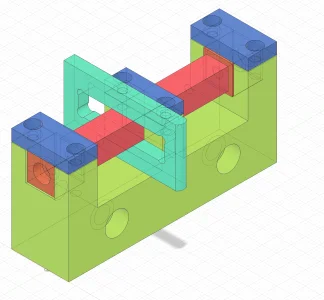
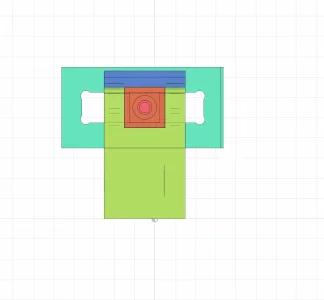
For the square clamping system it may not be needed - but I need to mill those square holes. The middle column one is especially tricky. Need a 4" reach through the side square 1x1" hole down to the middle column. So instead if I have top clamps then it will be easy to mill the square hole from the top of the vise jaw.
 
Last edited:
Agreed. Clamping cap on middle column good approach. Helps to tighten down on fingers and also after set-up the third cap is easy
 
I don't have any other drawings yet - just this 3d model. Yes this is all Fusion 360. @Dabbler was trying to use Fusion 360 on an older machine - the limiting factor seemed to be RAM. 8GB just wasn't enough. I have 16GB on my 5 year old macbook pro laptop and it works pretty decent.

Great, I'd bet it already has 16Gb but if not I'm sure it can be loaded up with more. The worst that could prolly happen would be have to pitch what it has to get a larger pair. I'm pretty sure it already has Win 10 on it.

When I look at Autodesk's website, the have 360 everything. And I don't see any reference to hobby use of Fusion 360. Would you be so kind as to send me a link to the hobby version?
 
One bolt seems like a good idea - I thinking twisting forces with one bolt might be a problem with the red bar trying to rotate on it's axis. Probably over worrying that as the fingers should hold it tight.

For the square clamping system it may not be needed - but I need to mill those square holes. The middle column one is especially tricky. Need a 4" reach through the side square 1x1" hole down to the middle column. So instead if I have top clamps then it will be easy to mill the square hole from the top of the vise jaw.

Yes, I was looking at the center piece and wondering how you would machine it. Caps on all three posts would solve many many issues.

I'm anxious to see the entire assembly. I'm thinking that whole square center piece (both orange and red) does not really need to be square. If the bottom of the Fingers ride on the bottom of the E, they will be flat enough. If not, then one long flat cap that covers the fingers and the E from end to end will force them all flat. The sliding forces between the fingers will never be enough to move them when they are clamped together in a stack - especially if they are not polished.
 
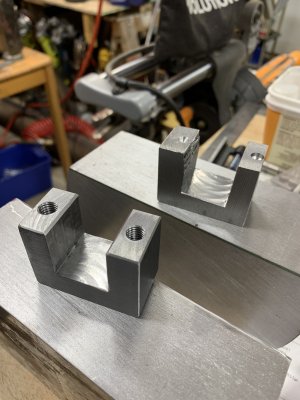
top clamps...

1650737525430.webp
 
but then scroll to the bottom and look at the left side - hobby version. You have to sign up and qualify...

THANK YOU. I was missing the scroll to the bottom part.

I didn't know I have to qualify. Any tips on what to say and not to say?
 
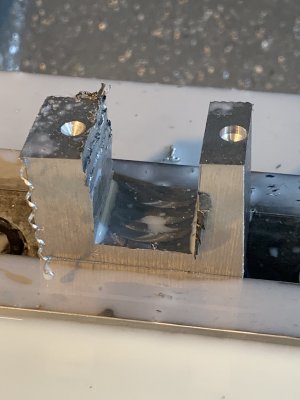
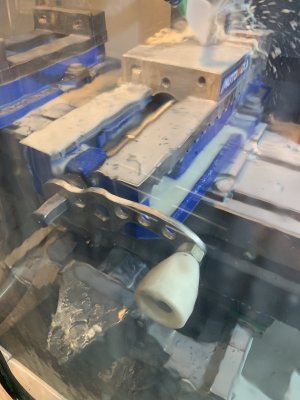
Top clamp test moved in the vise while milling. Way out of whack. Trying number two. Cleaned clamping surfaces and Pushed hard on the Kurt supplied handle not my speed handles.

6F9ECCE6-D41B-45BF-8C68-B8F9A84AB9C1.jpeg

Speed handle - usually they are fine but sometimes I get into trouble.
image.jpg
 
Well you can’t be making any money. I think that’s the main thing. Ie non commercial.

OK, I went ahead and went to create an account and discovered I already had one. I think I signed up so I could download the viewer so I could look at my field tile layouts.

Anyway, that has potentially turned into a blessing.

I was able to download and install Fusion 3D on my son's laptop. It has lots and lots of errors I think mainly stemming from my snail speed internet connection cuz the errors go away if I wait.

It is up and running now so it looks like I already got previously approved for non-commercial use. I guess we will see shortly when I try to create a drawing.

Anyway, I have lots to do outside today so I'm gunna quit using it for now.

So thank you @Janger . I really appreciate your help getting me going. I'll prolly post subsequent questions in another thread.
 
Outsidescrewball shows one at about 18:30 he just received and says a video will follow.

I thought I was gunna die watching this. Holy crap it's boring and lifeless and useless. SO I REALLY APPRECIATE your tip to wind ahead to 18:30. I skipped ahead and watched the piece on the Norgren Vise. That was worth the pain. Now I can see what @Janger is trying to accomplish........ I think...... LOL!
 
Top clamping...

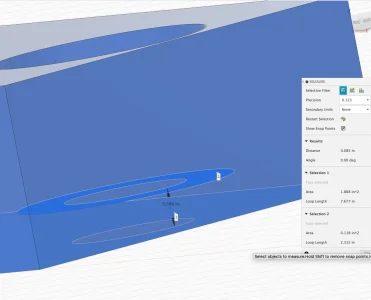
Material between bottom of cap head screw cap and bottom of clamp is 0.085". Too thin? I wanted the clamps to be below of the surface of the fingers but I suppose if it is the same that is fine. I could make the clamps 0.1" taller making the material between the bottom of the caphead screw 0.185" thick.

1650829676781.webp1650829690544.webp1650829860456.webp
 
To make the clamp stronger without sacrificing height, consider countersink screws instead. They retain more of the parent material.

--9 thousandths is too little; .185 is not too bad.
 
Top clamping...

Material between bottom of cap head screw cap and bottom of clamp is 0.085". Too thin? I wanted the clamps to be below of the surface of the fingers but I suppose if it is the same that is fine. I could make the clamps 0.1" taller making the material between the bottom of the caphead screw 0.185" thick.

View attachment 23421View attachment 23422View attachment 23423
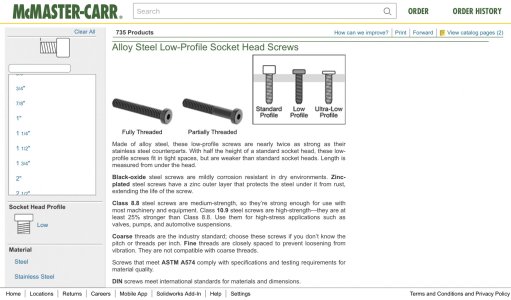
You could use low profile SHCS like these to regain the strength in your clamp bottom without sacrificing any of the other design features as the counter sink will be shallower thus leaving more material on the bottom.

A8EF1E15-D843-4C20-9D39-A8F11FF02B6A.jpeg
 
Top clamping...

Material between bottom of cap head screw cap and bottom of clamp is 0.085". Too thin? I wanted the clamps to be below of the surface of the fingers but I suppose if it is the same that is fine. I could make the clamps 0.1" taller making the material between the bottom of the caphead screw 0.185" thick.

View attachment 23421View attachment 23422View attachment 23423
Not sure if this will work, why not leave the top on solid and use setscrews in the side for clamping the holder? I have been following this for awhile and have finally figured out how this is going to work. Very clever.
 
Not sure if this will work, why not leave the top on solid and use setscrews in the side for clamping the holder? I have been following this for awhile and have finally figured out how this is going to work. Very clever.
Hacker I could do that and originally thought I would but thinking about how to make the square holes I decided top clamps would make the milling of the slot far easier. see post 106.
 
Back
Top