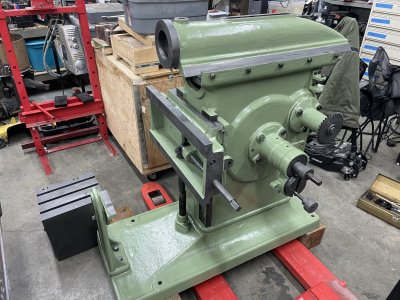
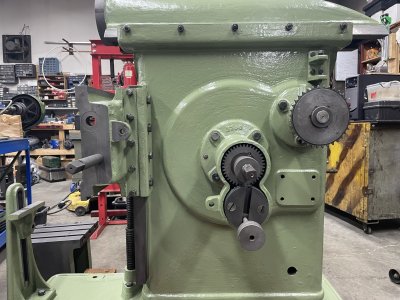
• Spring 2024 meetup in Calgary - date Saturday, April 20/2024. discussion Please RSVP Here to confirm and get your invitation and the location details. RSVP NOW so organizers can plan to get sufficient food etc. It's Tomorrow Saturday! you can still RSVP until I stop checking my phone tomorrow More info and agenda
  • We are having email/registration problems again. Diagnosis is underway. New users sorry if you are having trouble getting registered. We are exploring different options to get registered. Contact the forum via another member or on facebook if you're stuck. Update -> we think it is fixed. Let us know if not.
  • Spring meet up in Ontario, April 6/2024. NEW LOCATION See Post #31 Discussion AND THE NEW LOCATION

Mystery Shaper rejuvenation

deleted_user

Super User
Hey Kevin,

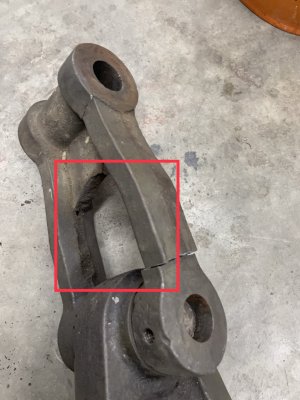
I agree that this looks to have had a previous issue and an initial crack.

I have another approach you may want to try. One I'd want to preserve the part as clean as possible so I'd not want to try brazing or welding as a first option.

Your project has a certain cool factor that will interest people. Your project deserves as good a "rejuvenation" as you can provide it. That means using a cast iron piece rather than aluminum if at all possible.

I've long had a plan that if I ever had a significant restoration where I had a large cast iron member break I'd start contacting every youtuber who works in cast iron and has a decent audience. Then I'd appeal to them to cast the piece for me. I'd offer to pay a small fee and provide content on the restoration for them to use on their channel. Most good tubers always want good channel content related to the theme of their channel.

Simultaneously, I'd work on a back up plan, while taking video and stills of the process.

In that case I'd prepare a pattern for casting the part by doing the following :

clean the broken pieces as much as possible,
insert turned to size stepped wood rod in the machined bores*
cast pieces in epoxy,
epoxy the two "broken" cast pieces back together.

*Required to create the core print. The step at either end is required to decrease the size of the machined bores so that you have machining tolerance when final part is cast. I'd measure the size and location of the bores as accurately as I could, then calculate a an end core size small enough to leave sufficient machining tolerance.

When completed you'd have a model of the part.

At this point I'd determine whether or not I'd want to repair it further to fill in the chunk of web that appears to have previously been broken out of the part.

It is hard to judge the size of the part, but I'd think that there should be extra meat on that part that it could be recast without adding shrinkage factor. Cut the part in half along the separation line and you have your two pattern pieces for cast iron or aluminum casting

If you want to be very precise you can use expanding epoxy formulas to try to scale up the part minutely to composite for shrinkage

BUT my main point is, seek help from a tuber motivated to help because they need good content. I'd watch
 

deleted_user

Super User
It was definitely cracked before. I'd be tempted to make a new one from steel. What are the dimensions?
had to tell from the perspectives the photos were taken while Kevin was holding them, but I got the impression that the web that had previously cracked was about 1/2"

The upper end of the member cross section about 1 3/4" x 3" and the lower end maybe 1 1/2" x 3", we know the pin penetrated the one end.. overall maybe 13" long? Lets see how close I am when kevin replies
 

johnnielsen

John (Makonjohn)
Premium Member
If you are going to stick the pieces back together, it is advisable to try tig or stick weld (NI ROD 99% is my preference) first as brazing makes it impossible to do either afterwards as brass/bronze doesn't play well with any type of arcweld. Speaking from experience.
 

DPittman

Ultra Member
Premium Member
If you are going to stick the pieces back together, it is advisable to try tig or stick weld (NI ROD 99% is my preference) first as brazing makes it impossible to do either afterwards as brass/bronze doesn't play well with any type of arcweld. Speaking from experience.
It shouldn't be too hard to remove all brazing with a bit more grinding. But yes any left will cause problems with welding.
 

RobinHood

Ultra Member
Premium Member
Kevin, yes it broke while you were getting the pin out, but it was already missing a large junk of the web (red box) and the ear was cracked part way through (as shown by the discolouration).

1B74E446-B260-4082-ABFB-A91646041970.jpeg

I would make one from steel. Or get one cast from CI (that could get expensive).

I don’t think aluminum will be strong enough.
 

DPittman

Ultra Member
Premium Member
Kevin, yes it broke while you were getting the pin out, but it was already missing a large junk of the web (red box) and the ear was cracked part way through (as shown by the discolouration).

View attachment 20771

I would make one from steel. Or get one cast from CI (that could get expensive).

I don’t think aluminum will be strong enough.
Alternatively, a pin could be made to go from one arm to another and welded/brazed in.
 

Susquatch

Ultra Member
Administrator
Moderator
Premium Member
Fabricating a piece out of steel is probably the sure bet, and the easiest to do.

Hey Kevin, I never did vote. Just said it wasn't your fault. If this happened to me, (and similar things have), I would make this out of four pieces of steel (two arms, the spindle, and a web) and then have someone who knows how to weld put them all together for me. That's a really beefy looking part and it cracked in use so I'm not in favour of making a casting. I'd vote for a steel replacement.

Edit - my forum portal is glitchy. I didn't see @RobinHood's reply till after I posted. Obviously I agree!

My only real concern would be the distortion that welding would generate. Maybe machine the three holes afterward?
 
Last edited:

Brent H

Ultra Member
Hey Kevin, looks like you have the correct mix of vodka with the paint! Way to go!

On the part breaking it looks like the first failure point was already established and probably a blessing it broke when you think about safety and the machine running and then having it break! Yikes!!

For a repair I would suggest making it out of steel. If we were closer I would try to weld it for you with the funky nickel mig wire.

Very nice job so far!!
 

Susquatch

Ultra Member
Administrator
Moderator
Premium Member
probably a blessing it broke when you think about safety and the machine running and then having it break! Yikes!!

Amen!

For the record, I think there is waaaay too much paint in the vodka.
 

kevin.decelles

Jack of all trades -- Master of none
Premium Member
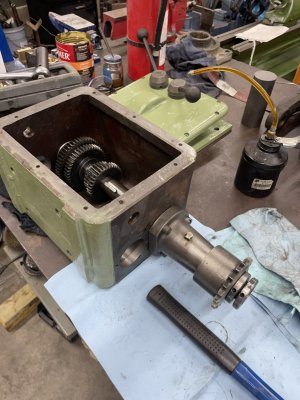
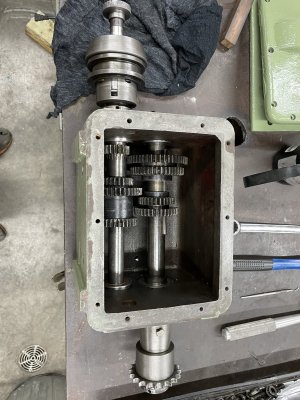
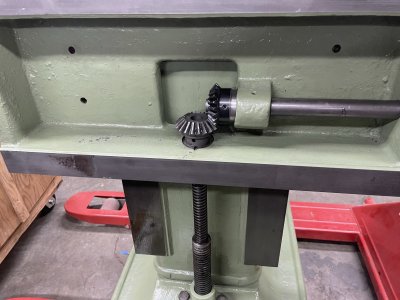
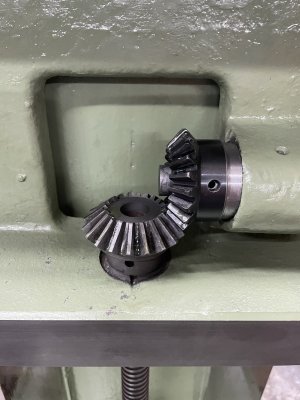
Ok, onto the bevel gears.... decided not to cut the gears for this as I don't have all the correct cutters (I will cut them once I get the cutters, but spring is coming!)

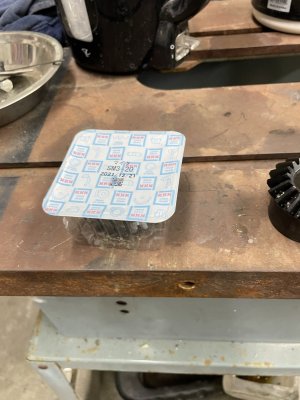
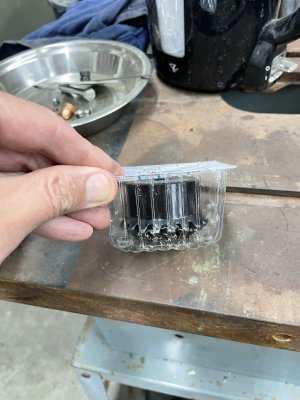
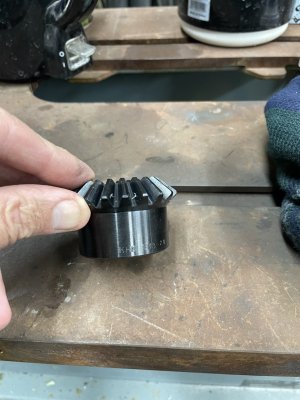
I decided to try ordering from KHK gears out of the USA (distributor for the Japanese arm). Short answer, not cheap (about $45 USD / gear + 45 for shipping. But, great service, great communication, fast response time -- I would definitely order again. The packing is impressive. Each gear came sealed in it's own package, blackened finish, 100% to spec. The offer Canada Post shipping (risky, but was nice as I was on vacation for 2 weeks). They emailed to say that UPS was the same price.... I said I doubt it once they deliver it, hold me hostage on the duty/customs and pretend that they can't deliver to my acreage. Canada Post please. No problems.

The nice part is that they provide CAD drawings for all the parts so I was able to print models to dry fit etc.

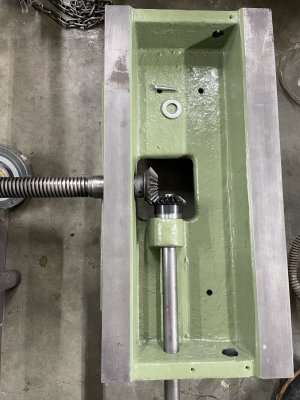
After receiving, I decided to use on of the original cast-iron gears w/new gear. I had to enlarge the bore from 16mm to 19mm, and had to take about about 0.100 on the base to ensure a smooth fit on the casting.

IMG_5745.jpeg


IMG_5746.jpeg
IMG_5747.jpeg

Mounted and meshed!

IMG_5748.jpeg

IMG_5750.jpeg

IMG_5751.jpeg

IMG_5752.jpeg

IMG_5754.jpeg

IMG_5755.jpeg
 

kevin.decelles

Jack of all trades -- Master of none
Premium Member
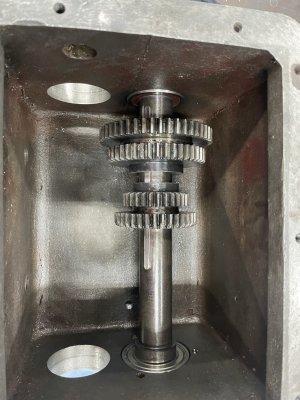
As a side note, the original shaper did not have a thrust bearing below the knee/apron... I added a 14mm thick bearing to make this more 'bearable'.

This required drilling new holes for the pin, and I opted for roll-pins vs. tapered pins as I'm not good at the taper pin reaming (yet).
 

Janger

(John)
Administrator
Vendor
As a side note, the original shaper did not have a thrust bearing below the knee/apron... I added a 14mm thick bearing to make this more 'bearable'.

This required drilling new holes for the pin, and I opted for roll-pins vs. tapered pins as I'm not good at the taper pin reaming (yet).
Looking good Kevin!
 

Janger

(John)
Administrator
Vendor
Kevin, yes it broke while you were getting the pin out, but it was already missing a large junk of the web (red box) and the ear was cracked part way through (as shown by the discolouration).

View attachment 20771

I would make one from steel. Or get one cast from CI (that could get expensive).

I don’t think aluminum will be strong enough.
For the already broken web - what happened there? Fatigue? Damage? Any thoughts ?
 
Top