• Scam Alert. Members are reminded to NOT send money to buy anything. Don't buy things remote and have it shipped - go get it yourself, pay in person, and take your equipment with you. Scammers have burned people on this forum. Urgency, secrecy, excuses, selling for friend, newish members, FUD, are RED FLAGS. A video conference call is not adequate assurance. Face to face interactions are required. Please report suspicions to the forum admins. Stay Safe - anyone can get scammed.

Follow Rest for Standard Modern

After a few passes I would know how far after the tailstock, and with what force, to bring the fingers into contact with the work.

I must be missing something here. This is a travelling steady. How are you changing the pressure on the work as you move up and down the length?

Or are you doing it manually by tightening and loosening the jaws in accordance with length?
 
I'm not changing it as it moves up down, just learning when to engage the fingers (how far away from the tail stock centre, e.g. 3 or 5" say) and with how much force. Not enough, and the middle will be bigger once it moves beyond the effect of the tail stock centre. Too soon and the diam at the TS will be smaller than the middle as for a bit there is the centre and the steady counter acting the cutting force.

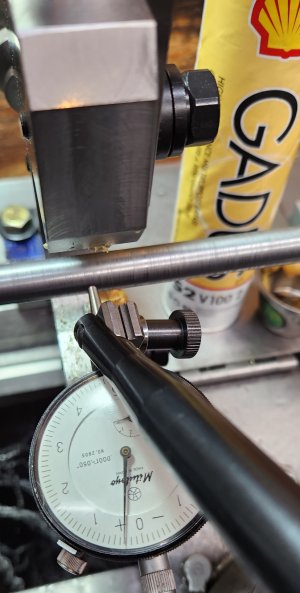
The first thing I do is indicate the work at the HS and TS. Adjust the tailstock until the are the same reading (assuming you have conficence in the centre drill hole placement, if not turn bother the same dia first). Then play when and by how to engage the fingers so the rest of it comes out the same diameter
 
Last edited:
Eureka!!
It's been so long that I've used a center in the tail stock for thin work, I had forgotten about heat lengthening. In the first attempt, I tightened down the tailstock and left it there. The heat created lengthened the piece creating a bowing at the middle.

So, on the 2nd attempt, I didn't lock the tailstock quill, and every couple inches, just slightly relieved the pressure.
Results:
-the taper is still there, same as before (since I didn't adjust for that)
-runout @head: 0.0001"
-runout @tail end: 0.0015"
-runout @mid point: 0.0003"
Now we're talking!!

The only other thing I did was use grease to lube the finger tips instead of oil.
 

Attachments

  • 20230203_114224.jpg
    20230203_114224.jpg
    183.1 KB · Views: 7
Test #3.

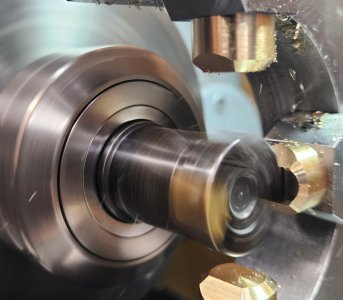
I decided to try a dead center instead of live center in the tail stock.

Results:
-taper was reduced to 0.0012" (because no runout from the live center)
-runout @head: 0.0002"
-runout @tail end: 0.0003"
-runout @midpoint: 0.0015"
-the finish is better

So it seems that, as @Mcgyver mentioned, tension of the fingers can make a difference. Especially as we go to smaller diameters. I just have to determine how to know.
 
If you are getting a consistent diameter with 1.2 thou over any distance, I'd say its a win! I got about about the same, as well as for the pitch dia (which is where the rubber meets the road). The best class of thread fit has greater tolerance than a thou so imo you're there.

All my work had diameter as the metric, vs run out. I think if you measure runout in the middle while supported by the steady it should near zero, no? Runout in the middle seems more like a measure of straightness which the travelling steady won't do much to fix....which I rationalize as, at a thou or two, as not mattering over a distances we're using a travelling steady for. i.e. I don't there is anything you can do about or that you need to
 
Just a little more work today.

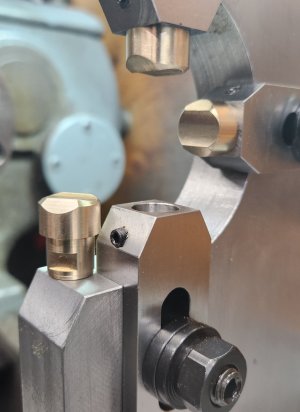
Worked on the finger tips. Milled 3/16" seat for the set-screws. Machined 45° for better clearance. Cut a 1" diameter curvature in situ. Which is kinda neat, in that I could pre-machine these surfaces if I was to be using the follow rest for threading a leadscrew.
 

Attachments

  • 20230204_162926.jpg
    20230204_162926.jpg
    136.3 KB · Views: 6
  • 20230204_165408.jpg
    20230204_165408.jpg
    270.8 KB · Views: 6
Back
Top