• Scam Alert. Members are reminded to NOT send money to buy anything. Don't buy things remote and have it shipped - go get it yourself, pay in person, and take your equipment with you. Scammers have burned people on this forum. Urgency, secrecy, excuses, selling for friend, newish members, FUD, are RED FLAGS. A video conference call is not adequate assurance. Face to face interactions are required. Please report suspicions to the forum admins. Stay Safe - anyone can get scammed.

Evaluating bridgeport ways and what to do about them

Xyphota

Ultra Member
Hello everyone!
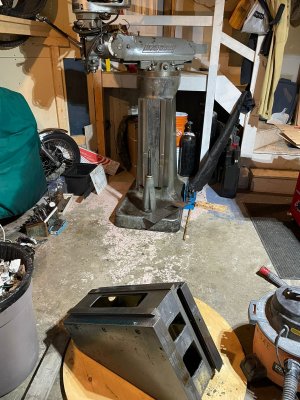
I recently purchased my first mill which is a 1963 9"x32" Bridgeport Series 1, which I believe to be in generally good shape but as I am a complete noob, I wanted to hear some extra opinions.

Upon delivery the y-axis was incredibly hard to turn and after removing the y-axis gib, it came out covered in chips and has some pretty deep grooves in it. The X-axis was very smooth. The z-axis was missing the gib adjustment screw so I couldn't give it a fair evaluation. I have since completely disassembled the table down to the knee to inspect the ways, clean out all the chips, and double check that all the oil fittings aren't filled with grease or blocked.

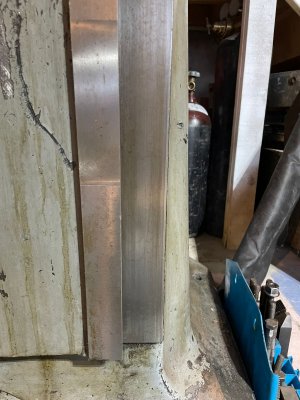
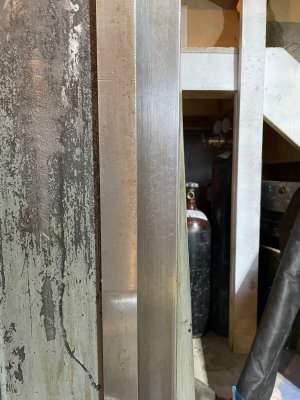
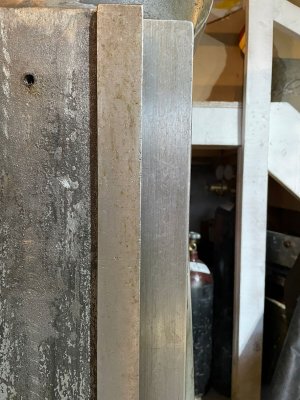
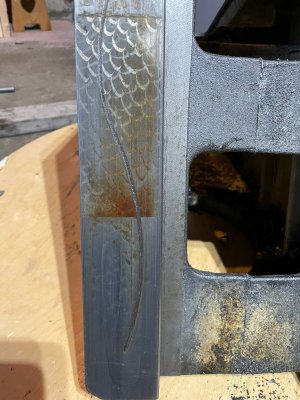
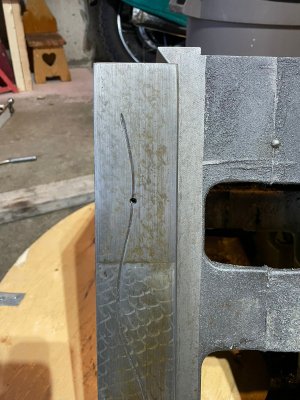
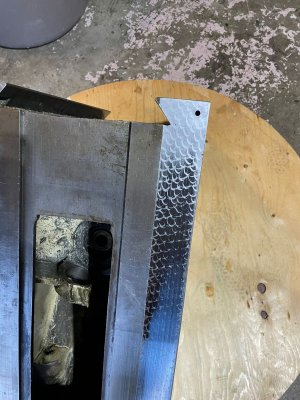
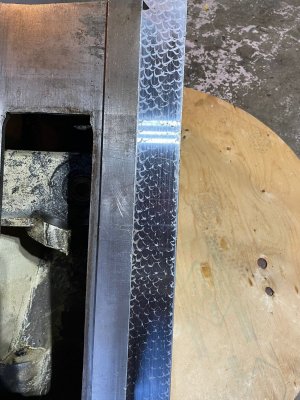
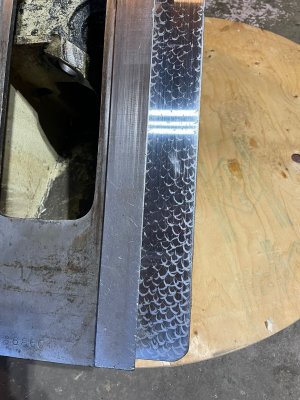
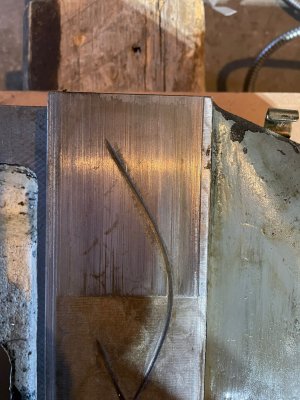
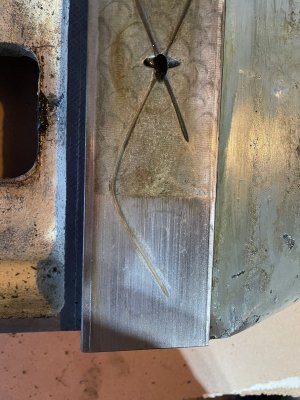
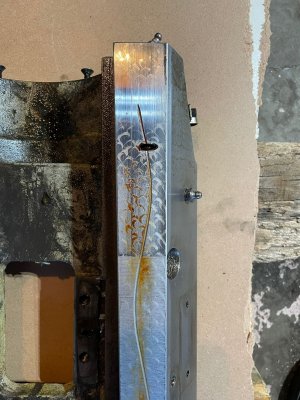
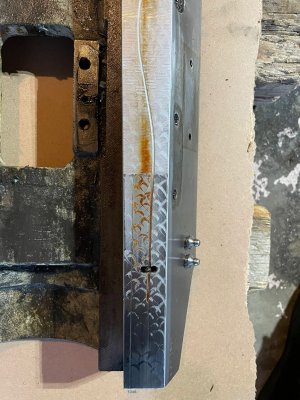
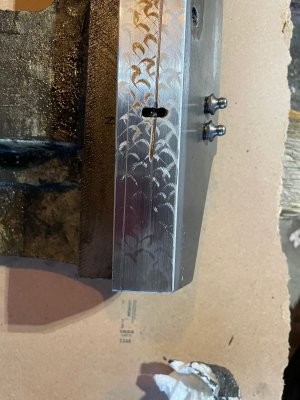
I know the visual wear on the ways in some sense doesn't matter if everything is smooth and tight, but could I get some comments as to if the visual wear you can see in the below pictures is a lot or a little? I'm not experienced enough to comment on this matter haha!

Additionally are there any recommendations to clean up both the surface rust/patina and the high spots from the scratches? I have seen some videos about precision ground flat stones that are advertised as being able to cut/polish off high spots without cutting into flat surfaces
 

Attachments

  • BP1.jpeg
    BP1.jpeg
    577.1 KB · Views: 30
Last edited:
Photos of the z-axis ways
 

Attachments

  • z-axis 5.jpeg
    z-axis 5.jpeg
    418 KB · Views: 29
  • z-axis 4.jpeg
    z-axis 4.jpeg
    485.1 KB · Views: 28
  • z-axis 3.jpeg
    z-axis 3.jpeg
    552.8 KB · Views: 27
  • z-axis 2.jpeg
    z-axis 2.jpeg
    542.7 KB · Views: 27
  • z-axis 1.jpeg
    z-axis 1.jpeg
    551.6 KB · Views: 29
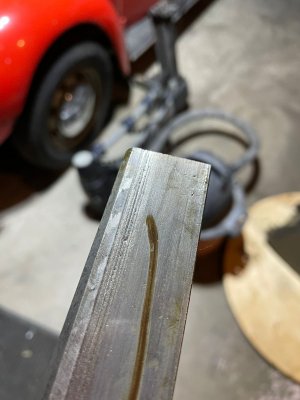
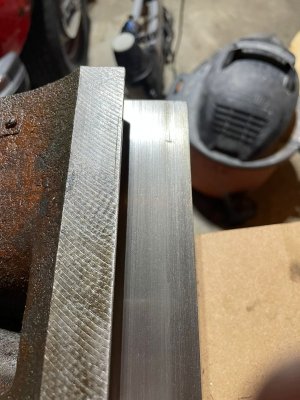
Photos of the y-axis ways and gib. I'm particularly worried about the pretty deep grooves in the gib.
 

Attachments

  • y-axis 1.jpeg
    y-axis 1.jpeg
    489.3 KB · Views: 22
  • y-axis 2.jpeg
    y-axis 2.jpeg
    547.9 KB · Views: 23
  • y-axis 3.jpeg
    y-axis 3.jpeg
    546.9 KB · Views: 24
  • y-axis 4.jpeg
    y-axis 4.jpeg
    504.7 KB · Views: 23
  • y-axis 5.jpeg
    y-axis 5.jpeg
    567.6 KB · Views: 24
  • y-axis gib.jpeg
    y-axis gib.jpeg
    329.3 KB · Views: 25
Photos of the x-axis. There is a bit of surface rust/patina on the saddle ways. It feels smooth to the touch.
 

Attachments

  • x-axis 1.jpeg
    x-axis 1.jpeg
    551.8 KB · Views: 16
  • x-axis 2.jpeg
    x-axis 2.jpeg
    546.8 KB · Views: 15
  • x-axis 3.jpeg
    x-axis 3.jpeg
    470 KB · Views: 16
  • x-axis 4.jpeg
    x-axis 4.jpeg
    504.8 KB · Views: 17
  • x-axis 5.jpeg
    x-axis 5.jpeg
    433.7 KB · Views: 17
  • x-axis 6.jpeg
    x-axis 6.jpeg
    457 KB · Views: 17
What you are seeing is typical wear on a well used machine. The long grooves in the gibb are from trapped swarf. It looks like the wear you get if the way covers and wipers are not present. As long as the ways don't have burrs they will do fine for hobby use.

It would be good to check XYZ for tracking using a tenths indicator (something I didn't get a chance to do when I looked at it)

What troubles me (just a tiny bit) are the worn off scraping marks on the vertical ways. They won't hold way oil and will wear faster. You can scrape oil marks in the vertical ways 'in situ' enough to prevent excessive wear. Since you won't have access to the mating parts, the marks have to be a little deeper to hold enough oil. *** that being said*** not many guys move a wide range in Z all the time.
 
Last edited:
Photos of the y-axis ways and gib. I'm particularly worried about the pretty deep grooves in the gib.

If by the "pretty deep grooves" you are referring to what I think you are referring to, these are put in by the manufacturer to assist with the dispersion of lubricating oil. Nothing to worry about they are supposed to be there!
 
That's wear. its hard to quantify from photo's, but depending on the extent, its quite likely the machine can still do lots of useful work. Wear, or the transition of it from wear to unworn happens over a distance. if the wear occurs over 10" and it is a 3 inch part, its effect is somewhat reduced. And it is milling not grinding, i.e. its never required to sub thou work and usually with a few thou is good enough, of course depending the drawing and use etc

The correction of it is only going to happen by scraping. By scraping it you can restore it to original factory condition or better....but its a very big job and for the unsuspecting, a fairly deep rabbit hole as far as technique, knowledge, and to a lesser degree, equipment goes. It is doable however, depends where you are in your life and pursuit of things technical.

barn doors are open and the horse is gone, but its a reminder that it really is worth it to put a pump oiler your mills gents. Lots of oil every time you use it will make it last a very long time.
 
I'm assuming he means the deep curvy lines that go thru the oil weep holes. Not the lesser straight lines. The straight lines are wear, the curvy lines are for better oil dispersal put in by the manufacturer.
 
If by the "pretty deep grooves" you are referring to what I think you are referring to, these are put in by the manufacturer to assist with the dispersion of lubricating oil. Nothing to worry about they are supposed to be there!
The deep grooves I am referring to are mostly on the y-axis gib, not the oil dispersion troughs.
 

Attachments

  • C39C7043-76E7-4702-AFB7-1497A5F8D11A.jpeg
    C39C7043-76E7-4702-AFB7-1497A5F8D11A.jpeg
    325.1 KB · Views: 11
Last edited:
Here is the thing, gibs are meant to be adjusted to compensate for wear (and minor abuse). As long as the ways are true life is good.

Clean, ensure they are burr free, same for the ways (use a light touch here).

Re-install and snug up just shy of binding while allowing allowing free motion. You may have to redo this after a bit of use (several times) as components settle into place.

After that run some test to see if you have any variances.
 
What is the best way to deburr the gibs and ways without removing too much material?
Use a stone that is flat (true) and lightly stone them to take any high spots on any accessible areas. I use a 150 grit stone. Be sure to clean very thoroughly after stoning. (most youtubers seem to not know this and they leave grit on their work).

The grooves you are worried about are unfortunate, but won't affect the use of your mill in any tangible way.
 
I have a Norton 220/1000 used for knife sharpening, and a DMT lapping plate to flatten it but I’m not sure if it is sufficiently flat. Do you have any experience with precision ground flat stones such as these ones?

 
Yes, but kind of pricy. The ones I use right now I hand lapped and then trued using the 3 plate method. They behave properly on milling table and ways, so I'm content for the moment. When I get a diamond wheel for my SG, I'll touch them up.
 
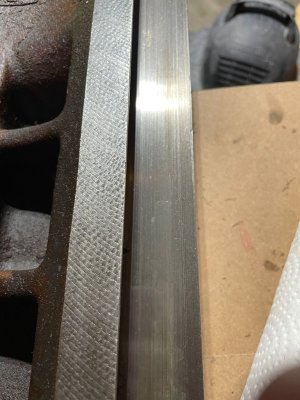
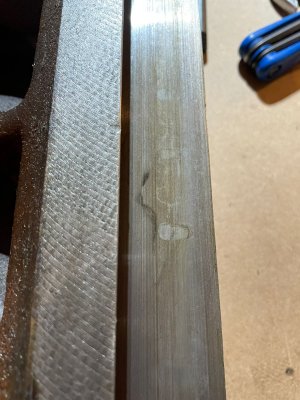
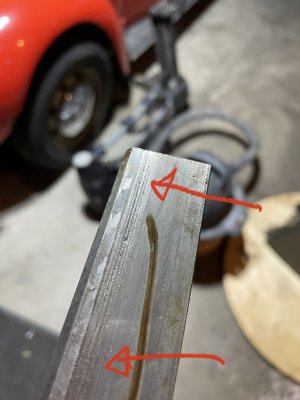
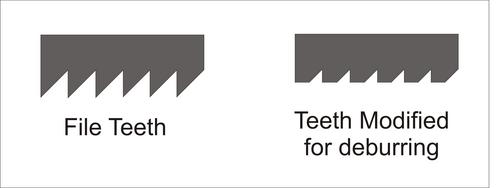
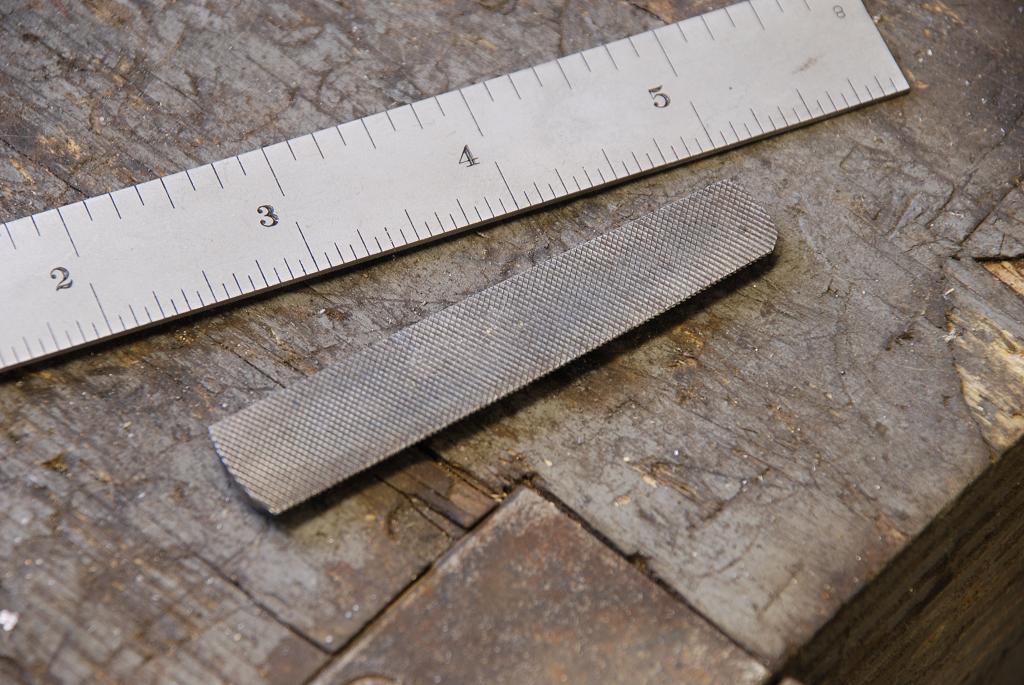
if just burrs, use a burr file. Scrapers tool. A short section of a file that has been stoned down so only bits that project between the teeth get cut, it just skates over everything else

2Jh3XK4.jpg


XuNKdvF.jpg
 
If you are the cheap (I mean thrifty) emery paper and any flat surface (including the wifes counter as long as she doesn't catch you) 300, 400 and 800 grits.

Water to stick it down and water to lubricate.

400 removes the highs and sharp edges.

Cheap effective and always new cutting surface, add more grits all the way up to 8000 and you can polish.
 
I have a Norton 220/1000 used for knife sharpening, and a DMT lapping plate to flatten it but I’m not sure if it is sufficiently flat.

Everything I have read says that once a stone has been used for anything else it should not be used for removing burrs on a mill table or ways. Buy a new stone designed for that and then don't use it for anything else. And as has been said, clean everything afterward. If you think chips are hard on your ways, try abrasive dust......

I'm in the camp that says clean up all the chips, get rid of the burrs, and use it to make stuff. That's what I did with mine. You can replace the Gibbs if you want, but I would not try fixing the ways if I were you. I bet the parts you make will never know the difference.

How was the backlash?
 
I'm in the camp that says clean up all the chips, get rid of the burrs, and use it to make stuff. That's what I did with mine. You can replace the Gibbs if you want, but I would not try fixing the ways if I were you. I bet the parts you make will never know the difference.

How was the backlash?
This is my plan! I am not really interested in scraping anything, except for maybe adding some scrapes to the vertical ways for oil adhesion as per Dabbler's comment above, but I think that will be a later problem.

I think the x-axis at the dial had about 0.020" of backlash, I did not note the y-axis before disassembly. I removed the lead screws and they appear visually consistent throughout the screw, but I dont know how visually obvious it is if a screw is worn out. Fortunately the mill came with a DRO for X and Y so I am to believe backlash shouldn't be a huge issue? I understand the bridgeport machines use split nuts for backlash adjustment. Assuming the leadscrews were in good shape, what would be an acceptable amount of backlash?
 
Back
Top