• Spring 2024 meetup in Calgary - tentative date Saturday, April 20/2024. Other regions are also discussing meet ups. If you want one in your area get going on organizing it! discussion
  • We are having email/registration problems again. Diagnosis is underway. New users sorry if you are having trouble getting registered. We are exploring different options to get registered. Contact the forum via another member or on facebook if you're stuck. Update -> we think it is fixed. Let us know if not.
  • Spring meet up in Ontario, April 6/2024. NEW LOCATION See Post #31 Discussion NEW LOCATION

Darren's active projects

Darren

Ultra Member
Premium Member
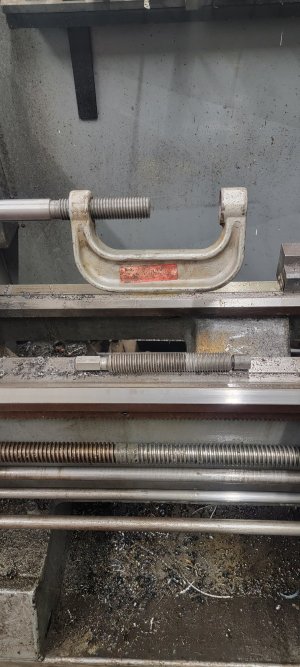
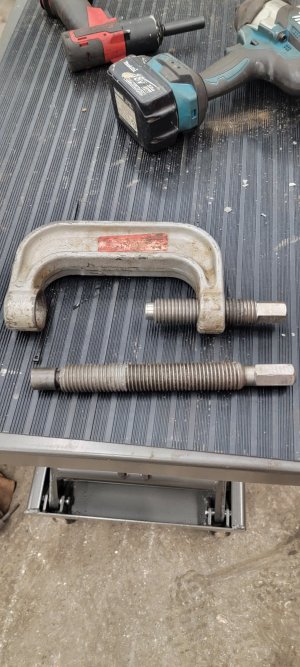
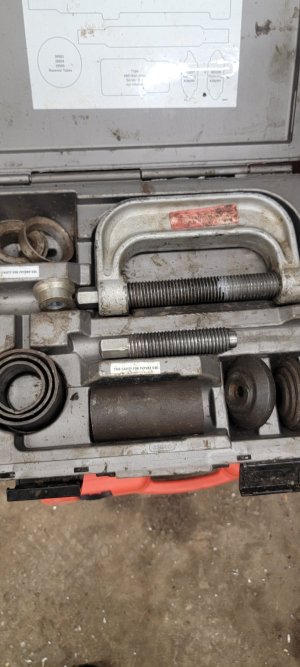
it's mostly Cat and JD that use this style of gland nuts. I have a good selection of hook spanners but they bent with a cheater pipe trying to loosen this one. My Bobcat and most other machines use face pin style. I have a few to do on my Bobcat as well and will be making the tools as well.

Local hydraulic shop story: they resealed a piston and gland nut for me recently. I brought the parts in, they matched up and supplied the seals. The total cost while i watched was about 20 bucks. I asked how much if I brought all my cylinders there. He says its a flat rate of $350......each. So I think I can handle disassembly/reassembly even if it means i have to make the tools. The oem seal kits are about $40 - $60 per cylinder and its dead easy to do.
 

Darren

Ultra Member
Premium Member
Doing a bit of threading tonight. Making a new, shorter pressure screw for my otc balljoint press. It's 1.110" 7tpi, I guess 1 1/8" nominal. Used an old axle shaft from a Ram 1500 that I annealed in the woodstove for a few weeks. Cuts with carbide ok, HSS, no bueno .

The reason for the new screw is for getting into tighter spots under fenders and such. I also plan a few new accesories for the balljoint press as I need them. Mostly this was an experiment to see how well an axle shaft will hold up to this sort of abuse. I used to throw literally tons of them away. Seems to be a good source of material. Before annealing, a file would barely touch them. Tough stuff and available behind every auto shop, except mine.


Here's a YouTube video showing how the leadscrew reverse on the Standard Modern 1660 works.


Attachments

  • 20230317_234659.jpg
    20230317_234659.jpg
    425.1 KB · Views: 19
  • 20230318_020903.jpg
    20230318_020903.jpg
    380.4 KB · Views: 16
  • 16791208065499197310982963562452.jpg
    16791208065499197310982963562452.jpg
    265.8 KB · Views: 16
Last edited:

Darren

Ultra Member
Premium Member
I'll have to check it out. I stopped watching him when he got into his truck rebuild. Did he anneal it or use cbn?
 

Darren

Ultra Member
Premium Member
I did not anneal this piece well. I tossed it in the woodstove and forgot about it. Pulled it out the oother day and decided to see if I could thread it. It turned well to nominal with carbide so I'll probably be using a bunch of this material in the future. It's still tough after softening. I'm sure with proper annealing the hss would work fine
 

Darren

Ultra Member
Premium Member
Generally watching other people work of vehicles is not my thing. Its what i do every day myself. I like machining vids, or true crime. When I'm machining it usually just the radio.
 

Darren

Ultra Member
Premium Member
Getting ready to to insulate the 12x50' attic in the shop. As of right now there's no stairs, so its a 14' climb to get up there. Building an elevator later. Right now i'm getting a workout on the ladder. Put up some temporary lights tonight, and started moving my tools up there. I have a pile of blocking details to take care of as i go. So i'll have a miter saw station, table saw and compressor/nailer, screw guns/chargers.

As some might remember i got a huge amount of high density EPS styrofoam insulation for free in the fall. Its all tapered flat roofing insulation. Each 4x4' piece has a 1/2" taper - 5-5.5", 4.5-5", 4-4.5" etc, all the way down to 0.5-1". My plan is to cut the pieces at 22" wide and foam them into place between the truss members.

20220920_131732[1].jpg
20220920_131636[1].jpg

Ended up with about 8 dump trailer loads!

When i did the initial ceiling, in 2018, I cut 3" foam at a smidge less than 22.5" and adjusted as i went. Truss spacing is never perfect and it was a pain in the ass getting them to fit right. Foaming them into place will be more expensive but will be faster and yield a better finished result. On the ceiling, it didn't matter as I knew I was putting r50 blown in on top, on each side of the attic section.

20190125_193213.jpg

The vertical truss members are 2x6's, the top chord of the trusses are 2x8's. There's 4.25" of blown in insulation under the plywood attic floor / on top of the 3" eps styrofoam.
20230324_174635[1].jpg

It'll be nice to be able to use this space for storage. Or something.
 

Darren

Ultra Member
Premium Member
Had to remove an upper intake manifold today on a Ram Promaster van. A common problem is that water sits in the well that the bolt sits in, rotting the head of the bolt off.

20230330_131727.jpg

The hex was completely gone. It's about 4" deep. Can't weld to it. Can't center punch it. So I decided to grind the head off with a carbide burr on a die grinder. Only problem was that I needed a little extra length. I whipped up a quick and dirty extension.

20230330_154023.jpg

I didn't get quit the press fit I wanted, so I added a few tacks. Because I was working on a plastic intake manifold, I cleaned up the tacks and checked the runout. Less than 0.002" , good enough.

20230330_161248.jpg

20230330_162104.jpg

Worked like a charm!

received_155795460740741.jpeg
received_607305881267222.jpeg
received_1173824149960287.jpeg
The 500 dollar screw
 

Darren

Ultra Member
Premium Member
Had to make a tool tonight. A job i'm doing in the shop right now is swapping a service body from one truck to another. The service body mounts to the trucks frame with 8 tabs that bolt to the truck frame with 1/2" bolts. The tabs are already drilled, since it came off another truck, The mag drill won't fit where I need to drill the frame through the tabs, so i made an arbor for a 1/2" annular cutter to be used in my regular 1/2" drill. I used an old stub axle that i annealed in the woodstove. It machined very well. Here's some pics.

20230416_202455[1].jpg
This is the axle. The splines were badly worn, and was replaced because of that. After pulling it from the woodstove, I cleaned up a bit of it to chuck it.

20230416_202712[1].jpg

Pretty ugly, but it machined really well.

20230416_210048[1].jpg

I turned the one end down to 1/2" and flipped it around and parted off the splined section

20230416_222935[1].jpg

Bored it out to 0.750"

20230416_222943[1].jpg

20230416_223144[1].jpg

And it fits nice and tight. The cutter is actually a half thou smaller than 0.750

20230416_231242[1].jpg

Drilled and tapped for a couple set screws and its ready to go to work tomorrow.
 
Last edited:
Top