Collet questions

20 years on my mill and have yet to shear it. Primarily they provide resistance to rotation, but primarily are used for alignment and resistance (prevent rotation) to disengage the drawbar should the threads become "tight" in the holder. Without that it would be near impossible to grab the holder and loosen it, the 5C collets use a similar arrangement.

When I did my CNC upgrade the spindle was remove to allow checking of the of all the wear surfaces and the pin was removed to check is condition, good and no evidence of excessive rotational contact.

Think MT holders and centers not all have a key molded in and the holders do not slip.

I also discovered (very early on) that some R8 holders are short threaded by 1/2 to 3/4 of an inch and do not allow the drawbar to be fully inserted. Initial reaction was the temptation to shorten the drawbar, actual solution was to add a spacer washer which allowed me the appearance of a shortened drawbar. I got lucky on the first guess and have been using it in excess of 20 years.

I've damaged only one drawbar and it was a momentary distraction and ruching that cause operator error resulting in damage.

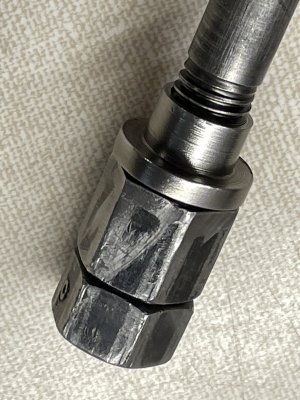
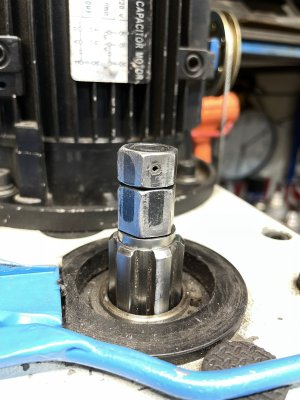
I have gone to using a butterfly wrench to tighten and loosen the drawbar.

I'm guessing the draw bars are grade 5 in terms of spec, which according to my references provide the following:

Advised torque 55ft lbs
Lubricated torque 41ft lbs
Clamping force 7,568lbs

(Clamping information is from the app iEngineer).
 
Last edited:

Tomc938

Ultra Member
Premium Member
I Googled your mill manual but not sure, is this the corresponding diagram that accompanies your description? It doesn't really show the part (52-1191) in much detail, but from what you know, is it circular section dog point looking part? Or does it have some kind of squared off section?

You have the right diagram for the page from my manual. The guy I talked to had the technical drawings for the part. Would have faxed it to me, but I don't have a fax. Was willing to mail it out, but I didn't want to be that much of a bother. But it was easy to describe it to me.

The end is a rectangular section. 0.150-0.156" wide by 0.08" in height. I didn't do the math, but I would guess it has at least twice the meat to resist the shearing forces. The dog points are easier to make and source. (cheaper). Ex-Cell-O didn't seem to cut corners like Asian imports might sometimes do. :eek:)

With the 24 TPI, the slot will line up every 20 thou, and I'm guessing that's close enough for the R8 slot.

All that said, with the realization that I will NOT be using a 5" shell mill or hogging out 2" depth of cut at a 50 thou feed rate, I'm going to go Asian dog point and see how it goes. My guess is the mill won't even have to wake up in the morning to do what I want it to do.

So off to the auto parts store to grab another grub screw.
 

Dabbler

ersatz engineer
All that said, with the realization that I will NOT be using a 5" shell mill or hogging out 2" depth of cut at a 50 thou feed rate, I'm going to go Asian dog point and see how it goes. My guess is the mill won't even have to wake up in the morning to do what I want it to do.

the set screw does not drive the R8 it is there for alignment. the taper holds the collet against cutting forces.
 

CWret

Ultra Member
Premium Member
I just today made a collar spacer for @CWret. It serves two purposes. One is to make the drawbar seem a little shorter, and the second is to center the drawbar in the spindle. Most drawbars have a lot of slop inside and I find it sometimes causes them to vibrate and even to rattle in others
I was away for a couple of days - but home now - just received and installed the drawbar collar that Susq made for me. It is great. The drawbar is now perfectly centred in the spindle. This makes drawbar tightening smoother and more consistent. No more vibrations or rattling either. Thanks again @Susquatch , very much appreciated. :)

This is such an easy and inexpensive accessory - I highly recommend moving it to the top of your ‘to do list’.

PS - i had considered shortening my drawbar, but instead I solved the problem by adding a thick washer. Once the drawbar is shortened, there is no going back.
 

Attachments

  • 659A3A83-DE24-40D1-8524-907D1531F283.jpeg
    659A3A83-DE24-40D1-8524-907D1531F283.jpeg
    412.2 KB · Views: 17
  • 24F8555F-D411-4359-BE3B-D24CEC1E4085.jpeg
    24F8555F-D411-4359-BE3B-D24CEC1E4085.jpeg
    417.2 KB · Views: 17

slow-poke

Ultra Member
Update.......
I finally got around to replacing the indexing set screw in the spindle. I wanted to make sure I didn't damage the M5 thread used for the set screw so I drilled a small hole end to end through a M5 bolt, and then with the drilled bolt threaded into where the locking set screw normally is I used a left handed drill to drill out the now headless stepped (indexing) set screw. With the old one out, I turned down the tip of another M5 set screw to 0.150" on the lathe and installed it so it protrudes about 0.03" into the spindle bore. All in all in was a bit if a PITA but appears to be as good as new now.

Thanks for all the helpful response!

My only concern is that the swarf from the old indexing screw is now likely sitting on top of the lower spindle bearing, so I'm probably going to pull the spindle, clean and pack the spindle bearings today. If anyone has a link to a instructional video for the procedure for one of these smaller knee mils that would be helpful, seems every video I have found so far is for different style mills. I want to make sure I get the preload correct and use a suitable grease.
 

YotaBota

Mike
Premium Member
My only concern is that the swarf from the old indexing screw is now likely sitting on top of the lower spindle bearing,

If you pull the drawbar could you get down there with a borescope to have a look? Might save taking things apart.
 

Susquatch

Ultra Member
Administrator
Moderator
Premium Member
My only concern is that the swarf from the old indexing screw is now likely sitting on top of the lower spindle bearing, so I'm probably going to pull the spindle, clean and pack the spindle bearings today. If anyone has a link to a instructional video for the procedure for one of these smaller knee mils that would be helpful, seems every video I have found so far is for different style mills. I want to make sure I get the preload correct and use a suitable grease.

I dunno if I would do that. Have you tried vacuuming it out with a home made custom screw-in nipple? Might be all that's needed.
 

CWret

Ultra Member
Premium Member
Or use a small (tiny) hook shaped dental instrument to pull it out or loosen it for Susq’s vac idea. How about loosen with a probe and pull out with a strong magnet (at least works for the steel chips).
I just pumped up basket balls for grandkids (here for S Break). The basket ball inflation attachment would get in there. (Compressed air is last resort since it can also blow stuff in instead of out.
 

slow-poke

Ultra Member
I used a magnet, but how would I know if tiny particles fell down into the lower bearing? That can't be good for a critical bearing. In hindsight I should have pulled the spindle from the get go.

Spindle is out.

I measured run-out before disassembly and it was quite good < 0.01mm, lets hope that it's not worse upon reassembly;-)

Recommendations for grease?

I have an old tub of Motomaster wheel bearing grease.
 

CWret

Ultra Member
Premium Member
Seems @slow-poke no longer is concerned about getting out tiny trapped metal fragments in a very small opening - but I’ll post this solution anyhow. Also included is how i got to this solution - :)

First- A few years ago i was at a conference and a politician was talking about commitment- you know - things like ‘you can’t suck and blow at the same time’. She said “you can’t su (then she switched mid sentence to) inhale and exhale at the same time”

Second- A few years ago my son-i-l gave me a vacuum attachment that reduces the inlet to a series of smaller and smaller diameter tubes.

Third- Today i was showing the grandkids what happens to metal filings that are sprinkled on a plastic sheet that is over a magnet. I got a “cool Grampa”!

Forth- Also today I used a compressor hose attachment to inflate the grandkids basket ball.

Pic one - metal fragments over a magnet
2EC49290-8A25-4429-8036-6A09BAAD59F5.jpeg
Pic two - vacuum small tube attachment ending with a basketball inflator tool
18D11040-84EB-4810-BCC5-52788B447C16.jpeg
Pic 3 - metal fragments sucked into and clogging the basketball inflator when used to ‘inhale instead of exhale’.
82126360-3AFE-41D2-BD55-6EAC11076DFB.jpeg
 
Last edited:

Susquatch

Ultra Member
Administrator
Moderator
Premium Member
Recommendations for grease?

Some mill manufacturers recommend Kluber Isoflex NBU 15 for long life, high-speed, spindle bearing lubricant. Many spindle manufacturers specify only Isoflex NBU 15 for use in their spindle bearings.

I'd guess for hobby use wheel bearing grease is fine, but if you want to play it safe use the Isoflex NBU 15. If your manual suggests something else, use that. Your spindle is the heart and soul of your mill.

Only pack it about 1/2 full. Don't overpack it. Some oil from regular oiling will go down the spindle and you don't want it trapped and pooling in there nor do you want the grease expanding and pushing things apart.
 

Susquatch

Ultra Member
Administrator
Moderator
Premium Member
metal fragments sucked into and clogging the basketball inflator when used to ‘inhale instead of exhale’.

LMFAO - you know, when I posted the comment about using a vacuum, I almost said to check the end of the hose for plugging but figured everybody would know that........

You couldn't help it. You just had to prove me wrong didn't you! :rolleyes:
 

slow-poke

Ultra Member
Update......

I'm glad I decided to pull the quill and spindle as I found a couple of interesting things.

My machinist neighbour had some suitable Mobilgrease, so I'm good on that front.

Apparently the angular contact bearings have been replaced/upgraded with expensive premium made in Germany bearings.

There was swarf from my previous drilling sitting on top of the bearing, so glad I did not run it.

The top bearing is the interesting one, it is looser in the quill bore than it should be, no sign of spinning just looser than it should be. Plan is to clean it up really well and my neighbour is going to chemically copper coat that area to decrease the diameter 2-3/10ths and that should make for a better fit.

Fun and games.
 

Susquatch

Ultra Member
Administrator
Moderator
Premium Member
it is looser in the quill bore than it should be

Another option is a series of gap filler products that Loktite makes. Give them a good look. I believe they make one for just that application. I used a related product to make a pulley fit on a loose shaft. I'm very happy so far.
 

slow-poke

Ultra Member
Another option is a series of gap filler products that Loktite makes. Give them a good look. I believe they make one for just that application. I used a related product to make a pulley fit on a loose shaft. I'm very happy so far.
I will clean it up and measure today hopefully the copper coating can make for a snug fit. I do recall using a green locktite product in a similar situation about 30 years ago and it did the trick. IIRC the clearance on that one was quite a bit more than this on, thanks for jogging my memory.
 

Susquatch

Ultra Member
Administrator
Moderator
Premium Member
IIRC the clearance on that one was quite a bit more than this on, thanks for jogging my memory.

Yes, I used the one for bigger clearances than that too. But IIRC, they have one for each of the different types of fit and I don't think they were colour coded like regular Loktite.

Fastenal can get it for you if you know what you want.
 

Mcgyver

Ultra Member
Some mill manufacturers recommend Kluber Isoflex NBU 15 for long life, high-speed, spindle bearing lubricant. Many spindle manufacturers specify only Isoflex NBU 15 for use in their spindle bearings.

I'm inclined to think the need for uber expensive Kluber is mostly all BS. You know, that car part from billet is worth 3x as much as one from 6061 AL :rolleyes:

1) there is all kinds of OEM shenanigans that goes on - e.g. you get a big OEM discount if you put in the manual one must only use our brand of grease or oil. So you really don't know what the truth is. Provided additives and viscosity are the same, how could one major manufacturer's be ideal and another is not up to the task? Different dinosaurs? Baloney I say, and proffer it's the OEM discount driving the manual's insistence.

2) SKF knows a thing or two about bearings, agreed? Buy their eye wateringly expensive AC matched P4 bearings and what do they recommend? their standard grease, e.g. LGMT 2/.4 bearing grease which is about 1/10th the price of the Kluber.

btw, pretty sure it is 1/3 fill on the AC's, maybe all bearings ...... bearing catalogues are the likely the most horrific prose ever created, but they do have tons of good info and recall that's what they say.
 
Last edited:

Susquatch

Ultra Member
Administrator
Moderator
Premium Member
I'm inclined to think the need for uber expensive Kluber is mostly all BS.

Hey hey hey..... Take it easy on me. You will note I backed all the way out to wheel bearing grease being ok by the time I got to hobby use.

I agree it's mostly all procurement agreements. But sometimes it's not. I do know for marginal applications they sometimes spec specific greases and oils and if you don't use em byebye warranty. But warranty is long gone on this one anyway.

I think you are right about 1/3 vs 1/2 fill. But can you really tell the difference between 1/3 and 1/2? I think they just say 1/3 to make sure users don't pack it to 85%. LOL!

How would you nail 1/3 anyway? I suppose one could meter it in till its full, wash it out, and then put 1/3 of the metered amount back in, but I doubt anyone does that. Or they could tell you how much 1/3 is. But I've never seen that either!

I just put in what I think is 1/2 and it's never been a problem with any bearing I ever packed. And I've packed hundreds. I've also seen what happens if you pack them!
 
Top