Collet questions

slow-poke

Ultra Member
My old mill used MT3 style taper, and most of the time I simply left a ER type collet installed and populated the inserts as require, once in a while I would swap out the ER collet for something else, and removing typically required a reasonably good smack with a brass hammer to get the two separated.

Fast forward to the new mill with R8 taper I read that R8 is an improvement from MT3. Mill came with some tooling: some new end mills and a set of straight collets. Am I correct to assume that generally speaking straight collets should clamp better and run truer than an ER setup?

Originally I was thinking I will need to order a new R8 ER collet set but not sure it's worth it?

Now for the newbie question: How do you lock the spindle when tightening the drawbar?
I'm guessing your supposed to have a spanner that engages the spline above the spindle pulley?
If that's the case I'm missing it.

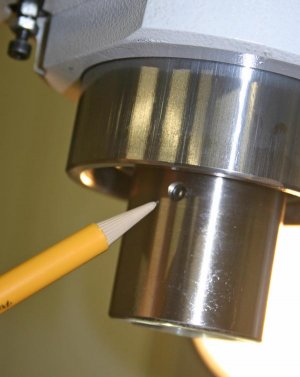
Newbie question 2: I don't feel a key inside the spindle, from what I have read, it is fairly common for the key to be sheared off, and it seems often people run them often for years with no key. Comments on this please.
 
Last edited:

DPittman

Ultra Member
Premium Member
Now for the newbie question: How do you lock the spindle when tightening the drawbar?
I'm guessing your supposed to have a spanner that engages the spline above the spindle pulley?
If that's the case I'm missing it.
With my mill you just hold the pulley as tou tighten, ya a bit micky mouse but it works. I've seen that some guys have made a pin spindle lock to avoid this hassle. I'm guessing on larger mills the spindle lock is a standard feature?
 

Ian Moss

Well-Known Member
Is your new mill a Bridgeport copy? If so, it should have a spindle lock lever. I just hold the lever snug while I tighten or loosen the collet on my First mill.
 
1. You don't need a spindle lock, I don't have one and never felt the need for one. I use a butterfly wrench to tighten and loosen.

2. On the mill you have your key is basically an alan screw ground with a flat on the end allowing it to be adjusted for proper engagement. So no biggy.

Don't over think stuff ;)
 

whydontu

I Tried, It Broke
Premium Member
F2E2F30D-047E-4522-81A5-840F8926439C_converted.jpeg Math.

Calculator at https://calcdevice.com/taper-connection-tightening-id258.html

R8 taper values used, with 20 ft-lbs of torque on the draw bar. Steel coefficient of friction at 0.8, typical for clean steel, not polished.

The calculator is ignoring the thread pitch on the drawbar.

Results in over 850 lbs of force required to push out taper from socket.

The set screw doesn’t do much, lots of machines I’ve used have been missing the set screw. It’s just nice to have it because it makes sure the arbor is lined up properly and not cocked.

Using the R8 taper in one of the shops I inhabit, a good one-arm pull on the draw bar using a 3/4” open end wrench is capable of holding the taper just fine. It’s a 2hp round-column mill/drill, and it will stall before the taper spins. And it doesn’t have a set screw. And my good one-arm pull might not be much, I weigh less than Grandma’s 21” console TV.

It was interesting to try to find a calculator for this.
 

Dabbler

ersatz engineer
I sold my B048 about 8 years ago. I don't remember any problems tightening the R8 collets. It is the only system I had for that mill. I may have just pulled on the wrench, using the momentum of the spindle/belt to resist the jerk of the tightening.
 

Susquatch

Ultra Member
Administrator
Moderator
Premium Member
I just use the spindle brake to resist the torque applied to the drawbar. I never gronk on the drawbar. But I am a big guy so it could be lots more than I think.

Mine has provisions for the alignment pin. I went to great pains to find and buy replacements. I also slightly modified my spindle to make it easier to replace them. Mine was missing when I bought the mill. On disassembly, I discovered it had sheared off. I made replacements with a bar nose instead of a pin nose. That requires alignment with the collet slot, but it's probably twice as strong.

Note - Some mills have a set screw on top of the alignment pin. (effectively stacked screws)

@CWret put a really cool spindle lock on his mill to make it easier to tighten collets. I failed to find his thread on it just now so maybe he can chime in.
 

Tecnico

(Dave)
Mine has provisions for the alignment pin. I went to great pains to find and buy replacements. I also slightly modified my spindle to make it easier to replace them. Mine was missing when I bought the mill. On disassembly, I discovered it had sheared off. I made replacements with a bar nose instead of a pin nose.

I too found a sheared set screw when I bought my First LC1-1/2. In that case the set screw is a dog point m6 which just happens to fit the R8 slot. Like @Susquatch ’s Hartford, my First has stacked set screws allowing adjustment of the dog point screw depth.

D :cool:
 

PeterT

Ultra Member
Premium Member
If you have ever experienced a set screw that had migrated inward, or more common these days, R8 tooling with insufficient slot depth, it can be an unwelcome headache if R8 tool/collet becomes jammed up in the quill. There is no pretty way to remove the collet short of tapping on the partially thread engaged drawbar unless you know exactly how to remove the (typical) dog point screw & retention set screw behind it. I recommend that you familiarize yourself with your machine as they vary & can be hidden bend other components. Particularly if its a used machine & someone else has been there before. I have a new habit of never assuming a new R8 tool slot is correct, first slide it in gingerly. Unfortunately your set screw position is dictated by the shallowest slot. If its too shallow (off spec manufacturing) might be worth returning. My other new habit is inspecting the slot & corner of new tooling, its inevitably has manufacturing burrs. use a stone o fine diamond burr. The ragged edge makes for good jamming & finger cutting material.
 

Attachments

  • IMG_7661_edited-1.jpg
    IMG_7661_edited-1.jpg
    63.5 KB · Views: 8
  • IMG_7676_edited-1.jpg
    IMG_7676_edited-1.jpg
    60.5 KB · Views: 8

PeterT

Ultra Member
Premium Member
2. On the mill you have your key is basically an alan screw ground with a flat on the end allowing it to be adjusted for proper engagement. So no biggy.
Don't over think stuff ;)

That is not what the set screw is for. This is really bad advice.
 

Susquatch

Ultra Member
Administrator
Moderator
Premium Member


I recommend that you familiarize yourself with your machine as they vary & can be hidden bend other components. Particularly if its a used machine & someone else has been there before. I have a new habit of never assuming a new R8 tool slot is correct, first slide it in gingerly. Unfortunately your set screw position is dictated by the shallowest slot. If its too shallow (off spec manufacturing) might be worth returning. My other new habit is inspecting the slot & corner of new tooling, its inevitably has manufacturing burrs. use a stone o fine diamond burr. The ragged edge makes for good jamming & finger cutting material.

^^^^ THIS! ++++

The time to understand how your alignment screw works is BEFORE you have a problem!

VERY WELL SAID PETER!
 

thestelster

Ultra Member
Premium Member
I don't use R8 tooling, but isn't that set screw just to prevent the collet from turning while tightening the draw bar and nothing else?
 
OMG!!!!

@Susquatch @PeterT learn to read "proper engagement" just that it there. I've never broken one or had to adjust mine. It is there should your threads be tight so that you can loosen or tighten your holder not to act as a driver.
 

Tecnico

(Dave)
If you have ever experienced a set screw that had migrated inward

Just a quick hint here inspired by @PeterT ’s comment.

When I was replacing the dog point set screw in my First, the inner wouldn’t stay put while I locked it with the outer. I got around that by setting the set screw depth and fixing it with a bit of Loctite 222 (purple) which is a removable formulation for “small” fasteners, up to 1/4”. You will get a quicker and better lock by using some Primer T on the other part. No problem removing it when you need to.

Anyhow, after the Loctite cured, the outer set screw locked the inner with no slippage of the inner.

D :cool:
 

Susquatch

Ultra Member
Administrator
Moderator
Premium Member
I stand by my compliments of @PeterT's post.

Here is a collection of my special Mill Tools:

20231116_125132.jpg

I didn't include the 3/4" ratchet Wrench I use on the drawbar, and my vise.

The big nut slips over my spindle and the pins fit the quill cap allows me to loosen or tighten the cap on my quill. Making it from a big nut allows me to easily remove the cap which can be extremely difficult to remove otherwise.

The small collar to the left of that is a drawbar spacer to use with the odd R8 tool that is longer than standard.

Below that is tool that has had the threads removed for a short distance in the center of the threaded portion. It is used with the belt tensioner system replacing the factory pins only when needed for belt removal.

Below that is a tool I purchased that has a hex end to fit a battery power driver drill, and a castle end that fits the mating castle half on the shaft that cranks the knee up or down. I only use it when the knee needs to be moved large distances. When you need it, it's amazing.

To the right of that is a Bearing Puller I made that allowed me to easily pull the bull gear bearing from a blind recess when nothing else would work.

Above that is the factory R8 alignment pin. My custom one is in the mill and I don't have another right now. I'll prolly make 3 or 4 the next time I need one.

To the right of the alignment pin is a special Allen key that has been shortened so it can be used between the inner and outer quill shaft to remove the cap retainer.

At the very bottom is a collar I made to fit the drawbar and hold it centered in the drawbar sleeve. There is a lot more to that collar than meets the eye. The small diameter precisely fits the drawbar sleeve so the drawbar is always centered and cannot rattle around - a very common mill complaint. The fat section is threaded so it will thread over the rolled threads at the bottom of the drawbar to get it on the shank. Rolled threads are bigger than the parent shaft. It is installed by threading it over the threaded section of the drawbar after which it will slide to the top with the female threads keeping it centered on the shaft and the OD keeping it centered in the quill. No more drawbar rattle.
 

Dabbler

ersatz engineer
I don't use R8 tooling, but isn't that set screw just to prevent the collet from turning while tightening the draw bar and nothing else?
It is there should your threads be tight so that you can loosen or tighten your holder not to act as a driver.

This an all-too-common debate. @thestelster has the right of it:

The set screw is *never* to have hardly any pressure on it. at all. It isn't there to aid in tightening. It isn't a drive dog. It *is* absolutely required for the R8 system.

It is there solely to orient the collet in the *same* direction each time the collet is inserted and tightened. During tightening, there is usually a tiny amount of pressure on the set screw as the slot touches the set screw, but it is *not* there to resist the high tightening pressure of the draw bar nut. It holds the collet in the same position during tightening so strictly speaking it resists the collet tendency to turn during draw bar tightening.

Some guys remove or fail to replace the set screw. This is also a mistake. But it is illustrative of the notion that R8 can be used without putting pressure on the (sometimes nonexistent) set screw - which I think is properly termed "dog" and the set screw is actually a dog-pointed set screw.

Please forgive the rant. I really hope that this clears up the R8 set screw thing.
 

Susquatch

Ultra Member
Administrator
Moderator
Premium Member
When I was replacing the dog point set screw in my First, the inner wouldn’t stay put while I locked it with the outer.

I solved this problem with a rectangular section at the end of the pin. The rectangle cannot turn when it is in the collet slot.

Just a different way to skin a cat, but had the additional benefit of doubling the pin strength. I have not broken a pin since I did that.
 
Top