• Spring 2024 meetup in Calgary - date Saturday, April 20/2024. discussion Please RSVP Here to confirm and get your invitation and the location details. RSVP NOW so organizers can plan to get sufficient food etc. It's Tomorrow Saturday! you can still RSVP until I stop checking my phone tomorrow More info and agenda
  • We are having email/registration problems again. Diagnosis is underway. New users sorry if you are having trouble getting registered. We are exploring different options to get registered. Contact the forum via another member or on facebook if you're stuck. Update -> we think it is fixed. Let us know if not.
  • Spring meet up in Ontario, April 6/2024. NEW LOCATION See Post #31 Discussion AND THE NEW LOCATION

Xyphota's bicycle related projects

Xyphota

Ultra Member
I've read the water freezing trick in a few places, but maybe it just shouldn't be done on .6mm tubing. Filling the tube with sand and then welding caps on the end is supposedly a good bet, but that seems like a lot of work. I've read a few suggestions about just stuffing the tubes full of brass brazing rod or TIG filler wire, so maybe I'll try that if I decide to try a 5"R bend on this tubing again. Although, I really should get the proper tubing diameter die first.

I kind of want to try and make a mandrel attachment for my di-acro no.2 bender. It'd have to be a bit convoluted as the mandrel would have to rotate with the handle as the bending die is stationary. I haven't seen it done before so maybe that implies its a dumb idea LOL.

Alternatively, maybe I should sell my di-acro bender and buy one of these:
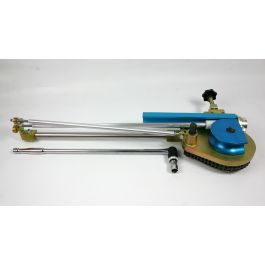
A bit pricey, but if I can make the dies it wouldn't be too bad.
 
Last edited:

Tom O

Ultra Member
My Dad told us about bending pipes in the dockyard filling them with rosin before bending or go with the low melt metals.


Xyphota

Ultra Member
I haven't heard of the melted metal ideal before, so that's a neat idea. What is appealing about freezing water is it takes about 30 seconds of prep work and there is no active time to clean things up. Both rosin and low melt metals sound like it would be a pain to get it into the tube, and then doubly painful getting it out of the tube after the bend is done, especially if it would interfere with the cleanliness for welding.

I don't consider myself a weight weenie, but I would be a bit chapped if I splurged for light weight tubing and ended up with heavier tubes because I couldn't clean out all the packing material LOL. For applications where weight or residue isn't a factor, maybe it works a treat!
 

Six O Two

(Marco)
I hear cerrobend talked about every now and then, but in addition to being pretty pricy, as Xyphota intuited it always seems more complicated than it's worth (For reference here and here). Definitely seems like bending over dies in various contraptions is the way most framebuilders go about it.
 

Xyphota

Ultra Member
Very interesting!

I looked up the MSDS sheets of the stuff and it looks pretty nasty, lots of lead and cadmium. Recommended 20 mins of rinsing for any skin contact lol. Maybe it is worth it with appropriate engineering controls, but I think it wouldnt be the best choice for my shop.
 

Susquatch

Ultra Member
Administrator
Moderator
Premium Member
Very interesting!

I looked up the MSDS sheets of the stuff and it looks pretty nasty, lots of lead and cadmium. Recommended 20 mins of rinsing for any skin contact lol. Maybe it is worth it with appropriate engineering controls, but I think it wouldnt be the best choice for my shop.

I buy and use a product called cerrosafe. Prolly the same company given the name similarity. It is very popular in the boom boom trade for casting chambers and throats. I've never seen any warnings for its use nor have I taken any precautions other than what I have done for solder and lead. No washing after handling - just avoid breathing the fumes.

I'll look up the MDS. Depending on what I find, I might start getting the hole ready.
 

Xyphota

Ultra Member
They are indeed both from the same brand, so maybe the 'safe' part of cerrosafe it to suggest it is less health adverse. Indeed, the MSDS for cerrosafe does say that there should be no adverse health effects from skin contact (page 3 in link below):

I can't find the exact MSDS for cerrobend, but this is 'Wood's Metal Alloy Sticks' sheet lists the material specs as identical to cerrobend (25% lead, 12% cadmium) (page 3 link below) and it reccomends 15-20 mins of washing after direct skin contact

I do not have a great ventilation system for welding as it is, so potentially vaporizing lead and cadmium in a weld puddle just seems like a bad idea LOL. I will be the first to admit that maybe I'm overly cautious, but avoiding things related to cancer is much more important when you are young then when you are old. When I think I have 20 years left to live I'll be the first to sign up for cleaning up nuclear reactor meltdowns :p.
 

Susquatch

Ultra Member
Administrator
Moderator
Premium Member
I will be the first to admit that maybe I'm overly cautious, but avoiding things related to cancer is much more important when you are young then when you are old. When I think I have 20 years left to live I'll be the first to sign up for cleaning up nuclear reactor meltdowns :p.

So in other words, what you are saying is that since I'm so old I'm gunna be dead shortly anyway, so I don't really need to worry about it.......

For some reason I don't think I like that......:eek:

That's funny though!
 

Xyphota

Ultra Member
First covid then I threw my back out so yet another weekend lost to the void :mad:. Feeling much better today though so I decided to shirk all my responsibilities and play in the shop.

Spent a few hours on the seat stays today. In my previous post I said I was going to shorten my seat stays to work around the gouge and then weld it in lower on the seat tube, but I realized (thankfully before re-cutting) that doing so would likely move the weld off the butted portion of the seat tube. I decided to just weld the hole closed instead and just get on with it. After spending an hour grinding and filing down the weld, back in the jig it went so I could cut the notches for the drop out.

1682574207344.png
1682574239991.png

A bit of clean up and filing of the dropouts and I got everything to sit fairly nicely. Still a bit more tweaking to do, but almost there!

1682574338125.png
1682574368253.png
 

Xyphota

Ultra Member
So after successfully spoiling 3 weekends due to sickness and injury, I was worried that this weekend would actually go to plan and I'd get to spend some quality time in the shop, but rest assured guys, I managed to spoil this one too! Naturally, with the next step on this project requiring my TIG welder, it seemed fitting to accidentally knock one of vertical v-blocks off my table and for it to land directly on my foot pedal cable. I wonder what will happen next weekend :):):).

1682919956490.png
 

Susquatch

Ultra Member
Administrator
Moderator
Premium Member
Naturally, with the next step on this project requiring my TIG welder, it seemed fitting to accidentally knock one of vertical v-blocks off my table and for it to land directly on my foot pedal cable.

So basically, you got lucky......

Your glass I'd half full, not half empty...... That cable probably sacrificed itself to save your big V-block. Fixing a cable is a piece of cake. Fixing a big expensive V-Block might not even be in the cards!

So ya, it was your lucky day!
 

Xyphota

Ultra Member
It was one of the tube fixturing v-blocks that holds the bicycle frame above the drawing. They are not precision ground or hardened or anything like that so I'm sure it wouldn't have needed anything more than a kiss with a file.

The cut in the cable is about a foot from the 14 pin connector so I was hoping I could just pop the pins out of the connector, carefully remove the pins from the cables, shorten the cable and then reinstall the pins, but it looks like they can't be removed from the connector without a special 'amphenol pin extraction' tool. I could probably make one, but it'll be quicker to just splice the cable back together with some solder and heat shrink, so I'll do that today.
 

Susquatch

Ultra Member
Administrator
Moderator
Premium Member
It was one of the tube fixturing v-blocks that holds the bicycle frame above the drawing. They are not precision ground or hardened or anything like that so I'm sure it wouldn't have needed anything more than a kiss with a file.

The cut in the cable is about a foot from the 14 pin connector so I was hoping I could just pop the pins out of the connector, carefully remove the pins from the cables, shorten the cable and then reinstall the pins, but it looks like they can't be removed from the connector without a special 'amphenol pin extraction' tool. I could probably make one, but it'll be quicker to just splice the cable back together with some solder and heat shrink, so I'll do that today.

I have the tool if you decide to go with the shortening it approach.
 

Susquatch

Ultra Member
Administrator
Moderator
Premium Member
I’ll live with the heat shrink for now, but if it doesn’t hold up to being dragged across a chip filled floor I’ll take you up on it!

It's a tiny little tool. Should be able to mail it in an envelope for a few bucks.

But I'm just thinking, I bet that thing is only a few bucks on amazon and then it's yours to keep!

Can't have too many tools....
 

Xyphota

Ultra Member
I made a fork! I wasted probably 6 hours this weekend trying to get a mitering setup for the fork blades to work. I was thinking I could miter them simultaneously like I did with the chainstays and seatstays so I wouldn't have to measure any angles, but I could not get my mitering jig to hold the fork legs rigidly enough. I eventually elected to set them up with the help of some SolidWorks angle measurements (please ignore the picture of the screen LOL).
1685042957628.png 1685042980030.png

MicrosoftTeams-image (20).jpg

I think I got lucky because the miters came out almost perfect. I machined up a tall v-block to hold the fork steerer and a special axle holder that holds the axle at the right height.
MicrosoftTeams-image (21).jpg
 
Top