• Scam Alert. Members are reminded to NOT send money to buy anything. Don't buy things remote and have it shipped - go get it yourself, pay in person, and take your equipment with you. Scammers have burned people on this forum. Urgency, secrecy, excuses, selling for friend, newish members, FUD, are RED FLAGS. A video conference call is not adequate assurance. Face to face interactions are required. Please report suspicions to the forum admins. Stay Safe - anyone can get scammed.
  • The 2026 Calgary Area Meetup is set for Saturday May 30th at 10am. The signup thread is here! Robinhood has graciously offered to host the meetup again this year. Please note that you MUST RSVP to the notice linked above if you wish to come.

Working on my South Bend 9C

@BaronJ

Re: spindle shims, noted! I'll pay close attention. I did also order a thrust bearing and washers because the original take-up washer was crumbling.

Re: zerk fittings, they actually seem clean. The issue was a user common sense one that the way oil was not thick enough for my grease gun and uh was a bad idea. I'll need another delivery method hah.
 
@BaronJ

Re: spindle shims, noted! I'll pay close attention. I did also order a thrust bearing and washers because the original take-up washer was crumbling.

Re: zerk fittings, they actually seem clean. The issue was a user common sense one that the way oil was not thick enough for my grease gun and uh was a bad idea. I'll need another delivery method hah.
Hi Michael,

I can't find the post right now, but on another forum, someone posted a picture of a metal oil gun that had a tip suitable for the ball on the nipple. He also said that it didn't leak.

I use SAE 30 everywhere, the non sulphur stuff.

Both my oil guns are plastic with a metal and plastic nozzle that you have to press hard onto the ball. I will take pictures and post them, but it will be next week. I'm currently away at Granddaughters birthday party. Not back until Tues.
 
Golem, when replacing the crumbling fibre take-up washer with the after market bearing thrust washer make sure the split take-up nut does not contact the reverse bracket during re-assembly.
You may need to machine off a small amount, as the bearing type thrust washer is thicker than
The standard fibre thrust washer.
I didn’t need to do this on my ‘38 model but i did on my ‘36 model.
 

Attachments

  • IMG_2084.jpeg
    IMG_2084.jpeg
    1.4 MB · Views: 5
Golem, when replacing the crumbling fibre take-up washer with the after market bearing thrust washer make sure the split take-up nut does not contact the reverse bracket during re-assembly.
You may need to machine off a small amount, as the bearing type thrust washer is thicker than
The standard fibre thrust washer.
I didn’t need to do this on my ‘38 model but i did on my ‘36 model.
Oh fantastic advice thank you!
 
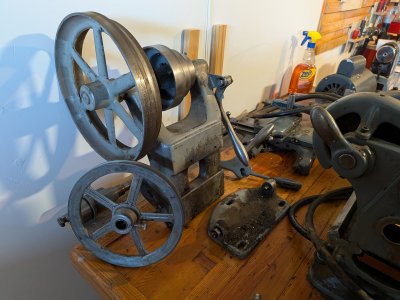
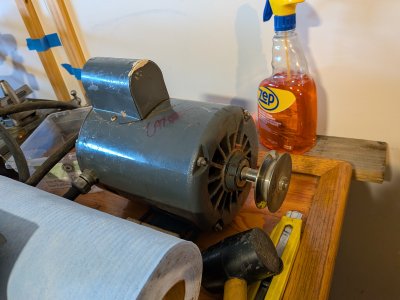
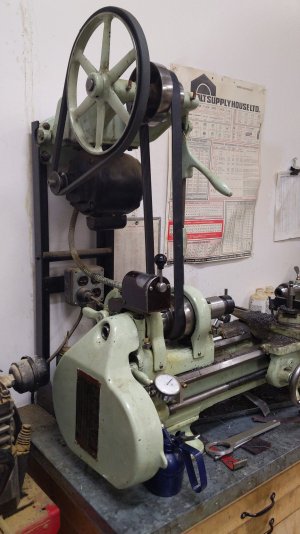
Many thanks to @140mower and @jorogi getting this drive assembly to me! Hopefully I can swap on the old v pulley or look into getting a flat motor pulley.

Also interesting that both parts had levers mounted. So figuring that out will either be a doddle or a headache!
 

Attachments

  • PXL_20251128_185641689.jpg
    PXL_20251128_185641689.jpg
    1.7 MB · Views: 10
  • PXL_20251128_185635972.jpg
    PXL_20251128_185635972.jpg
    1.5 MB · Views: 10
Many thanks to @140mower and @jorogi getting this drive assembly to me! Hopefully I can swap on the old v pulley or look into getting a flat motor pulley.

Also interesting that both parts had levers mounted. So figuring that out will either be a doddle or a headache!
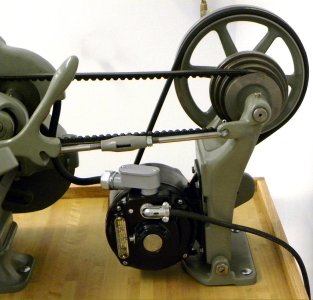
This at best a WAG, the electric motor will be mounted solid. That flat piece with the 3 holes in it will mount the drive assembly. One belt from the motor to the large pulley. Then one belt between the smaller pulleys. You'd move the drive assembly to tension the belt, one lever. Then I'm guessing if the belts right, you would tension the lathe belts, second lever

Or I could be completely off my rocker too
 
I don't think that's quite right based off what I've seen. The two levers is likely just because the parts are from different eras of machines. I think I see how it all goes together, just some light finagling needed
 
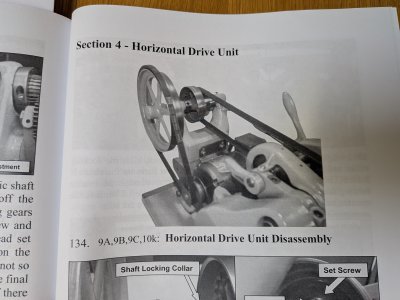
Here's the set up. I now suspect the tensioning arm on the rear assembly was just attached for convenience and not mounted there. I'll just need an appropriate threaded/pinned rod for the other side of the turnbuckle.

The flat/v pulley discrepancy between the countershaft and motor will need to be resolved though.
This at best a WAG, the electric motor will be mounted solid. That flat piece with the 3 holes in it will mount the drive assembly. One belt from the motor to the large pulley. Then one belt between the smaller pulleys. You'd move the drive assembly to tension the belt, one lever. Then I'm guessing if the belts right, you would tension the lathe belts, second lever

Or I could be completely off my rocker too
 

Attachments

  • img91.jpg
    img91.jpg
    137 KB · Views: 5
  • PXL_20251128_193538923.jpg
    PXL_20251128_193538923.jpg
    2.6 MB · Views: 5
Here's the set up. I now suspect the tensioning arm on the rear assembly was just attached for convenience and not mounted there. I'll just need an appropriate threaded/pinned rod for the other side of the turnbuckle.

The flat/v pulley discrepancy between the countershaft and motor will need to be resolved though.
Michael you have it correct !
Pulling the lever towards you slackens the belt. I tend to run mine slightly loose in case I overload things, like trying to take too big a bite.
 
To add to post #243, i had to thin the split take up nut to somewhere around .425 (+or-)
as it tended to force the spindle out the chuck end after tightening up the reverse bracket.
This was very disconcerting when i turned on the lathe & the chuck end of the spindle started
coming out.
I think this pertains to some (not all) of the SB9, 415 a,b, or c lathes when upgrading to the bearing thrust washer.
 

Attachments

  • IMG_2085.jpeg
    IMG_2085.jpeg
    2 MB · Views: 4
I was thinking of suggesting that, but it sounded a bit hoaky . May not work well with a segmented belt. Though I have seen a v- belt pulley wound with baler twine and black tape to make a flat pulley. Yeah it worked, but did have to wind the “filler” the right way.
 
Believe it or not Michael the motor side is a "b" width belt running in a vee pulley at the motor and over a flat pulley on the drive end......
Well that's fantastic then! (I got a bit caught up in disassembling the carriage and haven't looked too close)
 
The issue was a user common sense one that the way oil was not thick enough for my grease gun and uh was a bad idea. I'll need another delivery method hah.

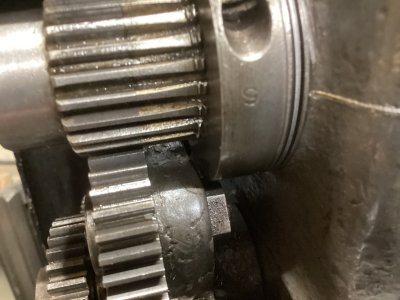
Ya, I would think a pressure gun of some kind is required. Please keep us posted. I hate all my ball oilers.
 
I hate to report poor results, but I've only got as far as rebuilding the compound and cross slide. Just giving the saddle base a good scrub and I'll get that all reassembled, but that shall be it for tonight. The drive assembly and headstock will have to wait. As will deciding how much to address the backlash in both those components. Pesky kids and life.

I reckon for the next step I should dry mount the drive assembly so I can calculate belt length. THEN rebuild the headstock and drive assembly with an endless belt. So that I don't have to disassemble those parts twice.
 
Back
Top