• Scam Alert. Members are reminded to NOT send money to buy anything. Don't buy things remote and have it shipped - go get it yourself, pay in person, and take your equipment with you. Scammers have burned people on this forum. Urgency, secrecy, excuses, selling for friend, newish members, FUD, are RED FLAGS. A video conference call is not adequate assurance. Face to face interactions are required. Please report suspicions to the forum admins. Stay Safe - anyone can get scammed.
  • Several Regions have held meetups already, but others are being planned or are evaluating the interest. The Ontario GTA West area meetup is planned for Saturday April 26th at Greasemonkeys shop in Aylmer Ontario. If you are interested and haven’t signed up yet, click here! Arbutus has also explored interest in a Fraser Valley meetup but it seems members either missed his thread or had other plans. Let him know if you are interested in a meetup later in the year by posting here! Slowpoke is trying to pull together an Ottawa area meetup later this summer. No date has been selected yet, so let him know if you are interested here! We are not aware of any other meetups being planned this year. If you are interested in doing something in your area, let everyone know and make it happen! Meetups are a great way to make new machining friends and get hands on help in your area. Don’t be shy, sign up and come, or plan your own meetup!

Welcome to Westwood Metalworks, What is he building in there?

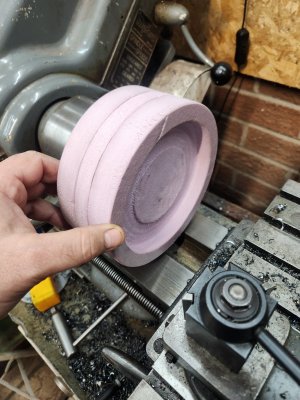
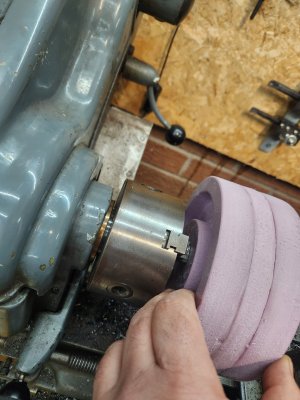
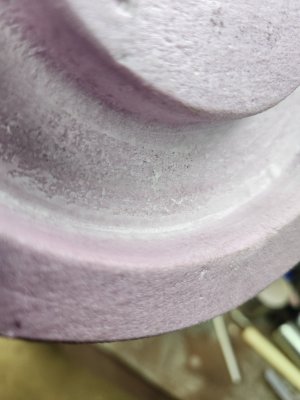
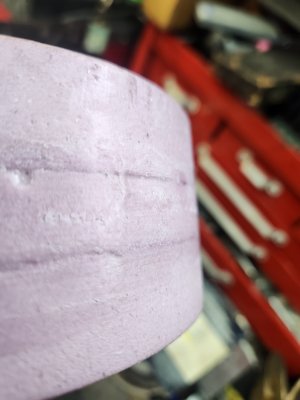
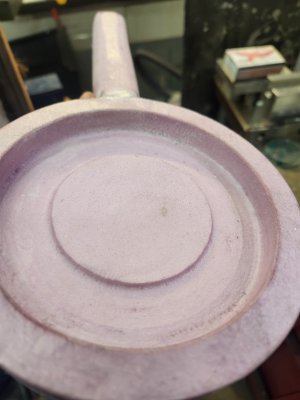
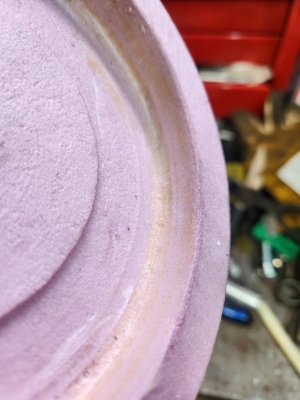
Pattern all cured, i wanted to check it on the lathe again
20250419_090730.jpg
20250419_090733.jpg

Yep, should be able to get it all on the lathe. Still want to try the r8 arbor though.....

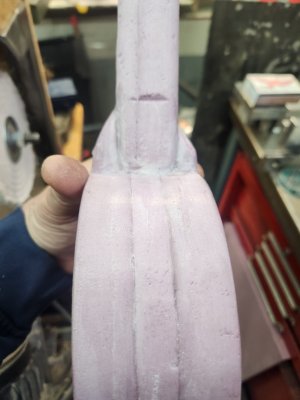
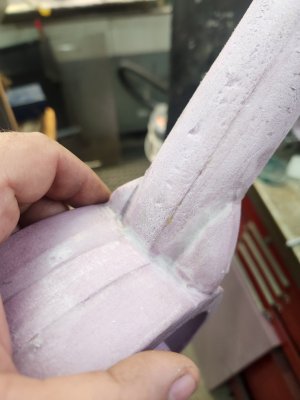
Next was to cut the spru. It DID get used....
20250419_084806.jpg

20250419_092755.jpg

Done. I'm going to try filling some holes and making some fillets with wax, and see if I can smooth it up a bit. Debating on the drywall compound coating. Some say it's not needed, others swear by it. If I don't use it, I can cast this today....if I do, it'll be next weekend probably.....
 
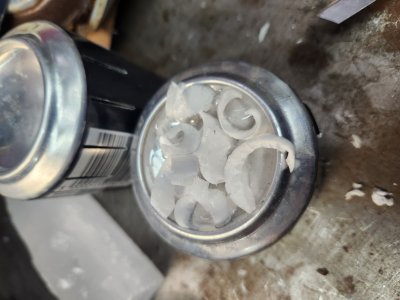
Had a go with some wax coating to smooth it out. Bit of a trial and error process, but overall pretty manageable. Made little wax melter from a beer can over a tea light candle. Worked great. Just brushed it on, then smoothed it out with a brush or this quick n dirty fillet tool I made. Will have to make a few more....20250419_125016.jpg
20250419_130048.jpg
20250419_131415.jpg
20250419_132253.jpg
20250419_133453.jpg
20250419_133941.jpg
20250419_133946.jpg20250419_133959.jpg20250419_134647.jpg

Pretty easy to put a bit more on then scrape it back off when it hardens. That's how I did the od and flats. The last pic there i tried some toilet wax ring wax and it worked well too. I used the heat gun to flow it out on the surface better as well. Still looks rough, but much smoother than it looks.

Ill have to play around with various waxes and mixes on future projects. Surprisingly I enjoyed this process quite a bit, so I'm already looking forward to the next one.

I also decided to give it a coating, and had to make the drive into town for some drywall compound. The tub I had here was rock hard. Will do that after dinner. Kinda forgot I also had to make a bigger crucible anyway, so I wasn't casting it this weekend no matter what. Might as well try and make it nicer.
 
Last edited:
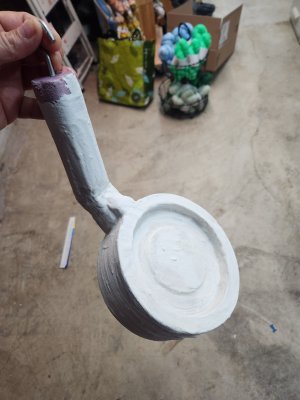
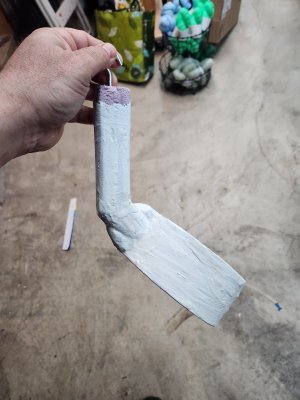
Got 2 coats of a thinned down drywall compound on it last night. Then decided after watching more lost foam videos last night I should angle the sprue for better results, so I cut, and rotated it then hot glued it back together. The pics are after coating the joint line one last time.

20250420_132515.jpg20250420_132511.jpg

It should cast better in this orientation. I'll let it dry for a couple days and get to building my crucible to fit my ribbon burner forge in the meantime.

I'm very tempted to just build a bigger foundry instead, but I've had enough side quests on one project for now.....if this casts we'll ill definitely move the foundry project up the list as being able to make bigger foam castings will be awesome.
 
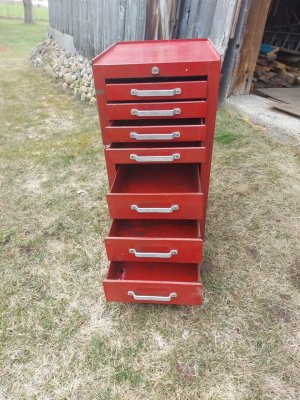
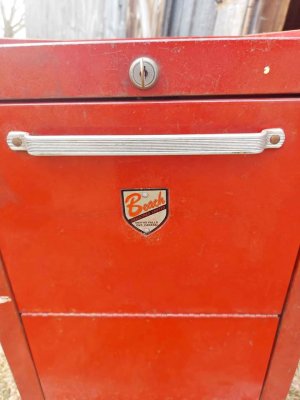
Just picked up this little guy off marketplace from down the road. Did I need it? No. Do I have space for it? Also no. Am I a sucker for these old Beach tool boxes? Yes. I've owned a few different styles of beach's at one point or another, A few tops, bottoms, cantilevers, lunchboxes, and a mid, but never a side box. Wish it was a rounded corner one, but beggars can't be choosers. I'll probably build a mobile base for it, and keep mill tooling in it. Will be nice and easy to wheel around out of the way when milling, then tuck it back in behind the mill when done.

1745337829626.jpeg
1745338300725.jpeg
 
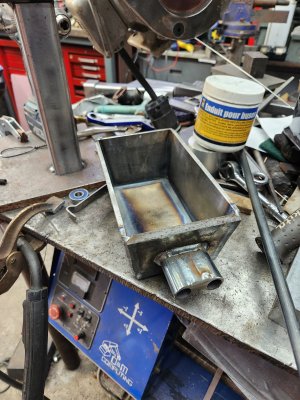
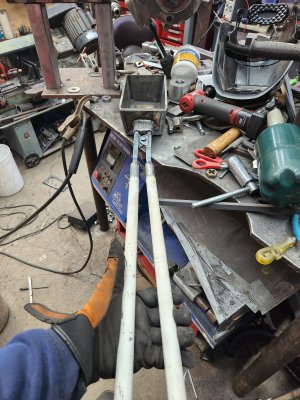
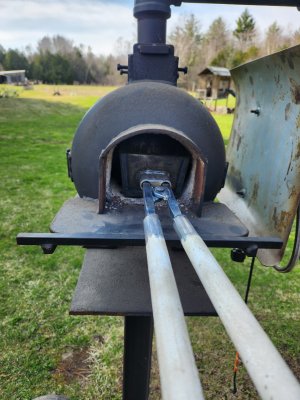
"Crucible" done. Bottom and front are 3/8". Sides and back 1/4". Didn't need to be that thick, but that's what I had as quick grab stock. Will probably only use it a few times as a crucible with the forge until I actually build a foundry and use proper graphite ones, but figured I can also use it as an ingot mold when that time comes so wanted to build it proper and not "disposable".

20250423_145144.jpg
20250423_144948.jpg

Next up is some q&d tongs, then bury my pattern and melt some aluminum. Hopefully later tonight....i know I've said that before......a few times now.....
 
Well....here goes....my first lost foam casting

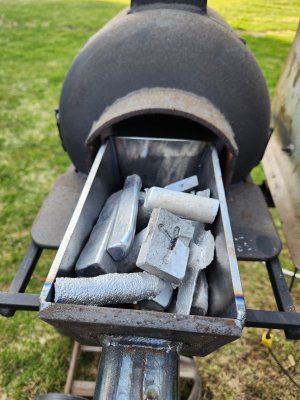
First I charged the crucible with some old ingots and stuff.
20250423_182930.jpg

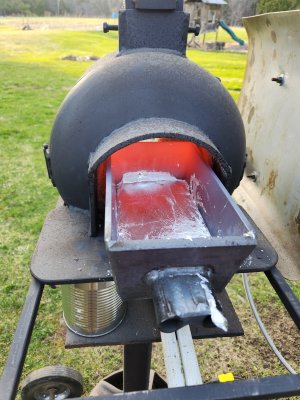
Then I awakened the beast.
20250423_183741.jpg

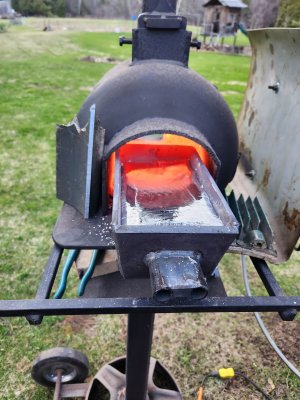
Didn't take long to get liquid....I forgot how hot this thing is. That's the reason I don't really use it yet, as I just don't need that level of intensity in my blacksmithing at this point....

20250423_184523.jpg

I kept adding some small chunks of car rims and motor housing until I had an almost full crucible, but still pour able.
20250423_193220.jpg

Last skim before pouring.


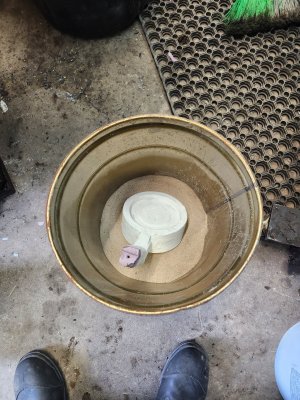
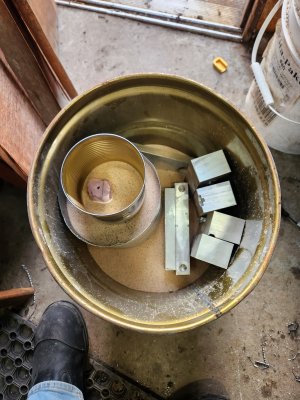
The molding was.....interesting....I made a slight miscalculation and had to scramble for a solution. I didn't have enough sand to completely cover the pattern, so I cut a quick riser out of some duct and made a stack to surround the sprue so I could use less sand, and concentrate it around there. But not after I had the bright idea to jam some filler in the form of old soft jaws in there....They pretty much did nothing, but I left them there because I didnt feel like pulling them out.
20250423_184150.jpg
20250423_185658.jpg
My other option was to use my old green sand, but I thought my riser idea would work. I was wrong.....

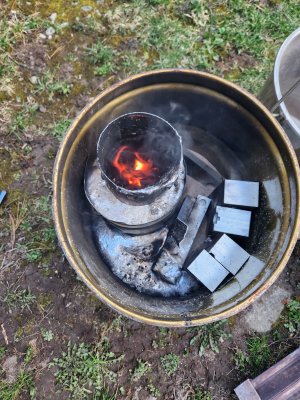
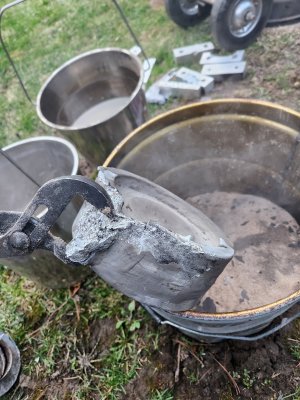
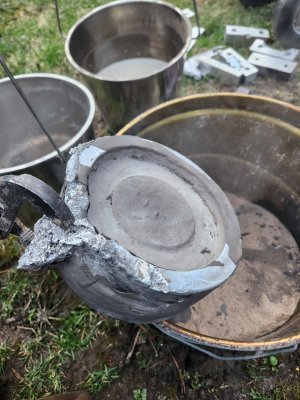
The pour started off great. Never having done lost foam, only watching a lot of videos, all was going as I expected until the burp....I'm guessing due to the way I had that riser there wasn't enough sand over that top section of pattern and when it burned out it burped out and flooded the bucket.....That's my guess anyway, on where it happened. It was tough to see as there was suddenly a lot of smoke, and my pouring basin got empty.....
20250423_193756.jpg

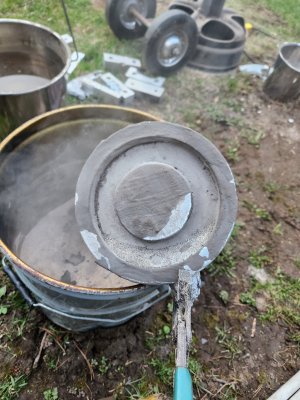
I still dumped the rest in, hoping to salvage something....but I didn't have much hope.
20250423_194344.jpg

20250423_194348.jpg
20250423_194644.jpg
20250423_194350.jpg

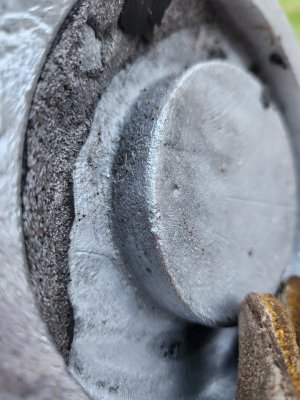
That sucks.....but not too bad. Despite not coming away with a usable part, I'm pretty encouraged to try again. The casting itself despite the blown out section is actually really good. The crucible worked great. No pouring issues there. The forge worked well as I'd hoped. All in all. There is a lot of good to takeaway for next time. I'm going to pickup another bag of sand tomorrow, machine another pattern, and keep moving forward.....
 
Last edited:
Looking back through my phone pics it was 14 minutes from cold forge to molten aluminum on that initial fill. Slightly less volume than that in my little electric foundry takes abut 45 minutes......That's pretty motivating to build a gas fired foundry now.....

Still took about 40 minutes to get that one filled up though, but that PDQ compared to what I'm used to.

Edit: Because I can no longer edit the above post....The part where I say " I didn't have enough to cover the pattern" I meant all the way up the sprue. I had about 1.5-2" of coverage over the entire wheel section at that point, before realizing that if I continued filling the entire bucket, I wouldn't reach the top of the sprue. Reading that section again with the pics shown makes it sound like I ran out of sand before the pattern got covered at all. Not the case.
 
A good try! I am wondering about the big burp, I had always used a sprue and a riser, wonder if a riser coming off the side might have helped. It appears there is a void on/in the side in 2 of the 3 last pictures. I can remember the riser sometimes appearing to vent when pouring before totality filling. My take on it was that the molten metal was flowing in though the sprue and pushing air/gases ahead of it and resisted allowing them to come back, therefore needing a way out. It maybe more so because of the coating on the foam not allowing venting through the sand.
Is the gray surface in a few pictures, the drywall compound still on the casting? I did a few lost foam casts many years ago, however none of foam was smoothed with wax or covered with anything.
Anyway a few thoughts, good or bad.
 
Last edited:
A good try! I am wondering about the big burp, I had always used a sprue and a riser, wonder if a riser coming off the side might have helped. It appears there is a void on/in the side in 2 of the 3 last pictures. I can remember the riser sometimes appearing to vent when pouring before totality filling. My take on it was that the molten metal was flowing in though the sprue and pushing air/gases ahead of it and resisted allowing them to come back, therefore needing a way out. It maybe more so because of the coating on the foam not allowing venting through the sand.
Is the gray surface in a few pictures, the drywall compound still on the casting? I did a few lost foam casts many years ago, however none of foam was smoothed with wax or covered with anything.
Anyway a few thoughts, good or bad.

Thanks for the thoughts. I think you're right about the venting. So much I've read and watched say that it's not needed, and that the gases escape through the sand, or up the sprue. Maybe my coating was too thick and couldn't let them escape? I poured/brushed it on and around, and the 2nd coat I did was only to get the spots I missed the first time. I didn't think it was too thick at the time, seemed pretty thin to me, but I had no experience to draw from. I'll thin the next batch out even more to be sure. I'll also consider adding a vent, or maybe a bigger sprue to aid in those gases getting out. If I gate on the outer rim, I can make it even bigger as it'll all get machined away anyway.

Yes, the gray coating is the compound. That pic is as it came out, just before quenching. There was a small overhang there due to the tilted orientation that I guess didn't get sand filled. The next one I'm going back to the way I had it the first time in the vertical plane. The wax smoothing seemed to have worked great. Looking at it closer, I can clearly see brush strokes in a couple spots that i missed scraping flat.

I'm going to try and machine this one today anyway. Especially the taper lock bore so I can check fitment. I'd like to play around with heat treating, so I'll do a little before and after. It's a learning experience part at this point anyway, might as well learn as much as I can from it.....
 
Thanks. I choose lost foam for a couple reasons. The first was that I don't have enough greensand to mold this with a normal split pattern, so I'd have to make or buy more. I'd also have to build a bigger molding flask as my current one is too small. The other reason was simply that I've always wanted to try it, and add that capability to my shop so to speak. This seemed like a good part to try it out on, as I also only needed one. Of course it would have been quicker and easier to just buy a blank and machine it from scratch, Especially at this point, but wheres the fun in that :D. I like learning new things, and it's one of the whole reasons behind having my shop in the first place.

After thinking about it all last night and this morning, I'm pretty sure I know what went wrong now, so I'm fairly confident moving forward again. I don't mind making mistakes, if I can learn from it. But I only have enough foam left over for 2 more though....That's the big downside to lost foam is having to make the pattern again. The upside is that you can remelt your mistakes though, so it's a wash really.....:D.

The plastic bucket I had the sand in at the start was smaller diameter than the steel one I used for the pour. When I thought I had enough volume of sand to completely cover the part to the top of the sprue, I didn't really think about the bigger diameter of pail.....It's close enough that it didn't really jump out at me as a red flag until I'd already dumped about 3/4 of my sand in there vibrating in lifts. I should have just went to the shed and dumped in my old crappy greensand, but with the metal melting quicker than I thought I made a hasty decision to make that riser and go that route. Haste makes waste as they say.....
 
Are you just pouring sand around the pattern and give some vibration, to firm/settle it? Using play sand or a mix, as you earlier said drying the play sand in a picture. Yup, as to the different buckets, does not take much diameter change to make a big difference in volume. Been cot by that that too.
 
Back
Top