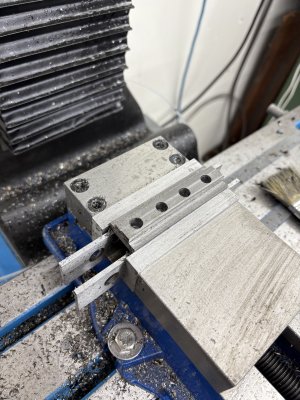
Probably best to think about it for a month or two before you try...I know, I know.... I hope to try an actual CAD/CAM project tomorrow 🙂
-
Scam Alert. Members are reminded to NOT send money to buy anything. Don't buy things remote and have it shipped - go get it yourself, pay in person, and take your equipment with you. Scammers have burned people on this forum. Urgency, secrecy, excuses, selling for friend, newish members, FUD, are RED FLAGS. A video conference call is not adequate assurance. Face to face interactions are required. Please report suspicions to the forum admins. Stay Safe - anyone can get scammed.
-
Several Regions have held meetups already, but others are being planned or are evaluating the interest. The Calgary Area Meetup is set for Saturday July 12th at 10am. The signup thread is here! Arbutus has also explored interest in a Fraser Valley meetup but it seems members either missed his thread or had other plans. Let him know if you are interested in a meetup later in the year by posting here! Slowpoke is trying to pull together an Ottawa area meetup later this summer. No date has been selected yet, so let him know if you are interested here! We are not aware of any other meetups being planned this year. If you are interested in doing something in your area, let everyone know and make it happen! Meetups are a great way to make new machining friends and get hands on help in your area. Don’t be shy, sign up and come, or plan your own meetup!
You are using an out of date browser. It may not display this or other websites correctly.
You should upgrade or use an alternative browser.
You should upgrade or use an alternative browser.
Weiss VM32 CNC Conversion
- Thread starter David
- Start date
....working on the CAD/CAM now....Probably best to think about it for a month or two before you try...
gerritv
Gerrit
Tormach has a hub for PathPilot where you can dry run your CAM: https://hub.pathpilot.com/login?next=/ Free to use.
gerrit
gerrit
Thanks Gerrit, appreciate that!Tormach has a hub for PathPilot where you can dry run your CAM: https://hub.pathpilot.com/login?next=/ Free to use.
gerrit
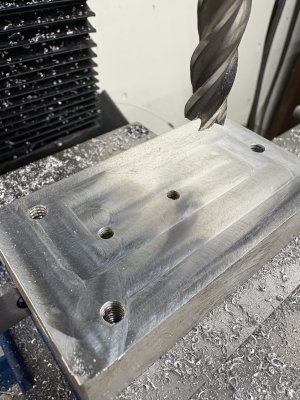
First chips under computer control.
Used the conversational face wizard to take 2mm off this block.
Discovered that I need to reverse the spindle direction in the driver as the M3 command starts clockwise rotation but the spindle is actually running counterclockwise. That’s the reason for the burr at the beginning.
Feed rate at 300 mm/min was too slow.

Last edited:
On Friday I went to mill my very first part from scratch.
Faced off the part and it was really rubbing but I thought maybe my DoC was too shallow
Started the adaptive clearing pass and promptly broke the end mill.
The cause was the blasted spindle was going the wrong direction, hence the rubbing on the facing cut.
I thought I had set the spindle direction but I neglected to save the settings.
In my haste/annoyance with myself at breaking the end mill, I accidentally reset all of the 128 servo drive parameters back to default rendering the drive unable to respond to the MASSO controller.
@jcdammeyer has the same servo drives on his machine so through much back and forth and him providing an on-site visit with a working drive and servo this morning we managed to track down the one parameter that was not correct.
And we also managed to sort out some other parameters so now the mill is running even better and and I have accurate rpm.
So much gratitude to John for his selfless help!
......ummm John, I thought we talked about this. 😉
The guy just can't help himself Don.
We will probably have to look after it ourselves. I know a guy....
Awe guys. I'm soooo sorry. But as I suggested @David buy the Bergerda I felt obligated to have him go through all 128 options about 20 times to try and figure out what wasn't working.
Truthfully it was really puzzling as to what finally solved the problem. Especially as mine had that same parameter set to 3 and mine works. Of course it could have been a number of other things but still very strange.
Truthfully it was really puzzling as to what finally solved the problem. Especially as mine had that same parameter set to 3 and mine works. Of course it could have been a number of other things but still very strange.
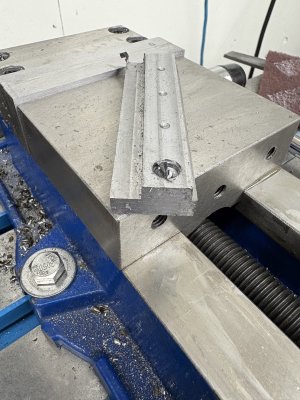
CNC lessons learned so far:
1) if you use the tool as your touch off and set the X and Y zero without deducting half the diameter of the tool your first cut will have either be air or 1.5 times as deep as you planned
2) Forget traditional speeds for peck drilling with a 1/4” drill. 500 rpm was way too slow, 1800 is more like it with 2mm pecks.
On the plus side. Nothing broken and the mill handled great!

Last edited:
See guys. It's going to take him forever to get up to the capabilities of @Susquatch Getting his mill working was the best way to slow him down........ tee hee.Ok that went better except I hit the estop just before the drill cycle so I had to try and pick up the X, Y and Z again and I was off a smidge because I didn’t use the probe.
View attachment 62485
I already know that my next shop project is going to be plumbing in my air compressor so I can have air blast/MQL. Bought a solenoid for it and there’s a relay in the enclosure already so just need to do the work of bringing the air to the mill.
gerritv
Gerrit
Drilling is absolutely the hardest on shop built CNC machines. M6/.25" is my personal limit. I turn my spindle down to 6000, and use very conservative feed rates. Risk is of course rubbing instead of cutting but doing otherwise results in machine making very unhappy noises.
I switched to using 135dg split point drills, which helped somewhat. Anything close to or over .25" gets bored using 4mm carbide end mill, which will happily run at 15k rpm and fast feed rates.
gerrit
I switched to using 135dg split point drills, which helped somewhat. Anything close to or over .25" gets bored using 4mm carbide end mill, which will happily run at 15k rpm and fast feed rates.
gerrit
Thanks Gerrit, I appreciate your confirmation of what I learned yesterday.Drilling is absolutely the hardest on shop built CNC machines. M6/.25" is my personal limit. I turn my spindle down to 6000, and use very conservative feed rates. Risk is of course rubbing instead of cutting but doing otherwise results in machine making very unhappy noises.
I switched to using 135dg split point drills, which helped somewhat. Anything close to or over .25" gets bored using 4mm carbide end mill, which will happily run at 15k rpm and fast feed rates.
gerrit
That was an F drill or .257" diameter so probably too ambitious for my first attempt.
I had set the first peck drill cycle to 500 rpm and what I thought was a conservative feed rate but the drill actually dug in and stalled the servo ending the cycle.
The second time I increased the rpm to 1000 and while it was better the feed rate was still far too aggressive.
All the CNC based drilling I've done always starts with a center drill (Tool #1), then switches to a small diameter drill peck drilling to make a clearance hole for the tip of the larger drill bits. Then finally peck drilling with the large one. WD-40 for aluminum. Oil for steel.Thanks Gerrit, I appreciate your confirmation of what I learned yesterday.
That was an F drill or .257" diameter so probably too ambitious for my first attempt.
I had set the first peck drill cycle to 500 rpm and what I thought was a conservative feed rate but the drill actually dug in and stalled the servo ending the cycle.
The second time I increased the rpm to 1000 and while it was better the feed rate was still far too aggressive.
I have the CAM software generate the G-Code. The center drill has the same path as the 3mm drill.
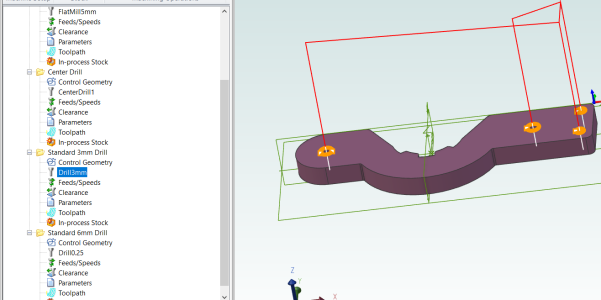
The 6mm drill then just enlarges two of the 3mm holes.
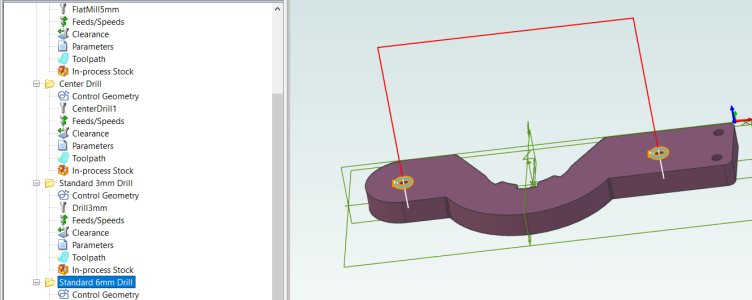
I don't know if this is the standard way to do it in a production environment. Just sort of the way I've learned.
Attachments
I think I must have lost part of my brain yesterday when I did the CAM as I went straight from center drill to the .25" drill. I probably should have put an intermediate drill in between.
I can't remember if your motor/spindle is 1:1 or is there a reduction?
I can't remember if your motor/spindle is 1:1 or is there a reduction?
I usually choose the intermediate drill bit based on what holes I need and the tip size of the largest drill bit. The 6.35mm or 1/4" really needs at least a 1mm pilot hole but that's really not useful anywhere else. A 3mm drill bit tends to be fine.I think I must have lost part of my brain yesterday when I did the CAM as I went straight from center drill to the .25" drill. I probably should have put an intermediate drill in between.
I can't remember if your motor/spindle is 1:1 or is there a reduction?
I have lumpy V-Belts 1:1 (approximately). I can turn the spindle up to about 2950 after which it reaches that point where requested RPM not reached indication comes up. And if that's the case LinuxCNC won't continue with the G-Code until it does. So it just sits there.
I should really put in a link belt but I'd rather spend the money on toothed belts and pulleys. But to do that I'd have to do some casting and I haven't run the foundry for a few years now. You've seen the pile of patterns........ Not quite 42 of them but the number is increasing.
Anyway, even just writing G-Code by hand for drilling ends up being mostly an editing operation after setting where the X=Y=Z==0 position is set. Back when I only had my DRO-350 and hand wheels I used the same approach.
Mark the XY locations of the holes on the drawing. Use my clip lead and touch off probe to set the DRO-350 XY==0 location. Then install each drill bit and move to each location on the drawing using the quill to do manual peck drilling. Very boring but it's important to drill down to the details.
Thanks John, I think I'll do some experiments to see what will work best. I also need to see what the actual file says. I'm still trying to figure out the various parameters in the CAM. Seems my life this past week or so has been all parameters, all the time 😀
Feeds and speeds is a place where it can make or break your day. The thing with a home brew cnc is you don't know its capabilities until you try.
That said, you can make some educated guesses. Using the link Gerrit posted for the PathPilot hub, use the conversational programming in it with a machine that is similar in mass/size/rigidity to yours (maybe the 770M?) and have a look at the speeds and feeds it pumps out.
Put your tool diameters / flutes etc. in the Offsets tab. Its been pretty good for mine so far, but I'm a chicken and still don't run 100% most times. Can also save the code it pumps out and use on your machine...

