• Scam Alert. Members are reminded to NOT send money to buy anything. Don't buy things remote and have it shipped - go get it yourself, pay in person, and take your equipment with you. Scammers have burned people on this forum. Urgency, secrecy, excuses, selling for friend, newish members, FUD, are RED FLAGS. A video conference call is not adequate assurance. Face to face interactions are required. Please report suspicions to the forum admins. Stay Safe - anyone can get scammed.

So I've jumped into the rabbit hole

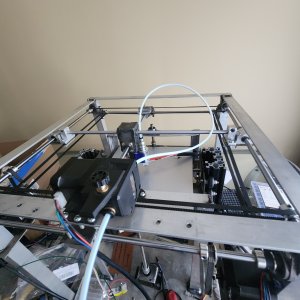
First look at the stored and travel set up of the telescope. Overall height of 13.5”. Sweet! The upper section fits nicely over the lower with lots of room for the secondary mirror to clear.
Still have to make secondary support bits and measure for the CF tubes for the trusses. The trusses are represented by the third photo of another persons build.
Pierre


IMG_9642.jpeg
IMG_9524.jpegIMG_9643.jpeg
 
I changed the design of the above brackets. Just too many issues with the support material and the thin section of the bracket.
I sliced the top off and printed the bracket piece upside down and the round portion for the nut right side up. Glued together and then printed the nut knobs.
Pierre


IMG_9659.jpegIMG_9661.jpegIMG_9662.jpegIMG_9660.jpeg
 
I got a new controller and I figured out why the printer wasn't running the g code on the onboard sd card. It was because the hot bed wasn't preheated to the correct temperature for the selected filament, however the motors don't seem to be running with as much amperage when printing as they do when I control it with the movement option. The movement options have no problem moving the gantry and are very accurate, but the motors cant drive the gantry when I print from the sd card. I have the latest version of marlin uploaded into the board, and I set the driver current high enough, but is that the setting that is used when printing? The stepper motors are all nema 17 but can't move the belts when printing; They only turn when I loosen the tension on the drive belt which doesn't move the rest of the belt drive.
 

Attachments

  • 17442423956757226874120672670476.jpg
    17442423956757226874120672670476.jpg
    1.1 MB · Views: 8
  • 17442424511482885726475751855661.jpg
    17442424511482885726475751855661.jpg
    1.1 MB · Views: 10
  • 17442424821786973233382049478295.jpg
    17442424821786973233382049478295.jpg
    1.2 MB · Views: 8
Last edited:
Sounds like motor tuning or step settings issues to me. With mach3 and steppers the motors wouldn’t move if those are wrong. Different application but similar.
 
I got a new controller and I figured out why the printer wasn't running the g code on the onboard sd card. It was because the hot bed wasn't preheated to the correct temperature for the selected filament, however the motors don't seem to be running with as much amperage when printing as they do when I control it with the movement option. The movement options have no problem moving the gantry and are very accurate, but the motors cant drive the gantry when I print from the sd card. I have the latest version of marlin uploaded into the board, and I set the driver current high enough, but is that the setting that is used when printing? The stepper motors are all nema 17 but can't move the belts when printing; They only turn when I loosen the tension on the drive belt which doesn't move the rest of the belt drive.
Stepper motor drivers have the ability to cut back on current to reduce heating when they sit idle. Then as soon as they get a step pulse the current is set back to normal. Even the little Chinese units I'm playing with right now can do this.
It's quite possible this new controller is expecting some sort of G or M code that puts the motors back into full power mode and your CNC preamble of what to do when you start printing is perhaps not doing this? Or perhaps there's a setting that can be enabled/disabled to deal with a reduced current mode.
 
The yard lights are broken. The posts break or snap off, so I made one for approval from the QC dept when she wakes up in the morning. It can be used with the type that push into the stand or glue the ones that the bottom post broke off. They will be screwed onto the top rail of the ditch guard at the road.
Pierre
IMG_9926.jpegIMG_9929.jpeg
 
Back
Top