• Scam Alert. Members are reminded to NOT send money to buy anything. Don't buy things remote and have it shipped - go get it yourself, pay in person, and take your equipment with you. Scammers have burned people on this forum. Urgency, secrecy, excuses, selling for friend, newish members, FUD, are RED FLAGS. A video conference call is not adequate assurance. Face to face interactions are required. Please report suspicions to the forum admins. Stay Safe - anyone can get scammed.

Post vise and striking anvil stand combo

If you do make one, please show us how you did it.
will do. I actually just had another thorough look through my box that turned up nothing. Guys borrow my shit all the time, and I find stuff everywhere, but I don't think that's the case here. I'm pretty sure it's gotta be somewhere at home. I've been slowly taking a bunch of tools home over the past few months, and that must have been in one of the loads. If I could just remember where I put it.......Might have to ask the Wife :D

In any case, I grabbed a new 1/4", and 3/8" HSS toolbit blank and will spin up a couple new ones tonight/tomorrow if I get some time. It's pretty simple to make. Just square up a toolbit (they're not always square), then grab it in a punch grinder and grind one end round to a nominal size so you can grip in a mill collet. If you had a square collet you could do it in a spindex too. Then on the business end, grind a suitable cutting angle for what material you're going to be cutting. I think the first one I made was around 8* compounded so it cut on two edges which was handy for internal square corners like this. I might make the 1/4" one just a single sided one.

In use I just set the rotation, and bungie the spindle brake. Sticking the mill in low gear helps too. Then just plunge away a few thou at a time until your arm falls off.....

I just had a thought typing this up that I might approach this a different way this time.....This is why stuff never get's done.....
Time to get the shaper going?
 
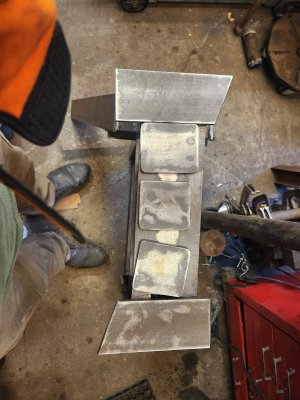
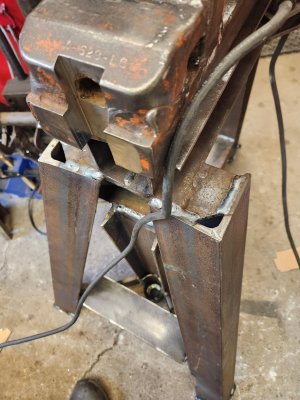
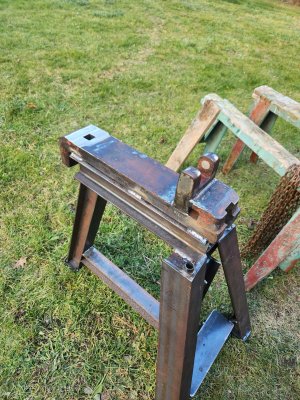
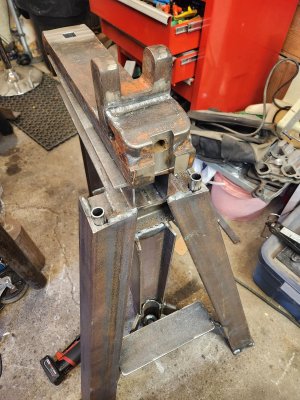
Friday came, and the vise went out the door. I put on some Motogp Practice session and proceeded to weld up the front braces, and feet.
lXFO6vS.jpg
bL64mX5.jpg

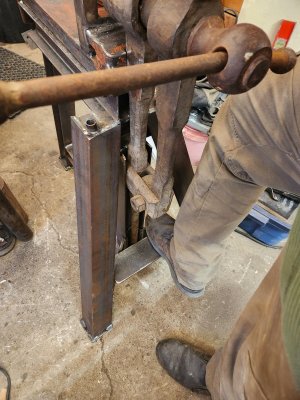
I added a foot rest too. Always feels a bit more comfortable when I'm filing/cutting/working on a vise to plant my foot on it somewhere.
4LUDvAb.jpg

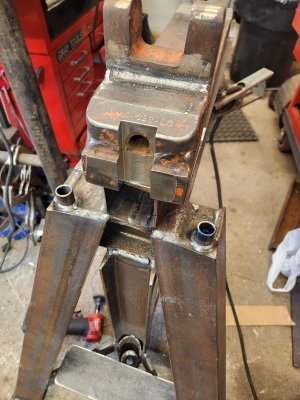
Then I had another idea for a quick and easy addition. Some sockets to mount some tool holders and racks in the future. Just some gas pipe welded into the front corners I had to nibble out a bit more with the jigsaw.
nIMP1xL.jpg

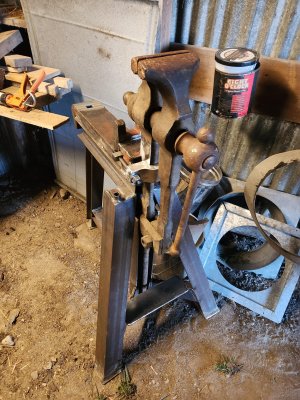
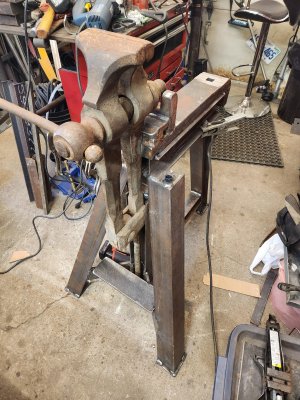
Next I mig tacked the anvil on, and dragged it outside to stitch it on with some 7018. Why? Because I wanted to, and I already had the leads out from last weekend :D.
2tzNR2G.jpg

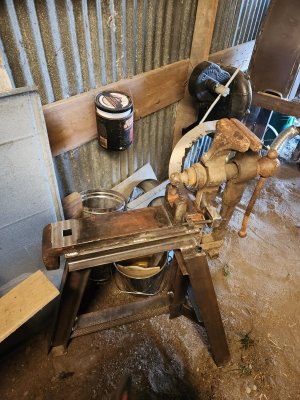
Then I did the same thing I did with my big anvil, and I walked it back out to the shed one leg at a time. Wasn't too bad, and not the ugliest thing I've ever danced with, although it did kick me in the shins a few times.

And here she is at home. A bit of an ugly duckling but should be pretty handy.
M1Gm2sI.jpgDbfSiyj.jpg

0E70h9d.jpg

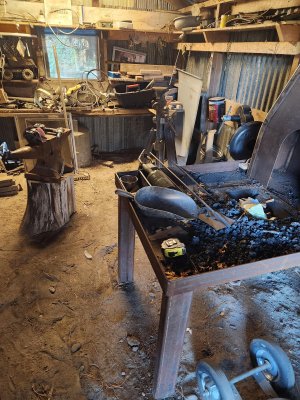
I'm not sure I really like it there, but I'll work with it a while before moving stuff around. In any case, phase 1 is done, and it's usable. Still a few more things planned for it, and I still need to make the spring, but at least now I can use it for some imminent projects. I promised a little girl we'd do some blacksmithing this weekend......so I'm going to light the forge tomorrow and plan to play around as long as I can with nothing else on the agenda.

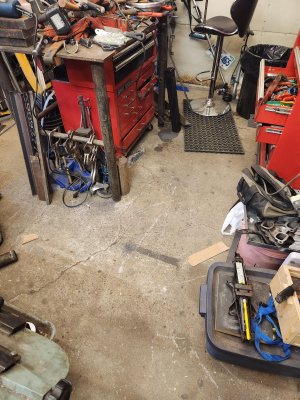
The best part is that I get my floor back....I'll be having a cleanup party tonight after dinner and I'm looking forward to it.
KWshcDZ.jpg

Thanks for following along. Dan.
 

Attachments

  • 51vyxhj.jpg
    51vyxhj.jpg
    646.4 KB · Views: 3
  • 1K7rOo5.jpg
    1K7rOo5.jpg
    801.8 KB · Views: 2
Wife just gave you a virtual high five for that :D.

I'm filling your return bag with drywall dust :D (that should raise some eyebrows at canada post lol)
You don't think that mailing all those identical envelopes from one location to all parts of the country didn't raise an eyebrow or two? I'm pretty sure that a few got sent through x-ray for a little look see. Lol.
 
(that should raise some eyebrows at canada post lol)
One time , after the long gun registry was in place for a while I liked to upgrade my files periodically just to be a pain in the a$$ to the folks at Miramachi and would ask for a new complete set of registrations and they would send them all at once, 2 to 6 registrations per envelope. These envelopes all had the RCMP emblem & return address on them so my little local town post office where everybody knows everybody received 52 envelopes addressed to me from the RC's in two days. Our local postmistress was somewhat of a busybody and shortly everybody in town knew I was contacted many times by the cops....My old man couldn't go to the coffee shop without getting hit up about "what's that young bugger of yours into now that has him in so much trouble.
 
Small towns are funny.....I hate when they don't deliver packages and I have to go into the post office to pick it up. Our regular driver will sometimes sign for it, and leave them inside our front door lol. The post office lady was vaccinated with a gramophone needle, and trying to get out of there in a hurry is impossible. How's the wife, hows the kids, haven't seen your wife in a while, etc......I like going in where there's somebody else in there. I'll drive by if it's just her car lol.
 
Small towns are funny.....I hate when they don't deliver packages and I have to go into the post office to pick it up. Our regular driver will sometimes sign for it, and leave them inside our front door lol. The post office lady was vaccinated with a gramophone needle, and trying to get out of there in a hurry is impossible. How's the wife, hows the kids, haven't seen your wife in a while, etc......I like going in where there's somebody else in there. I'll drive by if it's just her car lol.

Ain't that the truth. Our post lady often delivers to the backyard or to the kitchen if the door is unlocked. Must have the same grammy needle at this end of Ontario.
 
Had a good almost 4hour forging session this afternoon. I think my arm might be too tired to lift a Guinness. But I'm trying. This is pretty much being the 3rd time I've lit this forge and actually used it to make something, and the first session setup in the smithy with hood etc. I have gained a whole new appreciation for the youtubers that film their projects, and do a good job of it. I had such a hard time timing the heats and being able to take pictures that I kinda gave up trying to get progress pics, and just focused on the task at hand. It was just too difficult to maintain heat etc while trying to snap pics along the way. I'll try and get better....I need a good tripod, or articulating arm setup.

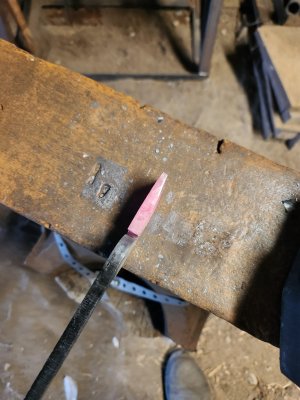
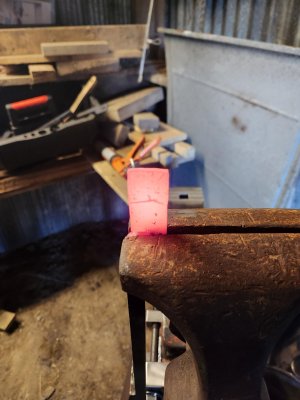
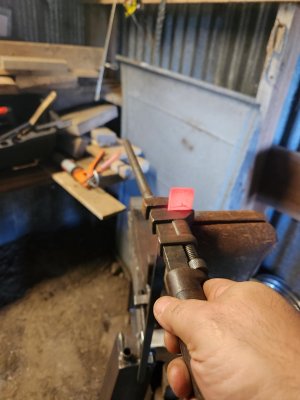
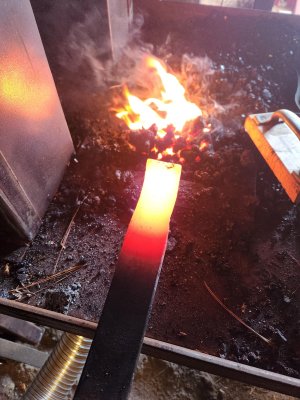
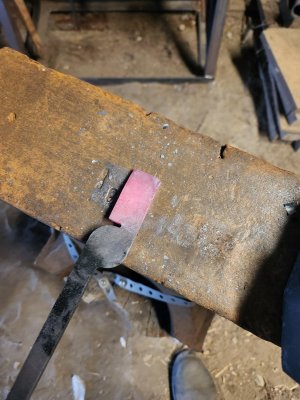
Anyway, the goal of today was to forge down a leaf spring into a spring for the post vise. But first I had to make some tongs to hold the spring. My tong selection thus far is terrible. A few weeks back I bought some cheap amazon plasma cut tong blanks. I figured this was the path of least resistance to get going quickly. They're a bit small, but adequate. The set came with 5 types, but I just finished the flat jaws for today. First I forged a taper on the tip, then twisted the jaw, drilled a rivet hole (I don't have punches yet.....) and then rounded the reins a bit, and riveted them together.
F51fTtR.jpgGJWtMhG.jpgNhLaJhH.jpgvFLcfA5.jpg
This is where I said eff it lol, and just put the phone down and got to business. Having to take extra heats because I couldn't do all the work in one because I was taking pictures.....I made a quick rivet punch this morning by plunging a ball enmill into the end of some O1, but I did such a terrible job of riveting this that it doesn't show lol. They work......(I will probably re-revit them at some point in the future). I didn't use the rivets that came with them, just some 1/4" rod.
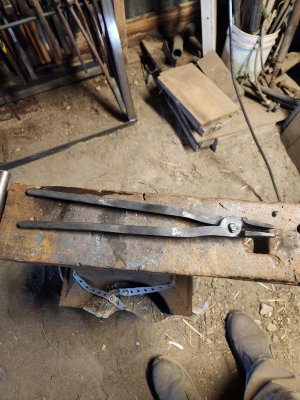
wxendU6.jpg

Tongs done it was onto the spring. First I forged the thickness down to go under the clamp (2"-1.25"), then the curve. Took a few heats to get it all done, but it sure was fun :D. Still have to do some fitting, and may have to take another heat to adjust, but it went pretty good. Once I get the size and fit right, I'll quench and temper. I don't think it's super critical in this application, I've seen guys make them from mild steel, but I want to anyway.
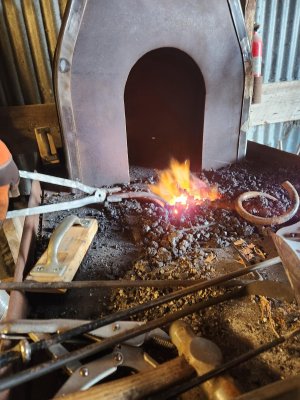
79DeVW2.jpg
o0LUn4g.jpg

My Son popped out for a bit to crank the blower, and he took a few pics. In this one I had just hot cut the end to length, and am bending it back to snap off before turning the bend on the end. again, sorry for the lack of progress pics. I need to up my game in the photo dept and make it easier to get some good in progress pics....
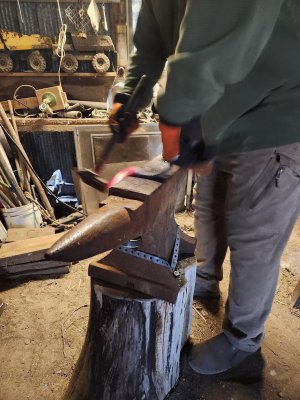
wkjhUFw.jpg

And here's a finished pic. Vise is still assembled so it's tough to really check fit, but holding it up and measuring with the eyecrometer says it's close enough that it shouldn't need much work to fit.
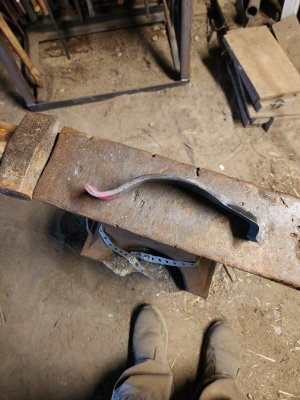
U9cJRVe.jpg

It's funny. Setting up this shop has been a big job this past year. Feels like all my free time I've been making stuff, the forge(s), the hood, tools etc. Finally getting to use it all to actually make something was pretty awesome today. A big relief that all the hard work was worthwhile. Also as a beginner smith, with no experience, I skipped the whole beginner brake drum/hairdryer/charcoal stage, and jumped right in the deepend. A big commitement when one doesn't even know if they'll even enjoy it yet......BUT, all it really did was add about 10 more things to the "need to build" list lol. I need an oil quench tank, bucket of ashes to normalize stuff, Proper anvil stand, a bunch of bottom tooling, fullers, drift plates, drifts, punches.....etc. I come up with projects at a rate that far outpaces my ability and free time to finish them.

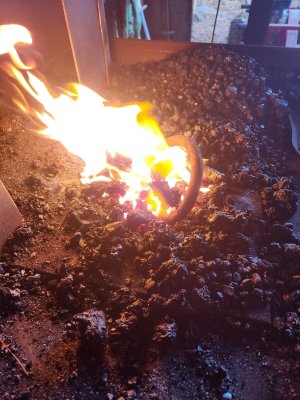
Soooo with that in mind, I decided to keep going, and forge some basic punches from coil spring.

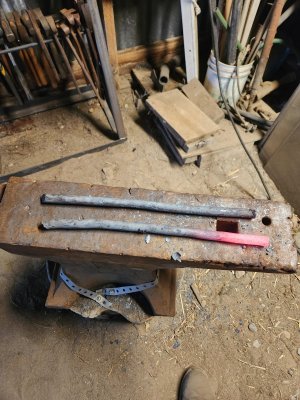
First job was to straighten them out
d1O4vln.jpg
uKgWUZ8.jpg

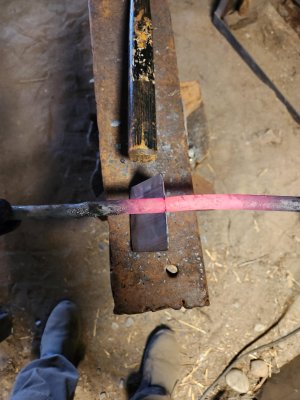
Then I hot cut them in half
WwghrOt.jpg

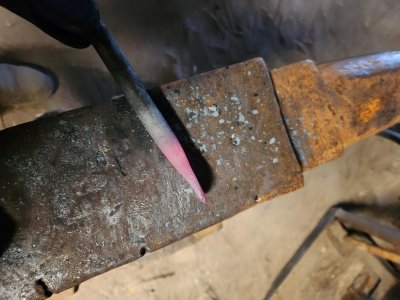
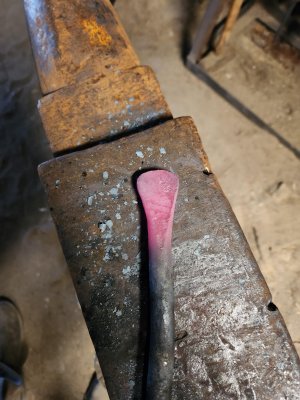
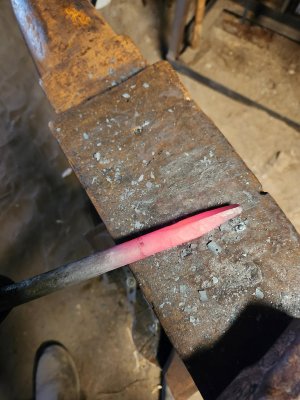
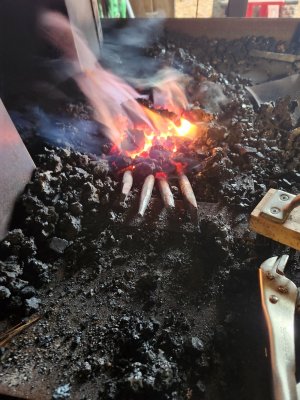
Then it was go time. You know that old saying too many irons in the fire? Ya, 4 at a time was a bit too much lol. Bumped it down to two at a time and it was enough to keep me busy working one while the other was heating up. I made a simple round punch, slot punch, round chisel, and ball punch. Just a few random pics when I had a break in the action....The round ones I tapered to square, then octagon, then round.
h33aFsR.jpg
fJqxpIC.jpg
cO4zUgq.jpg

Then I turned them around and made a small octagon taper on the struck end.
DMeVIgu.jpg

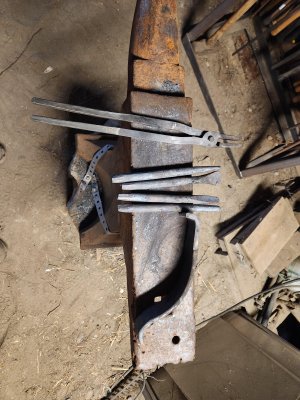
and here's the days work. 4hours of hammering was about all my right arm could take. I dislocated my shoulder a few weeks ago doing something stupid, and while it's healing up fine, I don't want to push it. I'm not as young and in shape as I still think I am.....
RYZwOOC.jpg

Pretty productive day. I will grind the punches to shape, and harden/temper them after a first build a quench tank. I feel like there are a lot of rite of passage blacksmith projects, so I'm going to try and incorporate a few of those into every time I'm out there. Also make a pair of tongs everytime too......

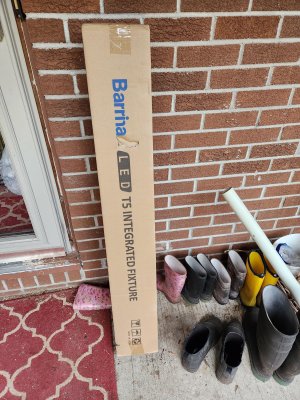
Another thing I need out there is lighting. Pics make it seem a lot brighter than it actually is, but it's pretty damn dark in there. I ordered these for the garage shop yesterday, and they were here when I came back in the house. This is why I don't buy prime. Once I replace the florescent tubes in there with the LEDs, I'll put a couple of them out in the shed. I'll see if I have the motivation after dinner......I'm not banking on it.
GKsjyN6.jpg
 
Last edited:
Had a good almost 4hour forging session this afternoon.

You did all that after doing the neighbour's drywall (or whatever you did for her)? If only I was 30 years younger....... As things are at my age, I'd a got the fire going just in time to go home!
 
Back
Top