MT3 V.S. MT2

YYCHM

(Craig)
Premium Member
I need to make a MT2 taper and my taper attachment is already setup for MT3 (or so I think the increments on the attachment are pretty course).

According to this chart https://littlemachineshop.com/reference/tapers.php there isn't a heck of a lot of difference between MT3 and MT2 apart from the diameters and length of the taper.

Will my current setup suffice for making a MT2 taper?

Thanks,

Craig
 

Dusty

(Bill)
Premium Member
I need to make a MT2 taper and my taper attachment is already setup for MT3 (or so I think the increments on the attachment are pretty course).

According to this chart https://littlemachineshop.com/reference/tapers.php there isn't a heck of a lot of difference between MT3 and MT2 apart from the diameters and length of the taper.

Will my current setup suffice for making a MT2 taper?

Thanks,

Craig

Hey Craig, this might help to answer your question. Sorry would have helped had I had read your complete post. LOL

 
Last edited:
I need to make a MT2 taper and my taper attachment is already setup for MT3 (or so I think the increments on the attachment are pretty course).

According to this chart https://littlemachineshop.com/reference/tapers.php there isn't a heck of a lot of difference between MT3 and MT2 apart from the diameters and length of the taper.

Will my current setup suffice for making a MT2 taper?

Thanks,

Craig
Is it possible to put a known one between centers and an indicator on your compound and sweep it? Then you would know for sure...
 

kevin.decelles

Jack of all trades -- Master of none
Premium Member
Given the challenge in getting a taper attachment dialed in (mine is notoriously -cheap and a pain), I want to say you're fine.

On the other hand, I'd probably spend the hour or so dialing in in to make up the 0.002 . Pour a cup'o'tea and get to it!
 

PeterT

Ultra Member
Premium Member
I never realized the taper angles were that close. According to my math you would be out 0.001" on a 4" long arbor/hole assembly. My own guess is that if you turned the 'wrong' taper with a fine finish, you are within lapping range of producing a very close matching fit. When I was producing an arbor taper to a mystery socket taper, that's about how much I was tweaking. But you need to be able to check, typically by blue-ing it & bringing your reference MT surface up to it to see the rub (where its interfering). Its a bit laborious but can be achieved. Its not a hardened ground surface like a commercial arbor but maybe fine for what you are intending.

I always wondered why Morse had varying angles across the range (as do others). Maybe someone has a historical answer? I always thought Jarno was a better system - exact same taper angle across 19 progressive sizes. Set the taper assembly once & park it, just vary the diameter to make any arbor.
 

Attachments

  • SNAG-2021-12-03 6.36.39 PM.jpg
    SNAG-2021-12-03 6.36.39 PM.jpg
    110.2 KB · Views: 6
Last edited:

YYCHM

(Craig)
Premium Member
Given the challenge in getting a taper attachment dialed in (mine is notoriously -cheap and a pain), I want to say you're fine.

On the other hand, I'd probably spend the hour or so dialing in in to make up the 0.002 . Pour a cup'o'tea and get to it!

Dialing it in how?
 

Dabbler

ersatz engineer
1 thou over 4" is enough to make it not 'stick' very well. really the angle is that important - unless - your barrel of your tailstock is very, very thin, and can expand to accommodate the 1 thou difference.
 

PeterT

Ultra Member
Premium Member
1 thou over 4" is enough to make it not 'stick' very well. really the angle is that important ....

Totally agree. I hope I didn't leave the impression it was good enough left that way, because its not. I just meant that lapping / micro-finishing finishing is a slow removal process, so having the part within a thou is about right starting point assuming the underlying geometry is true.
PT> ...you are within lapping range of producing a very close matching fit...

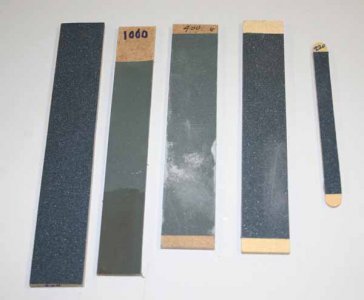
I'd aim for about 2-3 thou over off the lathe, blue the part & start with accurate abrasive sticks or flat stones to take the turning hilltops off in a controlled manner. A fat tip Jiffy marker works well for this & completely wipes clean with methanol. Pic of my early general use disposable MDF/hardboard type backing boards. I've since made myself some fly cut aluminum sticks which are better. They are flatter, stay truer & solvent releases the (3M spray) adhesive cleanly. The ideal taper/socket fit will be shown when the part is blued, inserted into the socket, give 1/4 turn or so & bare metal rub area is indicated down the entire length of the taper, no isolated stripe groups. Lapping in the conventional sense probably isn't a viable option because you ideally want a softer alloy to embed the lapping compound.

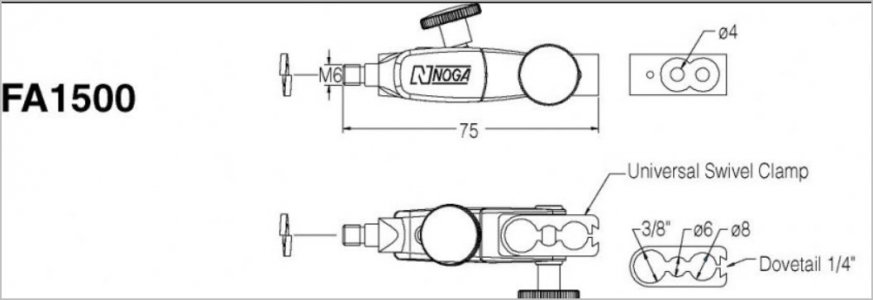
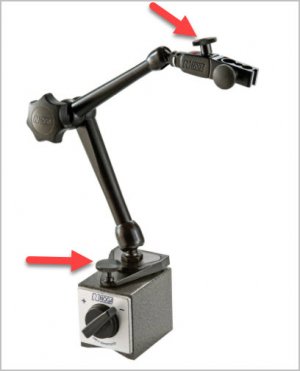
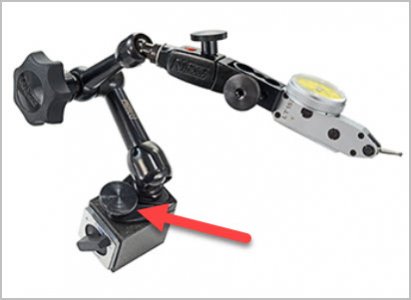
Another tip, when you are setting the taper attachment or compound like Tom is showing, very important to have the indicator positioned exactly on the centerline of the part or you'll set up a false taper. Because the indicator ball will ride up or down the taper if its inadvertently positioned high or low respectively. That's where those micro-adjust mag bases are nice - you can see the indicator needle maximize or minimize indicating center. Or you can get a flat anvil to screw on the end of a dial indicator. Santa endorses valuable tooling options such as these LOL
 

Attachments

  • IMG_5735_edited-1.jpg
    IMG_5735_edited-1.jpg
    34.7 KB · Views: 10
  • EDT-2021-12-04 6.06.02 PM.jpg
    EDT-2021-12-04 6.06.02 PM.jpg
    18.5 KB · Views: 11
Last edited:

YYCHM

(Craig)
Premium Member
For what I'm doing leaving the MT3 setup alone worked just fine....

Arbor1.JPG

It's an arbor to center a 4J on my RT. I had to turn the taper OD's significantly undersize when compared to LMS's spec in order to get it to fit. It fits nice and snug and doesn't seem to wobble any. Doesn't fit my tailstock though.

Arbor2.JPG

Ya, I overshot the chuck ID hence the wrap of green tape:oops: Still to do is turn the end down to 3/4" or 1/2" then I can center the whole shebang under the spindle. Need to find four 5/16-18 X 2"(1-7/8 actually) SHCSs as well.

Think I'll revisit the MT3 VS MT2 thing again and see if I can make a usable tailstock center using the MT3 setup.
 
Last edited:

Susquatch

Ultra Member
Administrator
Moderator
Premium Member
That's where those micro-adjust mag bases are nice - you can see the indicator needle maximize or minimize indicating center. Or you can get a flat anvil to screw on the end of a dial indicator. Santa endorses valuable tooling options such as these LOL

Santa wants to know where you found that micro adjustable magnetic holder?
 

Dusty

(Bill)
Premium Member
@Susquatch said, Santa wants to know where you found that micro adjustable magnetic holder?

Looks like a NOGA product to me, I have two NOGA adjustable magnetic holders of two different sizes both have the base and head adjustment knobs purchased from https://www.kbctools.ca/ (simply type NOGA in their search block)

For my money they are excellent magnetic holders and they go on sale from time to time., check these out for details.


Last edited:

ShawnR

Ultra Member
Premium Member
I turned one once. I used another dead center between centers to align the compound and then once I had it set to where the dial indicator said I was good, I loaded a blank and went to work. It actually worked. It was a practice project and actually stuck in the tail stock. I did not expect that...;)

Correction, I might have slid the tail stock over. But I just realized that you might not have one to use for setup.

The whole saga is here...


PeterT

Ultra Member
Premium Member
Noga catalog. They offer lots of products you may not see in the tool tool supply catalogs. There are some differences to be aware of.

You can get fine adjust capability on the indicator end (ie. the arm base may be a conventional swivel ball). This kind of head is also quite useful because it fits a lot of common stems & DTI dovetail.

Other models have a combo stem hole & dovetail, but be aware they can be metric or imperial.

example microfine on base & universal on indicator arm end

example universal on top only

The 1033 is a permanent magnet, some are ok with that, others prefer switch on. It has a swivel so the micro adjust is applied in the desired axis
 

Attachments

  • SNAG-2021-12-05 10.15.48 AM.jpg
    SNAG-2021-12-05 10.15.48 AM.jpg
    41.8 KB · Views: 3

Susquatch

Ultra Member
Administrator
Moderator
Premium Member
Noga catalog. They offer lots of products you may not see in the tool tool supply catalogs. There are some differences to be aware of.

Thanks @PeterT ! I don't think I would have found the catalog on my own. Lots to look at.

In the meantime, have you ever seen a magnetic holder with fine tune at the indicator as well as at the base? I think that would be very useful.

I'm still sad to find that the General doesn't have return to battery so I may take a stab at some kind of a mechanism to accomplish that too.

All great fun for an old man. Especially at Christmas!
 

PeterT

Ultra Member
Premium Member

Attachments

  • EDT-2021-12-05 10.33.29 PM.jpg
    EDT-2021-12-05 10.33.29 PM.jpg
    23.3 KB · Views: 2
Top