-
Scam Alert. Members are reminded to NOT send money to buy anything. Don't buy things remote and have it shipped - go get it yourself, pay in person, and take your equipment with you. Scammers have burned people on this forum. Urgency, secrecy, excuses, selling for friend, newish members, FUD, are RED FLAGS. A video conference call is not adequate assurance. Face to face interactions are required. Please report suspicions to the forum admins. Stay Safe - anyone can get scammed.
-
Several Regions have held meetups already, but others are being planned or are evaluating the interest. The Calgary Area Meetup is set for Saturday July 12th at 10am. The signup thread is here! Arbutus has also explored interest in a Fraser Valley meetup but it seems members either missed his thread or had other plans. Let him know if you are interested in a meetup later in the year by posting here! Slowpoke is trying to pull together an Ottawa area meetup later this summer. No date has been selected yet, so let him know if you are interested here! We are not aware of any other meetups being planned this year. If you are interested in doing something in your area, let everyone know and make it happen! Meetups are a great way to make new machining friends and get hands on help in your area. Don’t be shy, sign up and come, or plan your own meetup!
You are using an out of date browser. It may not display this or other websites correctly.
You should upgrade or use an alternative browser.
You should upgrade or use an alternative browser.
Mikes shop activities
- Thread starter Mike R
- Start date
Well, its been a long time since I have had shop time.
Just finished a 3 week tour of Ireland with my wife as a 25 year anniversary celebration.
We saw 26+ castles, abbeys and towers that are OPW sites in Republic of Ireland and a handful more NT sites in Northern Ireland; many neolithic ruins as old or older than the pyramids of Egypyt, wonderful panoramic views and stunning landscapes and had some wonderful food, met a lot of nice people. Got to drive on beautifully twisty one lane two way roads with 80km/h speed limits, some scarier than others (one pic of a fun one, can see all around, others were tall hedges both sides, had to creep around corners to not meet head-on with someone).
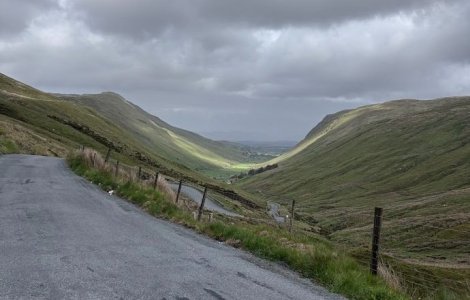
Also was driving on the "wrong" side of the road for 3 weeks when there were 2 or more lanes...(I may be dangerous here for a few days as I get recalibrated again...).
Also had a small culture shock, was little if any "road rage" type drivers, everybody doing at or below speed limit and if a farm tractor was blocking the road doing 40km/h (there always was a farm tractor blocking the road) then the vast majority waited for a clean opportunity to pass, the tractor could pull over and people flicked their 4 ways on to thank the tractor for giving way. Similar for bikes and pedestrians/hikers. No rage at them being on the road, just patience and giving clearance as they were passed. Refreshing. Need more of that here in NA but sadly its not in our go-go, me first culture.
With all that behind us I now need to get back to work Monday (boo 🙁) and spend the next week cleaning house and garden up before I'll probably have a real chance at hobby metal work again.
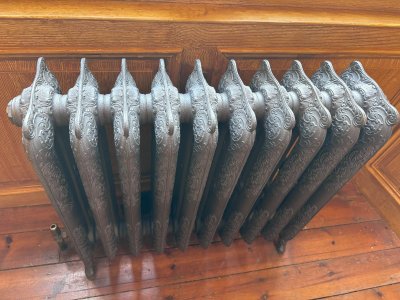
To keep this post mildly metalwork related, also took note of the beautiful detail in the castings for the radiators in Kilkenny castle. Amazing work in those.
Just finished a 3 week tour of Ireland with my wife as a 25 year anniversary celebration.
We saw 26+ castles, abbeys and towers that are OPW sites in Republic of Ireland and a handful more NT sites in Northern Ireland; many neolithic ruins as old or older than the pyramids of Egypyt, wonderful panoramic views and stunning landscapes and had some wonderful food, met a lot of nice people. Got to drive on beautifully twisty one lane two way roads with 80km/h speed limits, some scarier than others (one pic of a fun one, can see all around, others were tall hedges both sides, had to creep around corners to not meet head-on with someone).

Also was driving on the "wrong" side of the road for 3 weeks when there were 2 or more lanes...(I may be dangerous here for a few days as I get recalibrated again...).
Also had a small culture shock, was little if any "road rage" type drivers, everybody doing at or below speed limit and if a farm tractor was blocking the road doing 40km/h (there always was a farm tractor blocking the road) then the vast majority waited for a clean opportunity to pass, the tractor could pull over and people flicked their 4 ways on to thank the tractor for giving way. Similar for bikes and pedestrians/hikers. No rage at them being on the road, just patience and giving clearance as they were passed. Refreshing. Need more of that here in NA but sadly its not in our go-go, me first culture.
With all that behind us I now need to get back to work Monday (boo 🙁) and spend the next week cleaning house and garden up before I'll probably have a real chance at hobby metal work again.
To keep this post mildly metalwork related, also took note of the beautiful detail in the castings for the radiators in Kilkenny castle. Amazing work in those.
Attachments
Last edited:
I've been thinking over (over thinking?) the repair that is needed to the table of the Craftex CX610 drill press I just bought.
I need a few bits of steel that I don't have and some time to put it together.
Or I can Frankenstein the Craftex and the Delta to do what I wanted in the first place - have a nice working drill press.
It looks like the head on each of them is just slipped over the column, and they both appear to have the same diameter columns.
The craftex is 3.617" and the Delta is 3.625" (0.008" bigger). I'm hoping the head casting isn't a precise fit...
So off with its head (and on with a new one).
That will really allow me to procrastinate on the repair of the table part, while forcing the repair of the quill handle.
Now I just need to work up the strength to lift those beasts off their respective columns (or laying them down and doing it parallel to the ground might be a smarter move).
Noooooooooo!!!!!!!!!! Do an @DavidThat will really allow me to procrastinate on the repair of the table ...
And get it done yesterday.
Yeah right, yesterday. I can't remember yesterday.
No, I do need to get going on this project, only because the new to me drill press is in the garage, and I've just made a handshake agreement to become the owner of fairly nice 2002 MX5. Fortunately the car is about the size of a golf cart so I think I can squeeze it in without too much reorganization. So into the garage I go...
No, I do need to get going on this project, only because the new to me drill press is in the garage, and I've just made a handshake agreement to become the owner of fairly nice 2002 MX5. Fortunately the car is about the size of a golf cart so I think I can squeeze it in without too much reorganization. So into the garage I go...
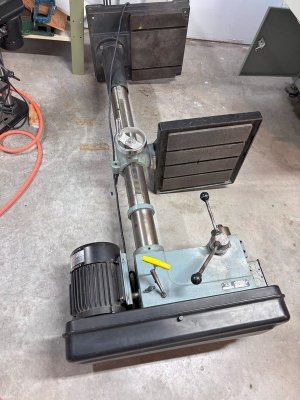
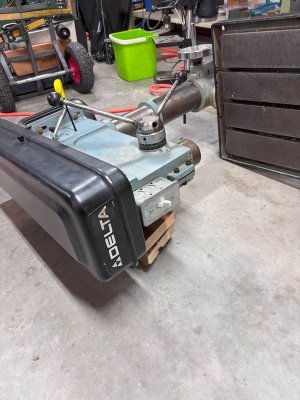
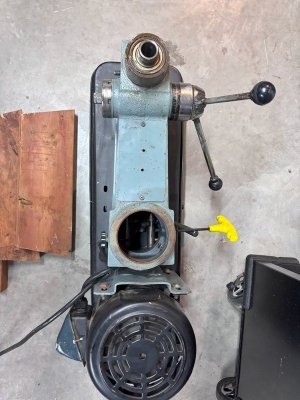
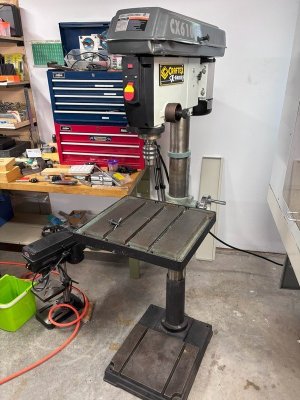
Allright - Frankie is alive!
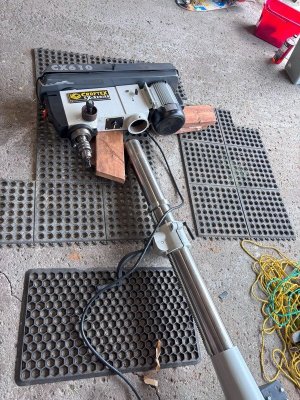
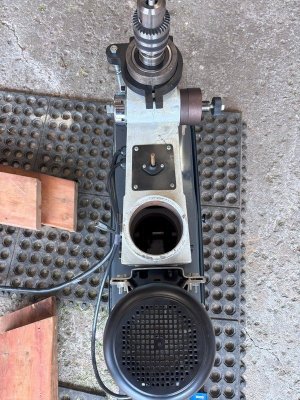
Laid the Craftex on its side and removed the head, hauled it to the basement.
Laid down the Delta and took off its head. You can see the previous owners hack job on the quill handle, what you can't see is the oval hole for it in the head casting (worn out).
Mated the Craftex head up on the Delta column, these 2 drill presses are twins separated at birth as far as the head mounting goes - same set screw locations and even size & thread.
Had my son help me tip it back up as I'm getting tired today - too much activity.
And that is the reason the head of the Delta is still in the basement - no chooch left to haul it up the stairs today.
I'm dreaming more and more of what my retirement house and shop will look like, and ground level shop is becoming more and more a priority.


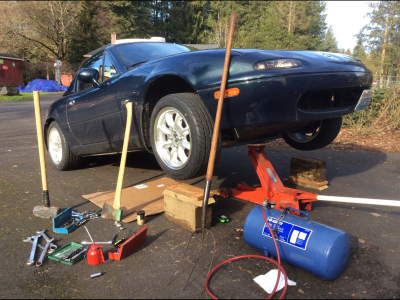
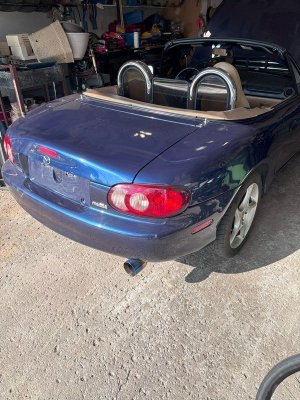
Added a new toy to the garage, should complement and not distract from metal work (I hope).
Its had a respray in its life but was done quite well, too hot to really get under it today (37°C without the humidity factor) but no rust holes in anything I can reach and nothing readily visible.
Needs an oil leak fixed (front main seal), should be a fun Sunday job, but otherwise is pretty much ready to go and very nearly stock except the muffler as far as I can tell.



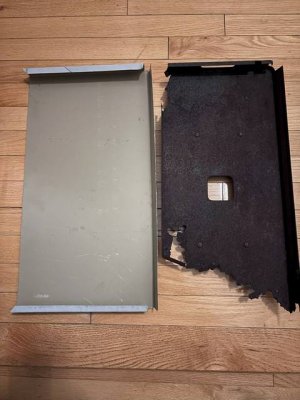
Today's activity was a quick bang up job to hopefully have a functioning BBQ that doesn't overheat the propane tank. New heat shield / drip tray. The target BBQ hasn't been used in 5 years, and in that time its drip tray seems to have lost a quarter of itself to the elements.
Unfortunately the BBQ is situated 125kms from here so its a guess job on if it will fit, hence the very half assed attempt. I'm actually impressed with myself that this took only 1/2 hour - had to pry myself away from debating car safety with @Susquatch to do this! Will find out Saturday if this is done enough or if its coming back home for round 2.
The Miata has had a good amount of work done to it in this time too. I forgot how much I enjoyed working on a toy car, and this is the most toy car I've ever had, especially the size. Take off a wheel and I can one hand lift it off and place it down, could never do that before and its not cause I'm stronger now!
New brake rotors and pads all round, replaced right headlight lens, fixed most of the oil leak up front (including fixing the crap half-assed timing belt job done previously) - still chasing a small one, fixed the speedometer sender, installed a cheap ($85) touch screen Android auto/Apple car play wireless stereo and new speakers including the famous to the Miata community Bose amp removal /bypass, so now its just as modern inside as a new car.
And now I've got a few more repairs / projects waiting: new coolant lines, new suspension bushings, new shocks and springs (coil overs), and I think I need at least 1 new wheel bearing, just need to figure out where...its noisy but not loose yet.
Unfortunately I also found the rust. Winter project will be fixing that. Seems common place enough on this gen of Miata, even for non-winter driven / salt exposed cars. All the panels are available, so long as I supply the labor it should not be much above $1000 to fix, followed by paint. At that point I'll likely enlist my brother in-law who is a professional painter to help out on that.

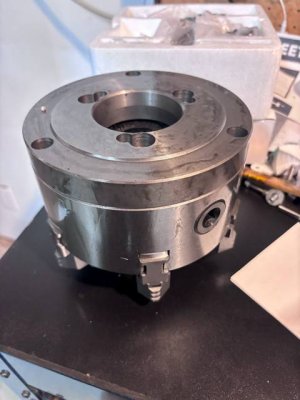
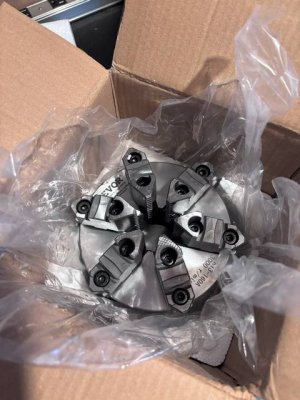
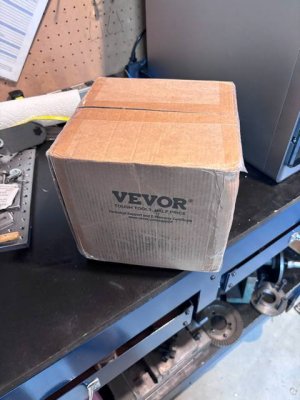
Well, this evening started with much promise - a delivery awaited me at home - a new 6 jaw, 6" D1-4 chuck from Vevor delivered for just under $300 bucks.
https://www.vevor.ca/lathe-chuck-c_...th-d1-4-cam-lock-backing-plate-p_010790897201
Unboxing went well.
Well packaged, light oil coating. No issues there.
Noticed right away that no holes or edges have been deburred, they are sharp as razors some of them, I kind of expected this at this price point, they cut as many corners as possible.
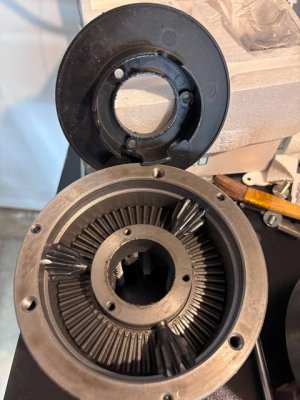
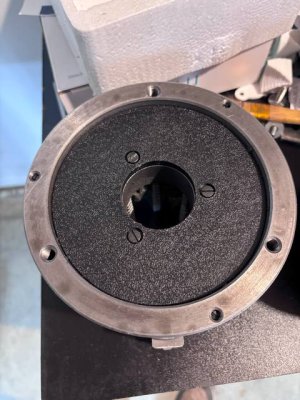
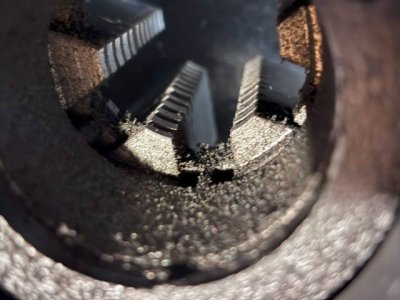
Next was the cleanliness - or lack thereof. Again, expected except actually even worse in areas than I thought - its really thick the grinding dust inside the bore.
I really wanted to just toss this on the lathe as received and check its runout, but that is not to be...
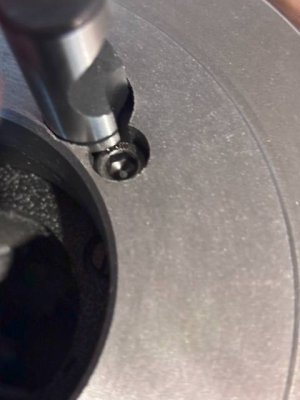
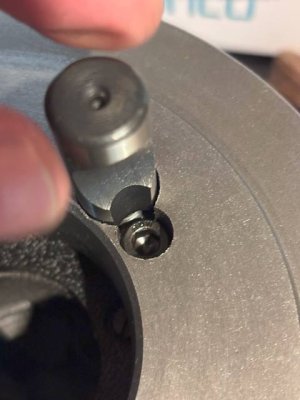
The cam lock D1-4 backplate, while not undrilled as @canuck750 suggested, that might have been a better scenario. The holes for the screws that prevent the cam lock studs from rotating have been drilled too deeply and do not prevent the studs from rotating. I also can't just drop a washer down there, the hole is too small a diameter for any of my ready at hand washers...
So the debate is - do I make a custom set of washers to jack those screws up, or do I deal with Vevor to see if they make it right, or both? I'm inclined to do both.
This is just a first step to determining if the chuck is fit for purpose...
The Cam studs themselves seem to be correct in length - they match up with ones from my Grizzly (made in china 12 years ago), and seem to engage with ~9 turns into the backplate but the thread is a looser fit than I'd have liked.
I continued on a bit, separated the back plate from the chuck (it was not screwed on, those screws were in the top of the box). Took off the plastic backing plate and its bone dry in there. I definitely need to clean this up before going further.
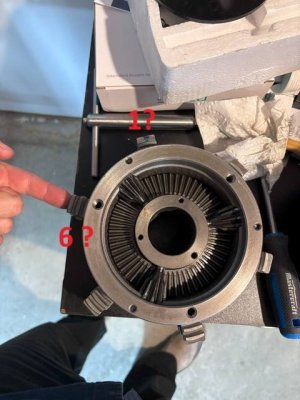
One question I do have on chucks, when popping the jaws out - what comes out first - jaw 6 in this case or jaw 1? I'm inclined to believe its jaw 6 as only 1 has a touch of blue paint and with the direction of the scroll for loosening the blue painted one will come out last. Can't see any individual jaw numbers yet and want to know order of operations to put it back together properly.
Anyway - the thing is coming apart and I'll clean it and put it back together and then try and grab some runout numbers...I could (and probably will) just mount it and just hand turn the lathe spindle to get an idea of runout, even without the studs locked in...
Attachments
-
 Jaw 6 vs Jaw 1.jpg50.5 KB · Views: 7
 -
 IMG_4070_CHMW.jpg48.4 KB · Views: 7
 -
 IMG_4068_CHMW.jpg54 KB · Views: 7
 -
 stud still rotates.jpg24.7 KB · Views: 7
 -
 lock-screw bottomed.jpg29.7 KB · Views: 7
 -
 IMG_4062_CHMW.jpg37.9 KB · Views: 7
 -
 IMG_4054_CHMW.jpg32.9 KB · Views: 7
 -
 IMG_4052_CHMW.jpg46.3 KB · Views: 7
 -
 IMG_4047_CHMW.jpg39.4 KB · Views: 7
what comes out first - jaw 6 in this case or jaw 1?
Just open it a smidge at a time until one can be pulled out. Then you will know which one is first. I'd bet it's #6 which would make #1 first when reinstalling.
Model Citizen
Active Member
Ok, a bit more futzing around with the chuck tonight, it still seems promising. Using the roundest items I could get - 2 different bearings and a 20mm diameter ER11 collet shaft I took a few runout measurements. The very first bearing I measured had an OD of 47mm, and showed an incredible 0.02mm of runout! thats 8 tenths of a thou. Next I tried a 72mm bearing. That was worse at 0.07mm ( 2.7thou). after playing with it a bit - reseating the bearing in the jaws as it was crooked, etc.
Next was the 20mm shaft with the ER11 nose. It initially was terrible at 0.15mm (5.9 thou) near the chuck and at about 3" away was 0.2mm (7.9thou). But that was when I realized / remembered the thing about a nominating pinion. So I tried just loosening and retightening using the other 2 pinions. Sure enough one of them resulted in 0.06mm(2.3 thou) at the chuck and 0.1mm (3.9 thou) at 3" out. So pretty decent for the price. Now I just need to resolve the backplate issue, and then debur the hell out of it.
I did clean it up after the runout checks as I will likely be keeping it.
one of the tidbits of knowledge I picked up working the sports/seasonal dept in Canadian Tire was understanding BBQ marketing speak, similar to peak vacuum HP and other nonsensical ratings BBQs were always touted as total BTU's - side burner included. Cooking area - yeah some listed it as total, including the warming rack up top. You really need to be on guard these days for creative marketing.I just bought a new barbecue the stickers said 41000 btu’s turns out after assembly I see the sticker on the side burner is 9000 btu’s saying that the barbecue itself is 32000 btu’s making the 41000. Now I feel ripped off.
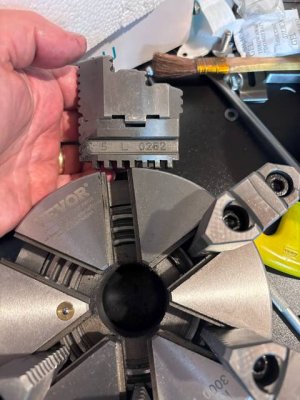
Yes the jaws reverseable, but I won't be doing that until I need to and have had a chance to laser engrave the jaw numbers on the replaceable/reversible portion as that is really what has been ground into alignment on this chuck. Here you can see the part of the jaw with the scroll is marked with the jaw number, but I haven't seen any markings on the removeable portion yet.
Attachments
Thank you for letting me know!
Sounds like the 6 Jaw is a decent chuck albeit the shortcomings of manufacturing finishing and the socket head screws threaded too deep.
I was wondering if you can screw in a short grub screw of the same size / pitch and have it bottom out and then insert the pin locking screw?
Sounds like the 6 Jaw is a decent chuck albeit the shortcomings of manufacturing finishing and the socket head screws threaded too deep.
I was wondering if you can screw in a short grub screw of the same size / pitch and have it bottom out and then insert the pin locking screw?
By the way, if un-deburred edges trigger you then I do recommend staying away from this Vevor 6 jaw. just looking at it will cut you. I think there are maybe 4 deburred / chamfered edges on the whole thing. That will be a good amount of time just touching up those edges.
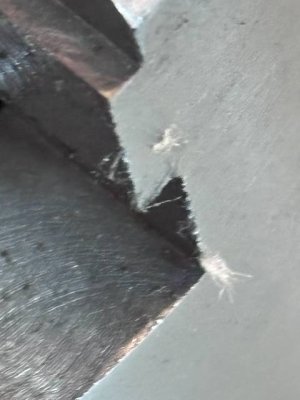
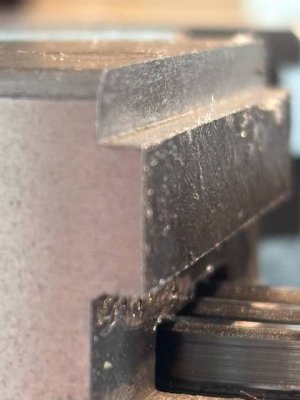
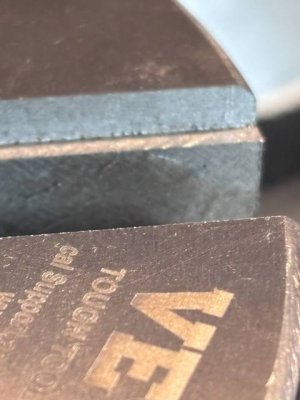
I have sent a message to Vevor about the backplate, we'll see what happens there. I kind of don't want to send it all back, and would like just a new backplate, but who knows what they'll do. So until then I'll hold off on deburring this thing.
I did just go and check and the removeable jaws are also numbered (L5 for the 5th jaw) to match the main jaw.
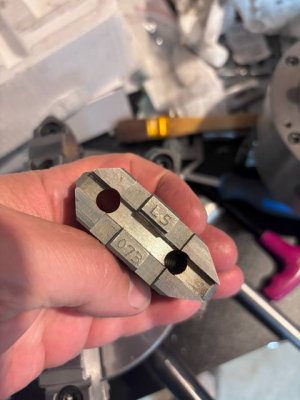
So I checked my older Grizzly chuck and sure enough they're marked too. Now I can try and put it back together properly and get reduced run out on it!
Lastly while those jaws were off I checked them for interchangeability.
Almost.
The tongue and groove portion is fully interchangeable and both are effectively to the "American Standard Tongue and Groove" dimensions (not that I can find where that standard is published) but the hole sizes are larger and spacing is wider on the 3 jaw (seemingly matching the "standard") compared to the 6 jaw (basically slightly undersized due to the 6 jaw configuration). Its unlikely that I'd buy jaws in the future so the lack of following a true standard isn't important to me.
It does mean if I model up the tongue and groove in CAD, that part is useable for making soft jaws for both and I only need to mess with the hole sizes and spacing between the 2 chucks.


I have sent a message to Vevor about the backplate, we'll see what happens there. I kind of don't want to send it all back, and would like just a new backplate, but who knows what they'll do. So until then I'll hold off on deburring this thing.
I did just go and check and the removeable jaws are also numbered (L5 for the 5th jaw) to match the main jaw.

So I checked my older Grizzly chuck and sure enough they're marked too. Now I can try and put it back together properly and get reduced run out on it!
Lastly while those jaws were off I checked them for interchangeability.
Almost.
The tongue and groove portion is fully interchangeable and both are effectively to the "American Standard Tongue and Groove" dimensions (not that I can find where that standard is published) but the hole sizes are larger and spacing is wider on the 3 jaw (seemingly matching the "standard") compared to the 6 jaw (basically slightly undersized due to the 6 jaw configuration). Its unlikely that I'd buy jaws in the future so the lack of following a true standard isn't important to me.
It does mean if I model up the tongue and groove in CAD, that part is useable for making soft jaws for both and I only need to mess with the hole sizes and spacing between the 2 chucks.

